

Workday
Learn how to connect Workday to Synthesia and sync employees into your Learner Portal automatically. Keep learners up to date daily with a Workday report.

Learner Portal integrationThis connector populates your Synthesia Learner Portal. The employees you sync from Workday become learners in Synthesia.
Use this integration to provision learners in Synthesia directly from Workday, instead of uploading them by hand. On the Workday side you build a Report-as-a-Service (RaaS) custom report and an Integration System User (ISU) for authentication, then paste the report URL and ISU credentials into Synthesia. The employees in the report are added to your Learner Portal and refreshed daily, so new joiners, role changes, and departures are reflected automatically.
Before you start
You'll need Workday configuration access — to create custom reports, calculated fields, an Integration System User, and security groups — plus organization admin access in Synthesia.
1. Create the report
Search for Create Custom Report and set:
- Report Type: Advanced (only Advanced reports can be web-service enabled)
- Enable As Web Service: Enabled
- Optimized for Performance: Enabled
- Data Source: Indexed – All Workers
Click OK.
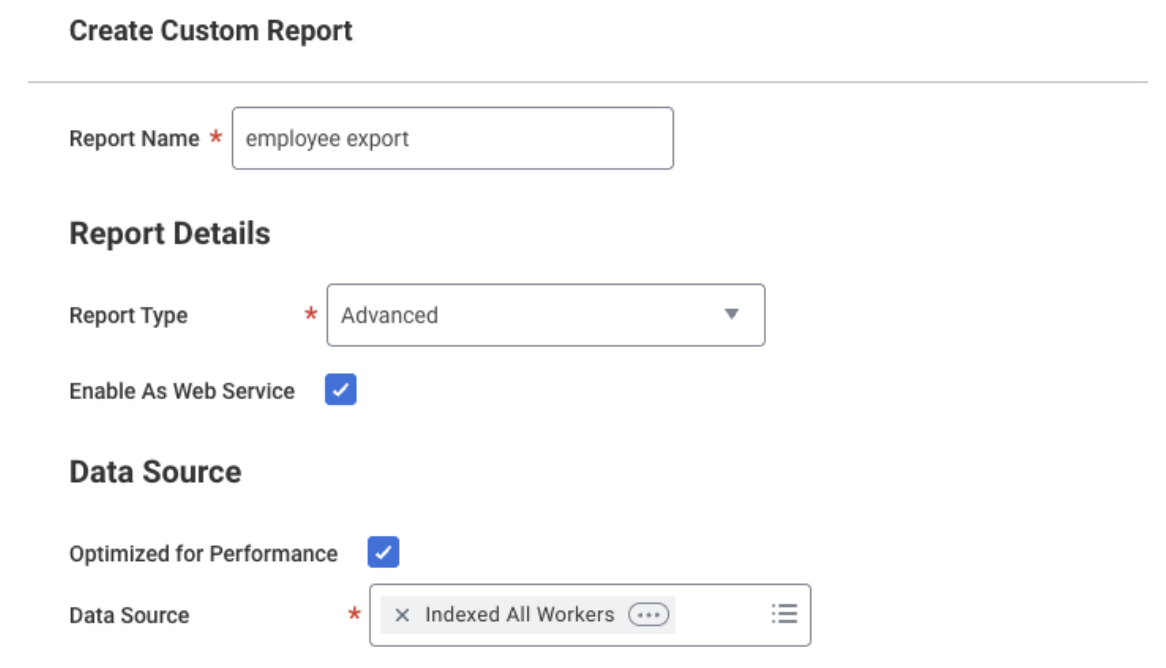
Create Custom Report dialog
2. Columns
Add the following columns. The XML Alias values are mandatory — Synthesia uses them to map each field internally.
Set every XML Alias explicitlyIf you leave an alias blank, Workday derives one from the column heading (for example, "Location - Name" becomes
Location_-_Name), which won't match Synthesia's mapping. Set each alias in the column's XML Alias field exactly as shown below.
| Field | Business Object | XML Alias | Notes |
|---|---|---|---|
| Public Primary Work Email Address | Worker | Work_Email | Required |
| Employee ID | Worker | Employee_ID | |
| Job Title | Worker | Job_Title | |
| Worker Status | Worker | Worker_Status | Values: Active, On Leave, etc. |
| Cost Center - Name | Worker | Cost_Center | |
| Location - Name | Worker | Location_Name | |
| Country of position location on worker profile | Worker | Country | |
| Public Primary Work Email Address | Calculated field | Manager_Email | See "Manager email" below |
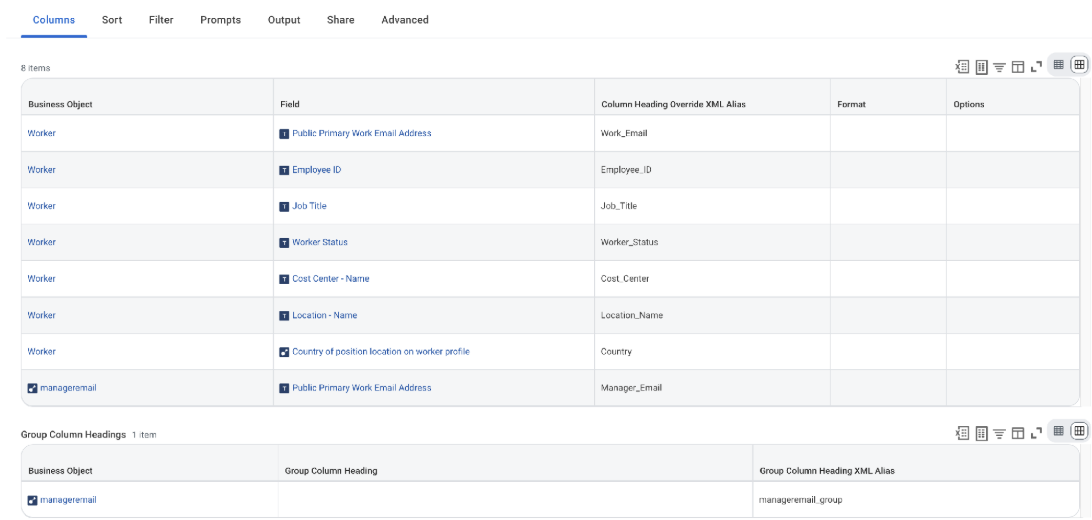
Columns tab with all 8 fields and their XML aliases
Manager email
Manager_Email lets Synthesia assign learners by org structure, but a Worker report column can't traverse Worker → Manager → email directly. To get the address, build a calculated field:
- Add a column, then in the Field cell choose Create Calculated Field for Report.
- Name it (for example,
manageremail), set Business Object to Worker, and Function to Extract Single Instance. - Set Source to Worker's Manager, Condition to Any is True, and Sort to Employee ID, returning the First occurrence. (There's only one manager, so the order doesn't matter.)
- The calculated field now resolves to the manager as a single Worker instance. Add a column with Business Object set to that calculated field, Field set to Public Primary Work Email Address, and XML Alias set to
Manager_Email. - Under Group Column Headings, give the calculated-field subgroup the heading
manager.
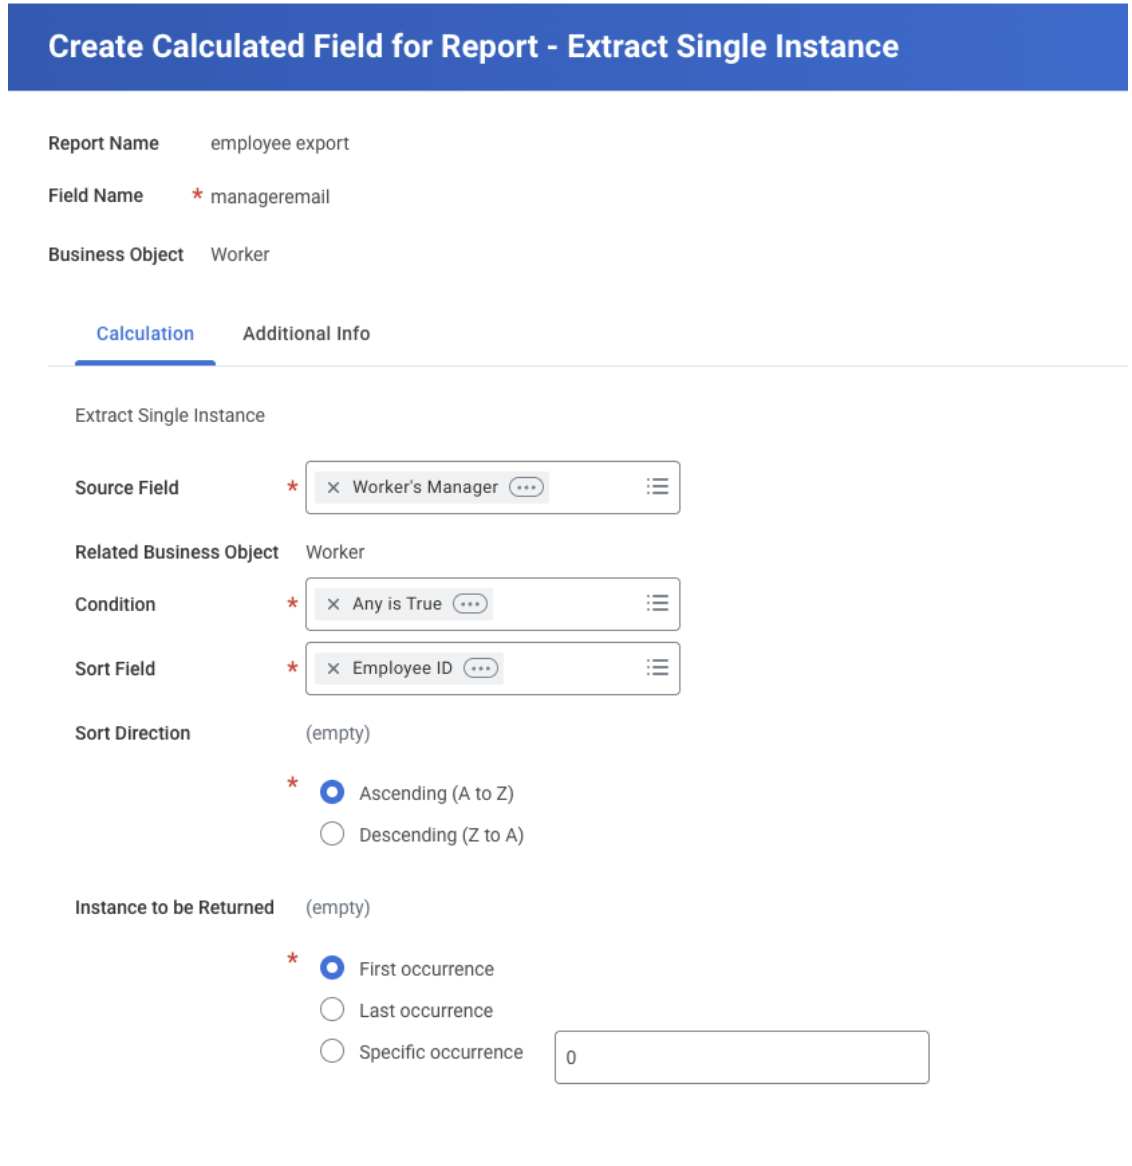
Manager-email calculated field — Extract Single Instance
3. Prompts
An indexed data source forces required prompts. To run unattended as a web service, only the filter prompts (added in the next step) can be required at runtime.
- On the Prompts tab, select Populate Undefined Prompt Defaults.
- For each prompt, set the Prompt Qualifier to Default Prompt where possible.
- For each prompt, check Do Not Prompt at Runtime.
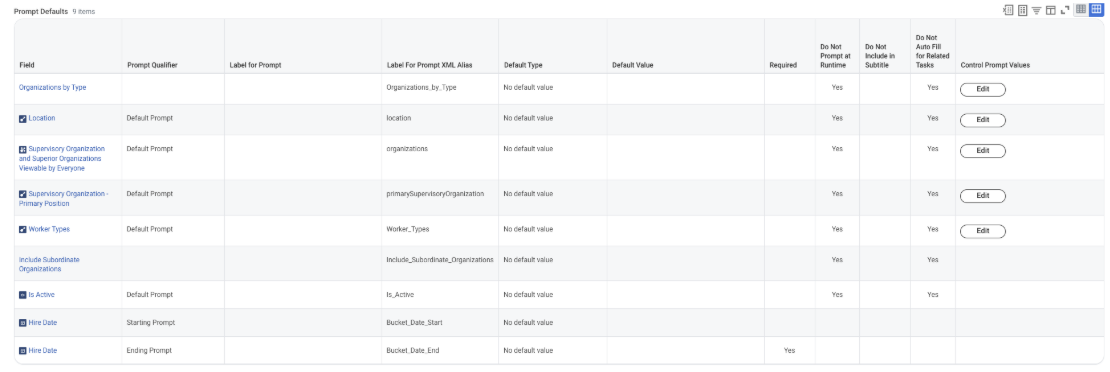
Prompt Defaults with Do Not Prompt at Runtime checked
4. Pagination — date-window prompts
Synthesia paginates through records using a date window. The specific date field is secondary, but it must be indexed and populated for all workers. Hire date is a good default — it's indexed and populated in most Workday tenants.
On the Filter tab, under Filter on Instances, add two conditions on your chosen date field:
| And/Or | Operator | Comparison Type | Prompt Qualifier | XML Alias | Required |
|---|---|---|---|---|---|
| And | greater than or equal to | Prompt the user for the value | Starting Prompt | Bucket_Date_Start | No |
| And | less than | Prompt the user for the value | Ending Prompt | Bucket_Date_End | Yes |

Filter on Instances — Hire Date window
5. Get the report URL
Open the report's ⋯ menu → Web Service → View URLs, then copy the JSON link. If Workday asks for date-filter values, enter anything sensible for testing — Synthesia won't use them.
The URL follows this format:
https://<host>/ccx/service/customreport2/<tenant>/<report-owner>/<Report_Name>?format=json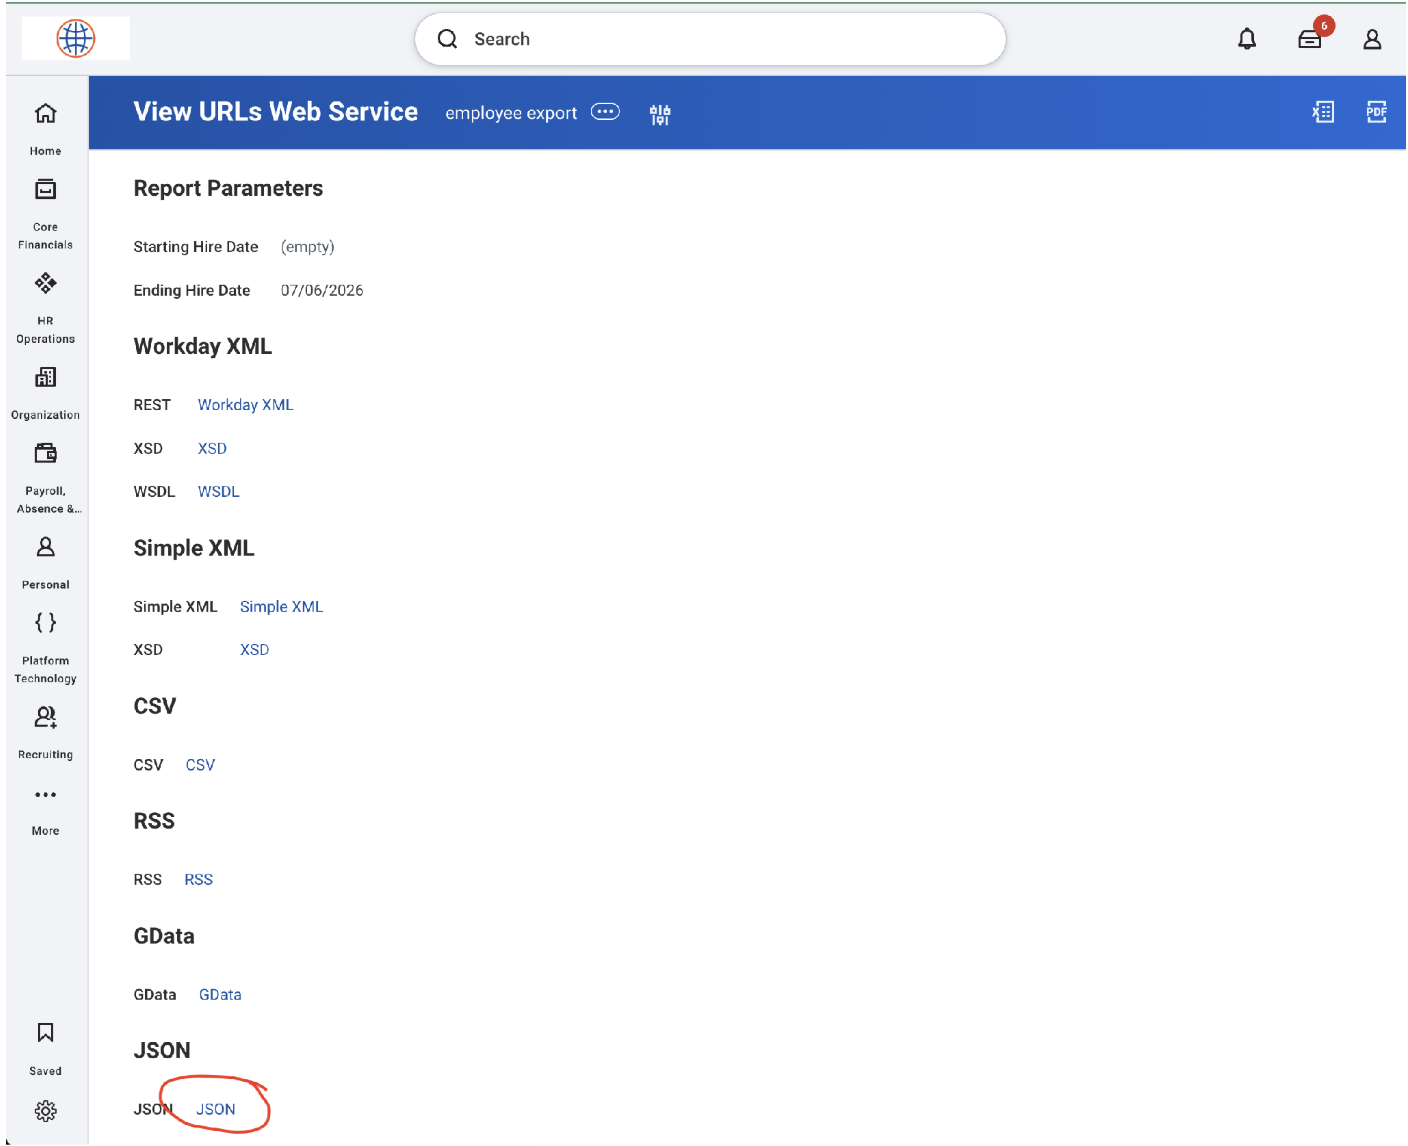
View URLs Web Service — copy the JSON link
6. Authentication — Integration System User (ISU)
Synthesia retrieves the report as an Integration System User.
-
Create an Integration System User — a non-person account with Do Not Allow UI Sessions = Yes, Session Timeout = 0, and the password exempt from expiration.
-
Create an Integration System Security Group (Unconstrained) and add the ISU as a member.
-
Grant the security group these three domains as View Only (via Maintain Permissions for Security Group) — the verified minimal set:
- Indexed Data Source: Workers — required to run the report, and surfaces
Work_Email,Job_Title,Cost_Center, andLocation_Name(these four need no additional field domain). - Worker Data: Current Staffing Information —
Employee_ID,Country, andManager_Email. - Worker Data: Active and Terminated Workers —
Worker_Status(including "On Leave").
These cover the standard setup documented here. If your report uses different fields or data sources, grant the matching permissions.
- Indexed Data Source: Workers — required to run the report, and surfaces
-
Activate Pending Security Policy Changes — security edits are tenant-wide and all-or-nothing, and stay inert until you activate them.
-
Test — open the JSON link from step 5, enter the ISU credentials, and spot-check the returned report for errors.
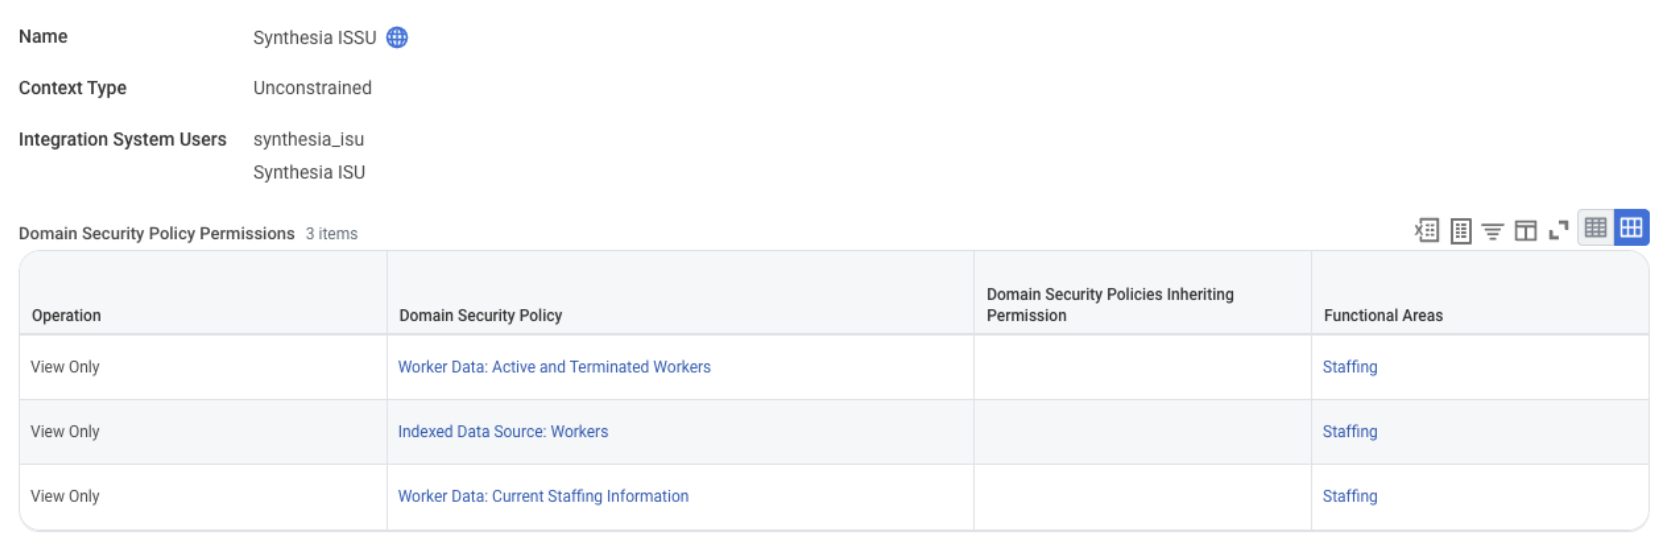
ISSG with the 3 domain security policies granted View Only
7. Connect in Synthesia
-
As an organization admin, go to Manage → Integrations in Synthesia.
-
In the HRIS section, click Connect next to Workday.
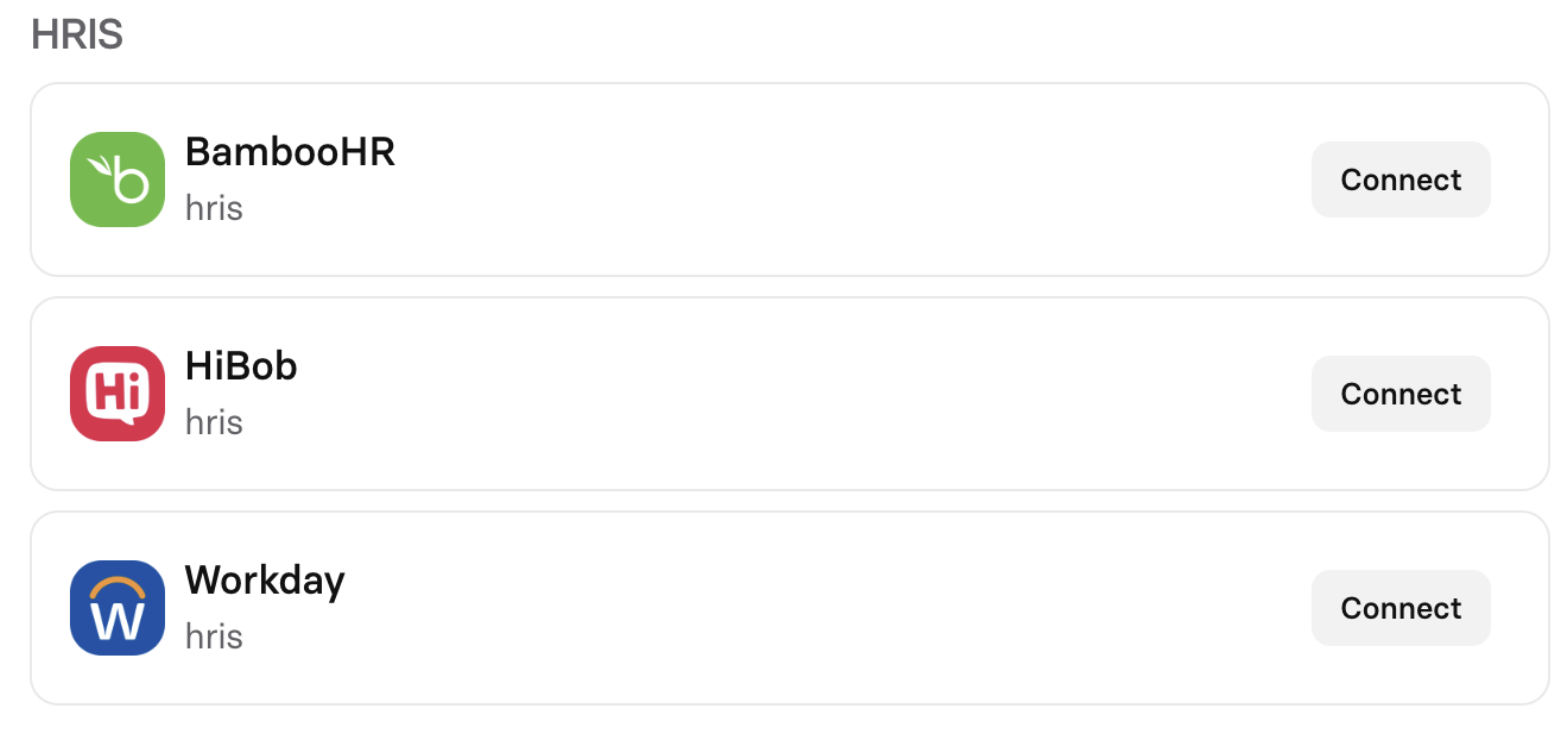
Workday in the HRIS integrations list
-
Enter ISU credentials — paste the ISU username and password, then click Connect. Enter the username only, without an
@tenantsuffix (for example,synthesia_isu, notsynthesia_isu@acme).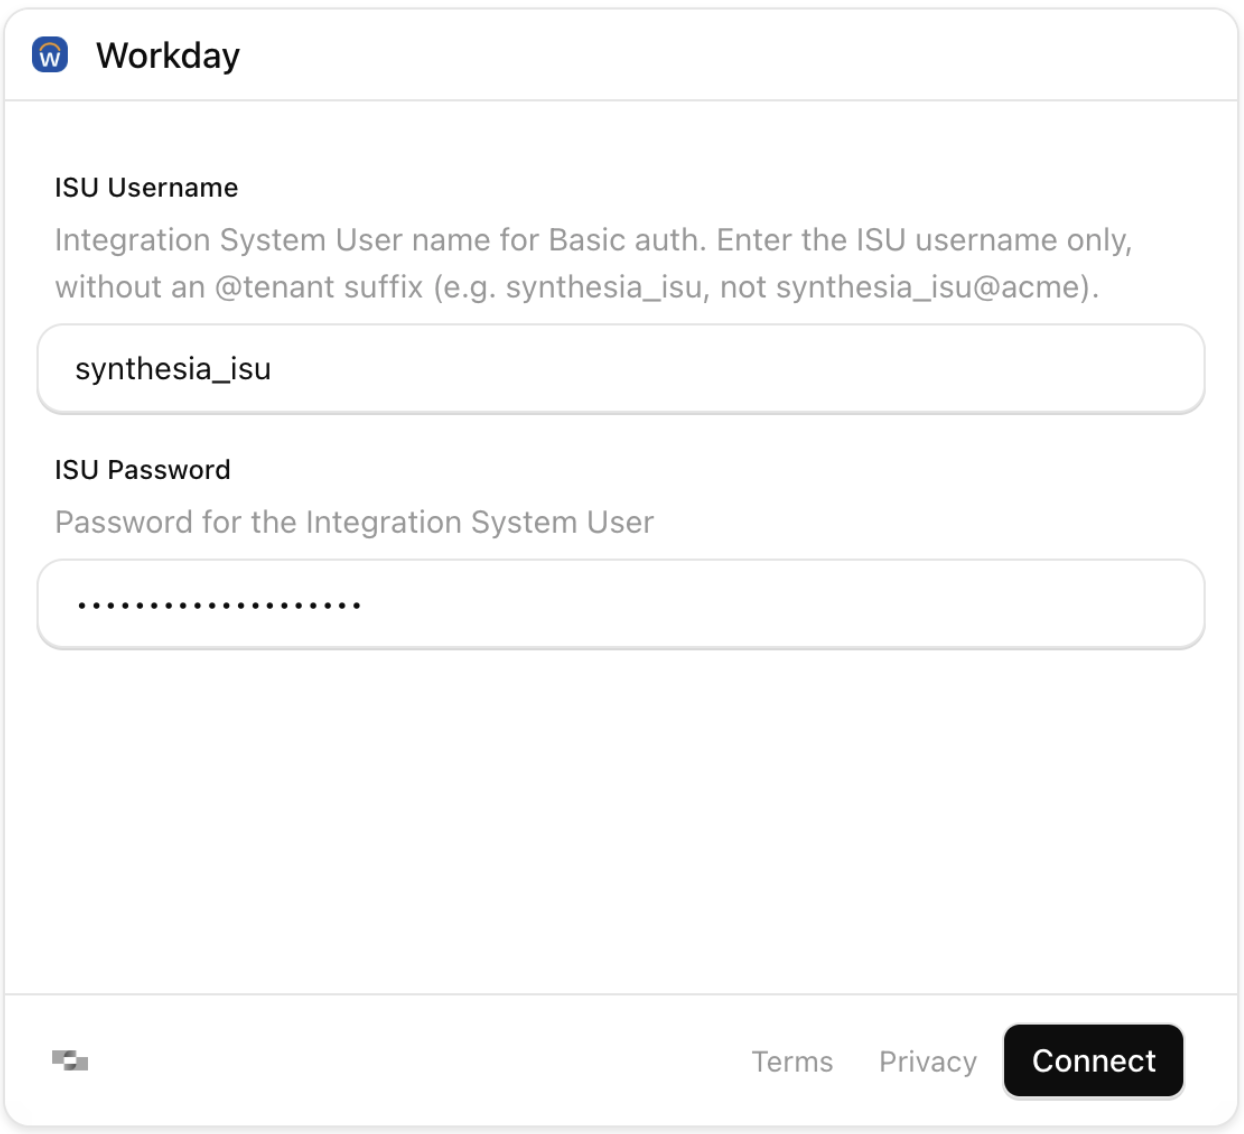
ISU credentials form
-
Enter the report URL — paste the RaaS JSON URL from step 5 and click Sync employees. Synthesia runs some basic checks on the report, then starts syncing. The first sync begins immediately and repeats daily.
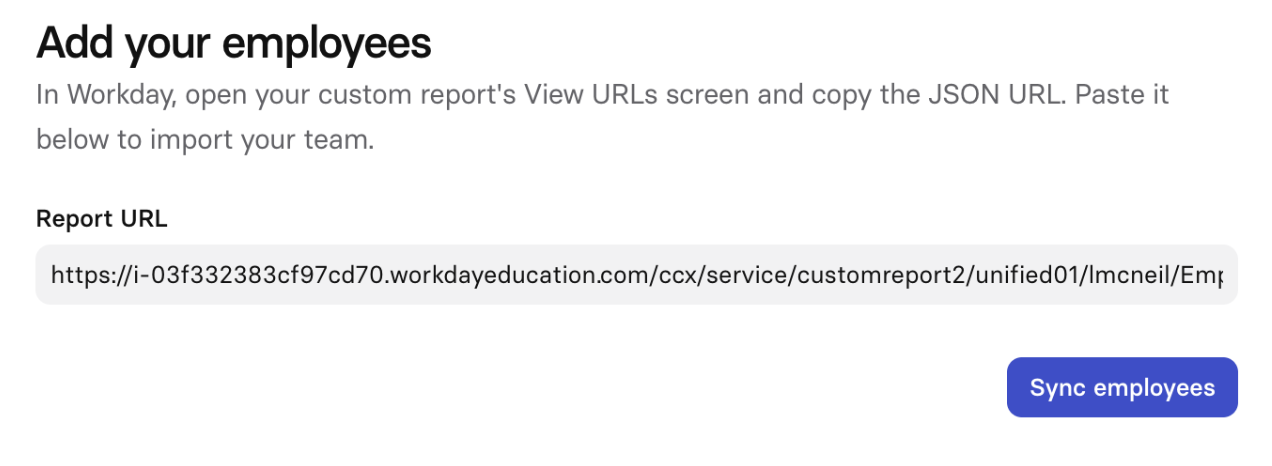
Report URL entry
-
Monitor (optional) — the status page shows the current and next scheduled sync. Return any time via Manage to trigger a manual sync, see how many employees were synced, or change the RaaS URL.
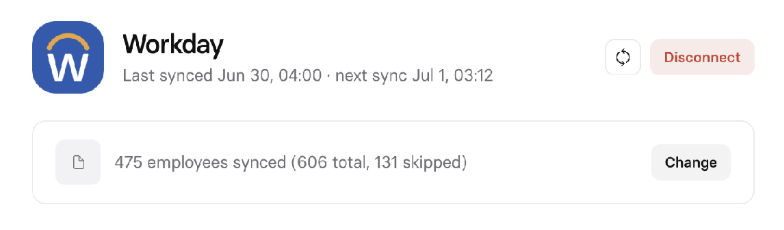
Sync status — employees synced
Updated 2 months ago