

Video overview
Once you generate your video, you'll have access to the video overview page.
Once you generate a video at least once, you can access the video overview page by selecting the video from your Workspace, My videos, or Shared with me.
The breadcrumbs at the top of the page (Workspace > ··· > the video's title) let you navigate back to the top-level location (Workspace, My videos, or Shared with me) and selecting ··· takes you to the video's parent folder (if it's in a folder).
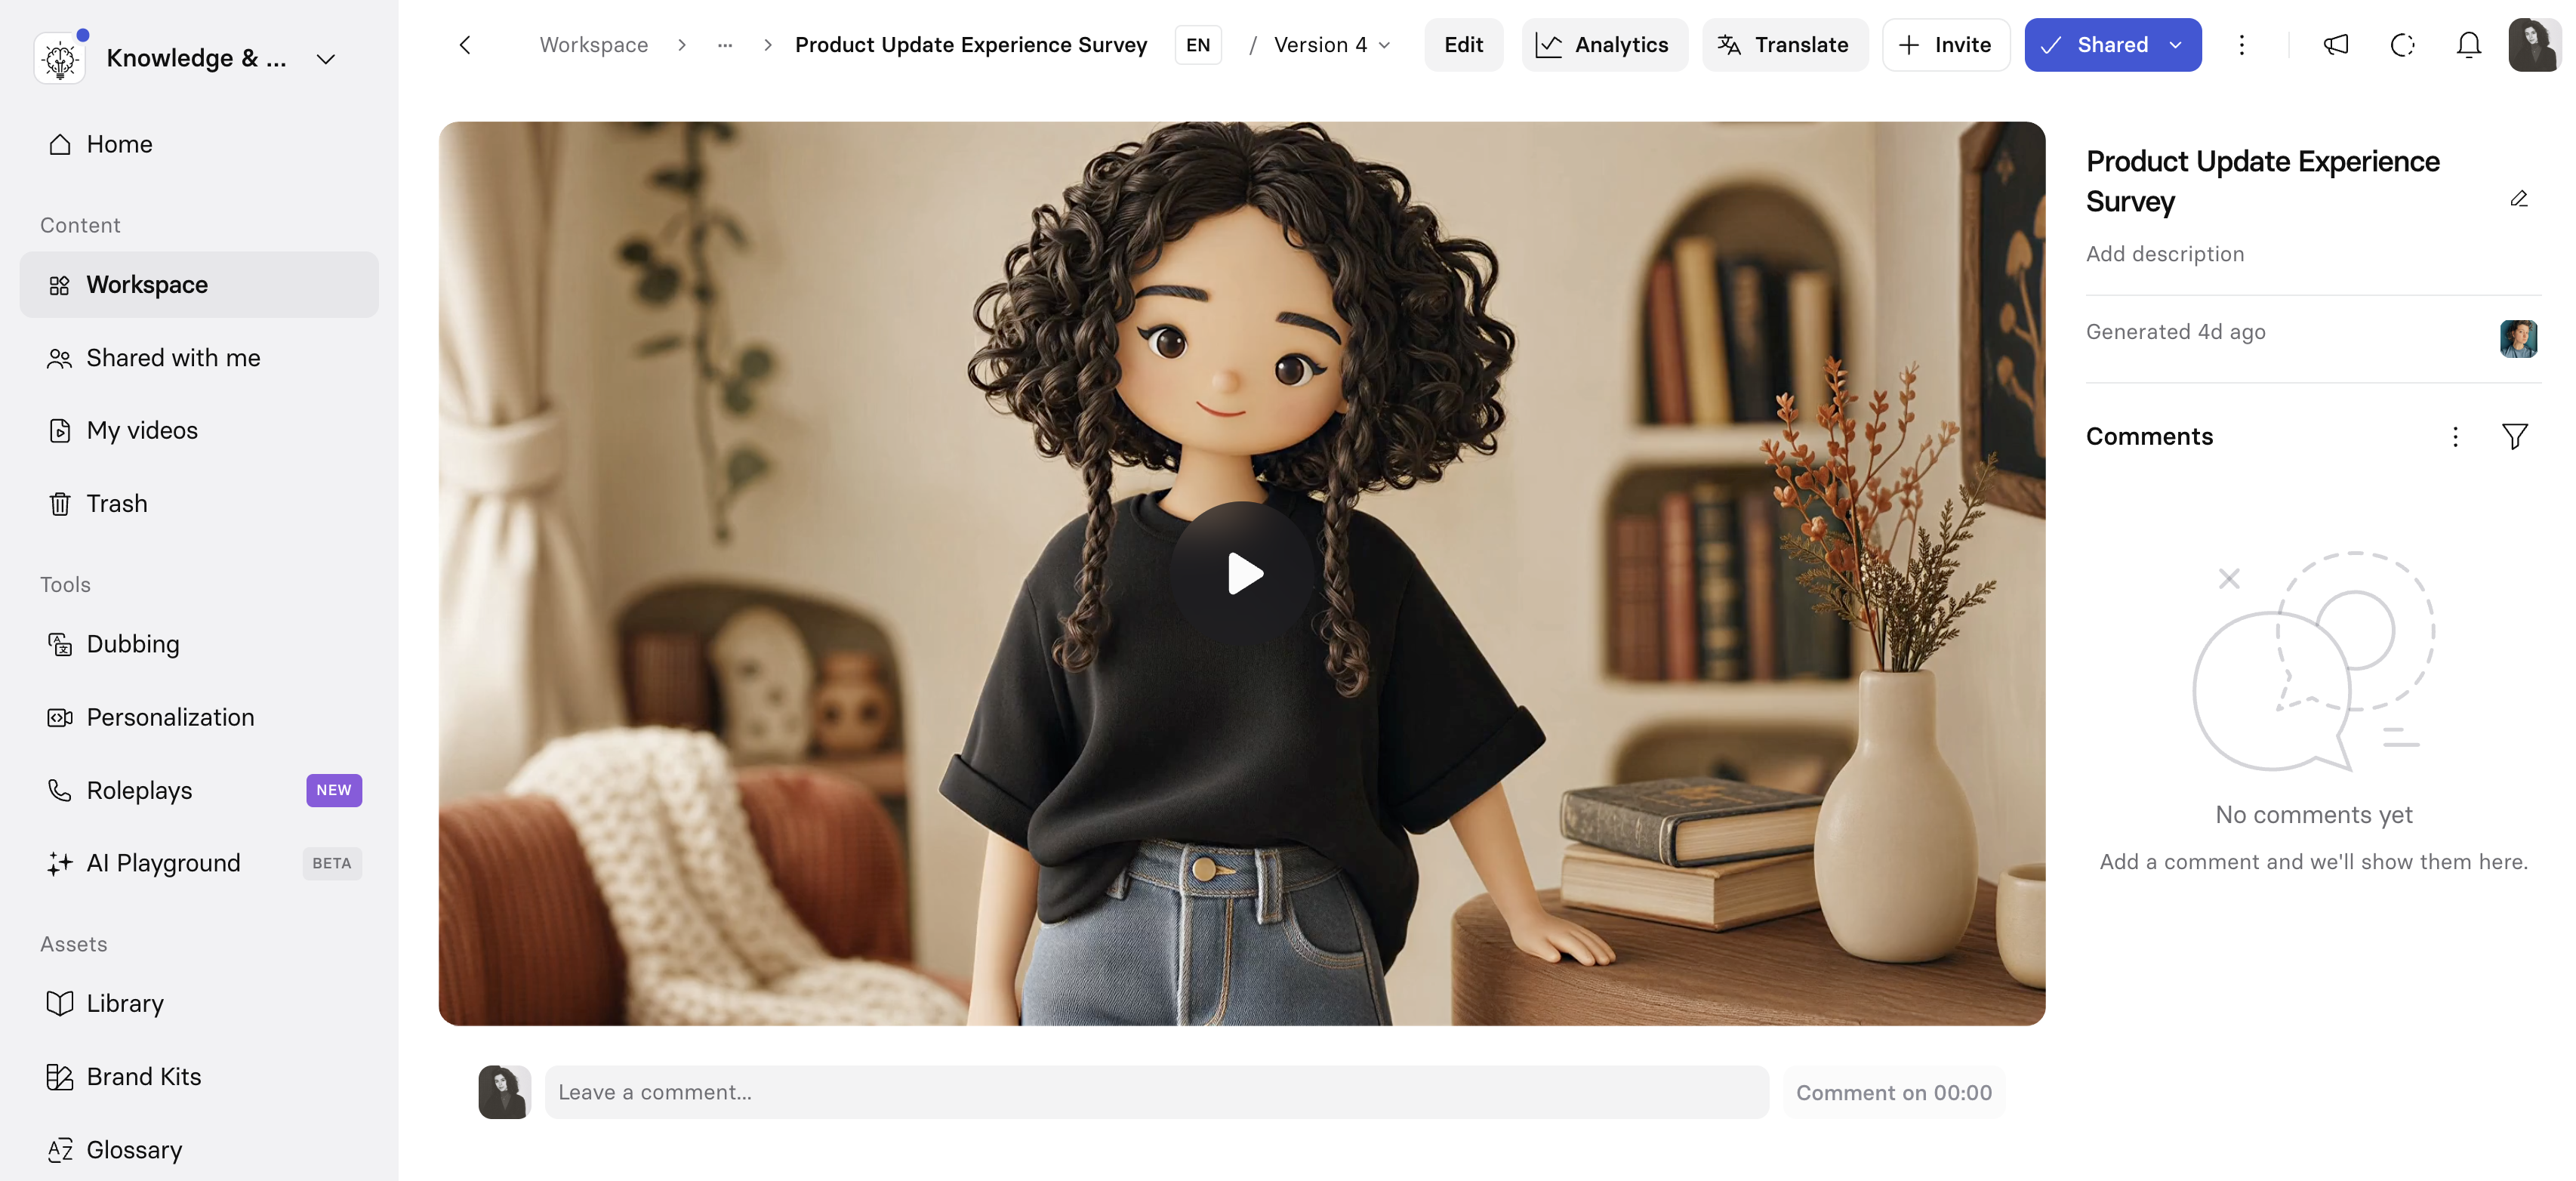
On this page you can:
- See the different generated versions of your video, using the version selector next to the video's title—each entry shows its generation time, and which one is currently published. Selecting a different version lets you make it the published one instead.
- Select
Editto open the video in the editor and make further changes. - Invite collaborators to view, edit, and/or comment on the video.
- Select
Analyticsto view the video analytics. - Select
Translateto translate the video into other languages. If a video has been dubbed or translated, a chip next to its title indicates this, and you can access all of its translations from there. - Share your video.
- Change the title and description of the video.
- Comment on the video and see pre-existing comments.
Note:The version selector in the overview page only covers versions that have already been generated, and only lets you choose which one is published. To overwrite your latest published version with an older one, or to duplicate from a version that was never generated or published, use the more granular version history in the editor instead.
Collaboration
Select Invite in the top bar to invite people to view, comment on, or edit the video.
Live collaboration (editing a video with others in real time) is an Enterprise plan feature.On other plans, collaborators are invited as guests, and can only view and comment on the video, regardless of the permission level you choose.
Note:Only one person can edit the script at a time. There's no limit to how many people can collaborate on a video.
To invite someone:
- Select
Invitein the top bar. - Enter one or more email addresses, separated by commas.
- Choose a permission level:
Full access,Can edit, orCan comment. - Select
Invite. - In the modal that follows, choose whether to invite them as a guest or as a full workspace member.
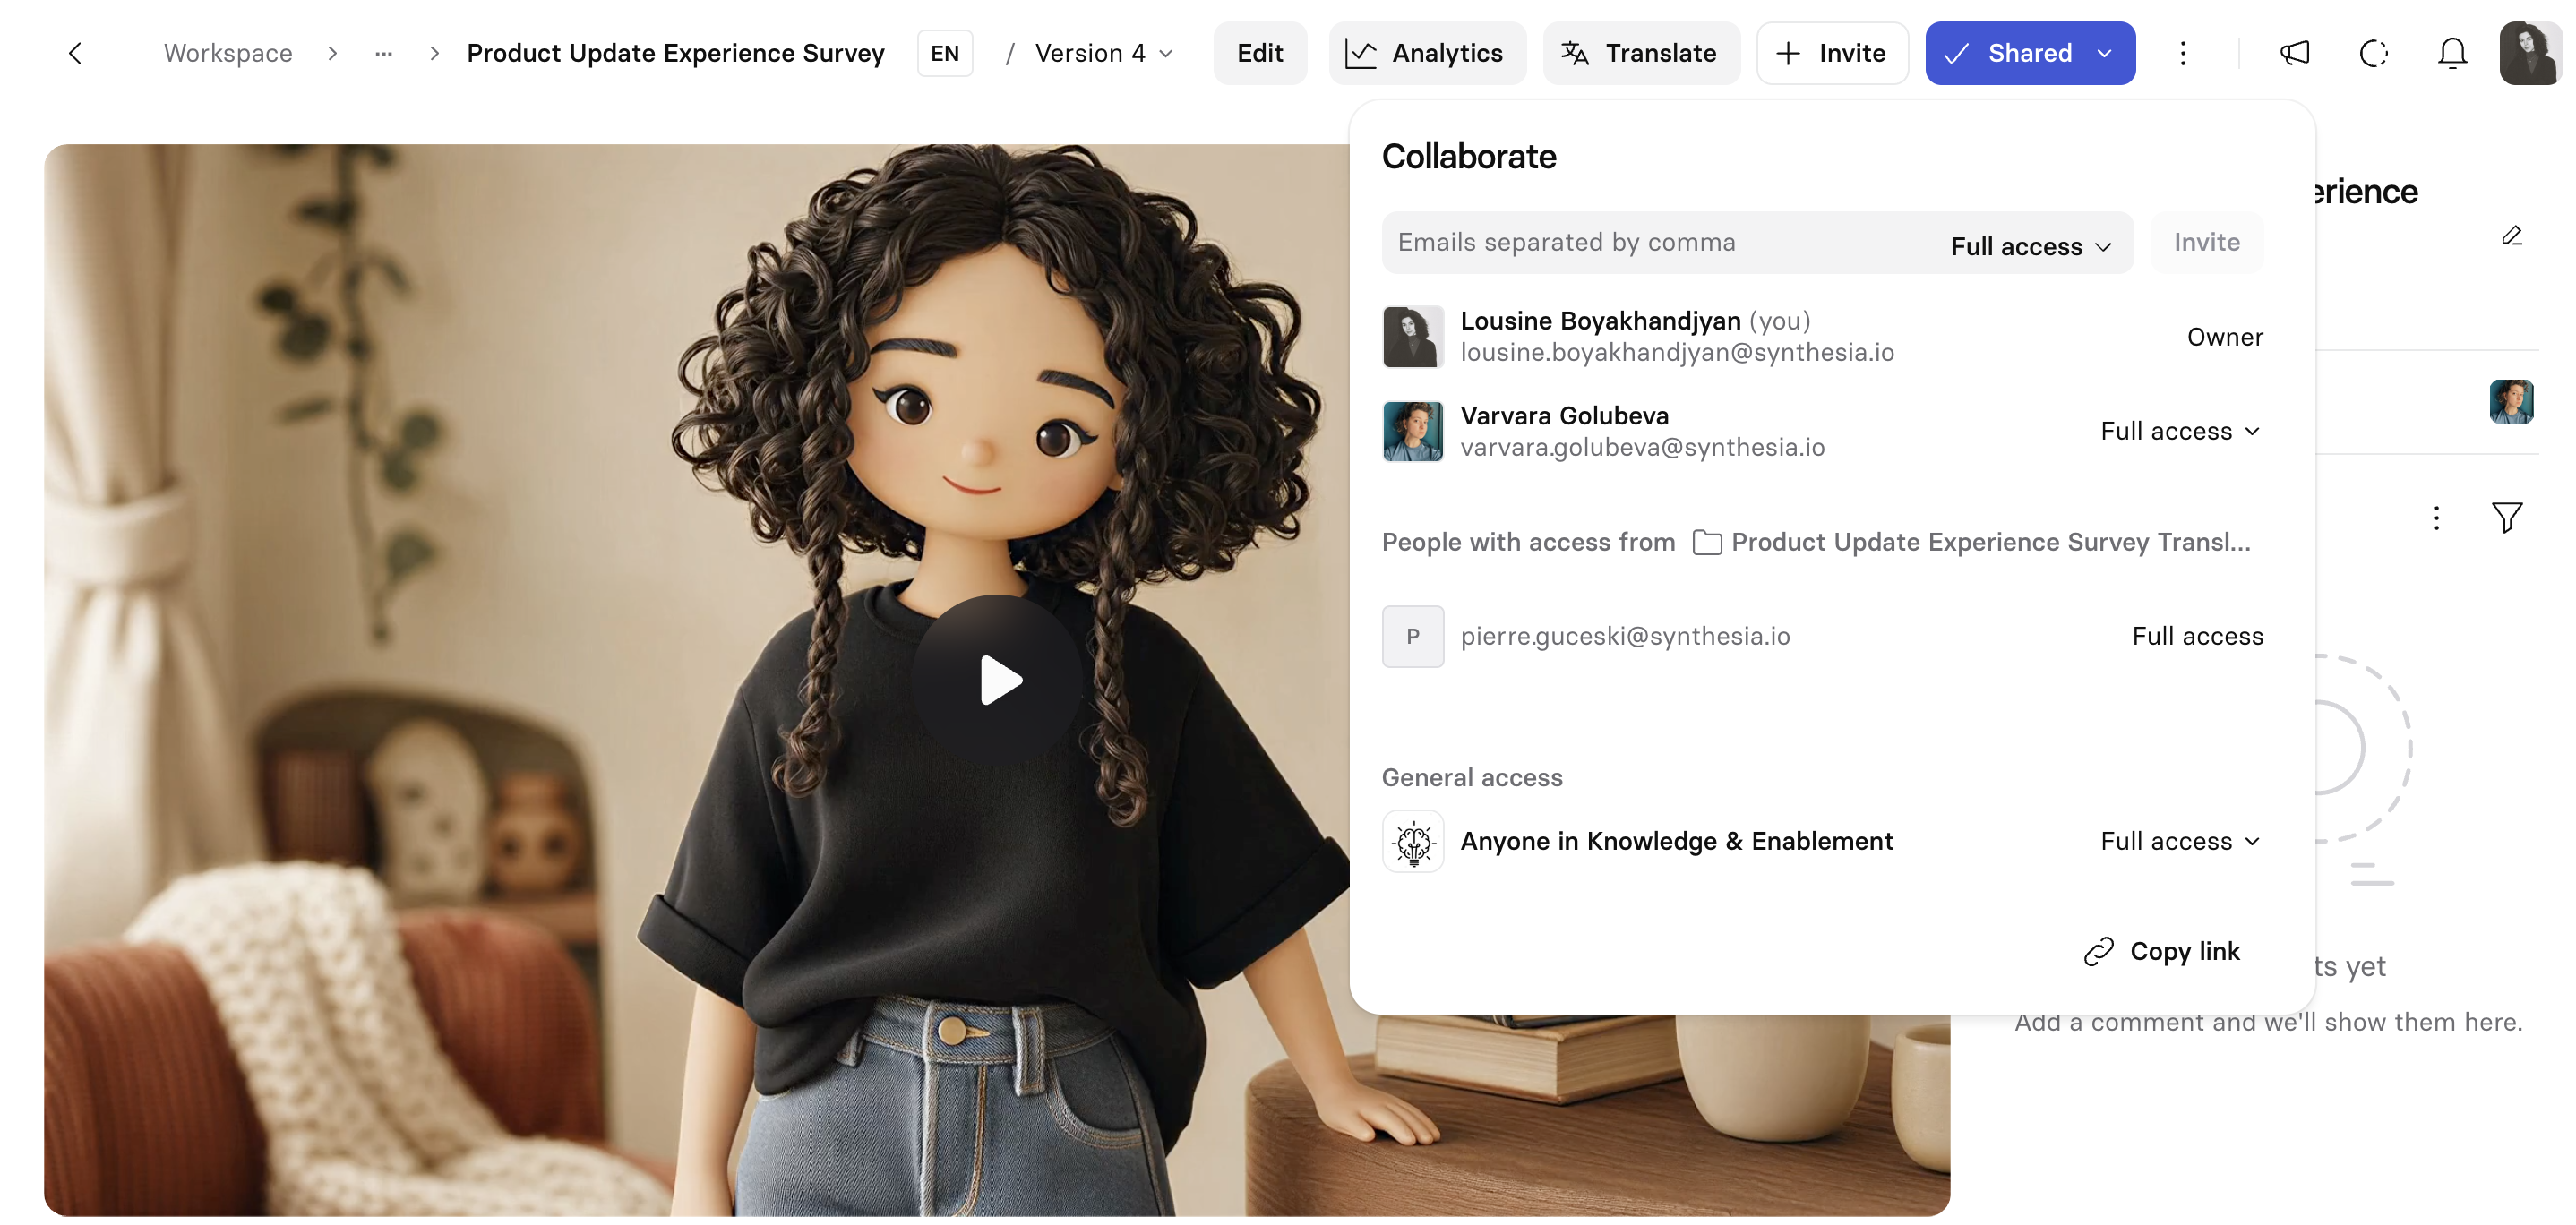
If a guest's email matches your workspace's allowed domain (if one is set), they can't be added as a guest—they're prompted to join as a full workspace member instead. Admins can also disable guest invitations entirely. See Administrator controls below.
If the person you're inviting is already a member of your workspace, whether they actually get access depends on other factors: the video's General access setting (described below), whether the video is in your private My videos area, and any folder-level permissions the video inherits.
On an Enterprise workspace, Full access or Can edit lets a collaborator edit on-screen text, music, avatars, layouts, background images, and other assets. As you work on a video together, each collaborator's cursor shows on the canvas with their name and a distinct color.
Members on free or restricted licenses can also be invited with Can edit or Full access permission—they can edit scripts and add screen recordings without needing a full license. See User licenses for the full list of what they can and can't do.
The invite panel also shows everyone who currently has access to the video—including anyone with access via a shared folder—and a separate General access control, which opens the video to everyone in your workspace without inviting each person individually.
Choose a level:
Full access: Can edit and share.Can edit: But can't share.Can comment: But can't edit.No access: Turns off workspace-wide access, so only individually invited people (and anyone with folder-level access) can open the video.
Copy link copies a link for existing collaborators to open the video directly; this is different from the project's share page link.
Publishing
To share a video with your audience, you need to publish it—creating a shareable link and embed code, and enabling the option to export it as a SCORM package.
See Video publishing for how to publish, share, export SCORM, and configure your video's public page.
Video analytics
Once you've published a generated video, you can see how viewers engage with it: views, watch time, completion, interactive question performance, and individual learner results.
See Video analytics for the full breakdown.
More actions
Select the three dots in the top-right corner of the video overview page to access the More actions menu.
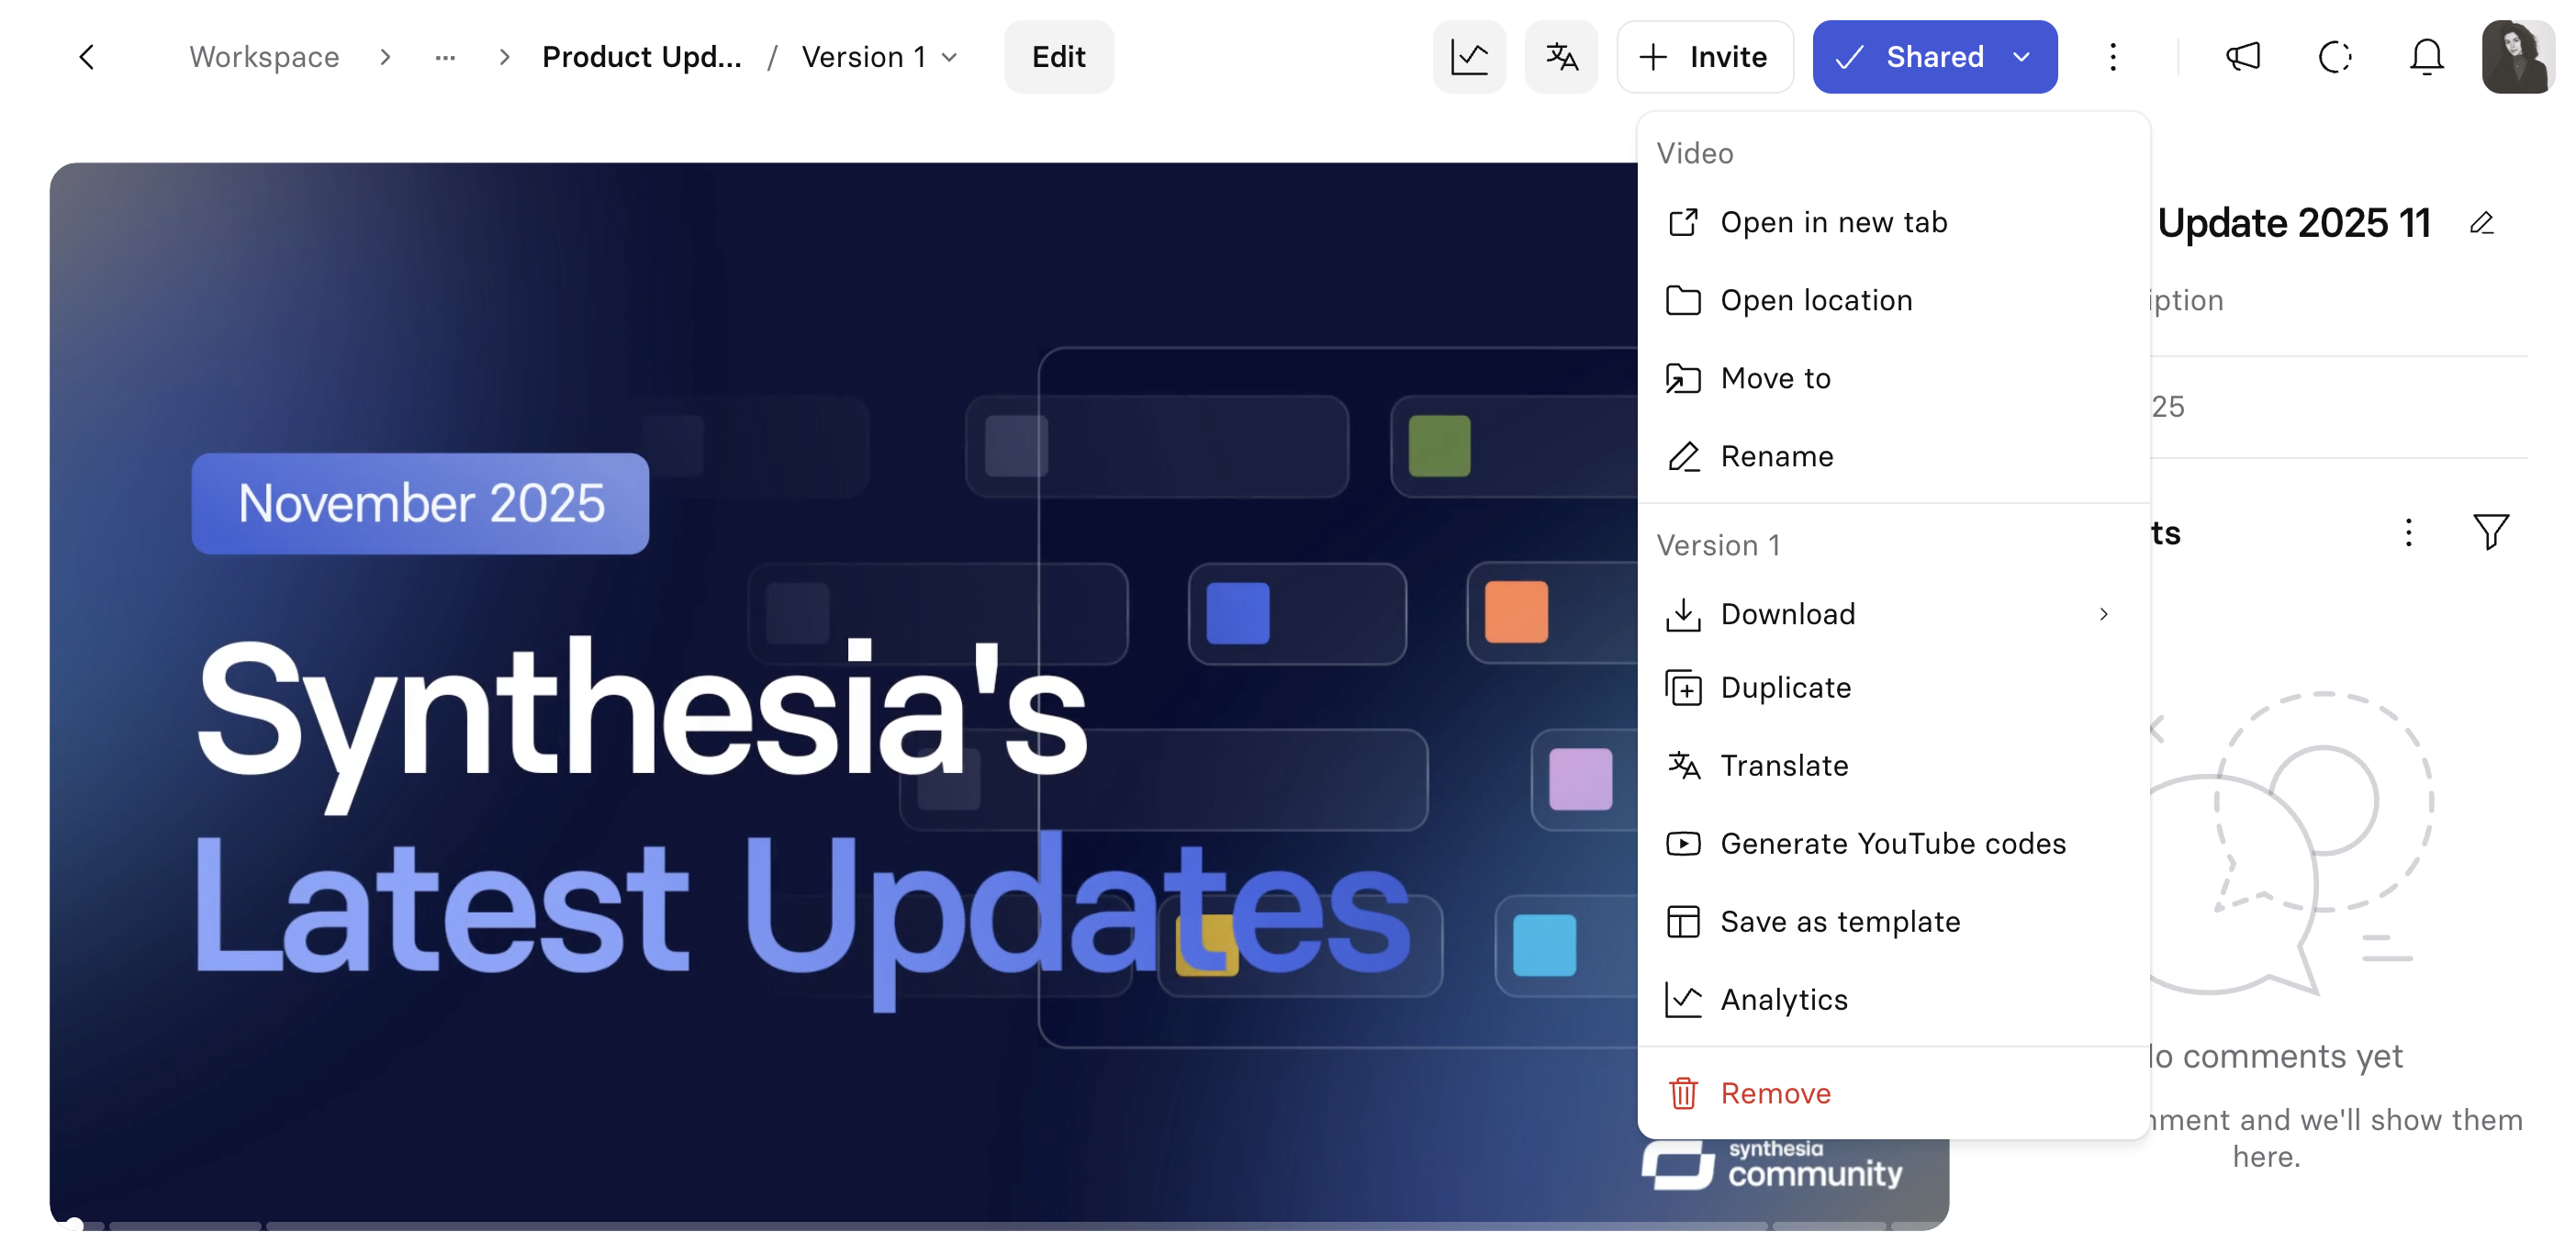
From this menu, you'll be able to:
- Open in a new tab.
- Open the location (folder) that the video is in.
- Move the video to another workspace or folder.
- Rename the video.
- Download the video, audio, captions, and XLIFF data.
- Duplicate the video.
- Translate the video.
- Generate YouTube codes.
- Save the video as a template.
- View the video analytics.
- Remove the video.
Download
Note:You can also download up to 20 videos at once, as individual
.mp4files, using the download option in a workspace's bulk actions toolbar.
You have three options for downloading your video content:
| Option | Description |
|---|---|
| Video | Download the video as an .mp4 file. The video's resolution will be 1080p (1920x1080 pixels). |
| Audio | Download the audio of the video as a .wav file. |
| XLIFF | Download the latest version of the video's text data as an .xliff file. See How do I Use the XLIFF Export Feature to Translate Videos in Synthesia? to learn more. |
| Download captions | Download the captions for your video. Captions are available as both .srt and .vtt files. |
You can download each generated version of your video separately. Use the version selector next to the video's title to switch to a different version, and access the More actions menu from there to download that specific version of the video.
Note:Interactive videos with clickable buttons or quizzes and Sessions projects can't be downloaded. An MP4 has no way to render a clickable button, and Sessions requires an active internet connection for the AI agent to function—so neither can exist as a static video file.
Important:If you've added music from Soundstripe to any of your scenes and plan to upload your video to YouTube, you'll need to generate YouTube codes for your video and add them to your video's description—otherwise, you might face copyright issues.
Duplicate
Duplicating a video creates a copy of the video in the current location it's already in (Workspace, My Videos, a specific folder), unless it's a private video that's been shared with you, in which case you'll get your own copy in My videos.
Translate
Select Translate to choose languages to translate your video into and start the video translation process.
Generate YouTube codes
YouTube codes prove that you have the right to use stock music from Soundstripe in your video.
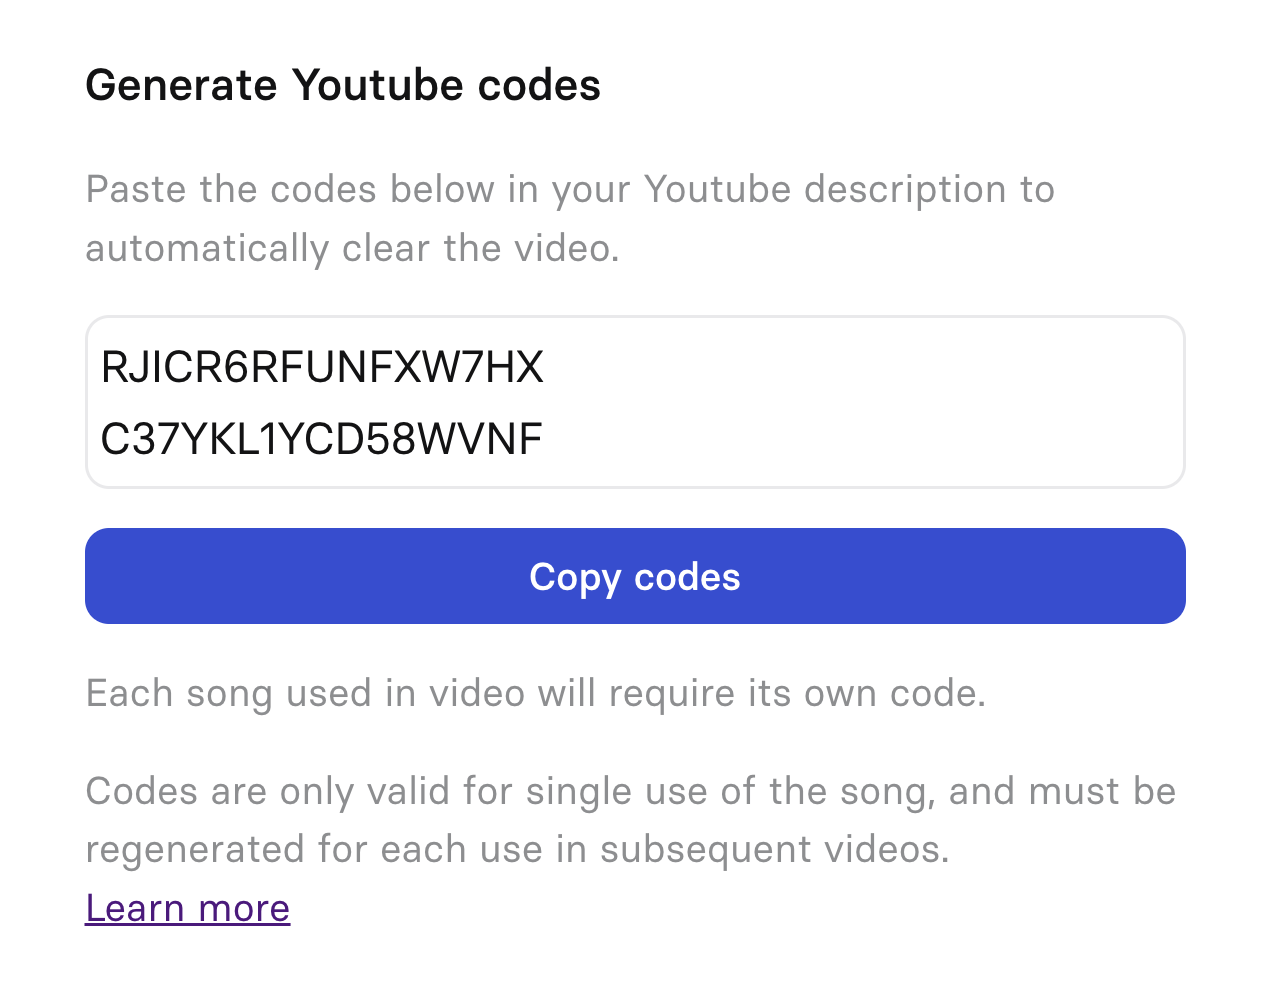
If you've created a video using stock music from Soundstripe and plan to upload your video to YouTube, generate YouTube codes for the music you've used and add them to your YouTube video's description, to avoid copyright issues:
- Select
Copy codes. - Add the codes to your YouTube video's description in the following format: Code:
1YIF7UEMH95ICLKR,XGUK7Z9KN80CCFJY
See How do I use YouTube codes? to learn more.
Save as template
Selecting Save as template creates a copy of the current video as a template. You'll be redirected to the editor, where you can edit the newly-created template and publish it to your custom template library to use for future videos.
Remove
Put the video in the Trash.
Administrator controls
Workspace and organization admins can restrict who can be invited to collaborate on a video. Organization-level settings apply to every workspace in it; workspace-level settings apply to just that workspace. Set these from Workspace settings or Organization settings.
| Setting | What it does |
|---|---|
Restrict invitations to allowed domains only | Prevents inviting users outside of allowed domains. An Allow guests from non-allowed domains checkbox can exempt guests from the restriction. |
Disable guests | Prevents inviting guests from outside the workspace to videos. |
Disable member invites | Prevents members from inviting new members from outside the workspace. |
Disable public invite links | Prevents workspace admins from creating or using public invite links. Organization-level only. |
Updated about 1 month ago
What’s Next
- Video Translation
- How do I publish a translated video by itself? - Synthesia Knowledge Base
- How do I enable video duplication? - Synthesia Knowledge Base
- How do I send a GIF thumbnail of my Synthesia video? - Synthesia Knowledge Base
- How do I publish my video? - Synthesia Knowledge Base
- How do I use the multilingual video player? - Synthesia Knowledge Base
- How do I export my video as a SCORM package? - Synthesia Knowledge Base