

Brand kits
Brand kits help you create content aligned with your company's branding by applying custom text styles, color palettes, logos, and avatars to your video
Brand kits apply your company's logos, colors, fonts, shapes, and avatars to videos so every video looks consistent and on-brand—no design experience required.
Brand kits are workspace-level unless an Organization admin has enforced a default brand kit across the organization. All users in a workspace can view and use them. If a workspace admin has locked brand kits, only admins can create new ones, edit existing ones, or change the default brand kit.
Brand kit components
| Component | Quantity | Details |
|---|---|---|
| Logo | 2 logos | Specify a primary logo for use with light backgrounds, and a negative logo for use with dark backgrounds. Accepts JPEG, PNG, or SVG files—WebP isn't supported. SVG is recommended where possible, since it's a scalable vector format and renders at the highest quality at any size. |
| Colors | Up to 120 colors | Brand colors—solid or gradient—are used to automatically generate themes for your videos. See Colors and themes for details. |
| Shape | 1 corner style | Sets the corner style applied across Brand Kit content. See Shape for details. |
| Text styles | 2 fonts | Select a primary font, then optionally a secondary font. See Text styles for how each of the 5 text styles map to them. If you or your team have uploaded any custom fonts to your workspace's library, you'll be able to select them from the dropdown menu. |
| Avatars | 6 | The avatars specified should be available to all members of the workspace the brand kit is in. You will need to share any custom avatars, or stock avatars that have been customized with your company branding, with your workspace. For Customizable Avatars and Personal Avatars, you can choose an outfit alongside the avatar. Personal Avatars created from a video keep whatever background they had when created—remove the background during that avatar's creation if you don't want it included in the brand kit. |
| Spaces | — | Save one or more avatar backgrounds (spaces) to the brand kit separately from your avatars, so an avatar and a space can be paired independently. Added the same way as avatars, from the Spaces list on the Avatar tab. |
Note:None of the brand kit components are required, and there's no minimum amount to specify for any of them. If you create a new brand kit and don't add any or all components or change the default title and exit the brand kit setup page, the blank brand kit will still save as an empty brand kit you can come back to later.
Colors and themes
Add up to 120 colors to your brand kit's palette, each either a solid color or a gradient. Hover over a color to see its details, or select the trash icon in its top-right corner to delete it.
Colors are automatically combined into themes of 4 roles each: Text & icon, Background, Accent, and Secondary accent, generated using contrast rules so your videos stay visually accessible. Up to 42 themes can be created (either manually or auto-generated) from your palette.
Editing a theme:
- Select the pencil icon in a theme's row to open a dropdown of auto-generated theme options, each a different combination of colors from your palette.
- Select a theme to open it, where you can override the color assigned to any of its 4 roles (Text & icon, Background, Accent, Secondary accent) individually, or select
Randomize colorsto shuffle all 4 at once. - Hover over a theme's row to reveal a trash icon and delete the theme.
Note:For themes where selected colors don't meet minimum accessible contrast requirements, you'll see a warning that your theme colors don't have enough contrast. Consider changing your theme to be more accessible.
Suggested themes:
Synthesia may also suggest auto-generated themes. These have the same editing options as your saved themes, but aren't added to your brand kit automatically. Select the checkmark icon (Accept theme) to add a suggested theme to your brand kit. You can edit the theme as you would any other before adding it to your brand kit.
Shape
Select a corner style to apply across your Brand Kit content:
- Hard: square corners
- Subtle: a slight corner radius
- Rounded: a pronounced corner radius
- Circular: fully rounded corners
Text styles
Select a primary font first. Once it's set, you can also add a secondary font.
Select Settings to configure how each of the 5 text styles—Title 1, Title 2, Subtitle, Body font, and Caption—uses your fonts:
- With both a primary and secondary font set, Title 1, Title 2, and Subtitle default to your primary font, and Body font and Caption default to your secondary font. You can change which font any individual style uses.
- With only a primary font set, all 5 text styles use it, and the font selection for each style is grayed out, since there's no secondary font to switch to.
For each text style, you can also set:
- Font weight: available weights depend on the font file, for example Regular, Medium, or Bold.
- Letter spacing: -0.1, -0.05, 0 (default), 0.05, or 0.1.
Custom fonts
When selecting a primary or secondary font, any custom fonts already uploaded to your workspace library appear in the list. If the font you need isn't there, select + Upload custom font at the bottom of the list to add it.
- Select
Choose fontsand select a font file for a specific weight and style. Only upload fonts from the same font family at a time—Synthesia combines them into a single family for you. Supported formats: TTF, OTF, WOFF, and WOFF2. - Review your uploaded fonts. For each file, you'll see the font name, file name, weight (on a 100 Thin to 900 Heavy scale), style (Italic or Normal), and a preview.
- Each weight and style is a separate file. To add more, for example a Normal weight to go with an Italic you already uploaded, select
Add fontsin the top-right corner. - Enter a Font family name to identify the uploaded fonts, then select
Publish fonts to workspaceto make them available when selecting custom fonts. SelectCancelto discard the upload instead.
Create a new brand kit
There are two ways to create a brand kit. You can either create one manually, or use our Brandfetch integration to import your company's branding with a few clicks.
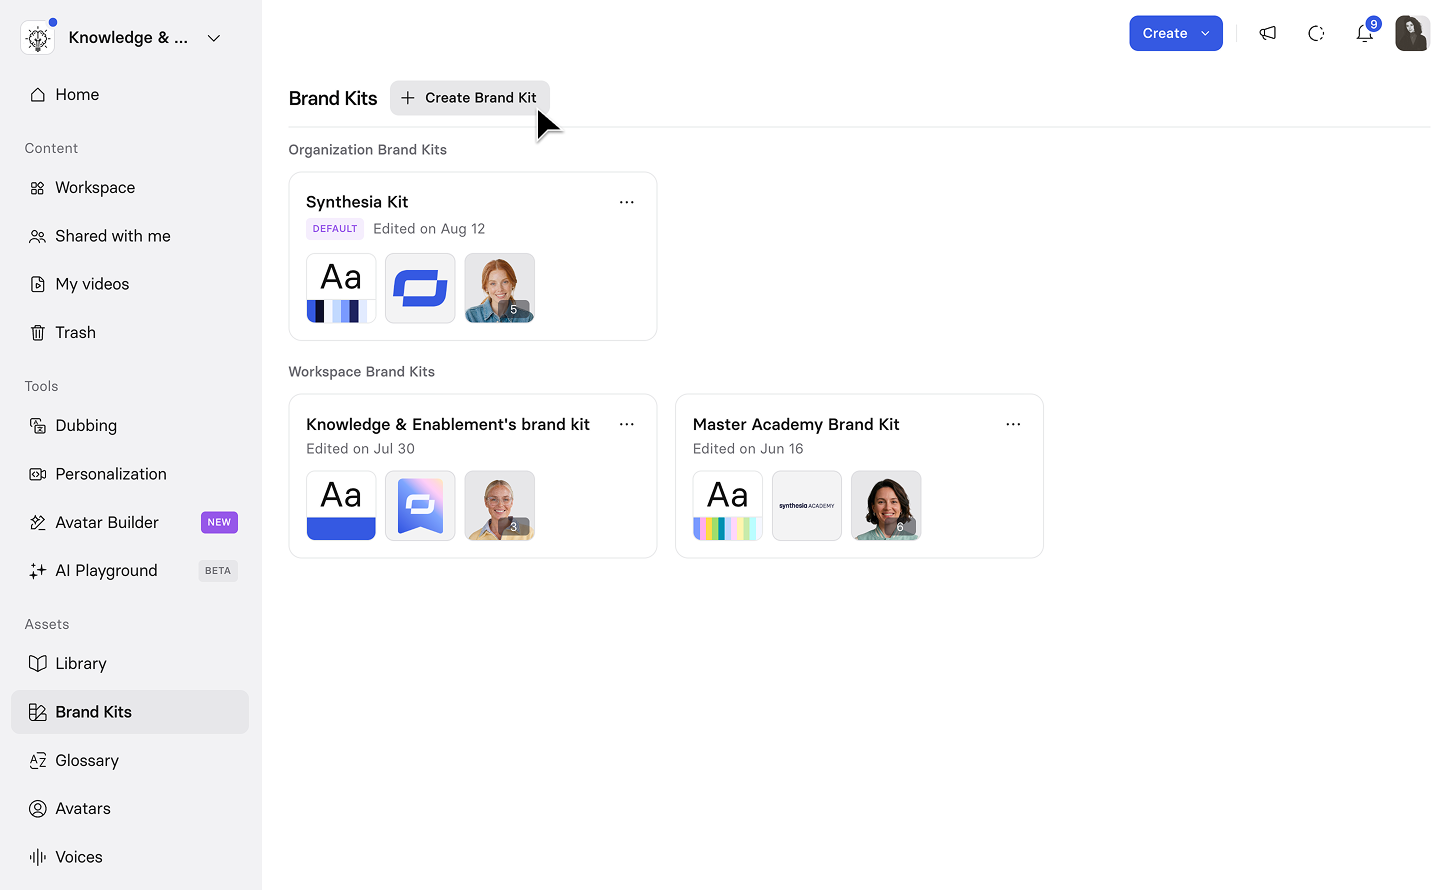
Refer to the brand kit components section for details on the settings available for each component.
Create a new brand kit manually
- Go to the Brand kits page (Assets > Brand kits) and select
Create brand kit. - Select
+under Primary or Negative to add your company logo. This opens your workspace library, which you can search or filter to All media, Images (JPEGs and PNGs), or Vector (SVGs). If your logo isn't already in your library, selectUpload media to libraryat the bottom of the panel to upload it directly. - Select up to 2 fonts in the text styles section.
- Add up to 120 brand colors.
- Choose a corner style.
- Select up to 6 avatars, and any spaces you'd like saved to the brand kit. Customizable Avatars have the option to select outfits.
- Select
Save.
Create a new brand kit with Brandfetch
Brandfetch lets you organize your brand essentials—like logos, fonts, and colors—in one place for easy access. If your company's brand assets are available on Brandfetch, you can import them directly into a new brand kit.
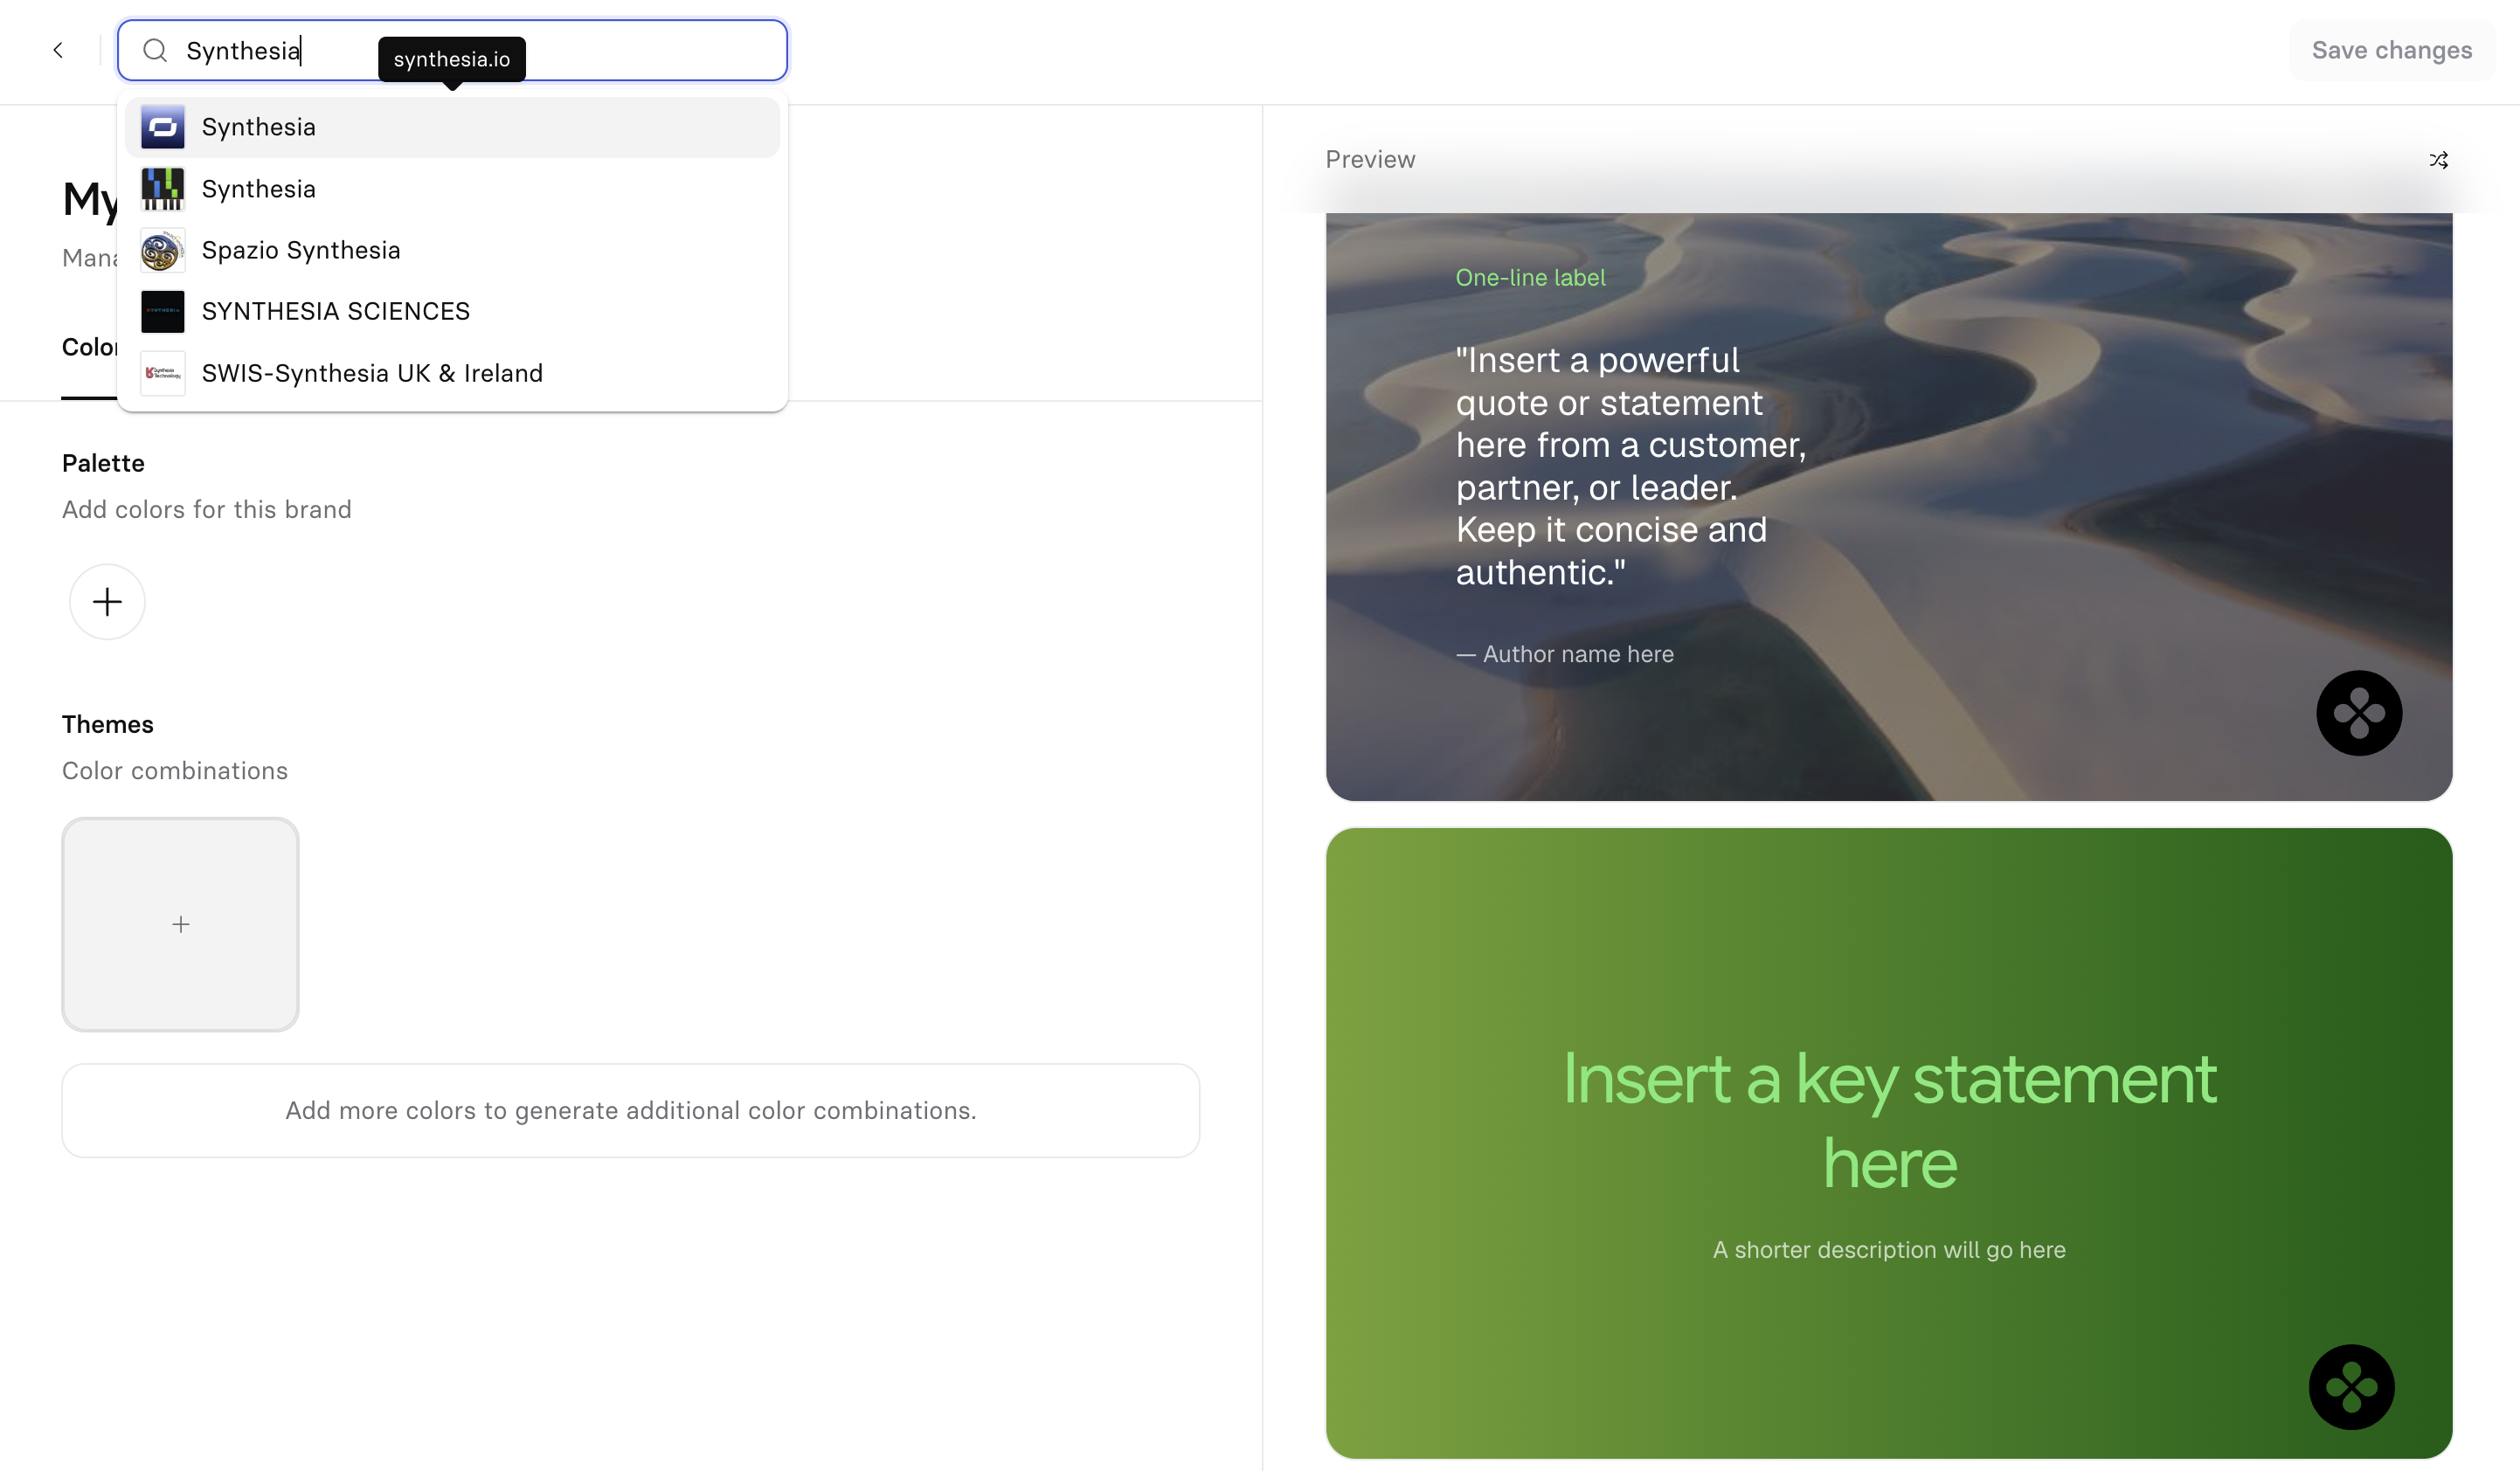
- Go to the Brand kits page (Assets > Brand kits) and select
Create brand kit. - Type your company's name in the search bar at the top.
- Find and select your company from the dropdown list.
Your company's colors and logos are added automatically. From there, update the brand kit to include your custom fonts and avatars.
Note:The search bar stays available while you're editing a brand kit, not just when creating one—so you can pull in a company's colors and logo at any point, not only at the start.
Managing brand kits
Default brand kit
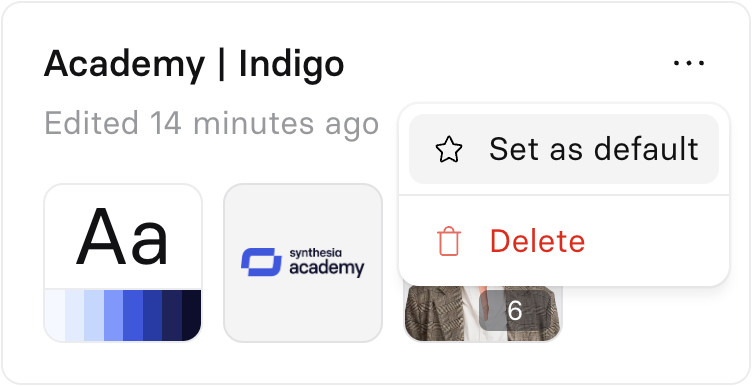
Setting a brand kit as default causes it to automatically be applied to any new videos created in a workspace.
- Go to the Brand kits page (Assets > Brand kits).
- Select the three-dot menu in the upper-right corner of the brand kit.
- Select
Set as defaultto update the default brand kit for your workspace.
Lock a brand kit
Admins can prevent anyone but admins from changing brand kits in Workspace settings.
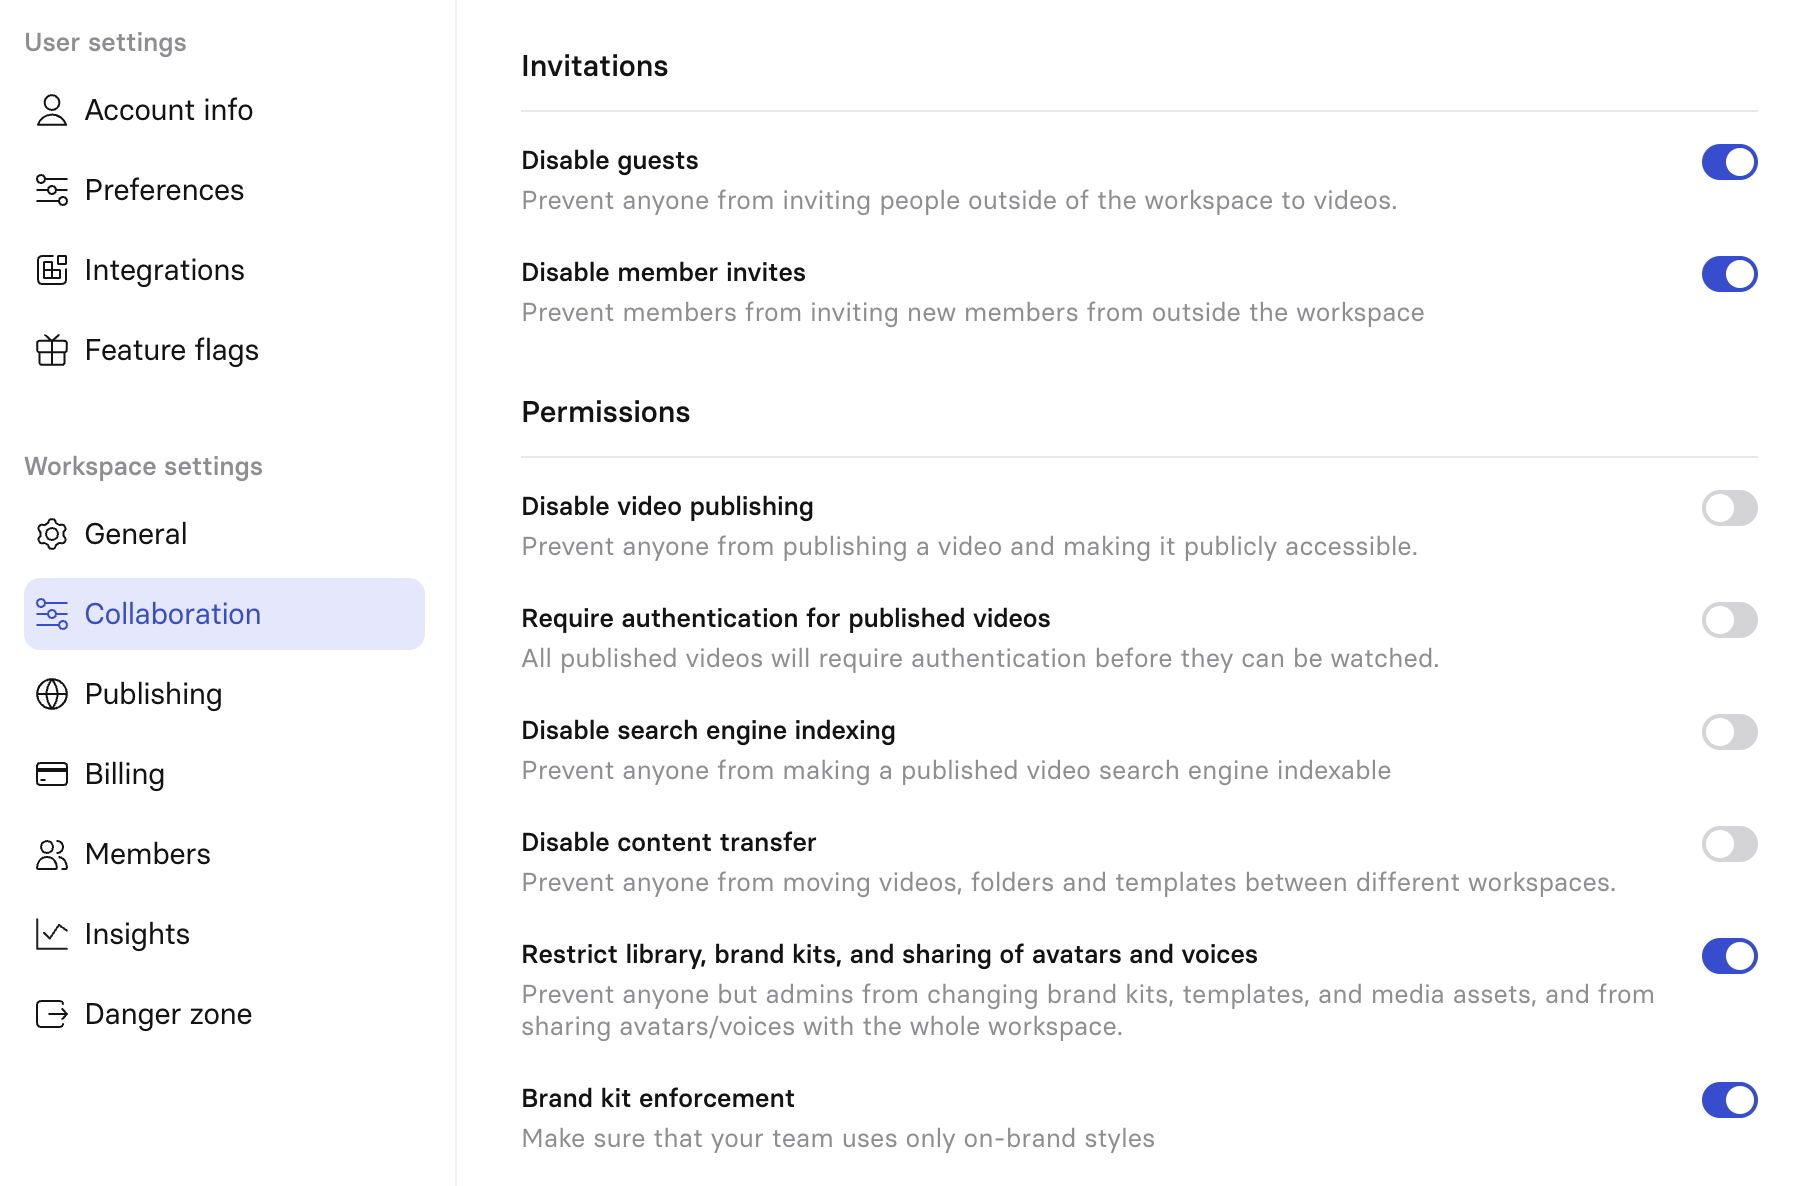
Brand kit enforcement
Restrict video creation to approved brand kits to ensure brand consistency. Workspace or organization admins can toggle this setting in their Workspace settings.
Brand kit enforcement helps Enterprise teams ensure that all videos follow their brand guidelines by locking in the use of approved logos, fonts, and text styles. This reduces review cycles and eliminates the risk of off-brand content.
When brand kit enforcement is turned on, all videos must use an approved brand kit.
Users can't:
- Change logos to non-logo media.
- Select fonts or text styles that aren't defined in the brand kit.
- Switch to the "no brand kit" option.
Users can still:
- Choose from approved colors in the brand kit.
- Switch to another approved brand kit, if available.
- Use Brandfetch to fetch external logos, for example for sales or support use cases.
- Copy and paste elements between videos.
Important behavior:
- If an enforced brand kit is deleted, it's removed from the video. The video is no longer brand-restricted.
- Templates created while brand kit enforcement is on must have a brand kit applied—"no brand kit" isn't an option.
- If a brand kit doesn't include logos or text styles, users can still select these freely.
- If your organization admin sets a default brand kit, it overrides workspace-level defaults.
Share brand kits across your organization
Brand kits are available to all members of the workspace they belong to. For organizations with multiple workspaces, organization admins can set a default brand kit that applies across the organization, overriding workspace-level defaults.
To ensure consistent branding across workspaces:
- Ask your organization admin to set a shared default brand kit.
- Use brand kit enforcement to require all videos to use an approved kit.
- If you need to share customized stock avatars or personal avatars across multiple workspaces, contact Synthesia support.
Delete a brand kit
You can delete a brand kit, but you won't be able to restore it.
- Go to the Brand kits page (Assets > Brand kits).
- Select the three-dot menu in the upper-right corner of the brand kit.
- Select
Delete. This action can't be reversed.
Editing and updating brand kits
To edit a brand kit, go to the Brand kits page (Assets > Brand kits) and select the brand kit.
When the brand kit for a video has been updated, you're notified in the editor. Select Update video to apply the updated version of the brand kit to the video.
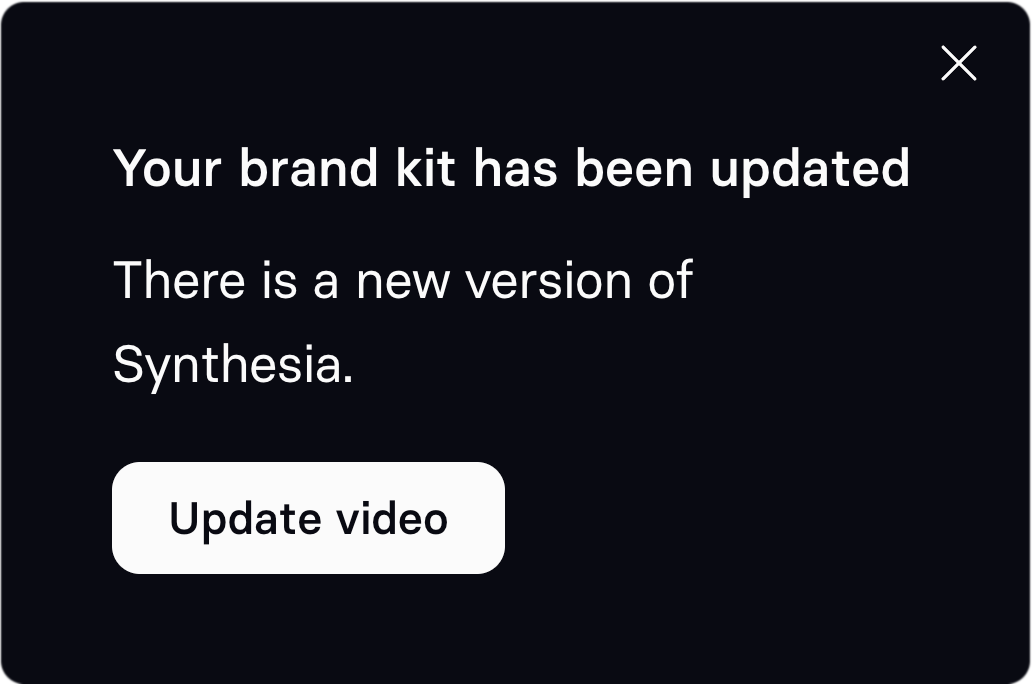
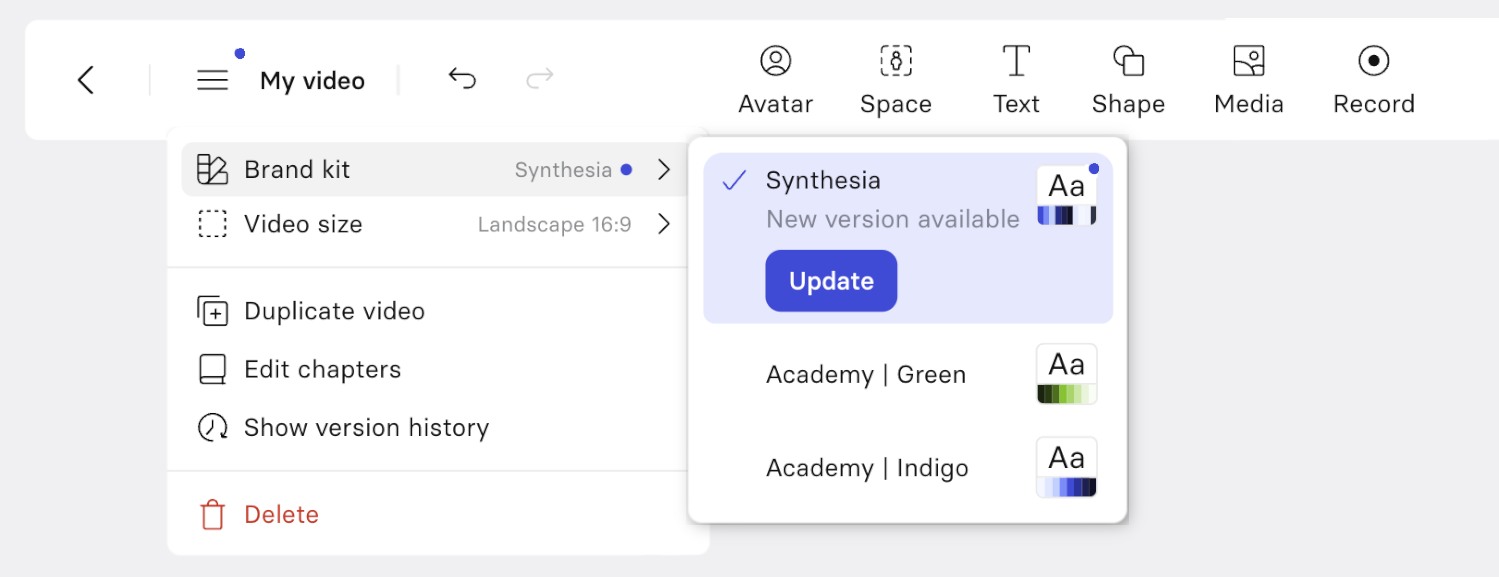
If you close the dialog, you can still update the brand kit from the video actions menu.
Applying a brand kit to a video
There are three ways you can apply a brand kit:
- From the editor, when you've created a new video. You can also change the brand kit from the editor.
- When creating a new video by starting with a template.
- When creating a new video with the AI video assistant.
Note:After applying a brand kit, you can still change the settings for colors and fonts in your video—you won't be restricted to the settings defined in the brand kit. So if a color isn't defined in your brand kit, you can still use it in the editor.
From the editor
To apply a brand kit to your video or change the current brand kit, open the video actions menu in the upper-left corner of the editor. Then open the brand kit submenu and select the brand kit you'd like to apply.
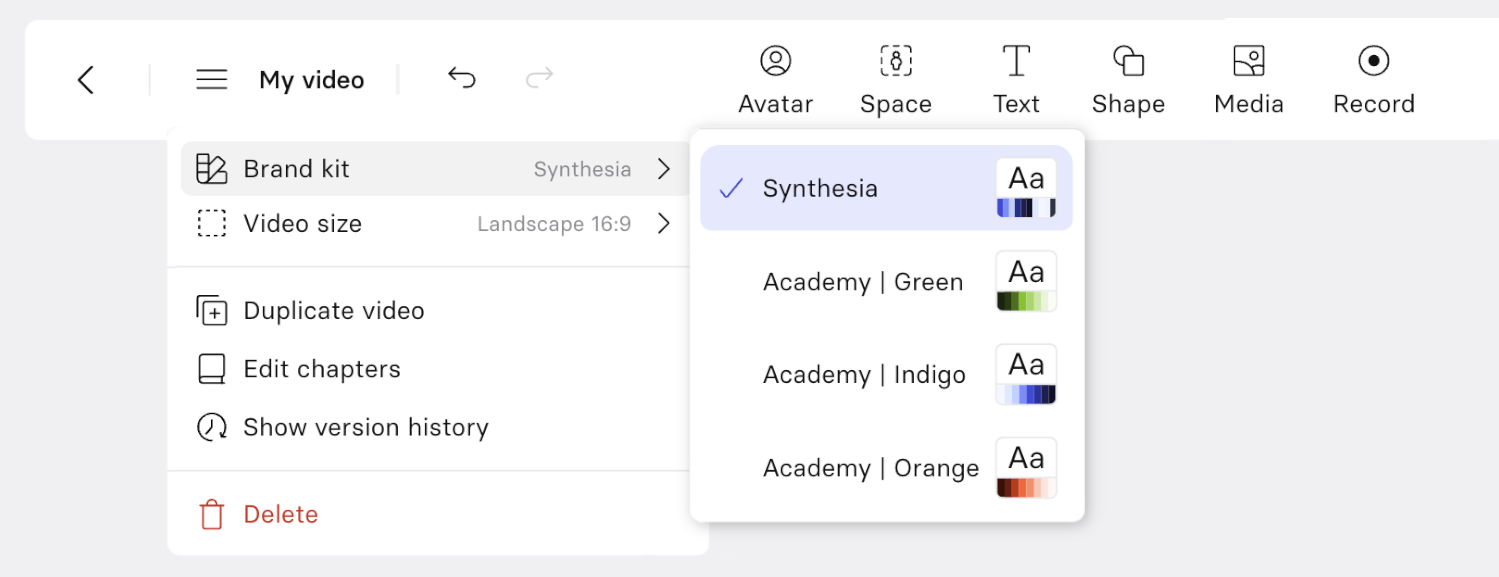
Applying a brand kit to your video automatically replaces any colors, fonts, avatars, and logos already set in the video, including in Button and Menu elements and Dynamic Captions, which inherit your brand kit's colors and fonts automatically.
You'll also have easy access to your brand colors, fonts, avatars, and logos from the editor.
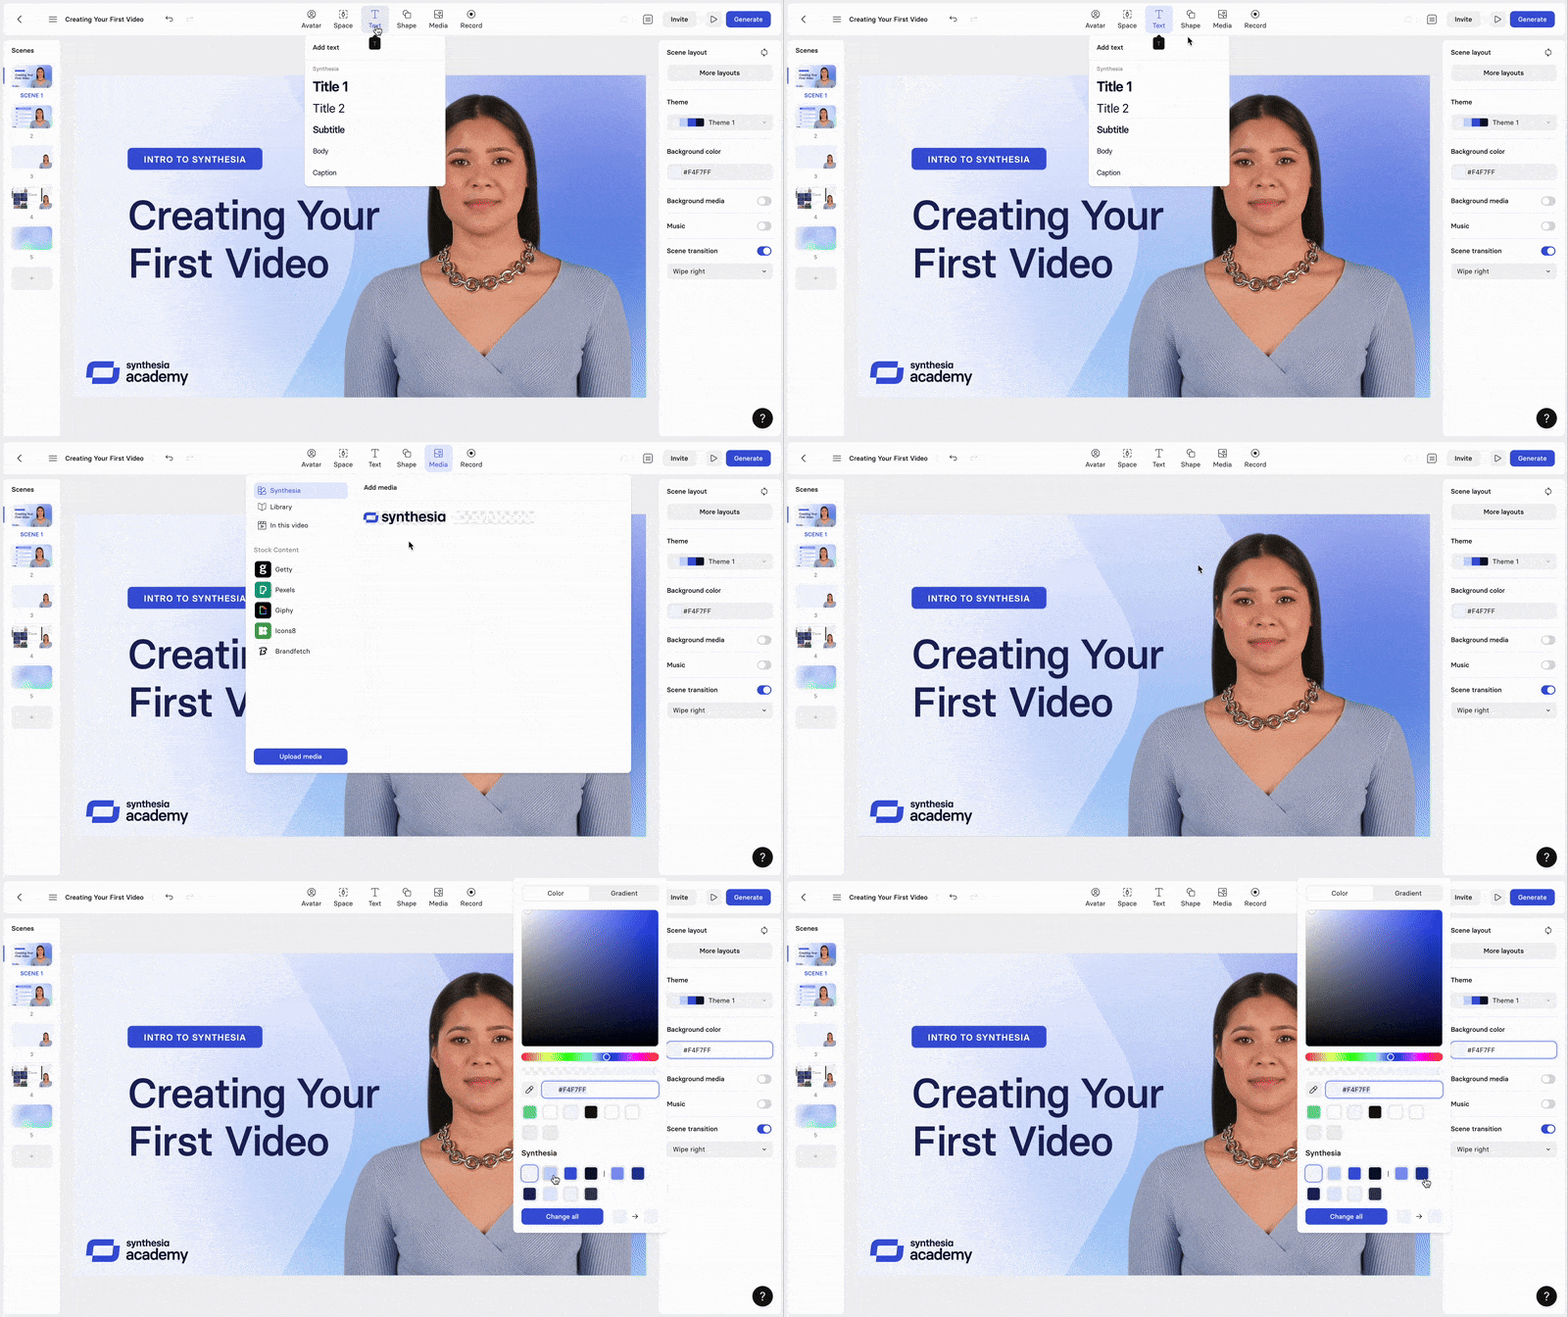
Note:When you add a new scene from a screen recording to a video that has a brand kit applied, the new scene automatically inherits that brand kit, for example its avatar.
Starting with a template
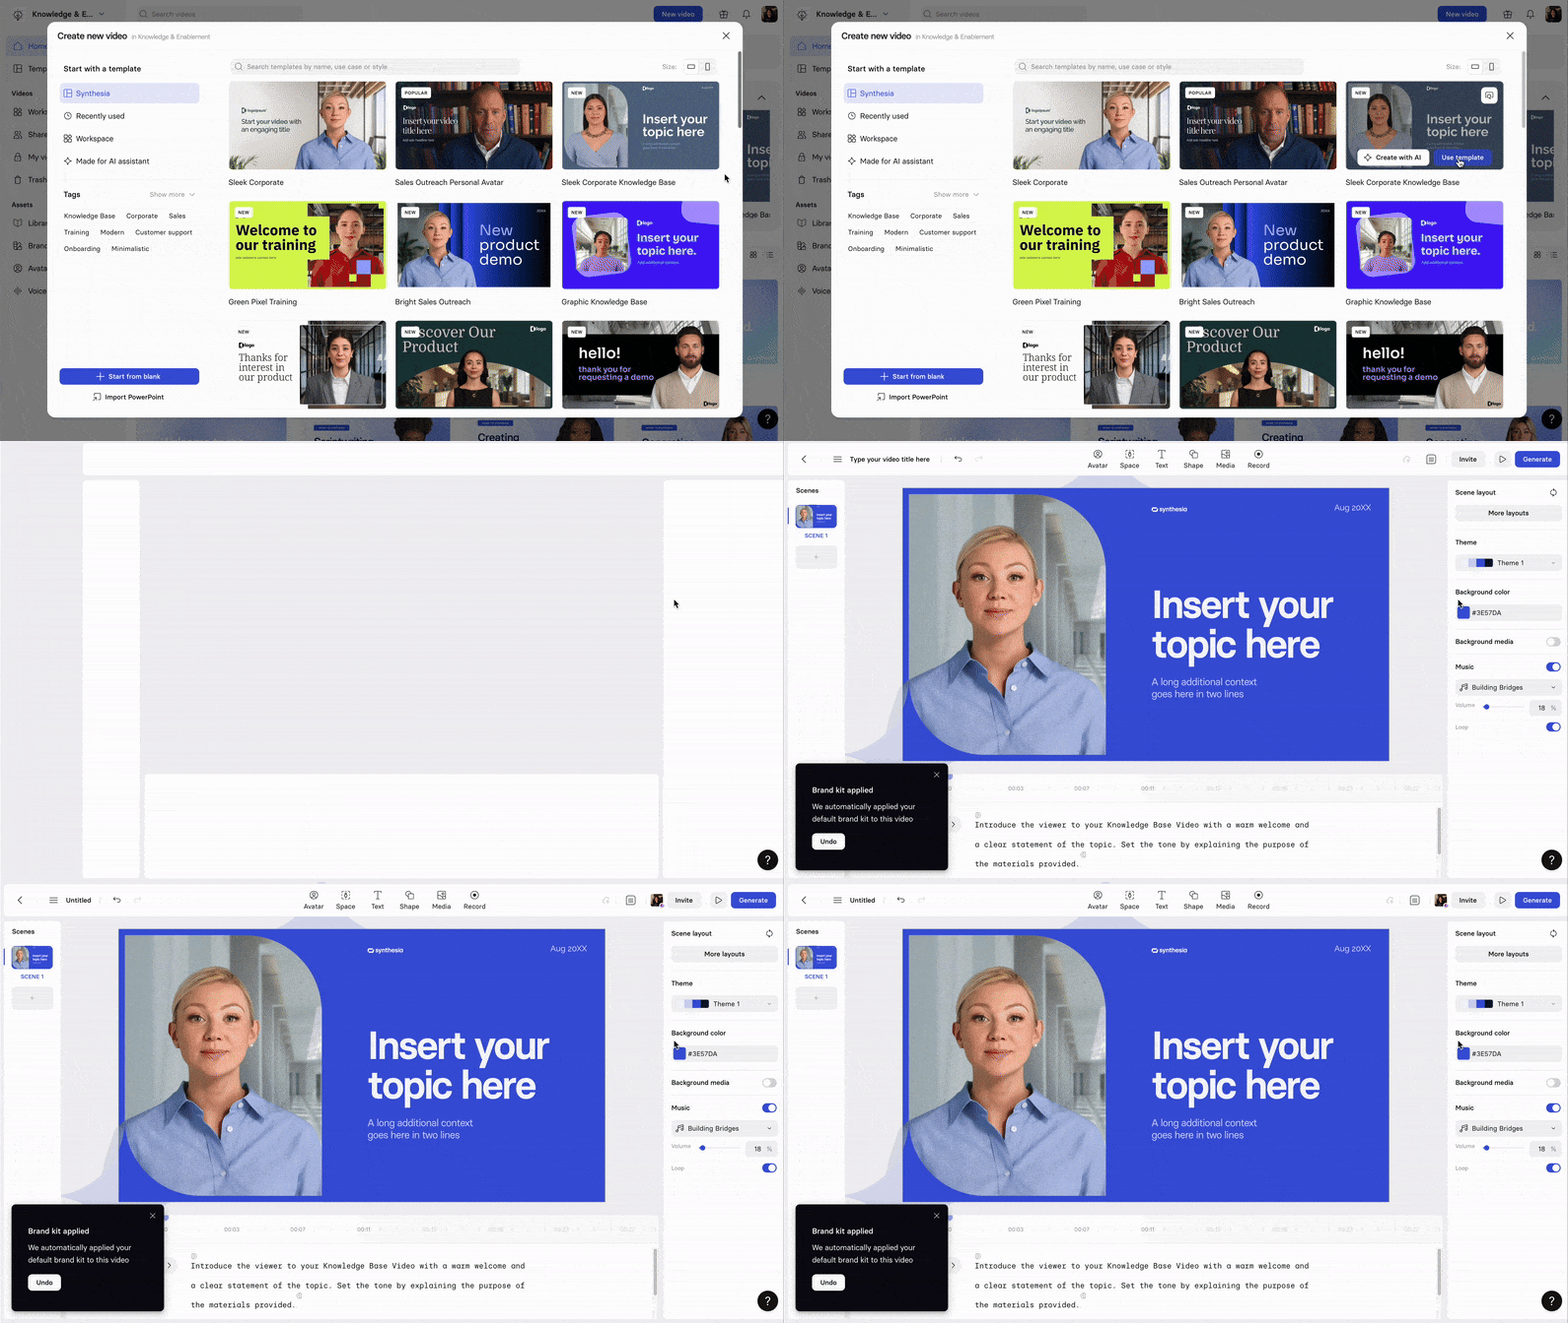
Brand kits can be applied to any template in Synthesia's template library, as well as any custom templates in your workspace's library.
Select Use template on the template's thumbnail to get started. Your brand kit is automatically applied to the new video.
Previewing brand kits
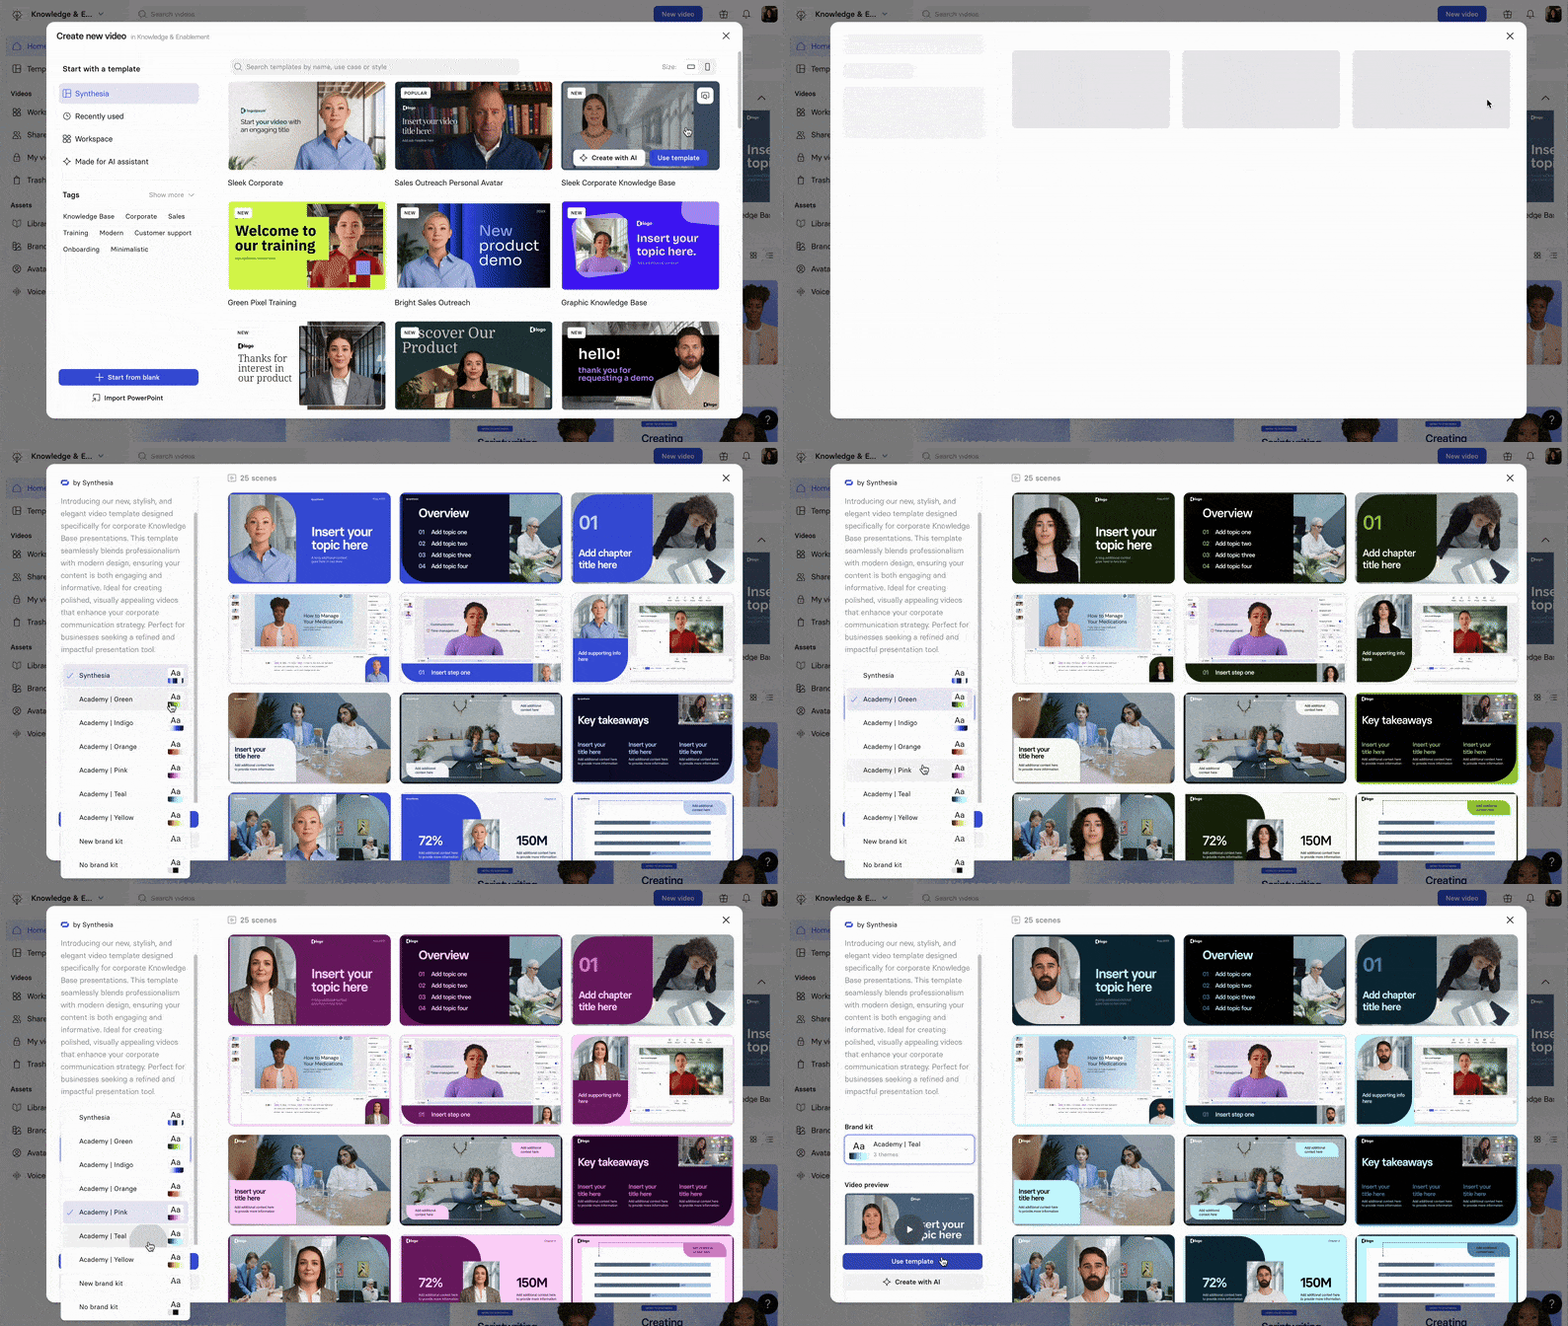
To see how the layouts for a given template will look with your brand kit applied, select the preview button in the top-right corner of the template thumbnail. If you have multiple brand kits, select them from the brand kit dropdown menu to preview the template with them applied.
With the Assistant
Start a video from the home page with a prompt or by uploading a file. This takes you to an outline page, where you can edit your video's outline. From there, select the brand kit you want to use alongside your template. You can preview different templates with your brand kit the same way as when starting with a template.
Using a brand kit via the API
When creating a video from a template using the Synthesia API, specify which brand kit to apply:
workspace_default: uses the workspace's default brand kit. This is the default if you don't specify a brand kit.no_brand_kit: creates the video without any brand kit applied.- A specific brand kit's UUID: applies that brand kit.
To find a brand kit's ID, go to the Brand kits page (Assets > Brand kits) and select Copy ID on the brand kit you want to use.
Updated about 1 month ago