

Templates
Start videos faster and keep your content consistent by building from reusable scene designs, instead of starting from a blank canvas every time.
Accessing templates
You can open the full template modal from Home:
- Select the
••(more) button above the prompt box, then selectExplore templates. - Select
Createin the top-right corner, thenVideo>Select a template. - On Home, switch from
VideotoRoleplayorSurveyabove the prompt box. Select one of the template tiles underOr start with a ready-made roleplay(orsurvey), use the shuffle button to see different suggestions, or selectView allto browse more.
Adding a scene from within the editor opens a different, simpler panel—see Adding a scene from a template below.
The template modal displays all available templates for your account.
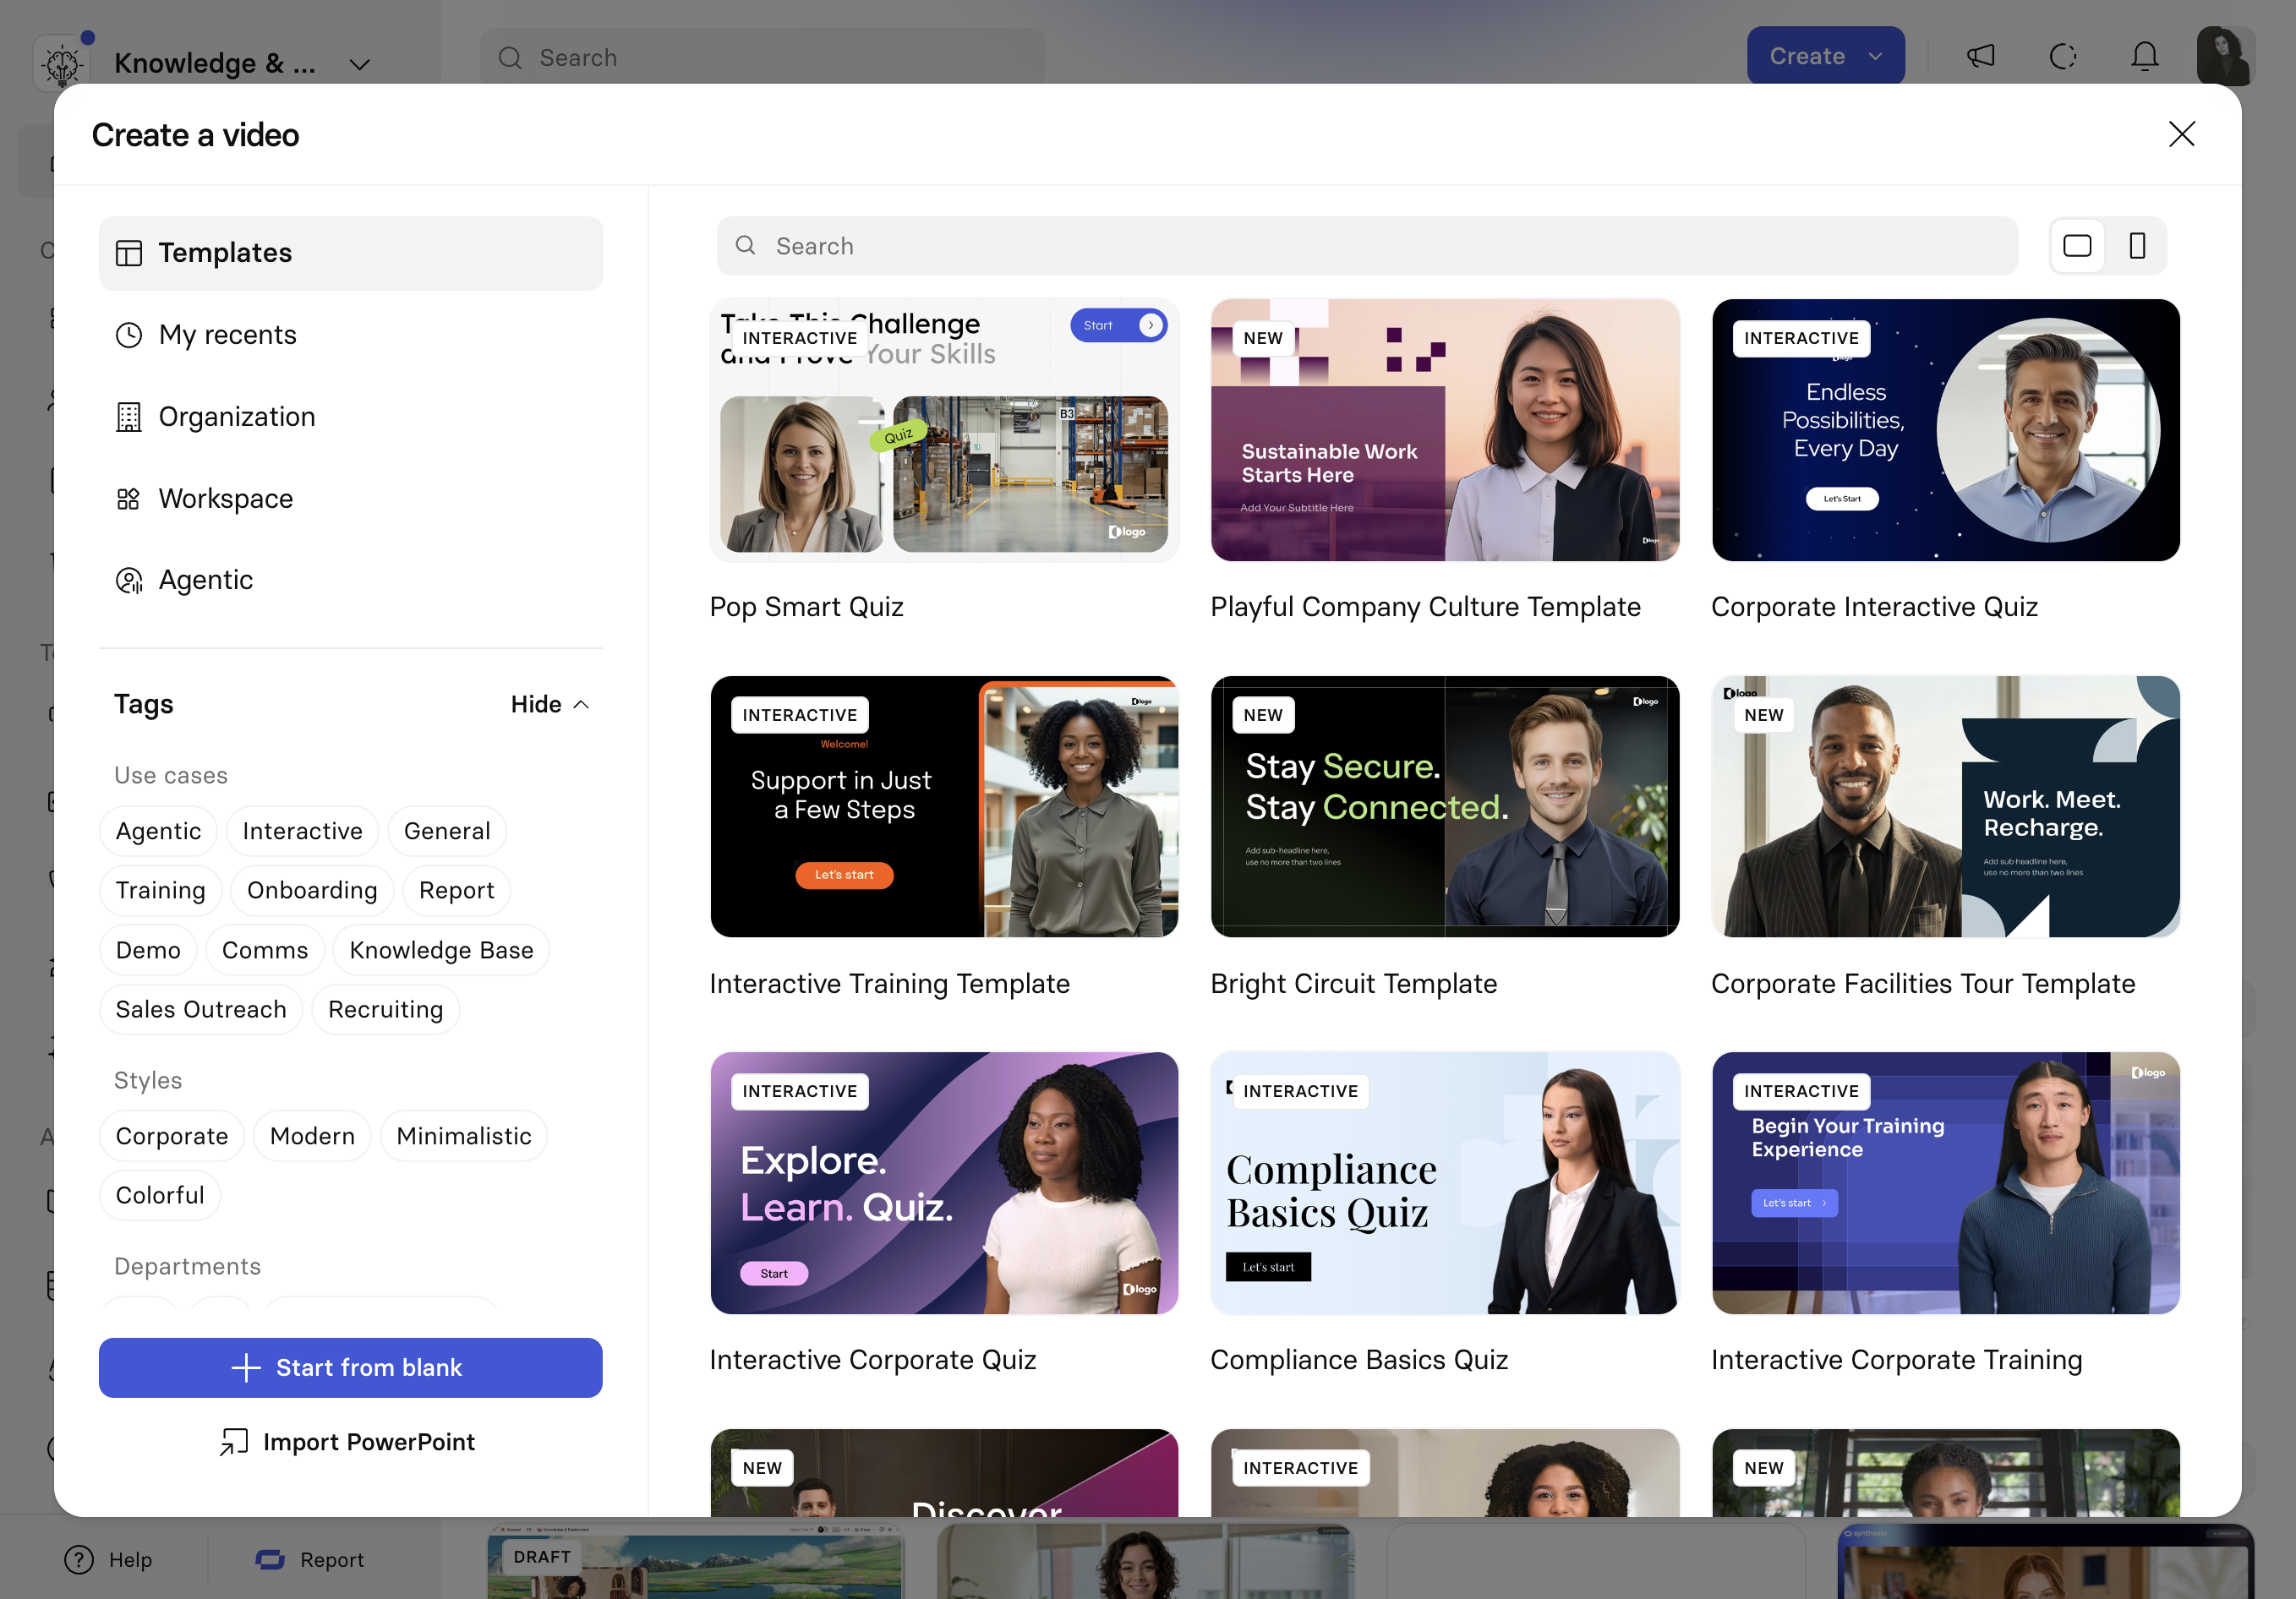
Browse templates from the categories on the left:
- Templates: The official Synthesia template library.
- My recents: Templates you've used recently.
- Organization: Custom templates shared across your organization.
- Workspace: Custom templates created in your workspace.
- Roleplays: Ready-made roleplay templates built by Synthesia.
- Surveys: Ready-made survey templates built by Synthesia.
Filter by tags, grouped into Use cases (for example Training, Onboarding, Sales Outreach), Styles (Corporate, Modern, Minimalistic, Colorful), and Departments (L&D, HR, Sales, and so on). Select Hide to collapse the tag filters.
Use the search bar to find a template by name, and the toggle next to it to filter by video format (Landscape or Portrait).
Instead of picking a template, you can also select Import PowerPoint to start from a presentation.
Note:
Start from blankdoesn't open a completely empty video—it starts you off with a minimal default template. To start truly from scratch, delete everything in the scene after it opens.
Select a template to open its preview panel to see what it looks like before using it to create a video:
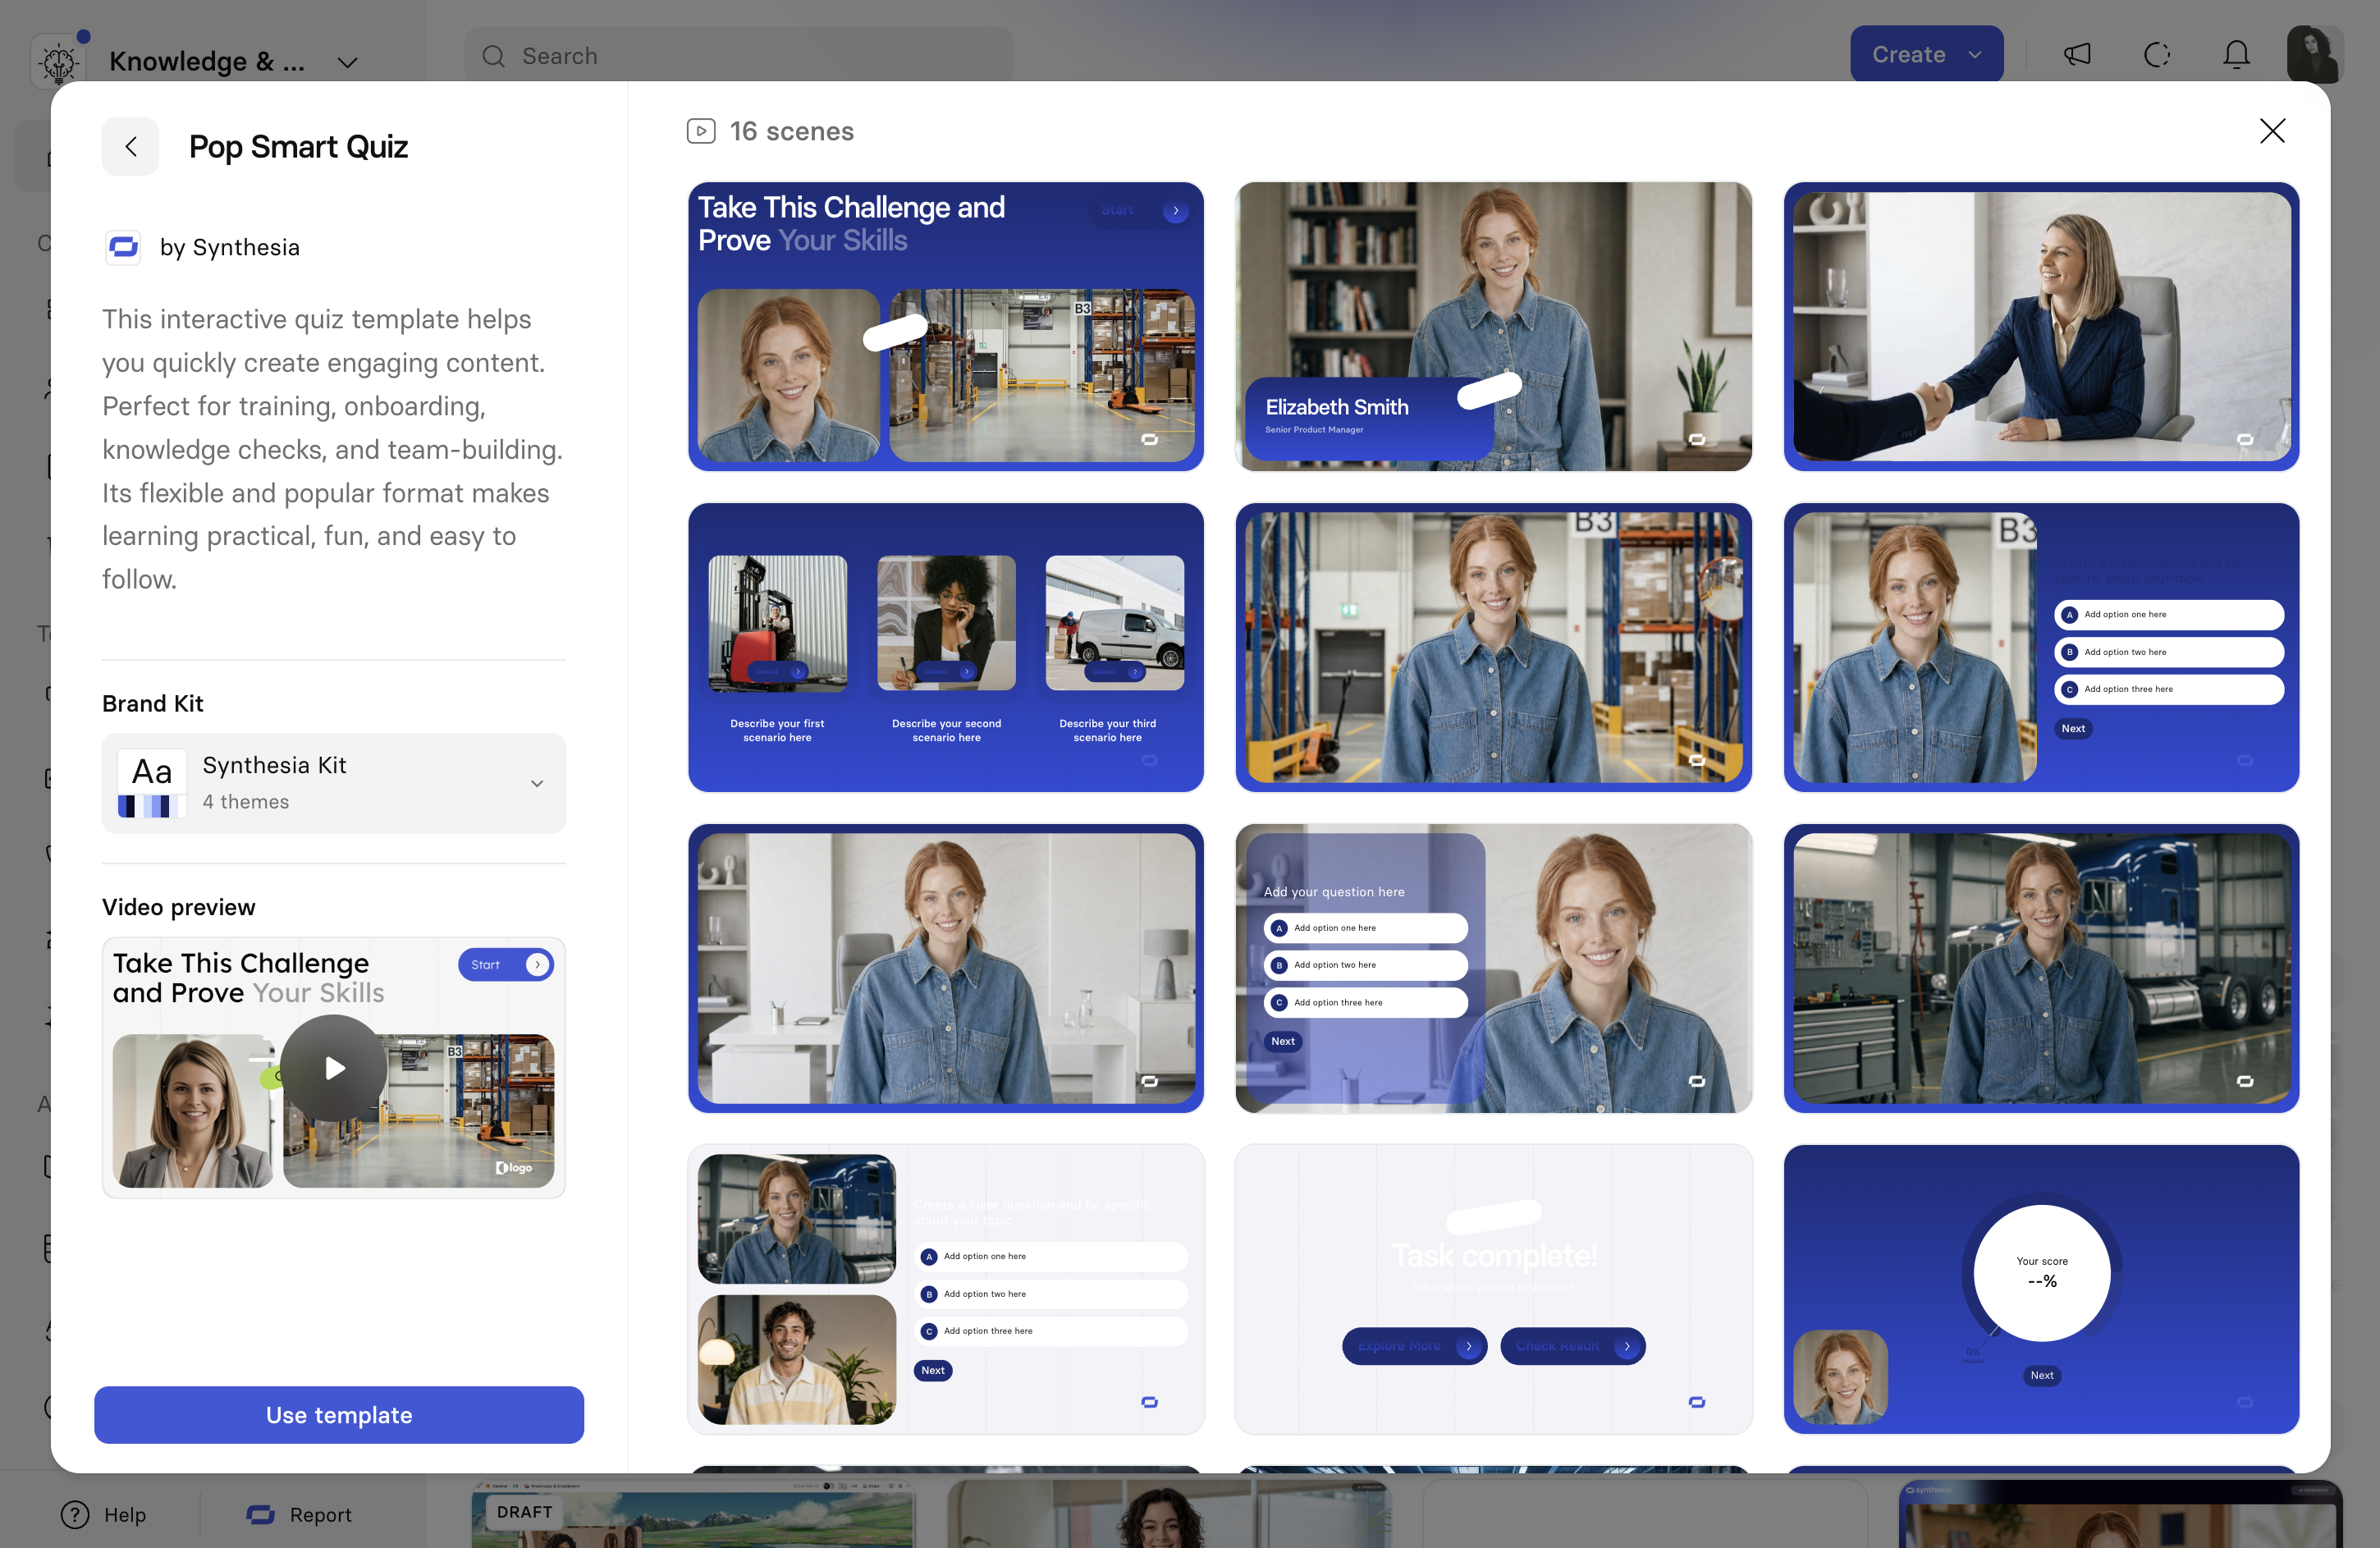
- The template's name, author, and a description of what it's for.
- If you're on an Enterprise plan and have a brand kit, a Brand Kit selector—the preview loads with your brand kit applied to the available layouts, and you can switch to preview with a different brand kit if you have more than one.
- A Video preview you can play to see the template in action.
- The full grid of scene layouts included, with a count at the top (for example,
16 scenes).
For roleplay and survey templates, the preview panel also shows:
- The avatar's role in the session (for example, Researcher).
- A summary of what the session does.
- The survey questions or the skills scored in the roleplay.
- The scenes included in the template.
On each template, you can select:
Use templateto start creating a video with it. For roleplay and survey templates, this opens the complete session in the editor with your selected brand kit applied. There are no placeholders to fill in.Create with AIto use this template with the AI-assisted creation tool. Not every template supports this—templates built around interactivity (like quizzes) currently only offerUse template.
Roleplay and survey templates
Roleplay and survey templates are complete, ready-to-use sessions built by Synthesia. Unlike video templates, which give you scene layouts to fill with your own content, each one includes the full script, the avatar's setup, and the content that drives the session: a study goal and questions for surveys, or a scenario and scored skills for roleplays.
Use a template as is, or adapt it to your own use case. They use Express avatars and include AI labels.
Roleplay templates
Each roleplay includes an intro, a context scene (who you're meeting, the scenario, and the skills scored), the roleplay with feedback, and an ending.
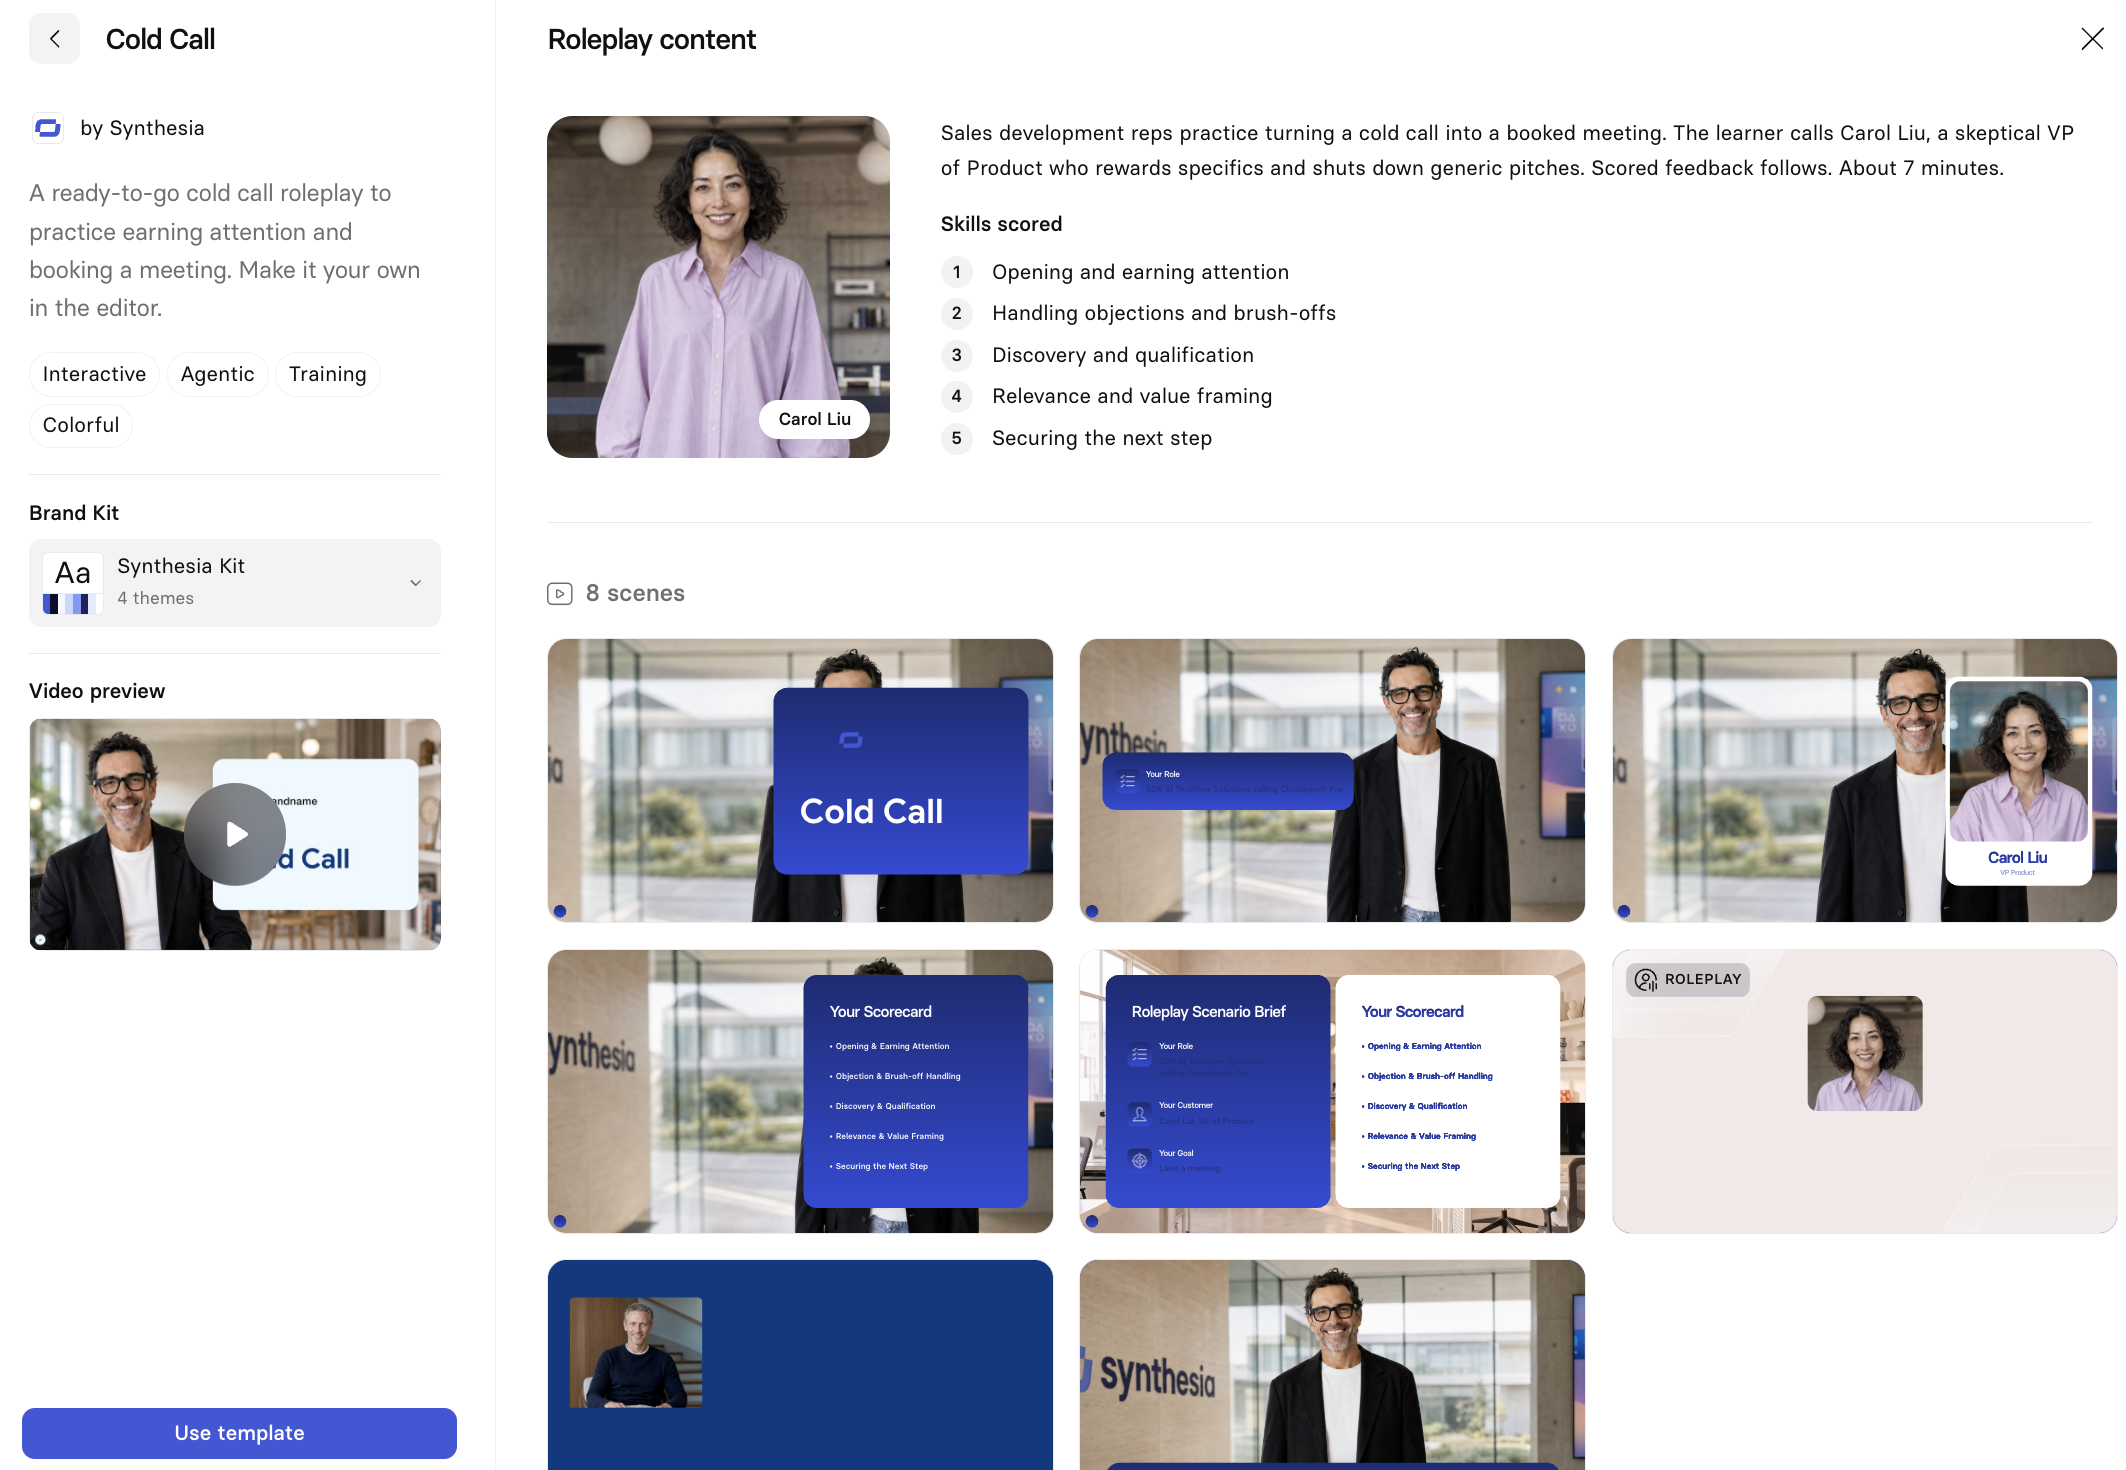
Roleplay template
| Template | What the learner practices | Length |
|---|---|---|
| Cold Call | Hooking a skeptical VP's interest and booking a meeting | About 7 minutes |
| Discovery Call | Qualifying an analytical buyer and earning a next step | About 10 minutes |
| Field Sales | Pitching a business owner face to face and landing a next step | About 7 minutes |
| Performance Feedback | Giving a direct report clear feedback and agreeing on next steps | About 10 minutes |
| Frustrated Customer Call | Calming an upset customer and resolving the issue | About 7 minutes |
Survey templates
Each survey has three scenes: an intro, the survey, and a thank-you.
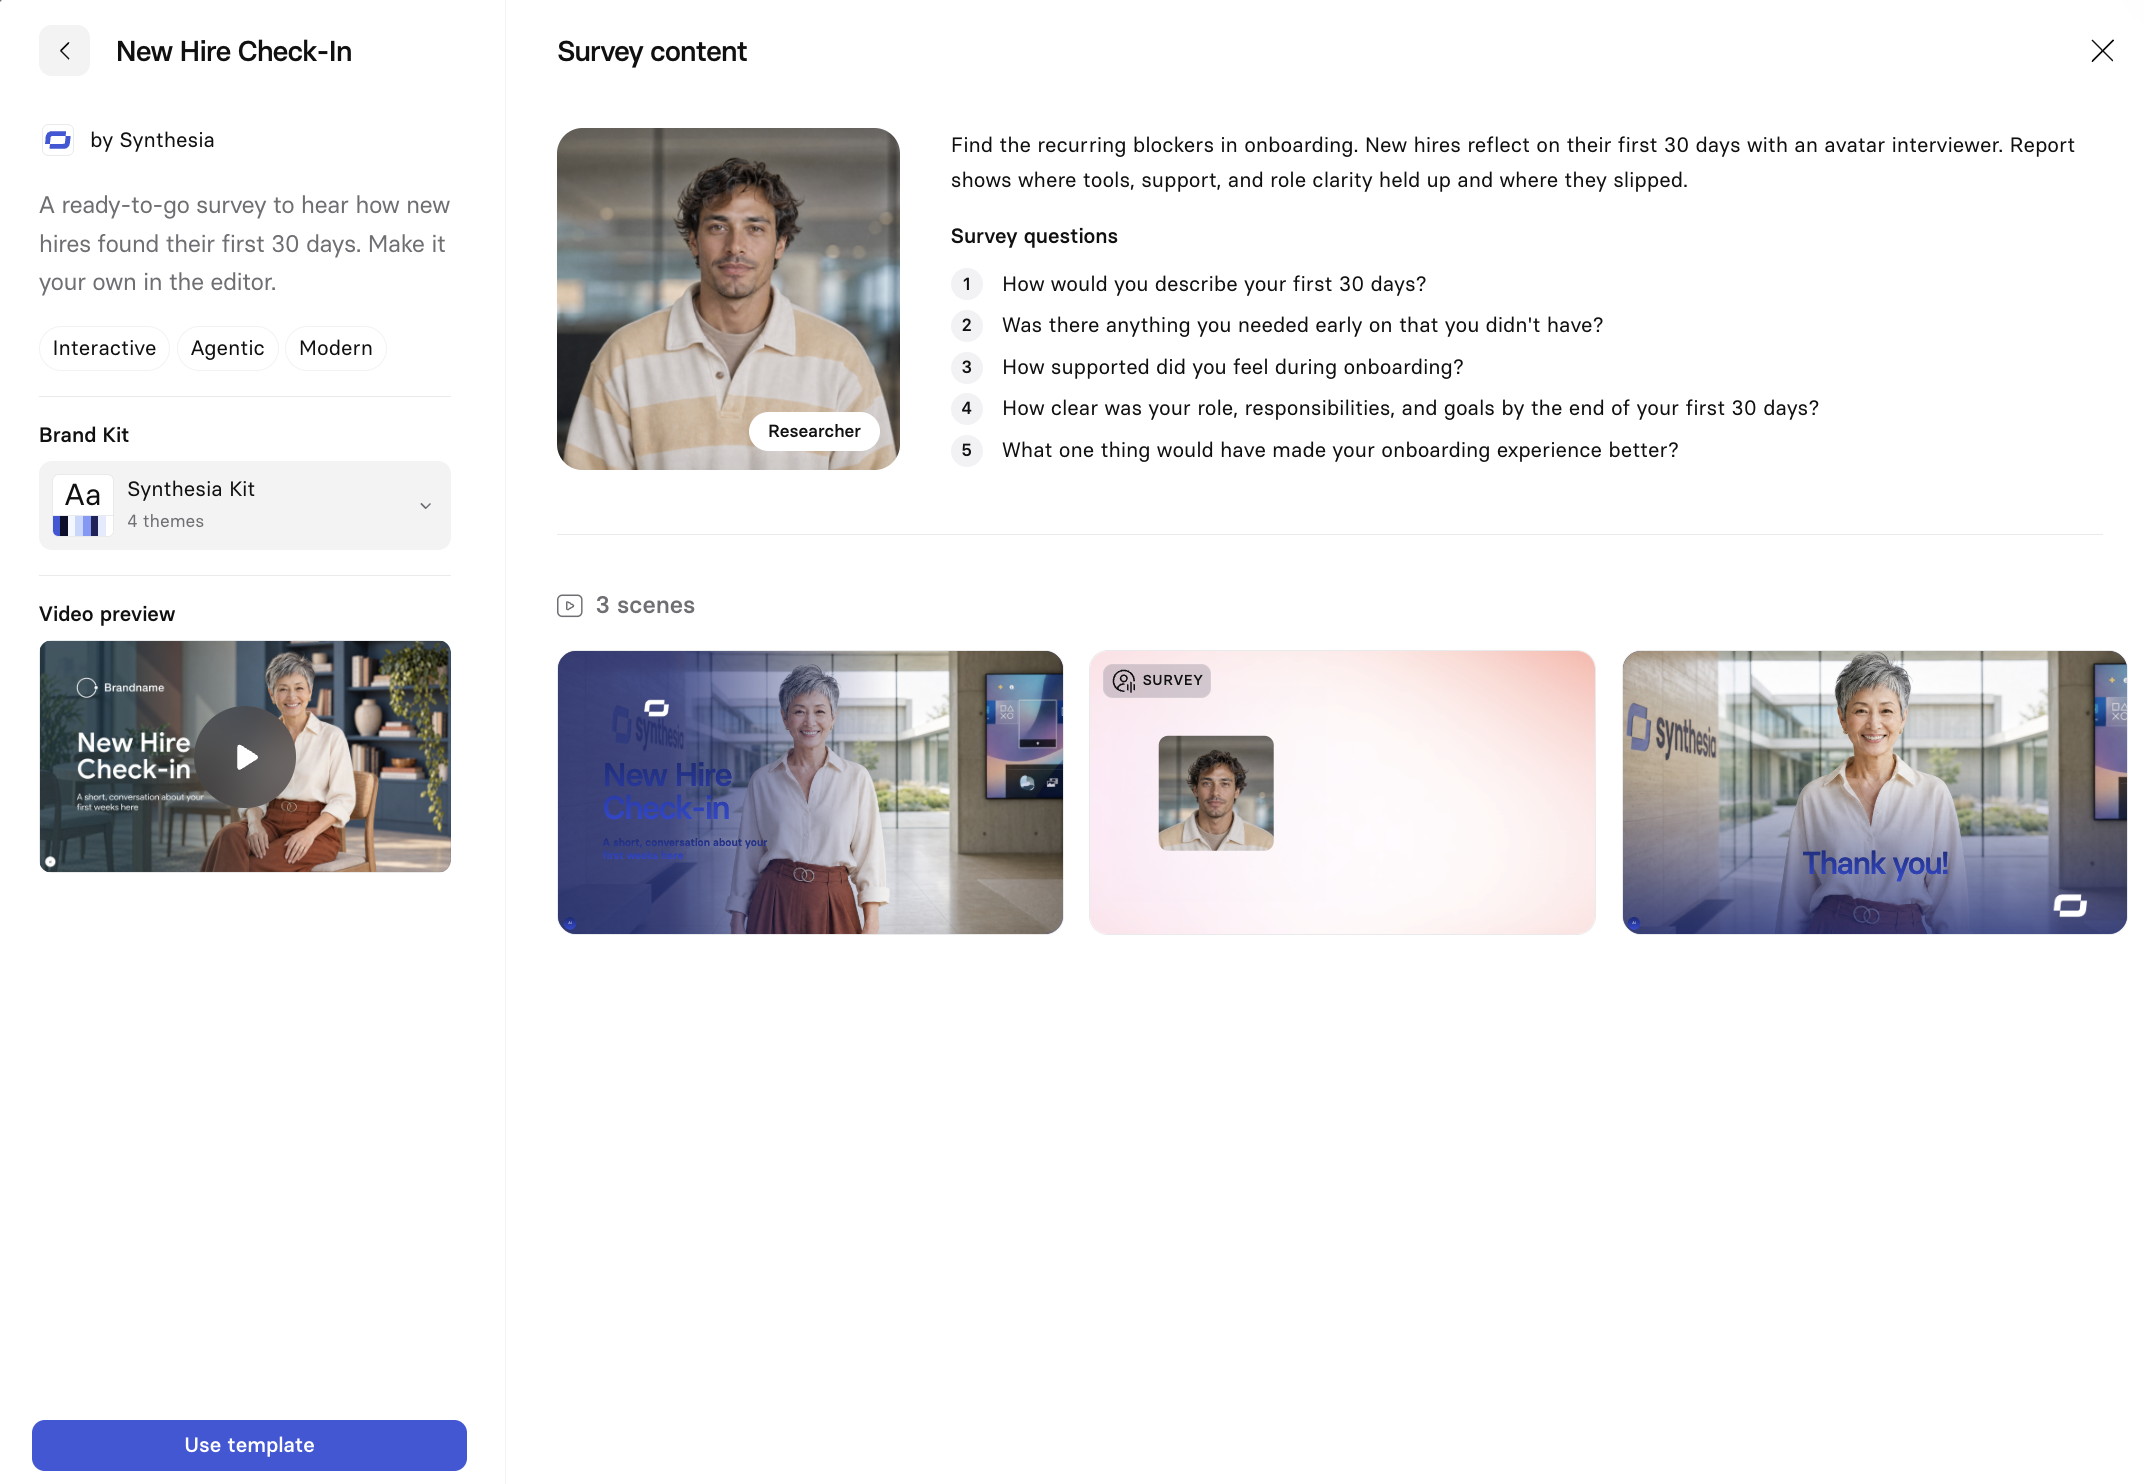
Survey template
| Template | What it finds out | Suited to |
|---|---|---|
| Post-Training Feedback | What learners took away, what didn't stick, and how they'll apply it | L&D, enablement |
| New Hire Check-In | How new hires experienced their first 30 days and where support fell short | People Ops, hiring managers |
| Customer Discovery | How customers use your product and what slows them down | Product, UX research |
| Customer Decision Debrief | Why a customer didn't move forward | CS, RevOps, product |
| Out of Office Catch Up | Decisions, blockers, and priorities you missed while away | Anyone returning from leave |
| Project Retro | What helped a project move forward and what didn't | Project leads |
Adapt a roleplay or survey template
After you select Use template, you can edit the session directly in the editor, or ask the Assistant to redraft the questions, study goal, or scenario for your use case. For example, you could change the Customer Discovery survey to collect feedback on a new product.
Sessions created from a template start with the nameUntitled. Rename the session after you create it.
Your brand kit is applied automatically, and simple brand kits (around four colors) give the cleanest result.
If you save one of your own sessions as a template, the preview doesn't yet show the session summary that Synthesia's roleplay and survey templates have.
Adding a scene from a template
Selecting Add Scene in the editor opens a template panel directly in the editor:
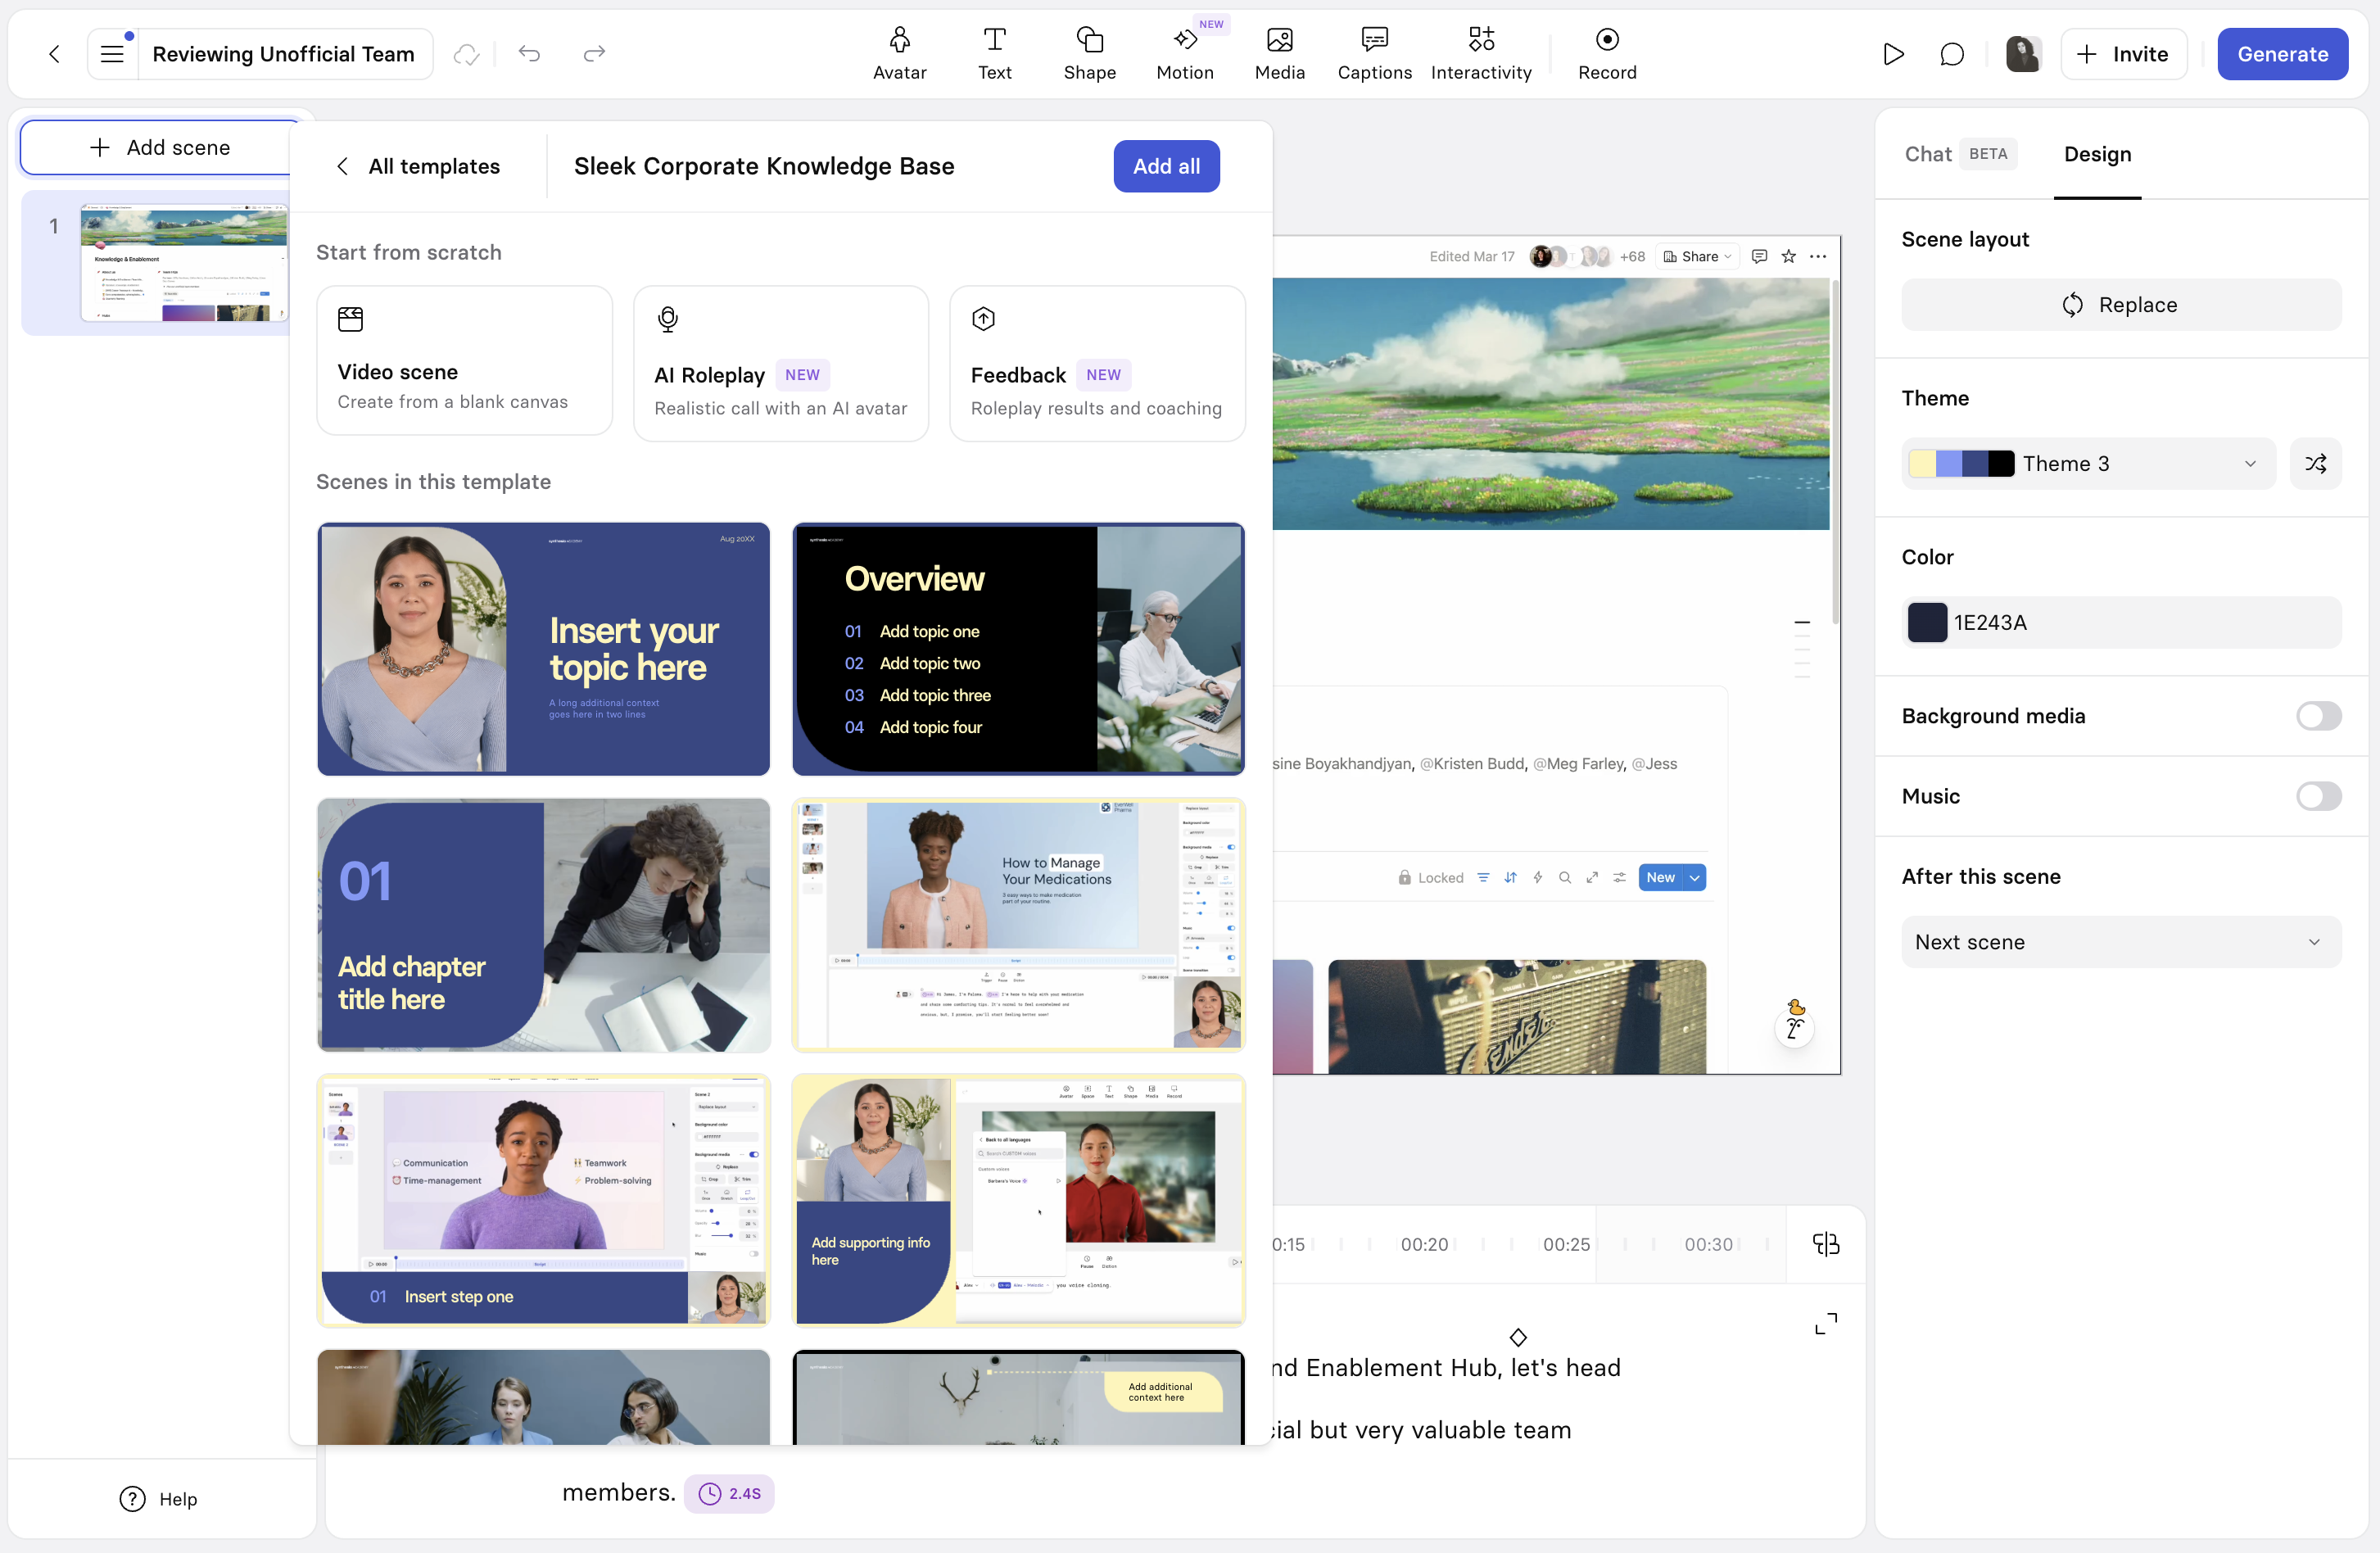
From here select an individual scene from your current template to add just that one, or select Add all to add every scene in the template at once. To explore layouts from other templates, click on < All templates at the top:
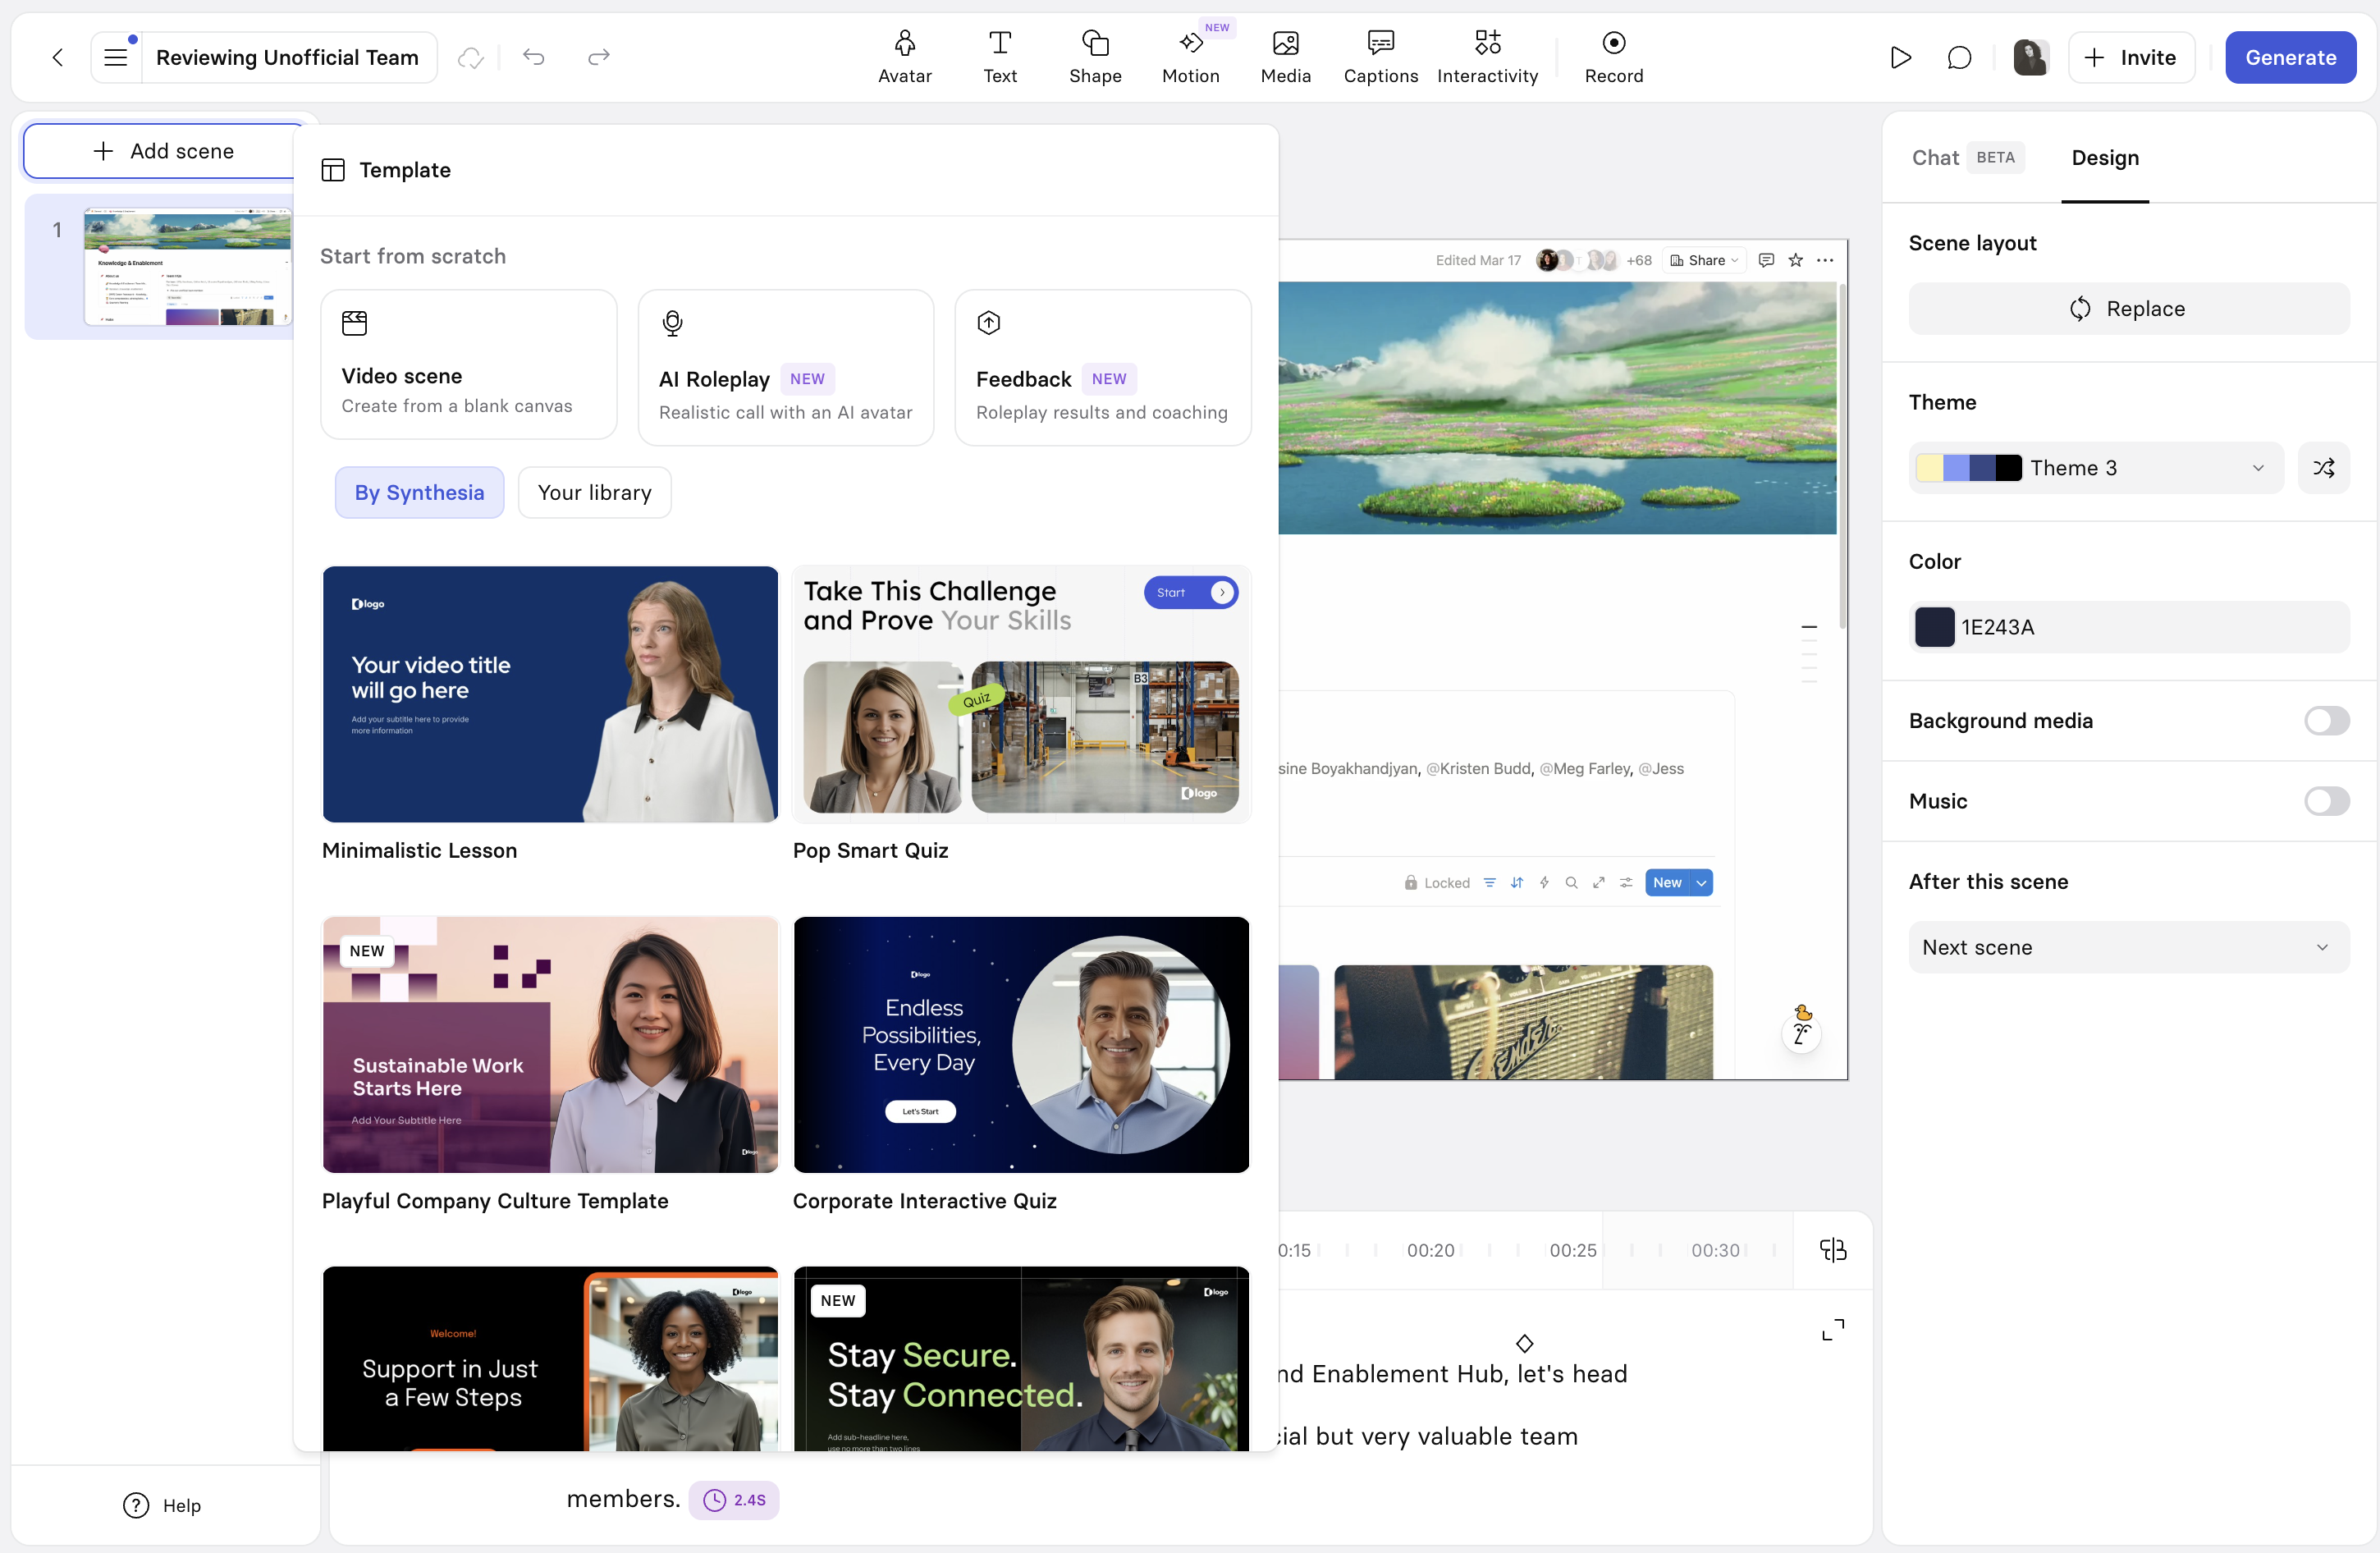
Start from scratch:
Video scene: Create from a blank canvas.AI Roleplay: A realistic call with an AI avatar.Feedback: Roleplay results and coaching.
Below that, browse templates using two tabs:
By Synthesia: Official Synthesia templates.Your library: Your organization's templates (if available) and your workspace's templates, combined.
Templates library
To access all custom templates available in your workspace, go to Library > Templates.
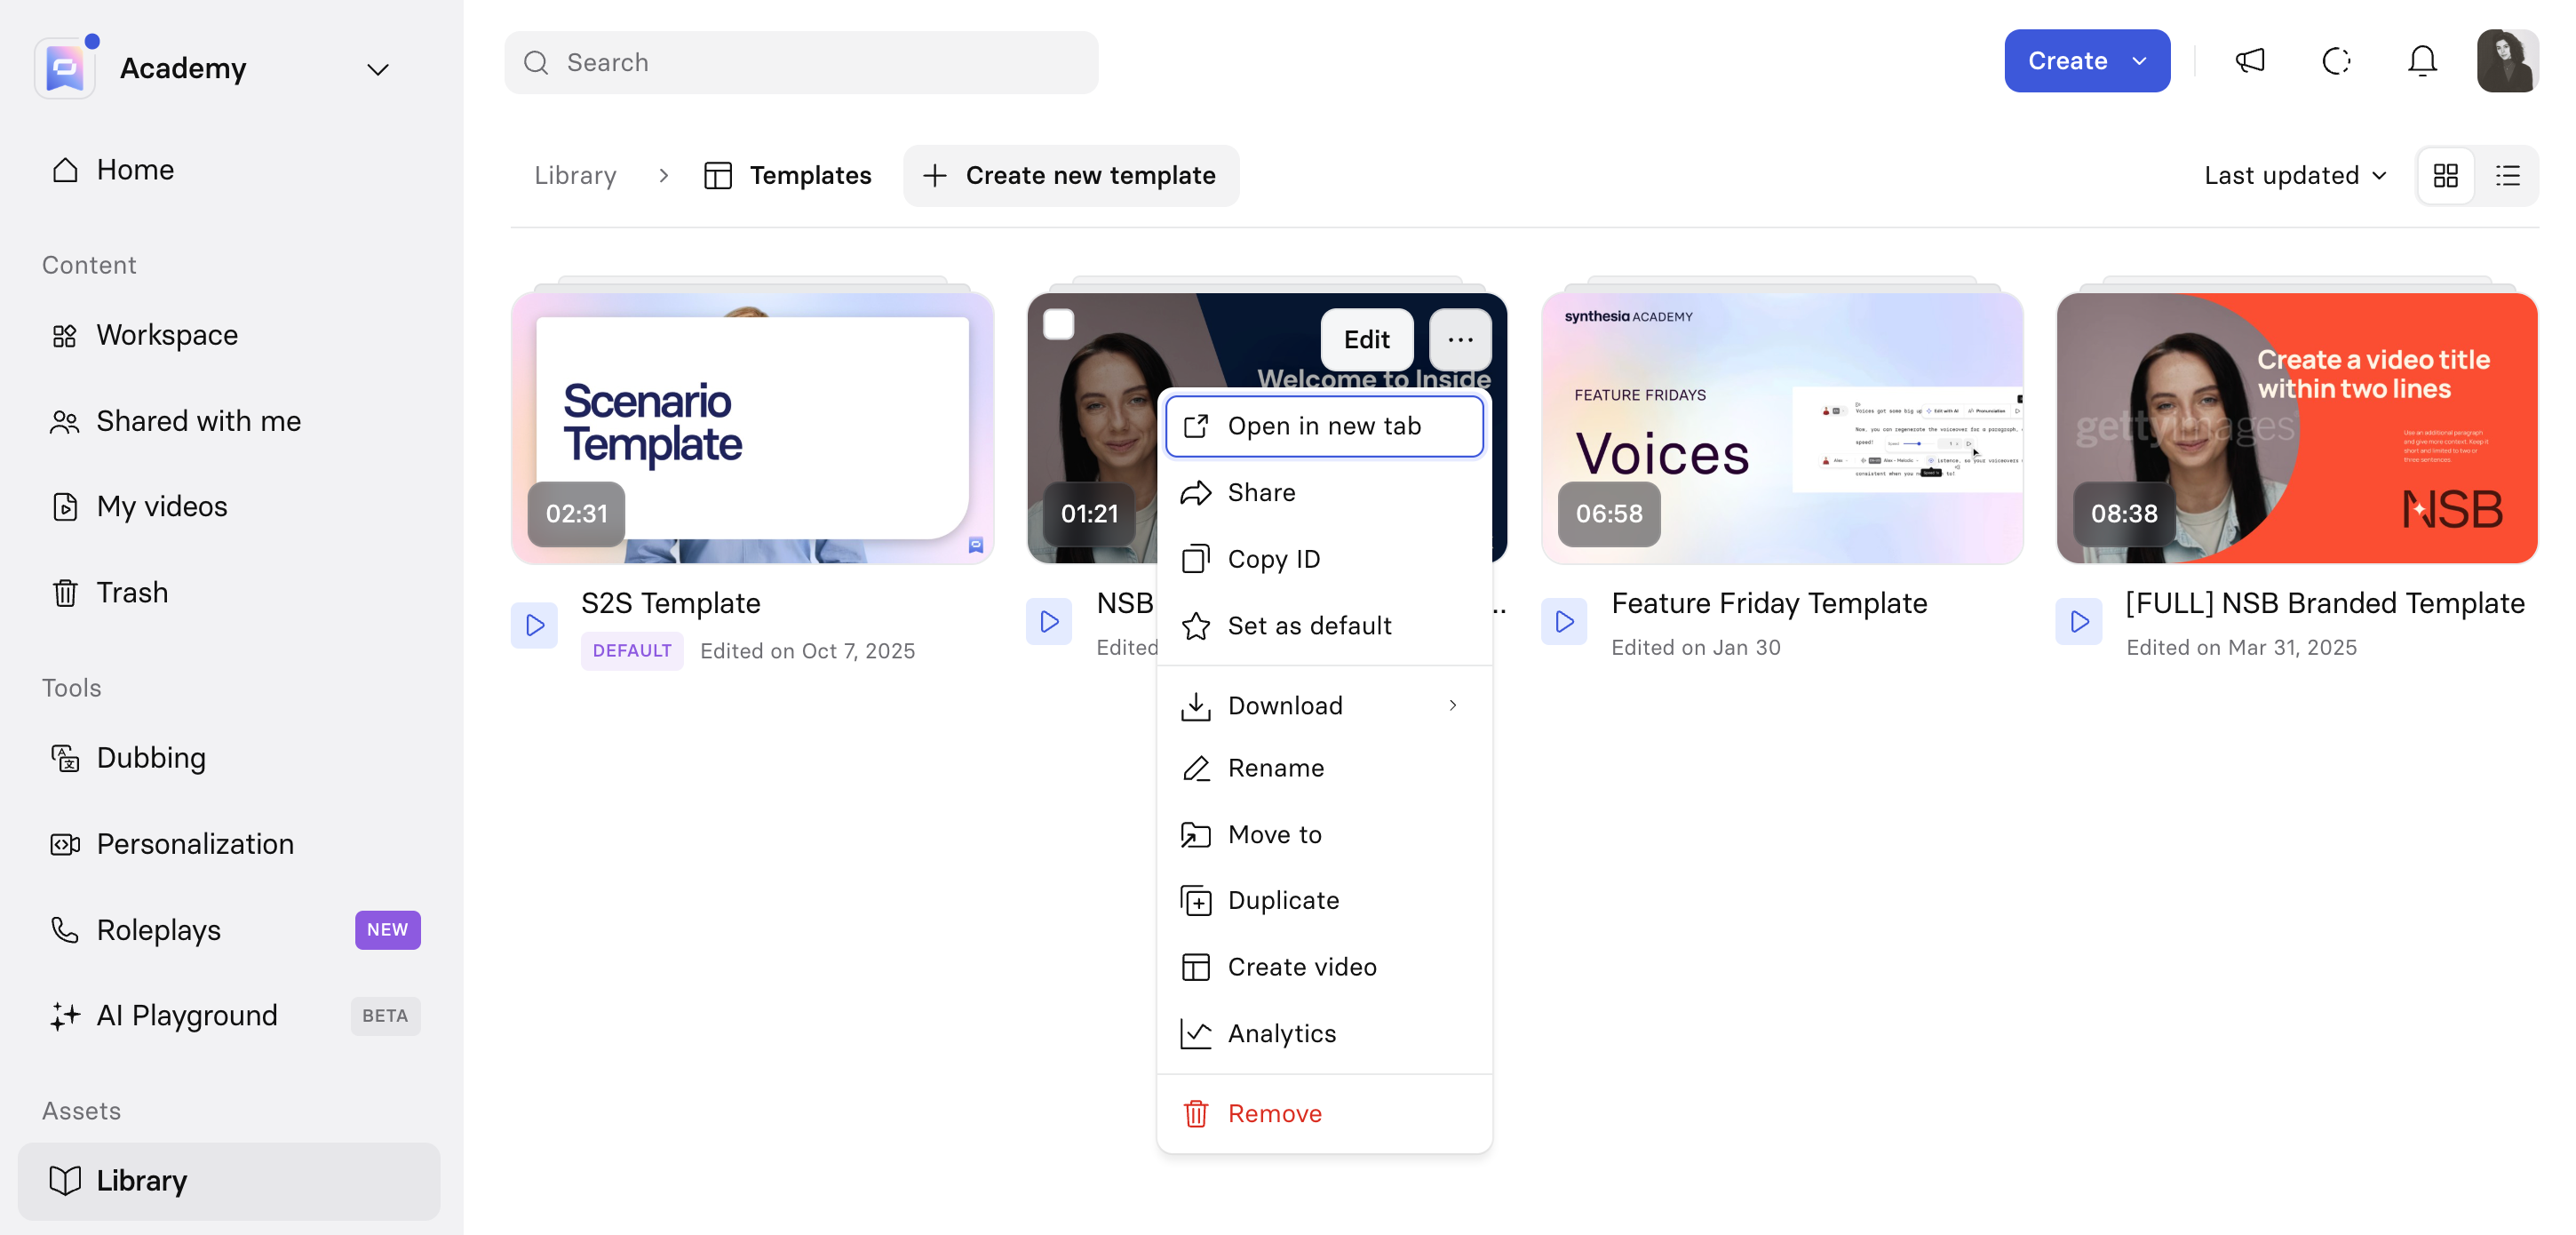
Select the three-dot menu on a template to access the following options:
Open in new tab: Opens the template in a separate browser tab.Share: Allows sharing across workspaces or organizations.Copy ID: Copies the template's unique identifier, to use it with Synthesia's API.Set as default: Designates this template as the workspace default—all new videos use this template as their starting point. Only available to workspace admins.Download: Downloads the template audio as a.wavfile.Rename: Changes the template's name.Move to: Transfers the template to a different workspace.Duplicate: Creates a copy of the template.Create video: Starts a new video using this template.Remove: Deletes the template.
Creating a custom template
There are two ways to build one.
Save an existing video as a template (two entry-points):
-
From the Video Overview Page of a generated video, select the three-dot menu at the top-right, then select
Save as template: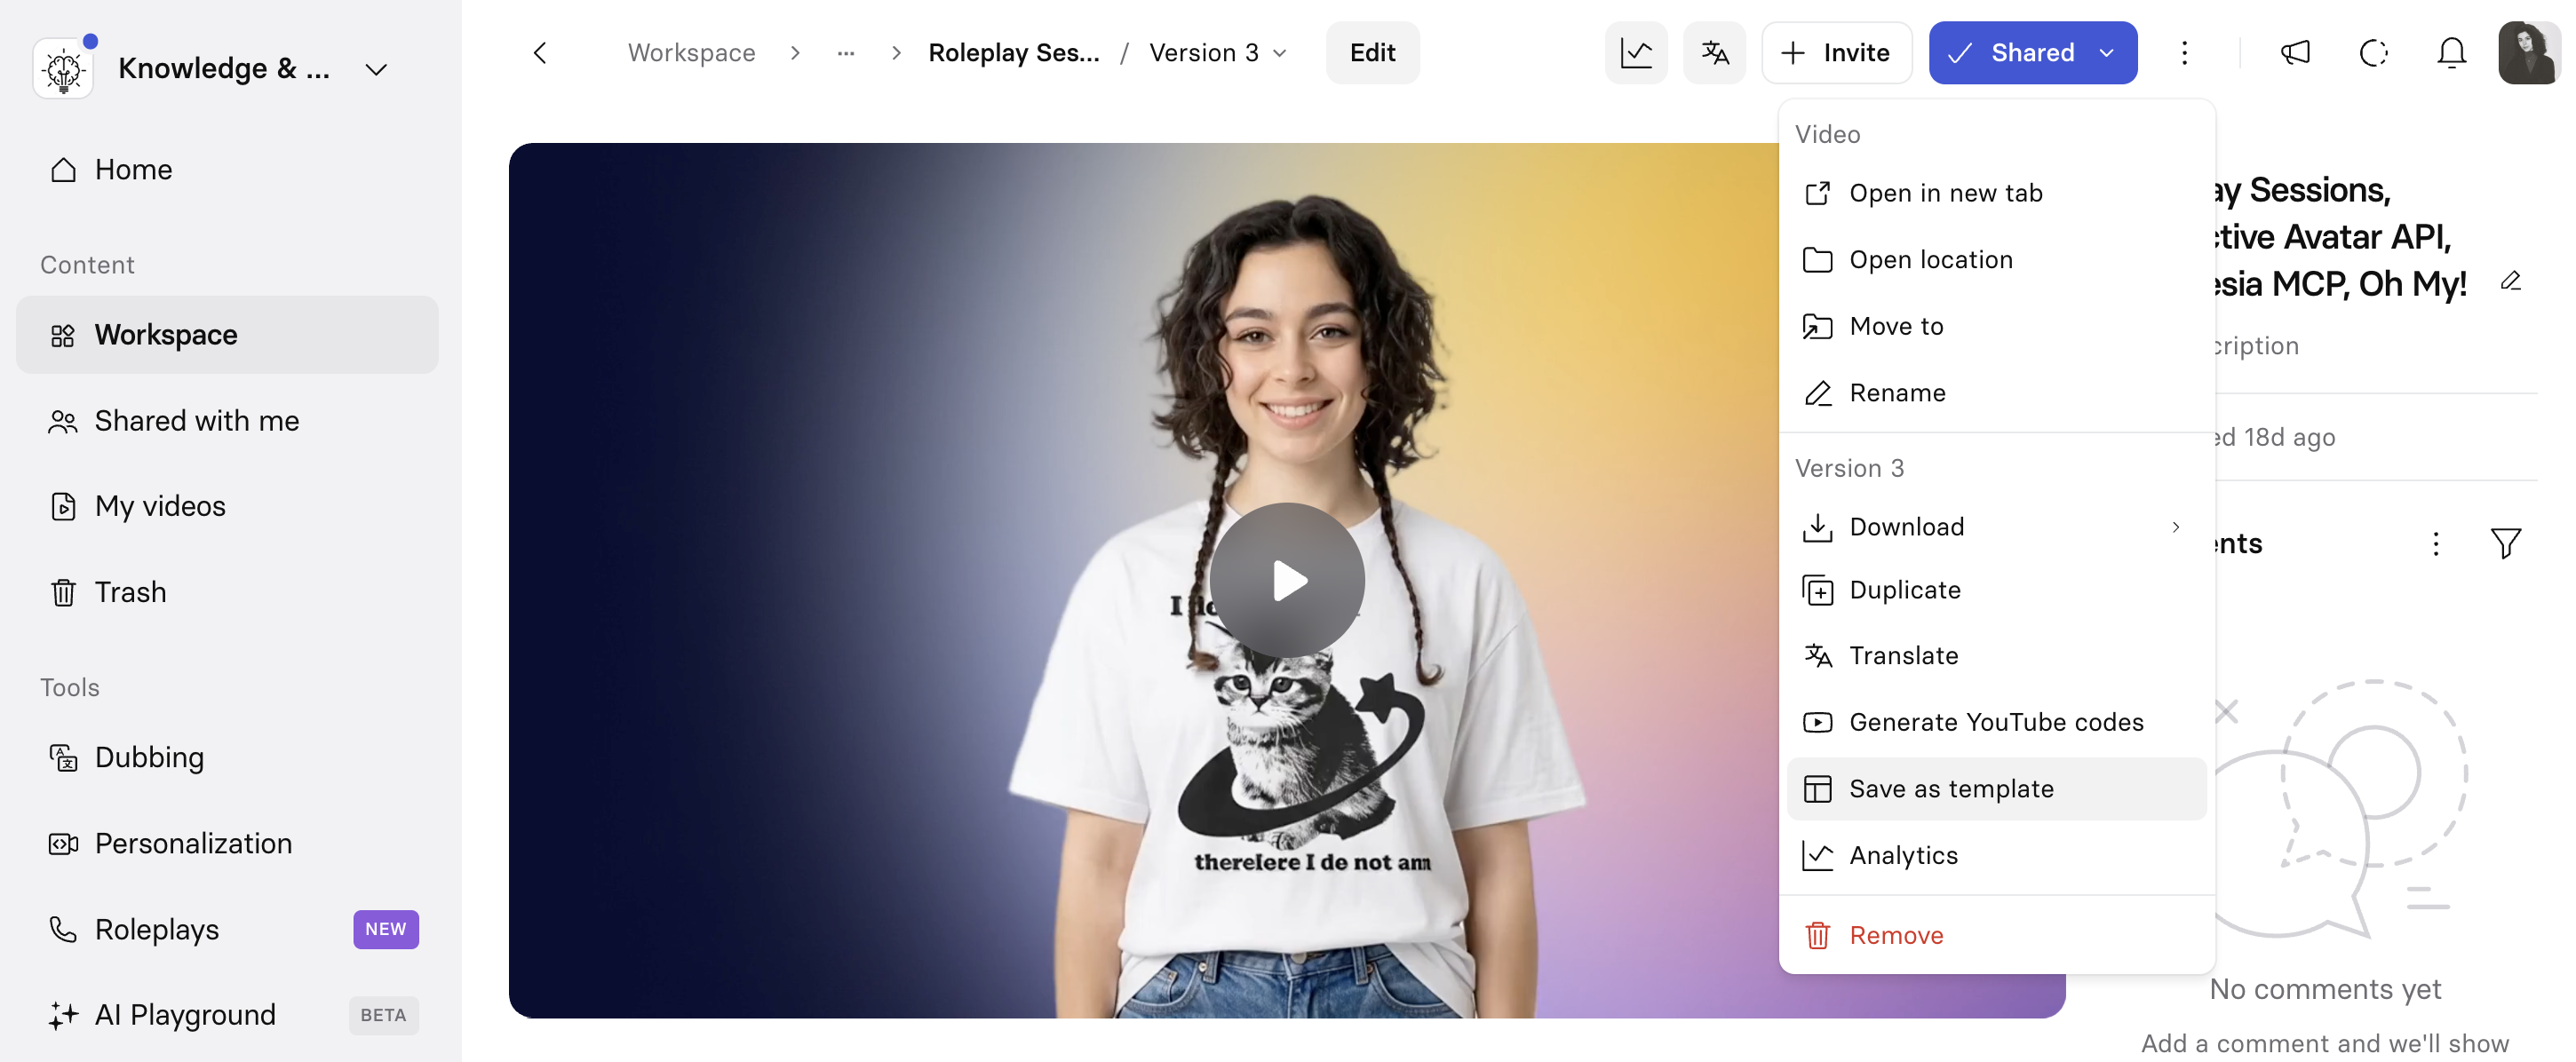
-
Hover of the thumbnail for a generated or draft video, click on the three-dot menu at the top-right, then select
Save as template: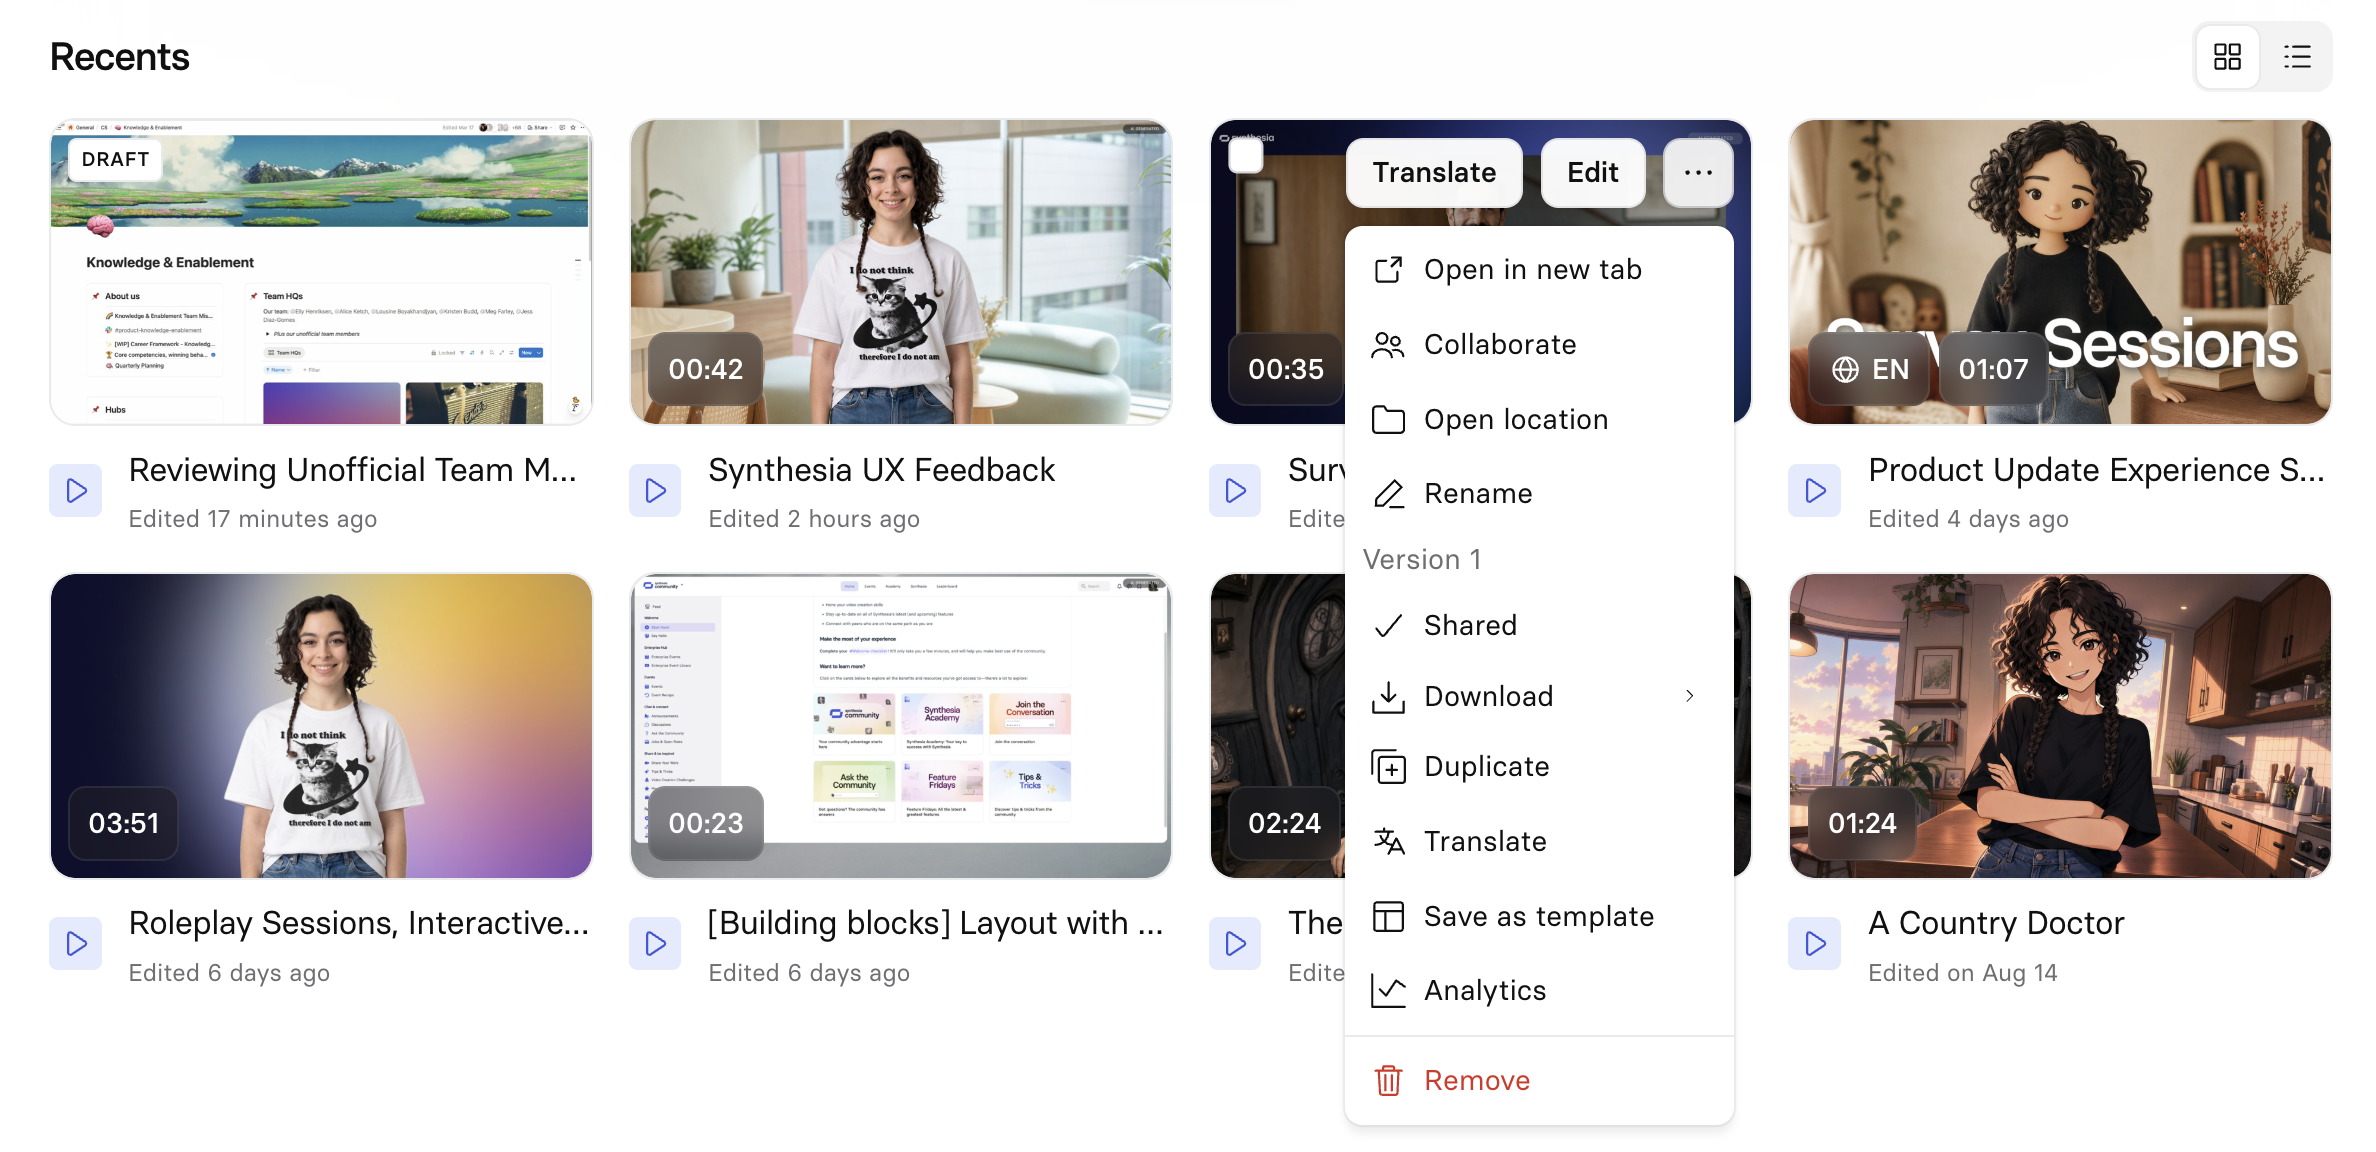
-
This saves the video's scene designs to your assets library, under Library > Templates.
Build one from scratch by mixing scene designs:
- Start a new video.
- Select
Add Scene, and pick individual scene designs from any stock or custom template to assemble into your new template. - Before saving, it's worth setting up anything you'll want to reuse every time you create a video from this template:
- Music: Add a track if you'll reuse the same music across every video made from this template. Music plays continuously across the whole video rather than resetting per scene, and can't be faded in or out. Restarting it on every scene is possible, but tends to sound disjointed rather than cohesive.
- Scene transitions: These carry over into any video created from the template.
- Animation triggers: Pre-attach triggers to elements so they're already in place once you write your real script later, instead of setting them up again each time.
- Once you're happy with it, generate the video, then select the three-dot menu, select
Save as template, name it, and selectPublish template. You'll get an email once it's ready.
Note:If you keep needing a scene design that isn't in a template yet, open the template, add the scene, and republish it—there's no need to start over.
Template strategy
Keep templates narrow and single-purpose, rather than cramming every scene type into one large template. Break a big branded template down by the specific job it needs to do (a course intro, a quiz, internal training, and so on), each with only the scenes that content type actually needs.
You're not limited to your video's starting template, though: whenever you select Add Scene > Templates, it always shows every template available to you, stock and custom, so you can mix and match scene layouts from any of them regardless of which template you started from.
Edit a custom template
Once a custom template is created, select Edit to make further changes to it before publishing again.
Custom templates and Assistant
If you're using a template with the Assistant and want to control whether a media element gets replaced with stock content or AI-generated visuals, select the media element in your template, then its three-dot menu in the inspector panel:
Auto: Let the AI assistant decide whether or not to replace this media item.Always: Always replace this media item with stock content or an image from a source document. Use this for placeholder media you want swapped out in every video generated from the template.Never: Never replace this media item.
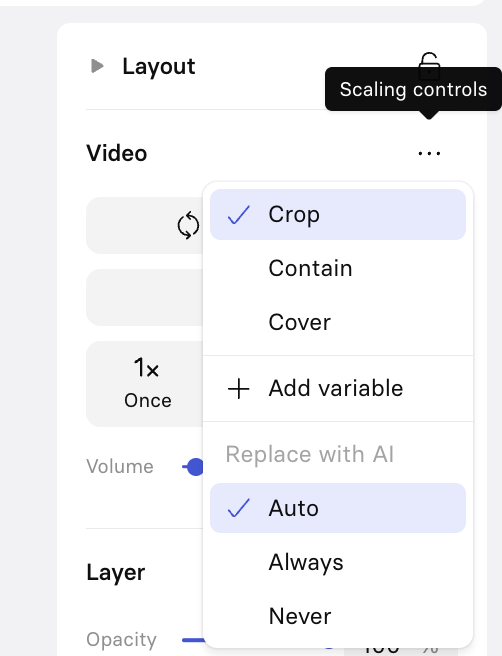
Note:Any media element you bring in for a background, or any other media you don't want changed, needs to be set to
Never. Otherwise, the Assistant may replace it and interfere with your template's design and branding.
If you make a change to your template, select Publish template in the upper-right corner of the edit page when finished, to make sure changes are saved.
Add variables for programmatic video creation
Add variables to a template so you can generate personalized videos at scale, without manually editing the script or canvas each time. For example, swap in a different viewer's name, company logo, or even avatar for each video generated from the same template.
You may notice the option to add variables when you're creating a video in the editor—once you add a variable to a video, you can't generate it directly—you'll need to save it as a template first.
NoteVariable names can only contain letters (
A-Z,a-z), numbers (0-9), and underscores (_)—no other special characters.
There are four types of variables:
Script variables
Add a variable as part of your script, or make the whole script a variable. You can place animation triggers on variables in your script.
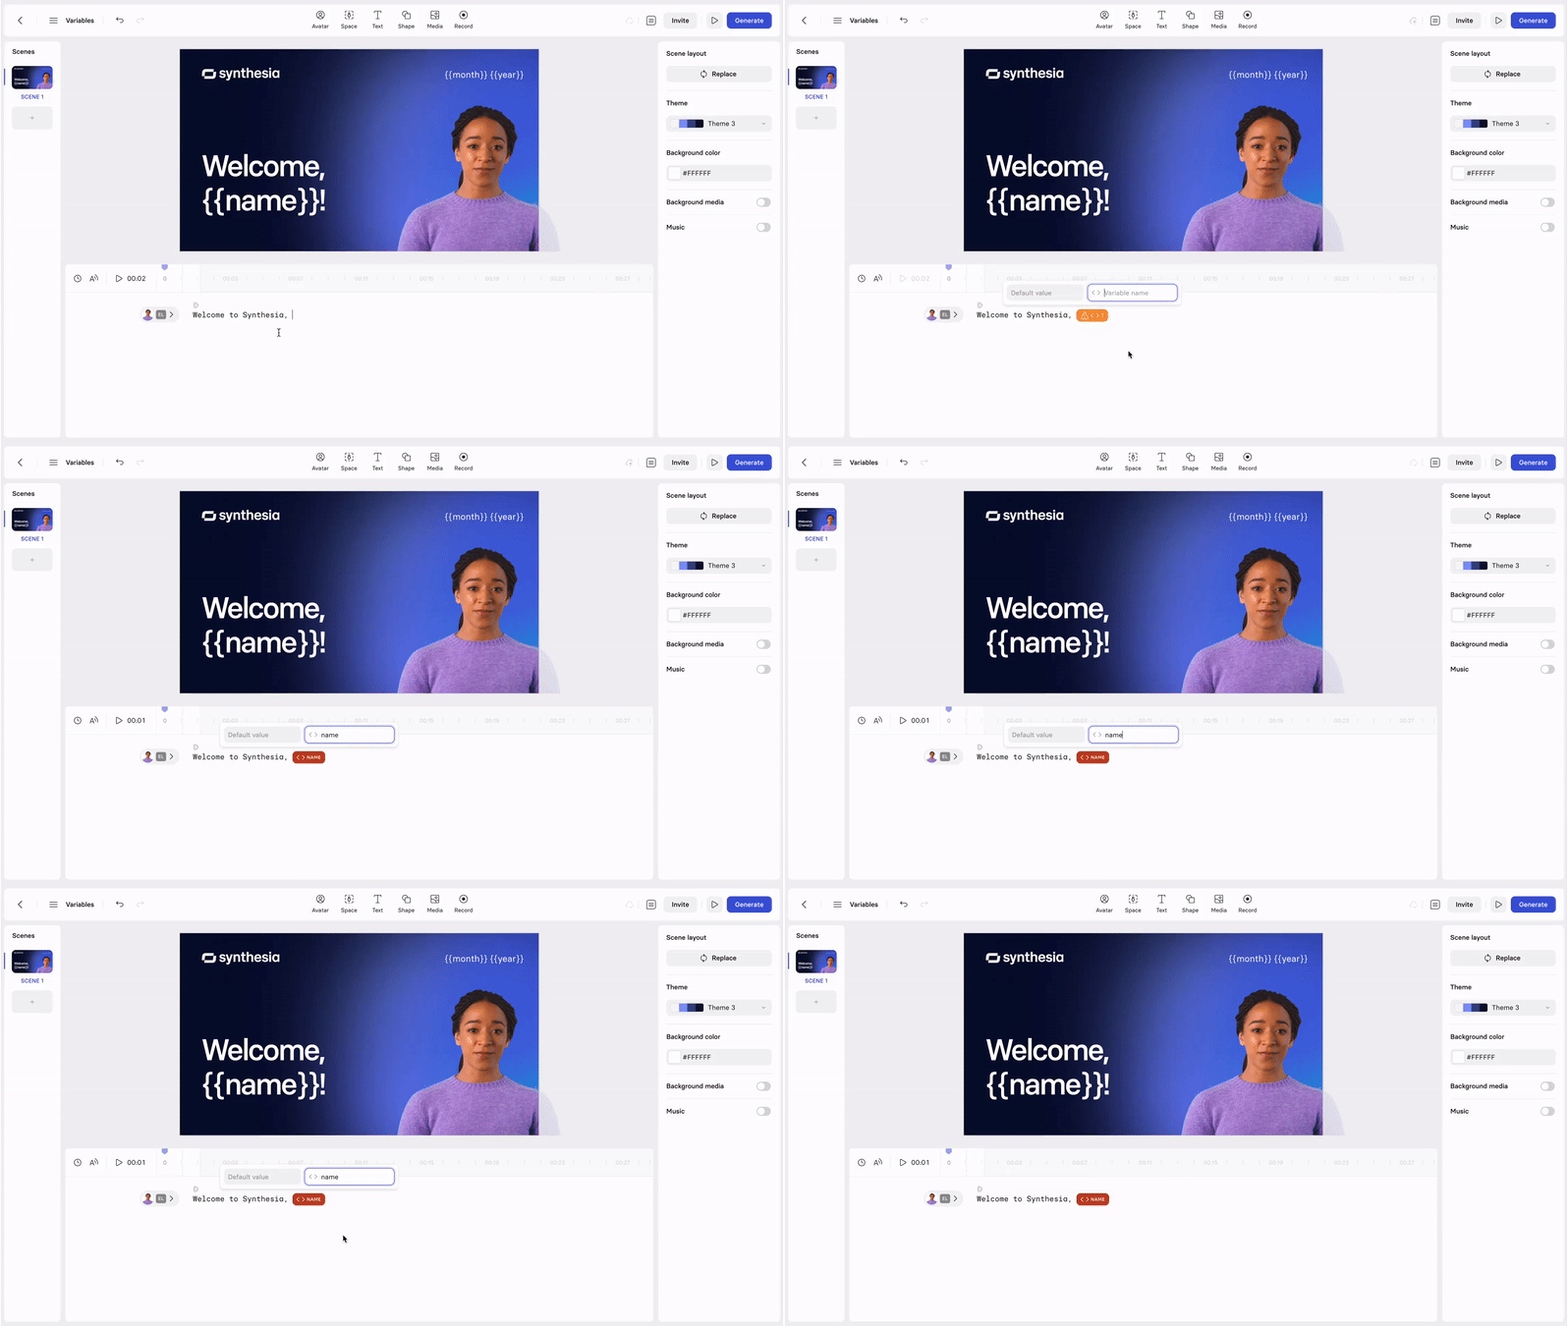
To add a script variable:
- Place your text cursor where you'd like to insert a variable.
- Right-click and select
< > Variablefrom the context menu. - Specify a name for the variable. Script variable names also can't start with a number—they must begin with a letter.
- Optionally, set a default value for the variable, used if nothing else is specified.
Canvas text variables
Personalize a text element directly on the canvas—for example, "Welcome to ACME, {{name}}!".
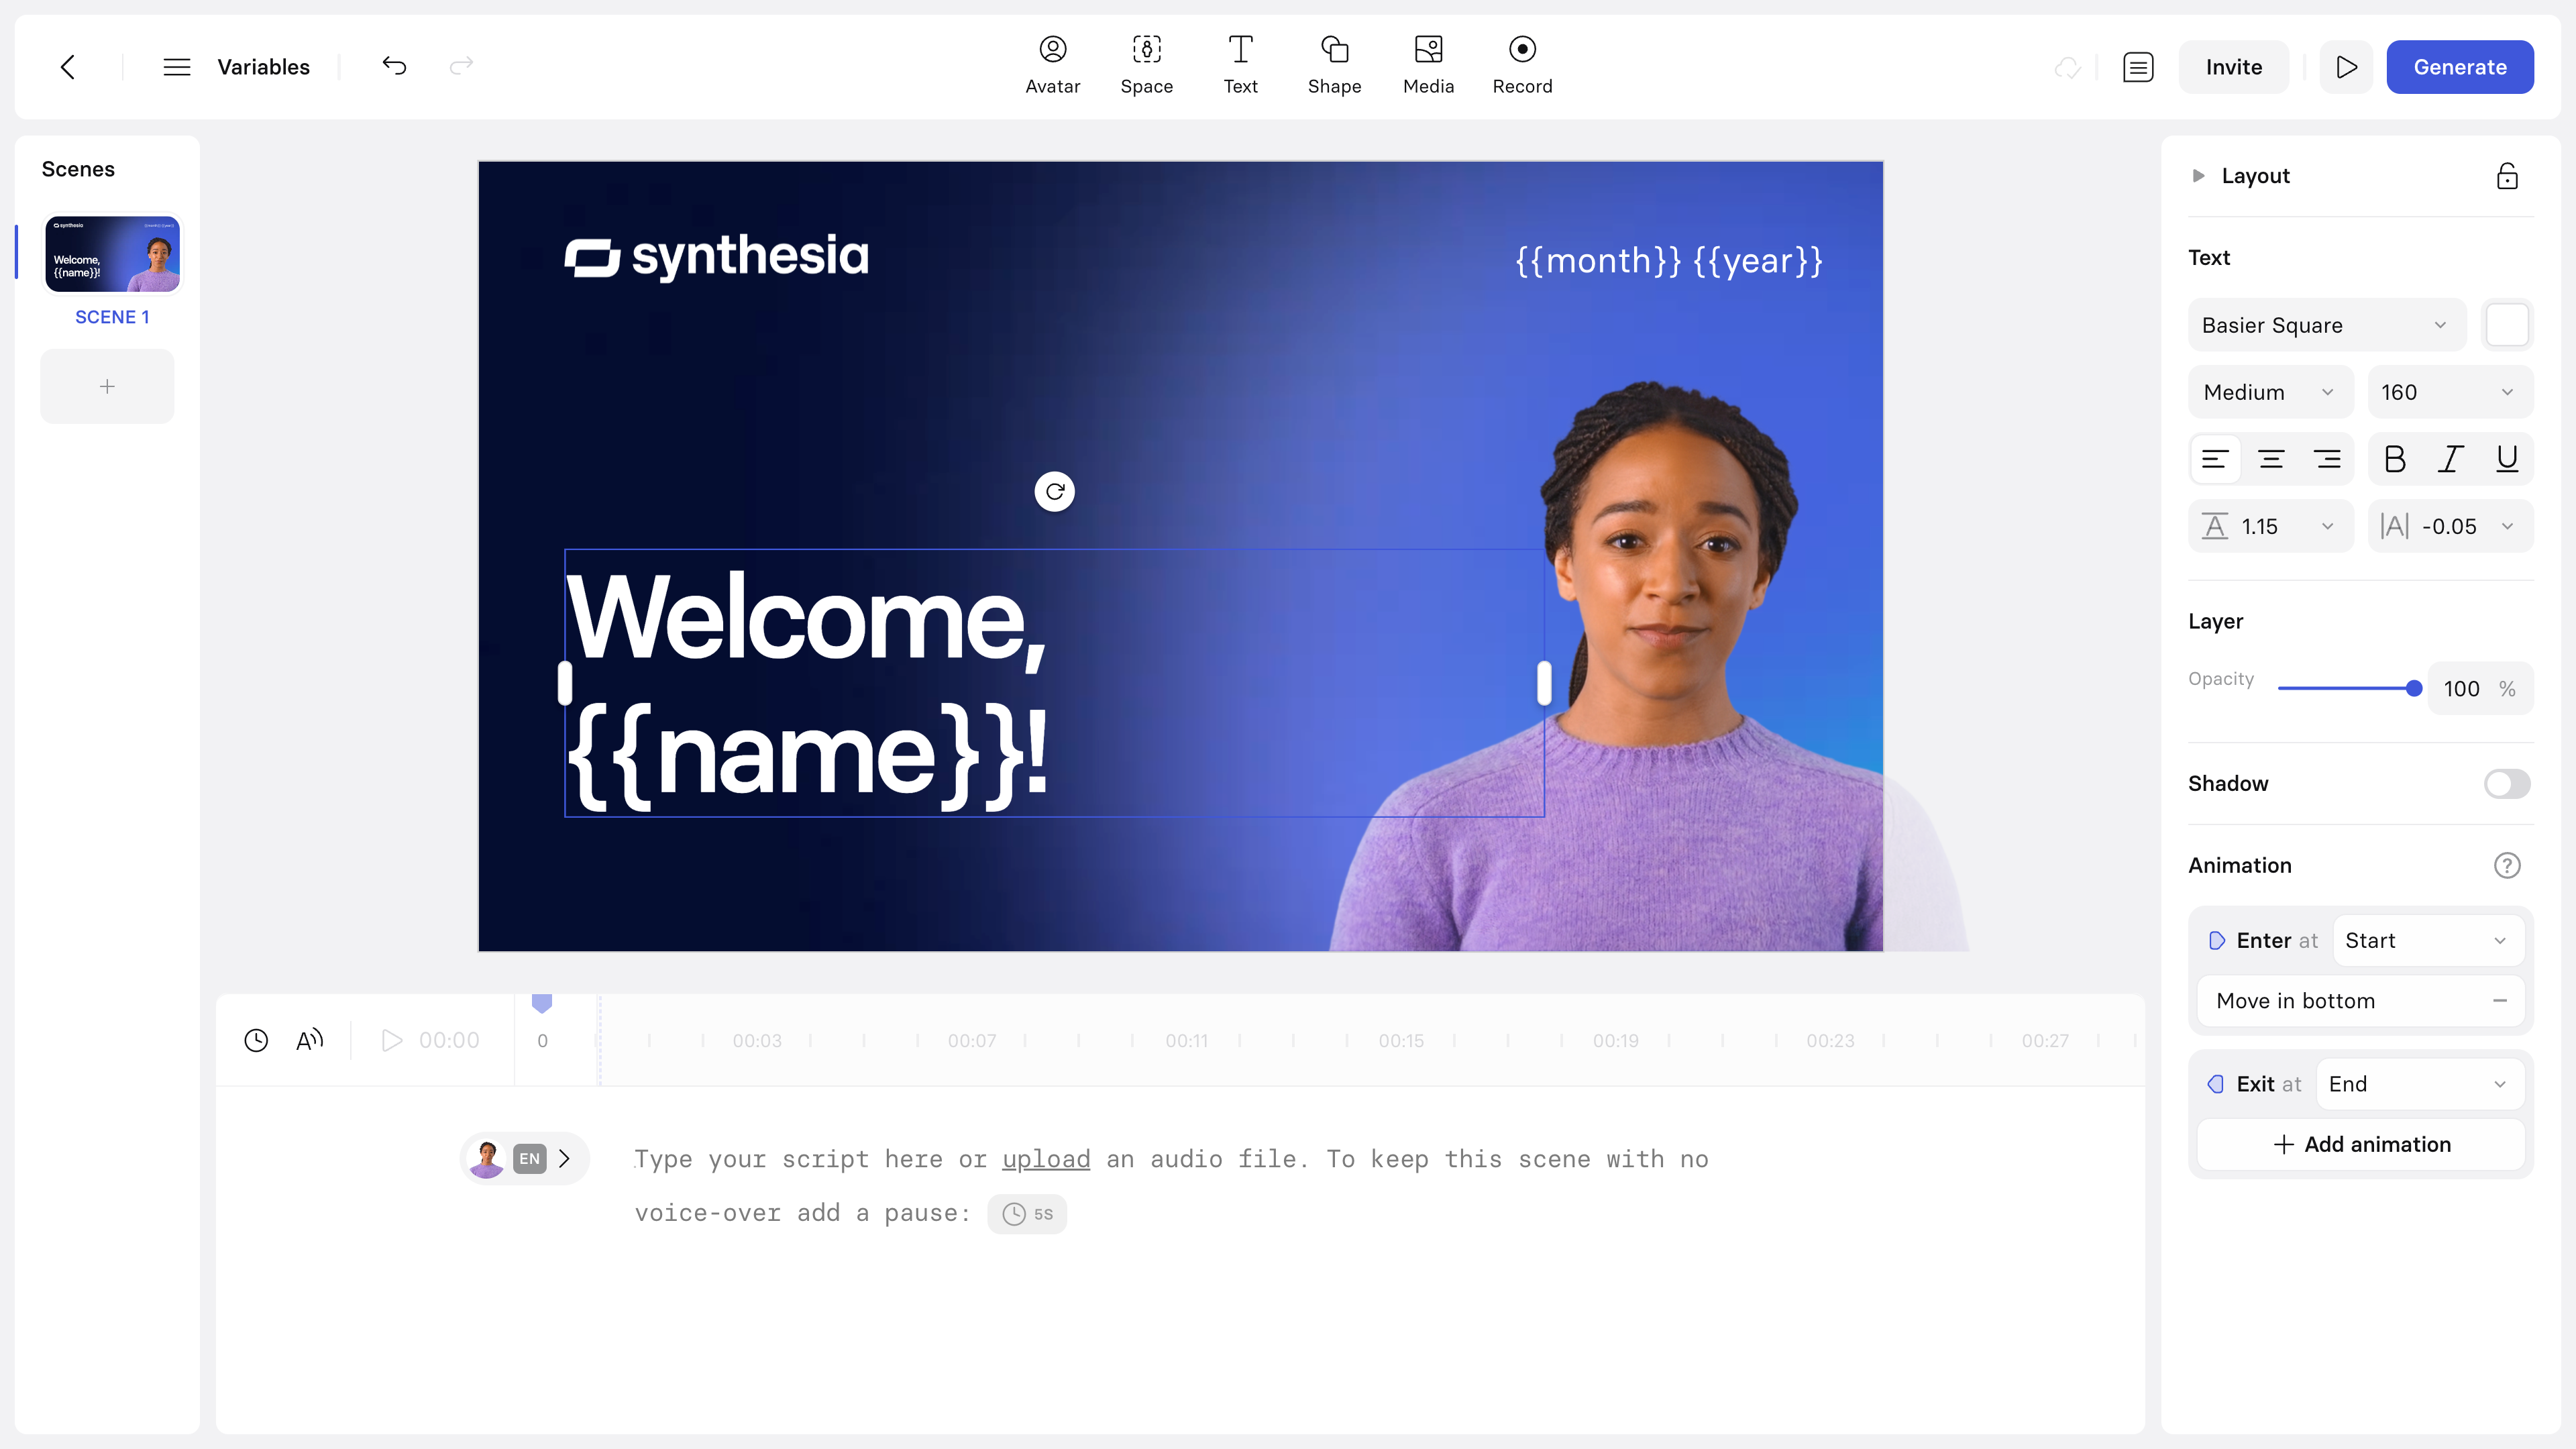
To add a canvas text variable:
- Add a text element, or select an existing one you'd like to replace with a variable.
- Type a variable name wrapped in double curly braces, for example
{{name}}. This is the only variable type that needs to be wrapped this way.
Media element variables
Personalize an image or video element in your scene—for example, showing a different company logo depending on the intended viewer.
To add a media element variable:
- Select the image or video element.
- In the inspector panel, select the three-dot menu at the top of the Image/Video section.
- Select
+ Add variable, name the variable, and selectSave.
Background media variables
Personalize a scene's background image or video.
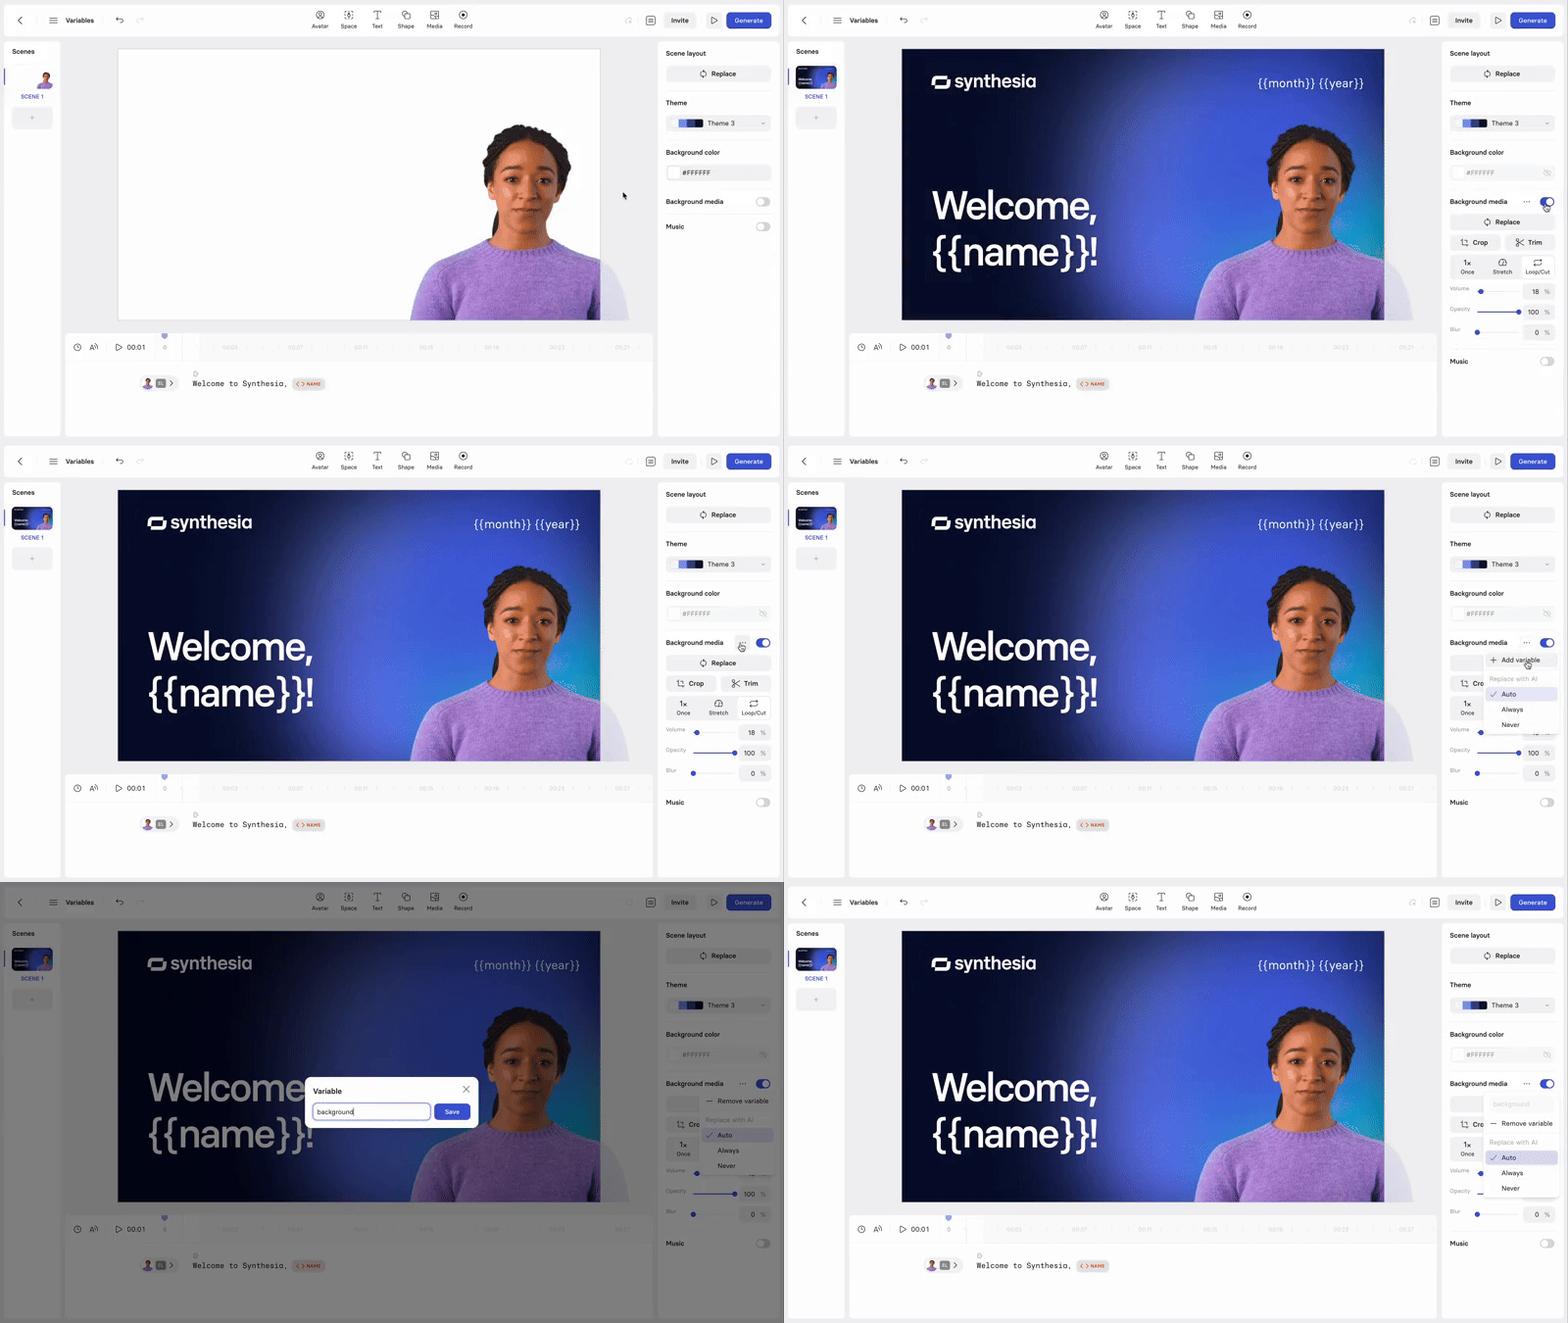
To add a background media variable:
- Deselect any canvas elements to access the scene settings in the inspector panel.
- Turn on Background media, adding a placeholder image or video if the scene doesn't already have one.
- Select the three-dot menu next to the Background media toggle.
- Select
+ Add variable, name the variable, and selectSave.
Note:For media element and background media variables, the replacement image or video should match the aspect ratio of what it's replacing, to avoid unexpected stretching or cropping. For a background media variable, that means matching your video's overall aspect ratio (for example, 1920×1080 for 16:9).
Avatar variables
Swap out the avatar itself for each video generated from the template.
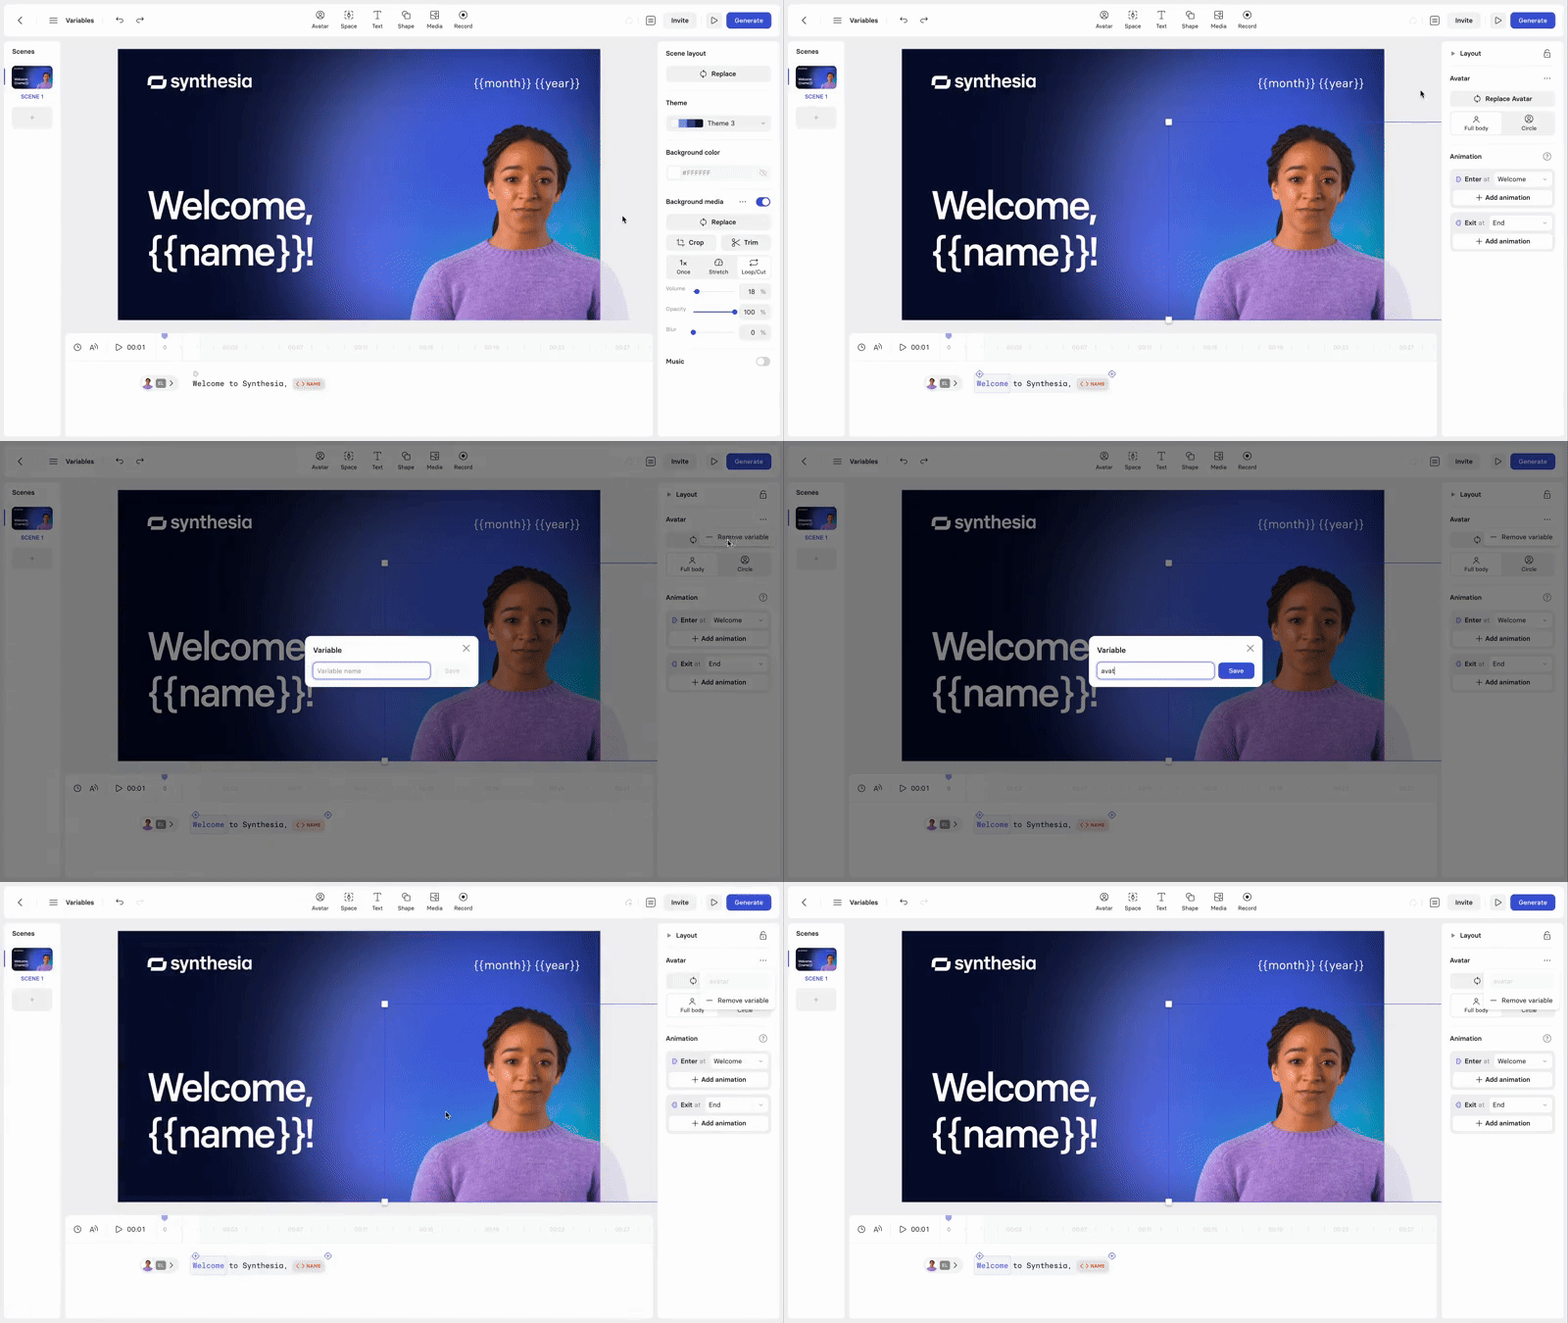
To add an avatar variable:
- Select the avatar.
- In the inspector panel, select the three-dot menu at the top of the Avatar section.
- Select
+ Add variable, name the variable, and selectSave.
Once published, there are four ways to create a video from a template with variables:
- Manually, in Synthesia: Select
Create videofrom the template's three-dot menu, then fill in a value for each variable and selectGenerate video. - Synthesia's API: Pass a
templateIdandtemplateData(a key-value pair for each variable) to the Create a video from a template endpoint. For image and video variables, supply either a URL for Synthesia to fetch, or the ID of an asset you've uploaded. Variable names are case-sensitive and must match the casing used when you created the variable. - Bulk personalization: Generate many videos at once from the same template, each with different variable values—see Bulk personalization.
- Zapier: Automate video creation from a template with variables using Synthesia's Zapier integration—see Guide: Synthesia <> Zapier integration.
Updated 11 days ago