

Roleplay Sessions
Practice high-stakes conversations before they happen.
Roleplay Sessions allows you to add practice, coaching, and measurement to your Synthesia projects to create one end-to-end learning loop. Learners step into a real conversation with an Avatar that talks, asks questions, and pushes back, then get coached and scored in real time, with their skill uplift measured over time.
Roleplay Sessions are available in English, Arabic, Chinese (Mandarin), Dutch, French, German, Hindi, Italian, Polish, Portuguese (Portugal and Brazil), Spanish, Swedish, and Turkish.
Note:Roleplay Sessions has its own Free, Self-Serve, and Custom tiers. The Learner Portal, assignment, and tracking described on this page require Self-Serve or Custom.
See How do I choose the right Roleplay Sessions plan? for details.
Ways to create a Roleplay Session
There are three ways to get started: use Assistant, start from a template, or add an AI Roleplay activity to a video.
-
Use Assistant to create a Roleplay Session
After Assistant builds the roleplay for you, you can customize and iterate on it from the editor, and continue collaborating with Assistant via chat—including asking it to adjust the skills you're scoring against.
Learn more about creating a Roleplay Session with Assistant.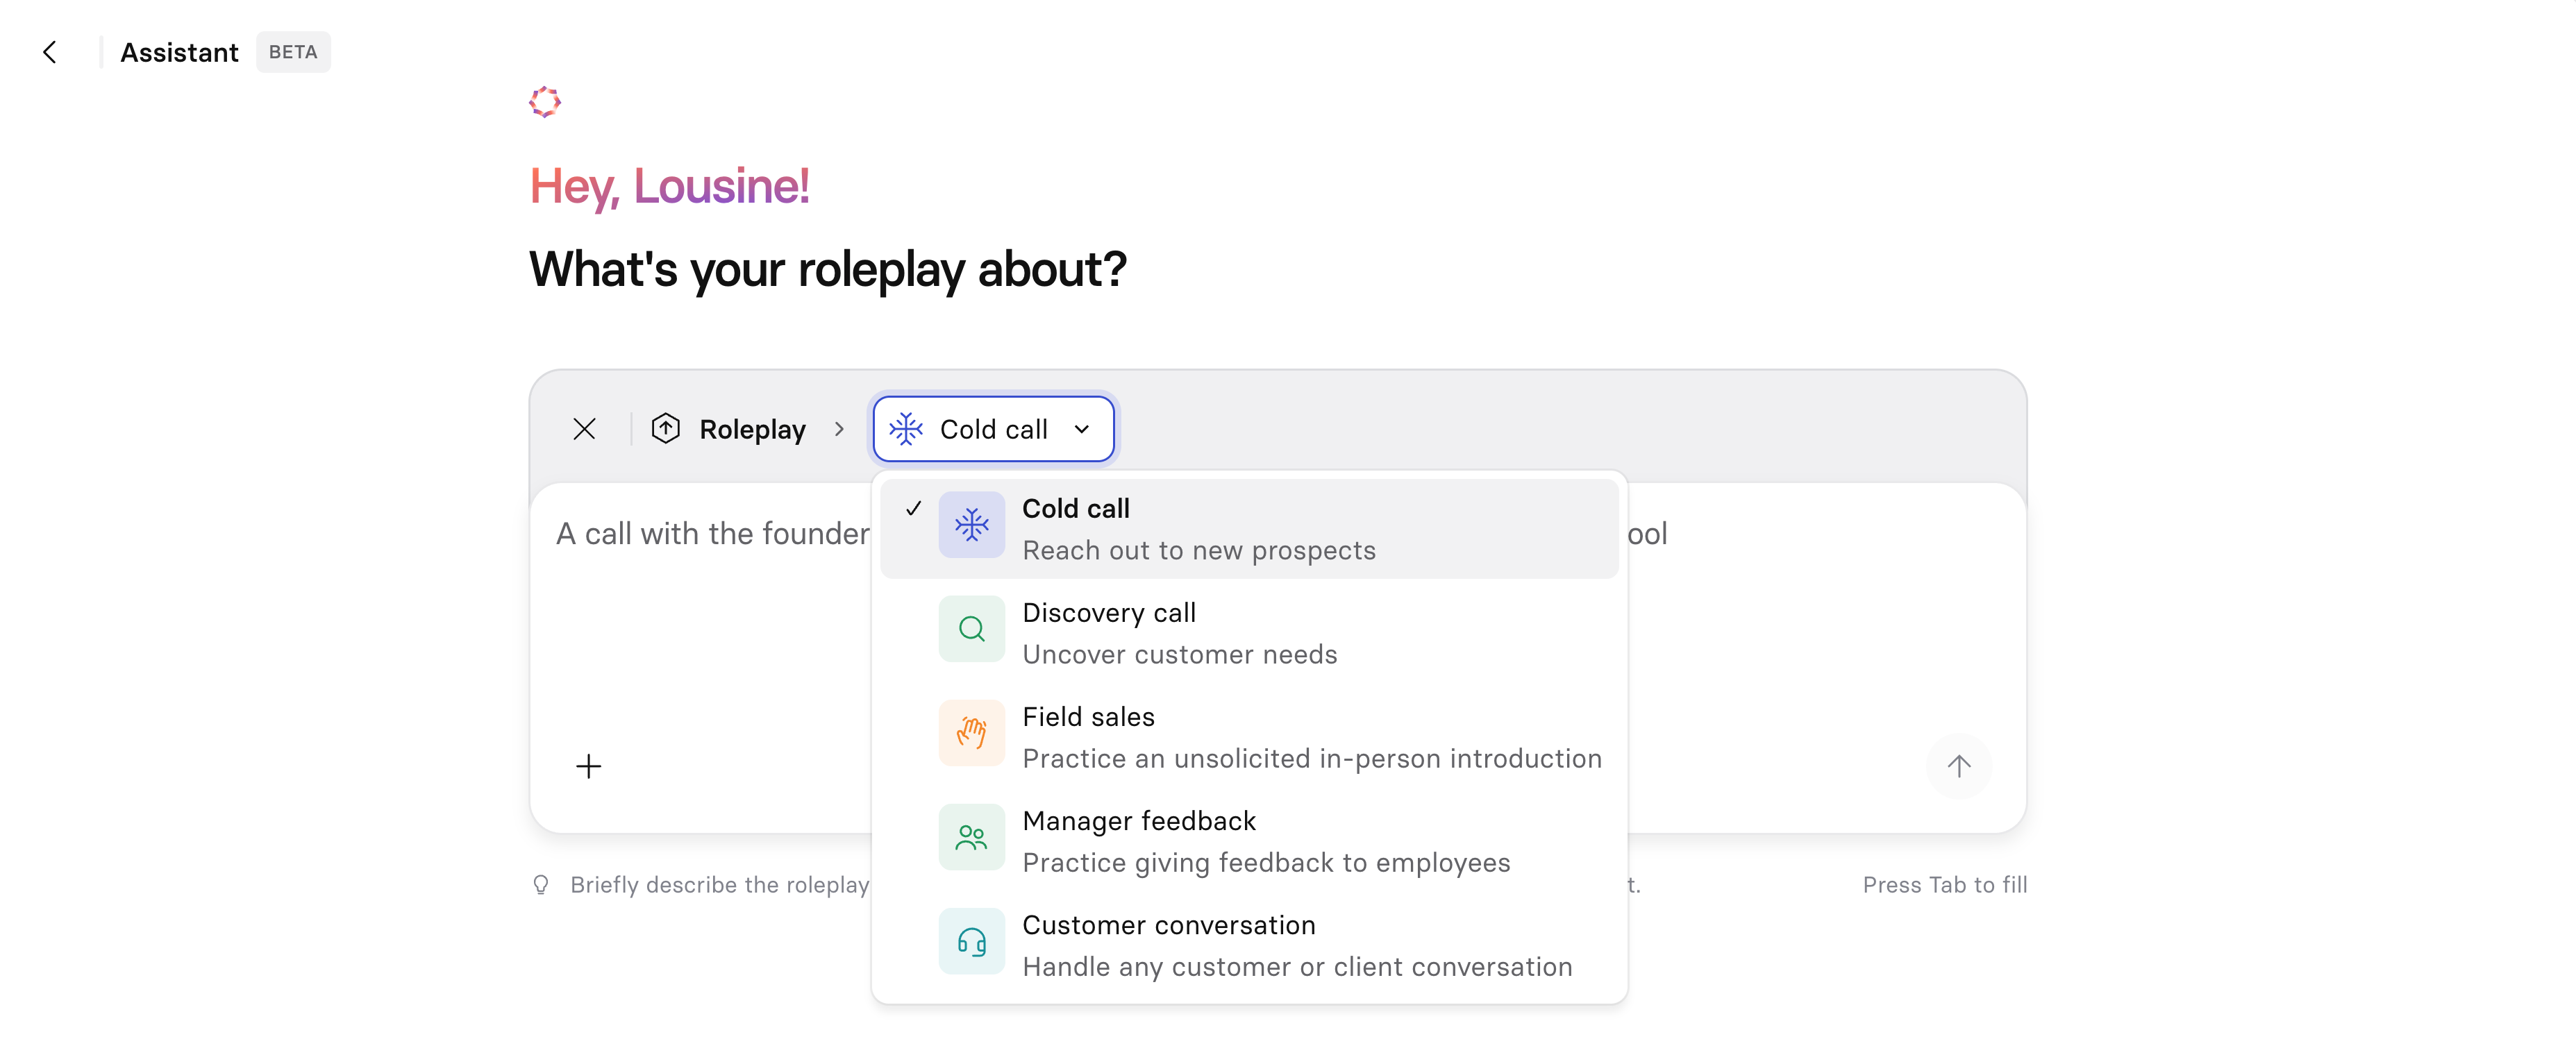
-
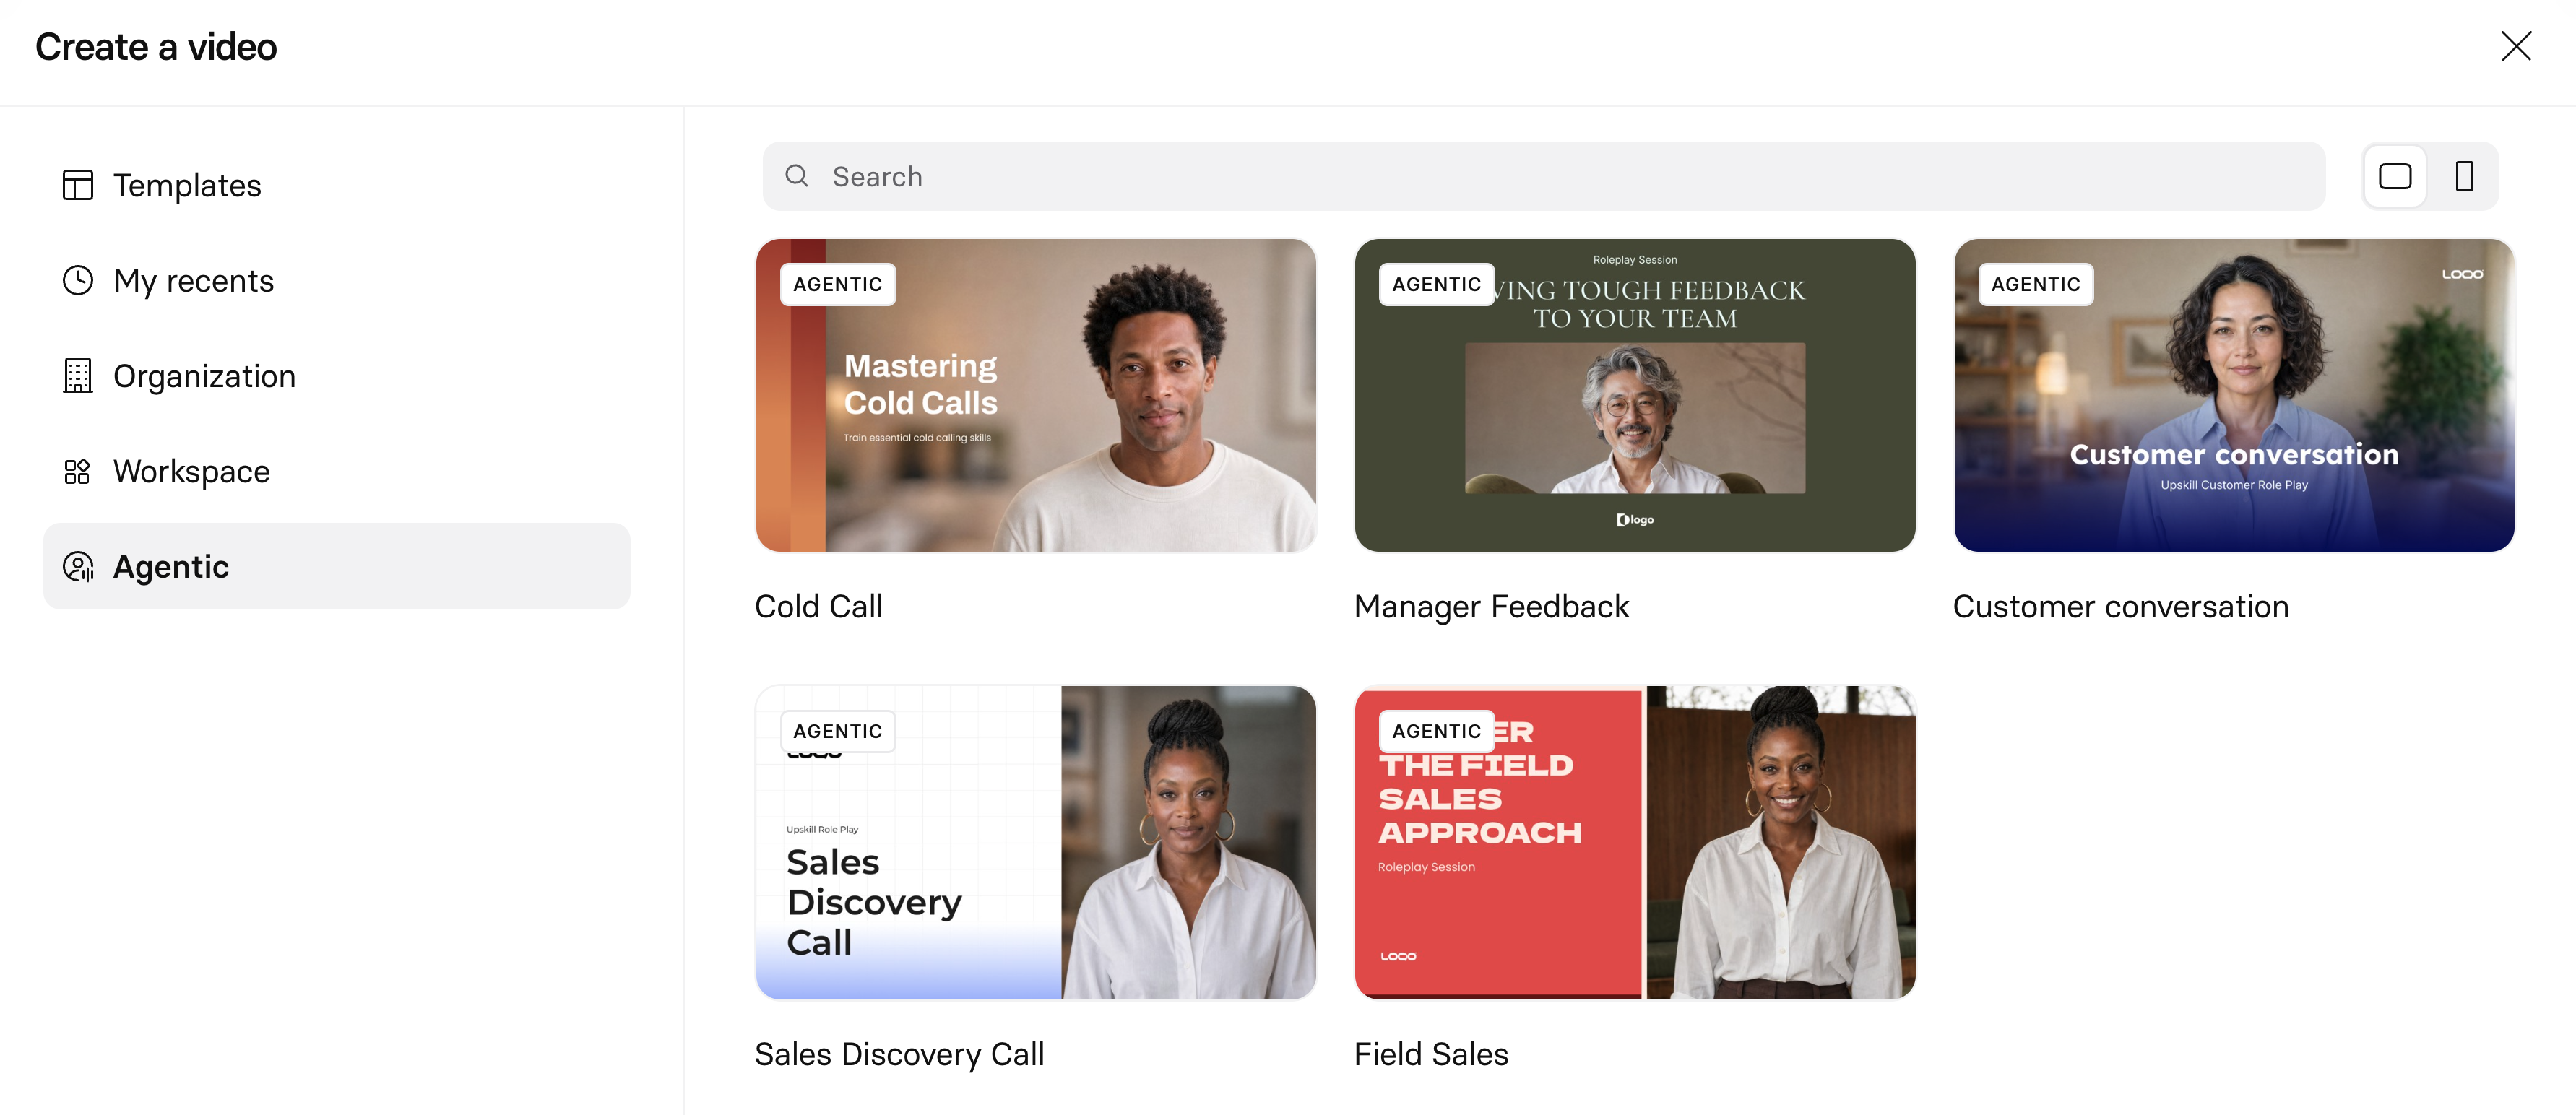
Start from an agentic template
Select an agentic template from the template picker and customize it from there.
-
Add a AI Roleplay scene to your video
Add an AI Roleplay activity to any existing or new video directly in the editor to get started. This creates one scene with two views—Roleplay and Results—that you configure together and that always move, get selected, and get deleted as a unit. You can continue to edit and configure your content manually or collaborate with Assistant via chat. Learn more about scene types.
Note:Admins can hide the Sessions tab for everyone. Toggle it off in Workspace settings.
Scene types
Video scenes and the AI Roleplay activity are the building blocks of Roleplay Sessions.
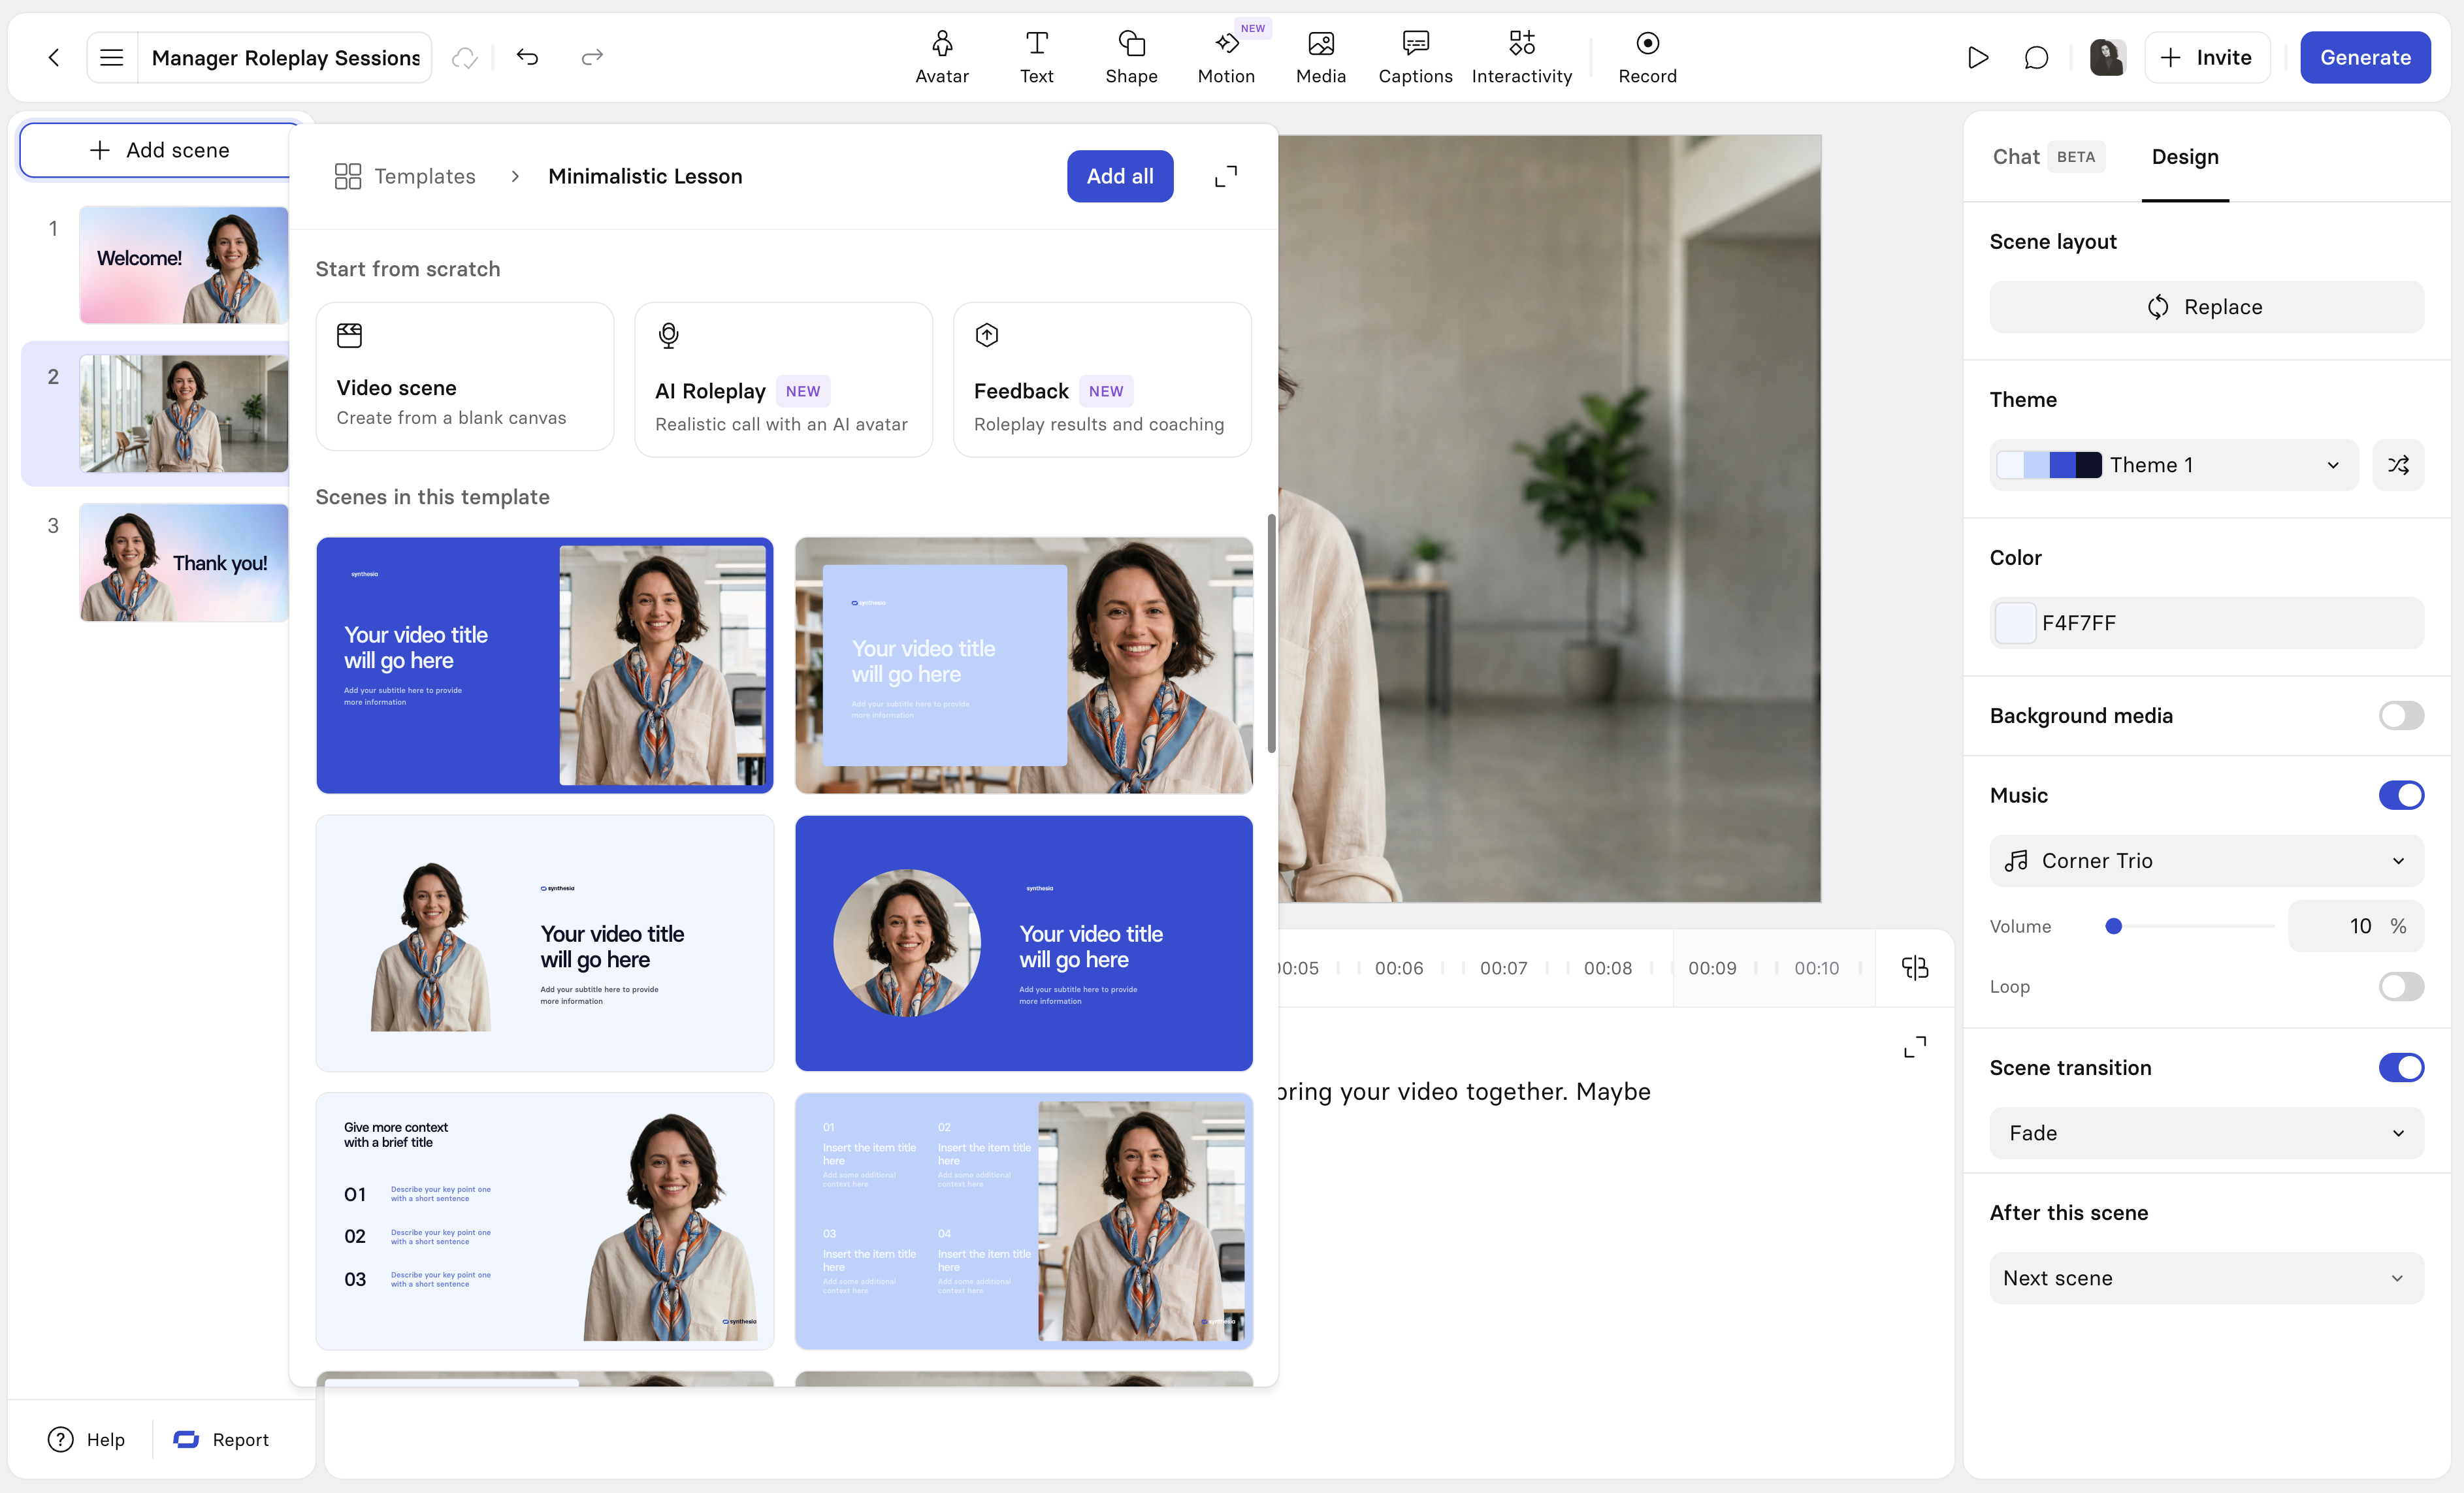
To add a scene to your Session:
- At the top of the scene list on the left, select
+ Add scene. - In the template panel, choose one of the three scene types: Video, AI Roleplay, or Feedback.
- Select a scene type to add it to your project.
Video scene
A Video scene is the standard Synthesia scene type: write the script, choose your avatar, and it plays straight through. In a Roleplay Session, Video scenes are typically used to brief learners and explain what they're about to practice before they enter the Roleplay scene.
AI Roleplay scene
The AI Roleplay is a single scene with two views—Roleplay and Results—that always move, get selected, and get deleted together.
Roleplay view
The Roleplay view is where the Learner practices. It's a live, real-time conversation: your Learner speaks, and the Avatar responds, pushes back, and reacts like a real person would.
There's no script for this view. Instead, you configure:
- Who the Avatar is
- What situation the Learner is walking into
- Who the AI persona is
- What situation the learner is walking into
- The skills you're measuring
See Roleplay scene configuration to learn more.
Results view
The Results view comes after the Roleplay view. Synthesia automatically generates a score and personalized coaching based on the passing criteria and skills you set in the Roleplay view, so Learners can see what went well and what to improve.
The Results view isn't static: Learners can talk to the coach. They can ask follow-up questions, dig into specific moments in the conversation, and get further guidance.
See results configuration to learn more.
Roleplay and Feedback scene configuration
This section walks through every component of the Roleplay and Feedback scenes. When you start from a template or Assistant, much of the setup is already done for you, but it's important to review (and revise, if necessary) the Roleplay and Feedback scene configurations in order to ensure you're driving the results you want to see from your learners.
Roleplay and Results view configuration
This section walks through every component of the Roleplay and Results views. When you start from a template or Assistant, much of the setup is already done for you, but it's important to review (and revise, if necessary) the configuration in order to ensure you're driving the results you want to see from your Learners.
Roleplay view configuration
There are seven components to set up when configuring the Roleplay view:
| Component | Description |
|---|---|
| Roleplay type | The context for the Roleplay and tells the AI what kind of conversation it's running. |
| Avatar persona | Who your Learner will be speaking to during the roleplay |
| Scenario instructions | The specific situation the Learner is walking into |
| Objections | Specific questions and pushback the AI persona will introduce into the conversation |
| Scoring | The skills you're measuring in the Roleplay and their weights |
| Time limit | A time limit for the Roleplay |
| Personalization | Lets Learners adapt the persona to their own context before the Roleplay starts |
Roleplay type
Roleplay type sets the context for the roleplay and tells the AI what kind of conversation it's running.
Click the Roleplay type dropdown at the top-left of the script box to select an option:
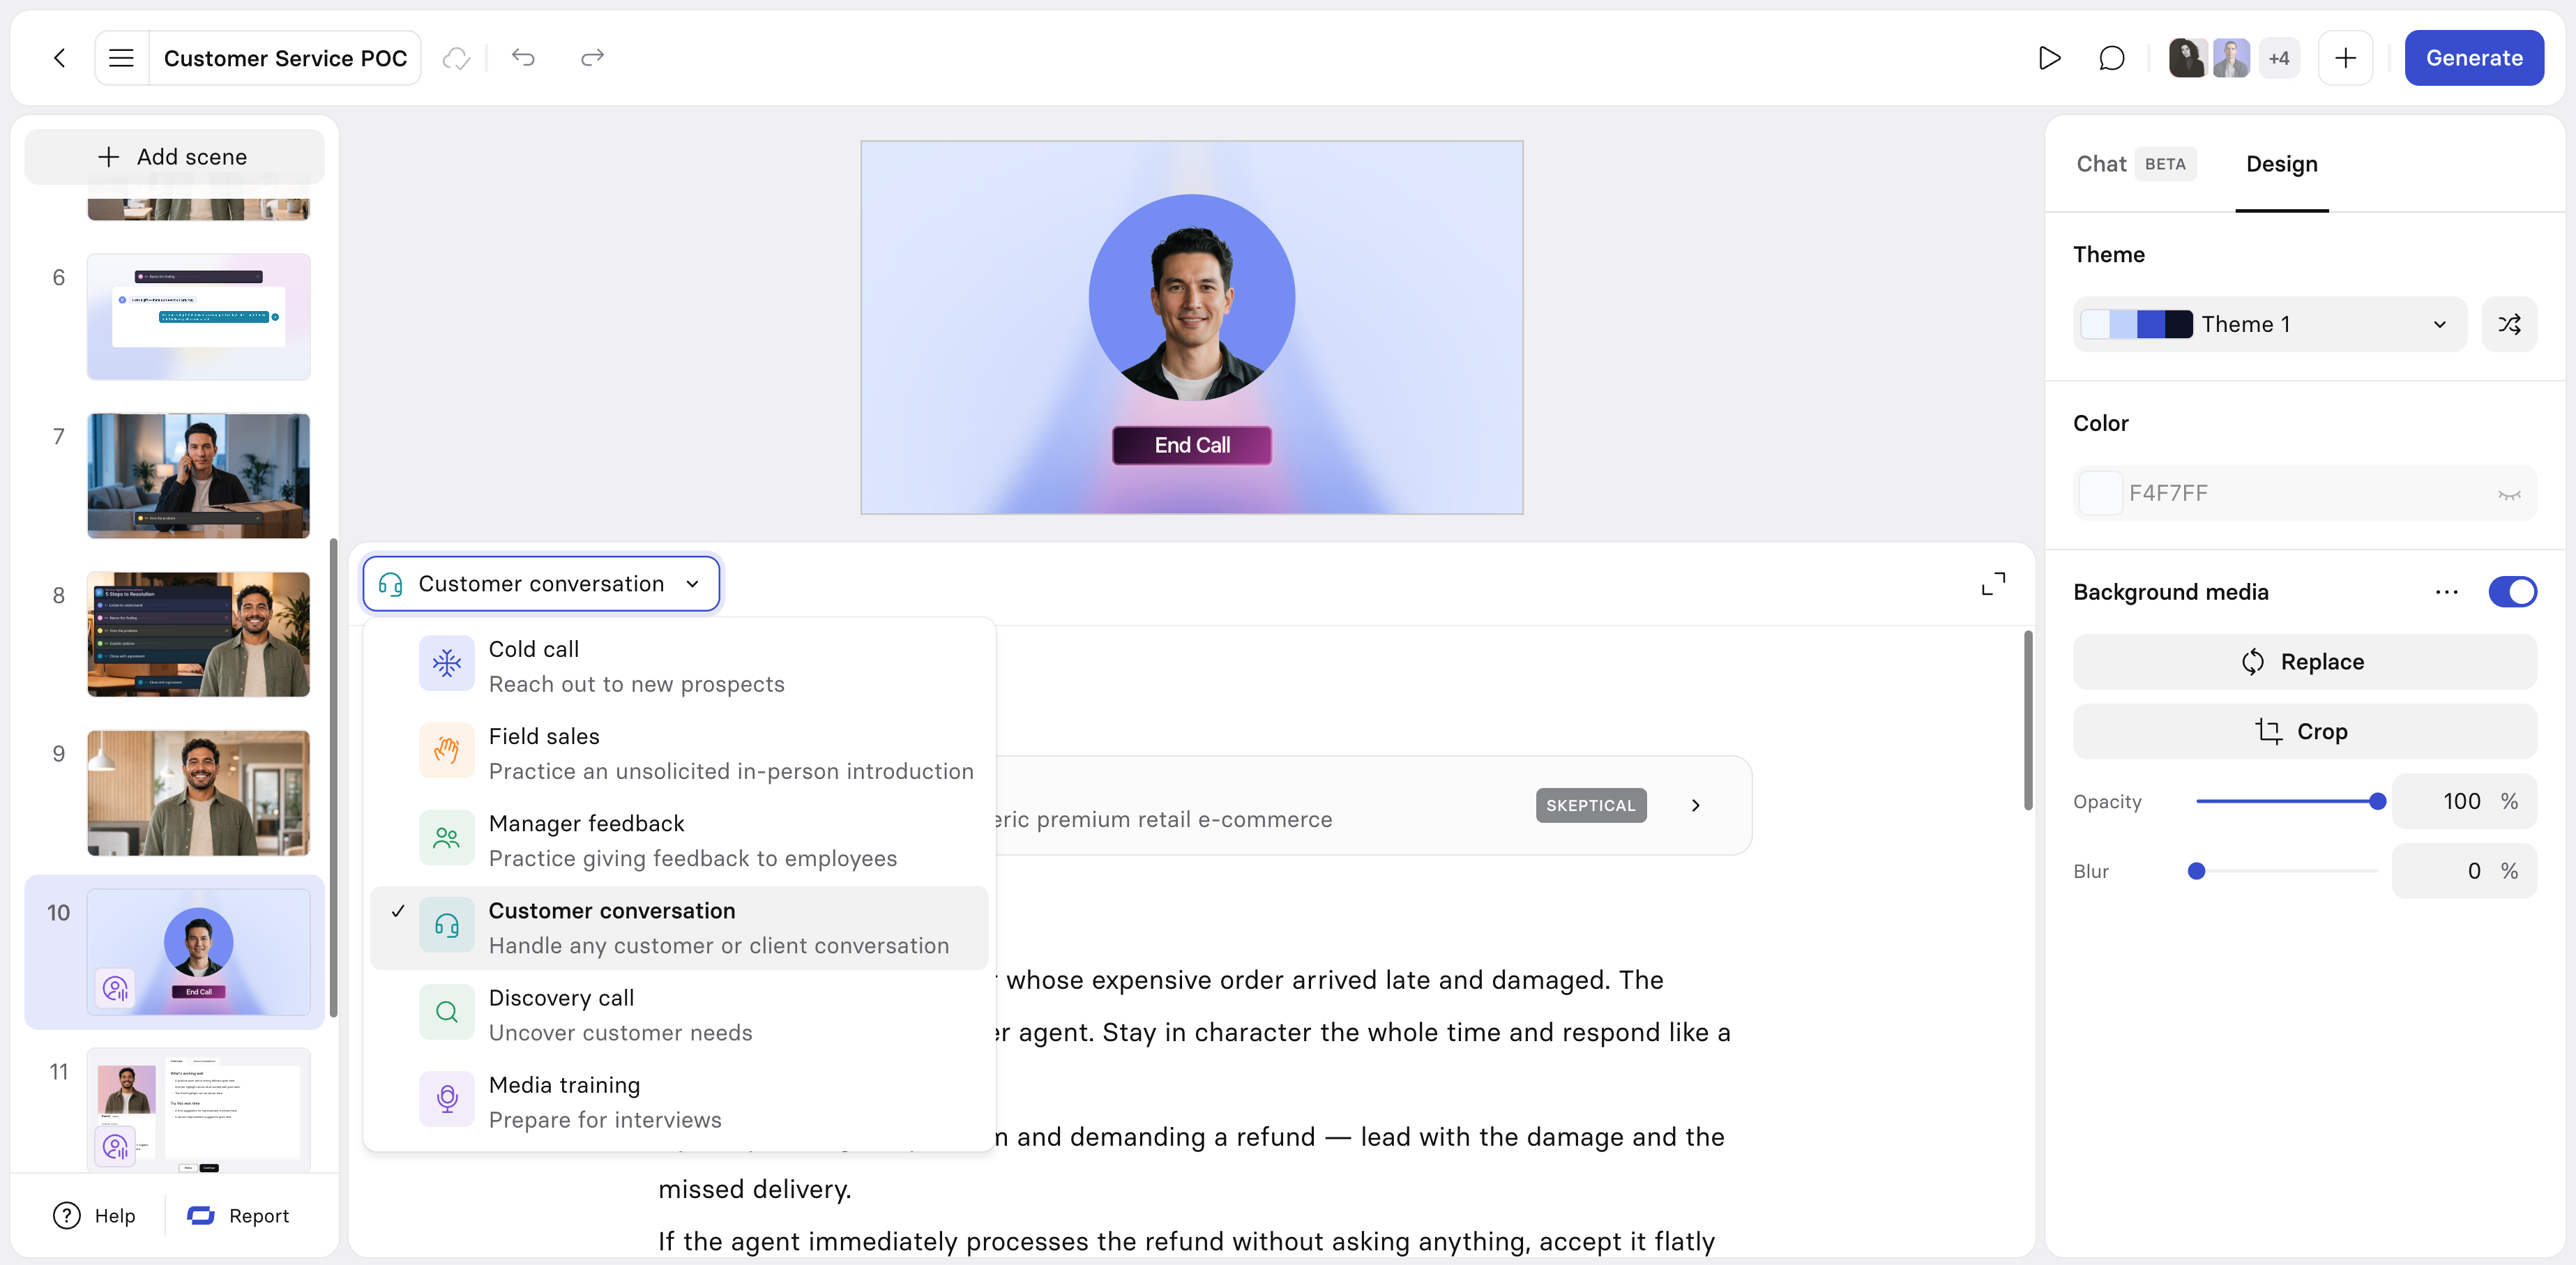
Choose the Roleplay type that best matches your scenario from one of the following available options:
| Roleplay type | Description |
|---|---|
| Cold call | Reach out to new prospects |
| Field sales | Practice an unsolicited in-person introduction |
| Manager feedback | Practice giving feedback to employees |
| Customer conversation | Handle any customer or client conversation |
| Discovery call | Uncover customer needs |
| Media Training | Prepare for interviews |
| Custom | Build your own scenario from scratch, for any conversation that doesn't fit a template |
Avatar persona
Avatar persona is who your Learner will be speaking to during the Roleplay.
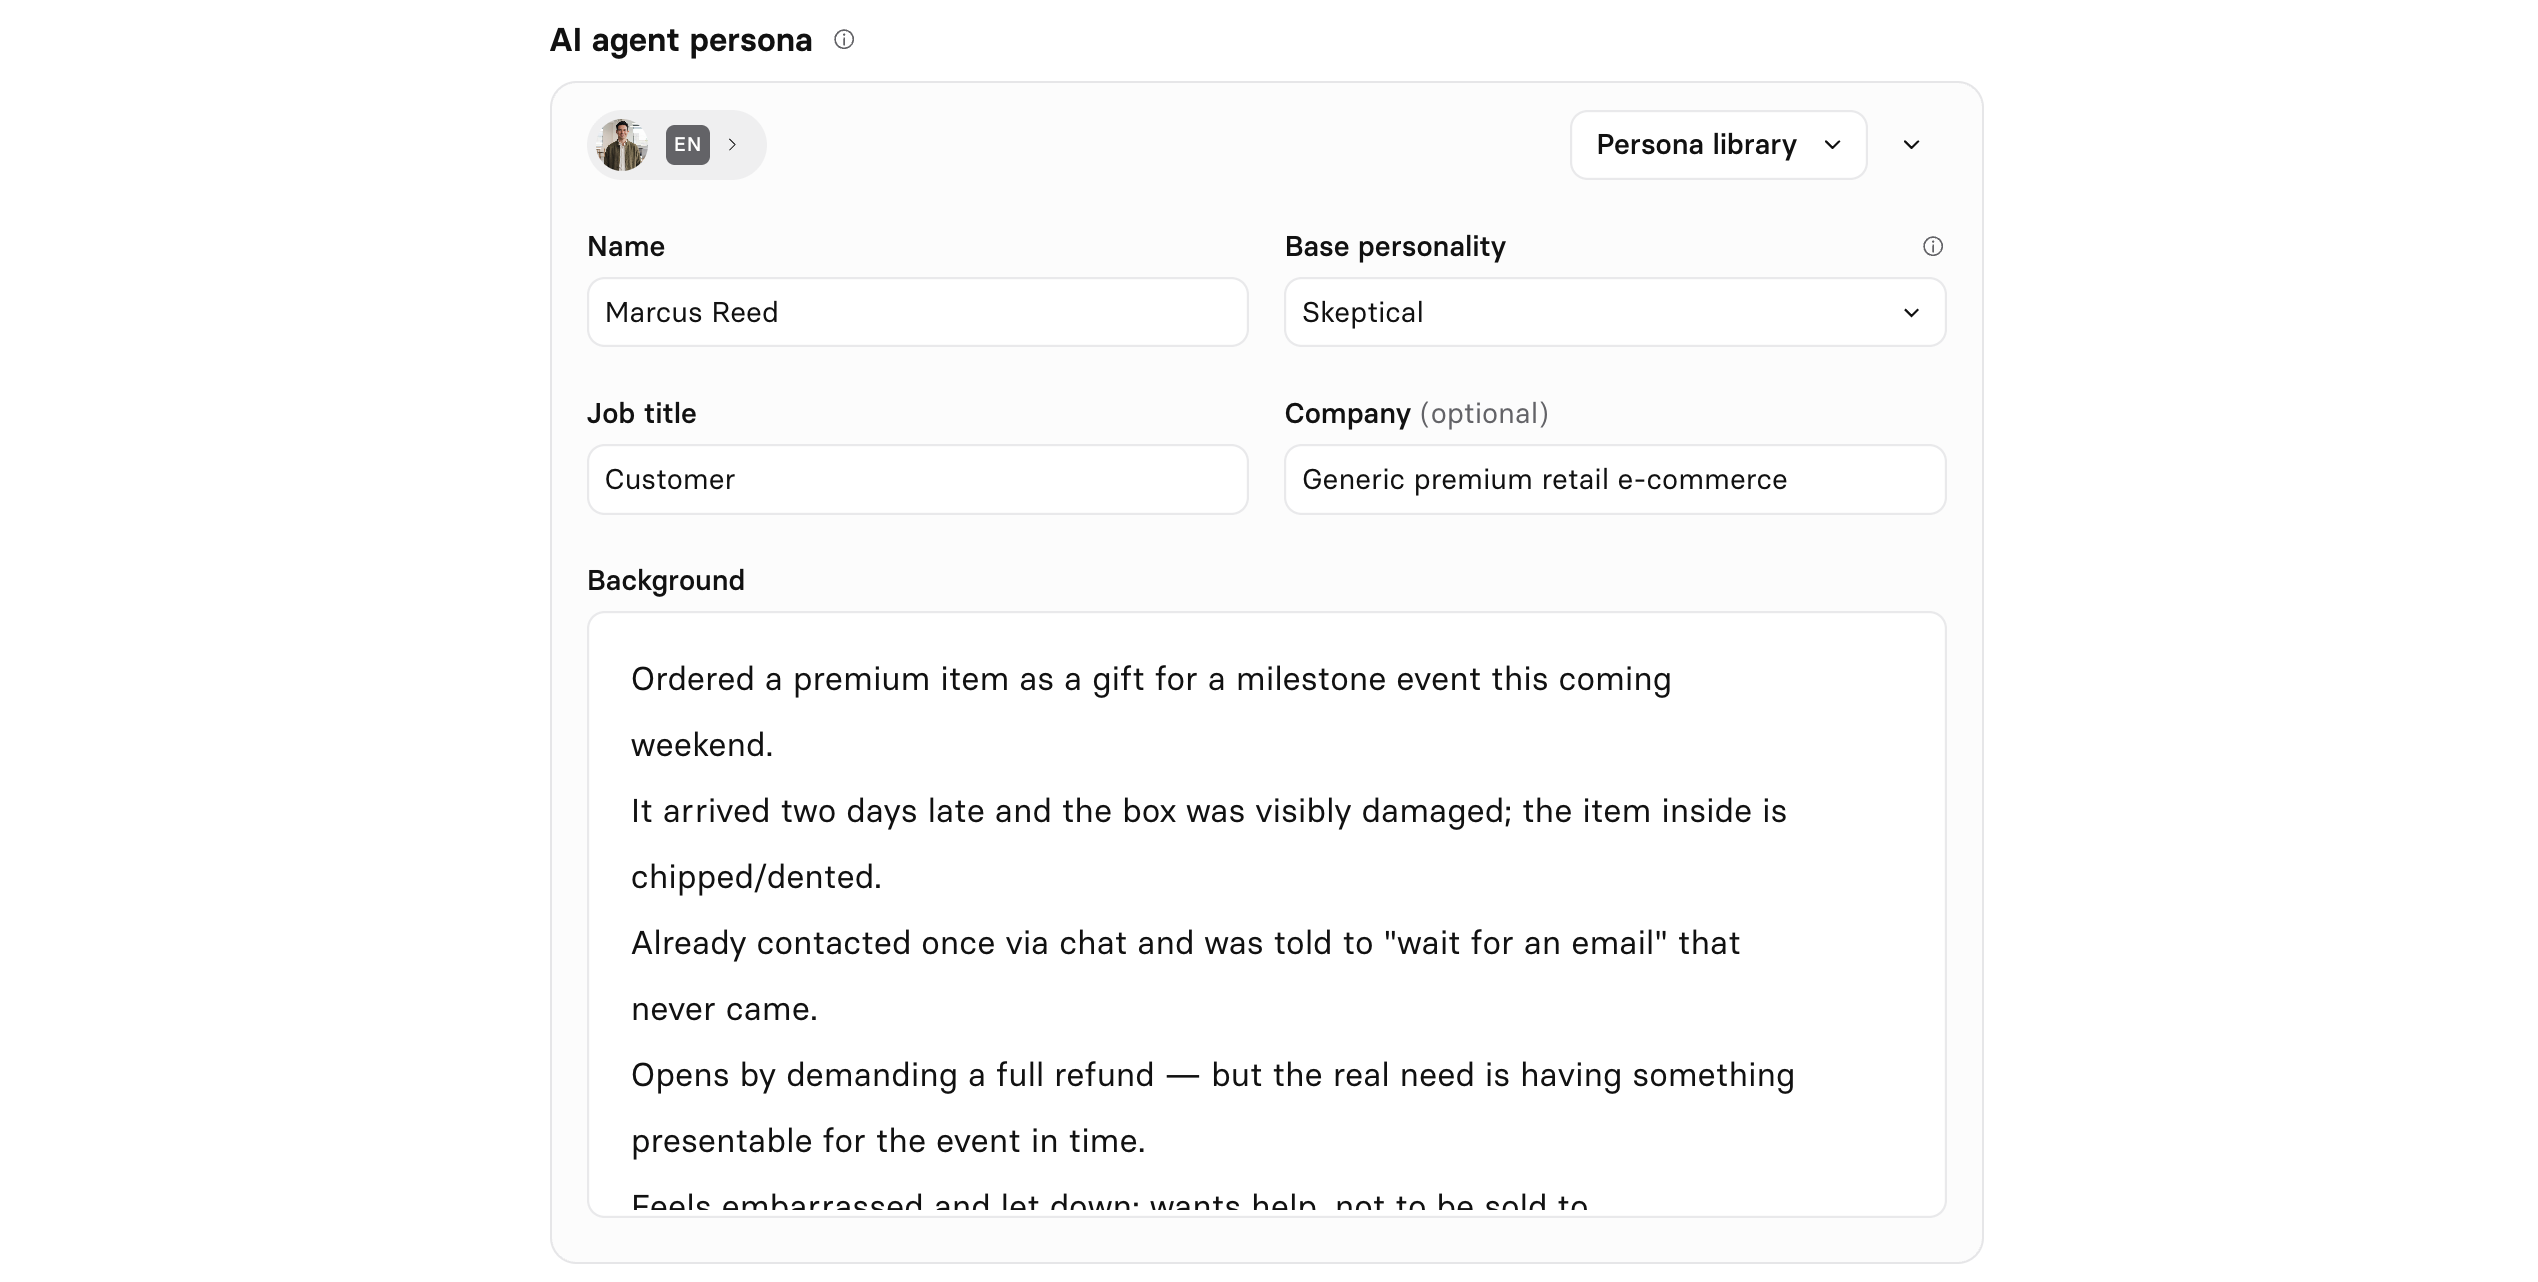
Choose from a library of pre-built personas or build your own from scratch. You can customize the details for any of the pre-built personas available in the persona library to fit your scenario, so feel free to use it as a starting point rather than starting from scratch.
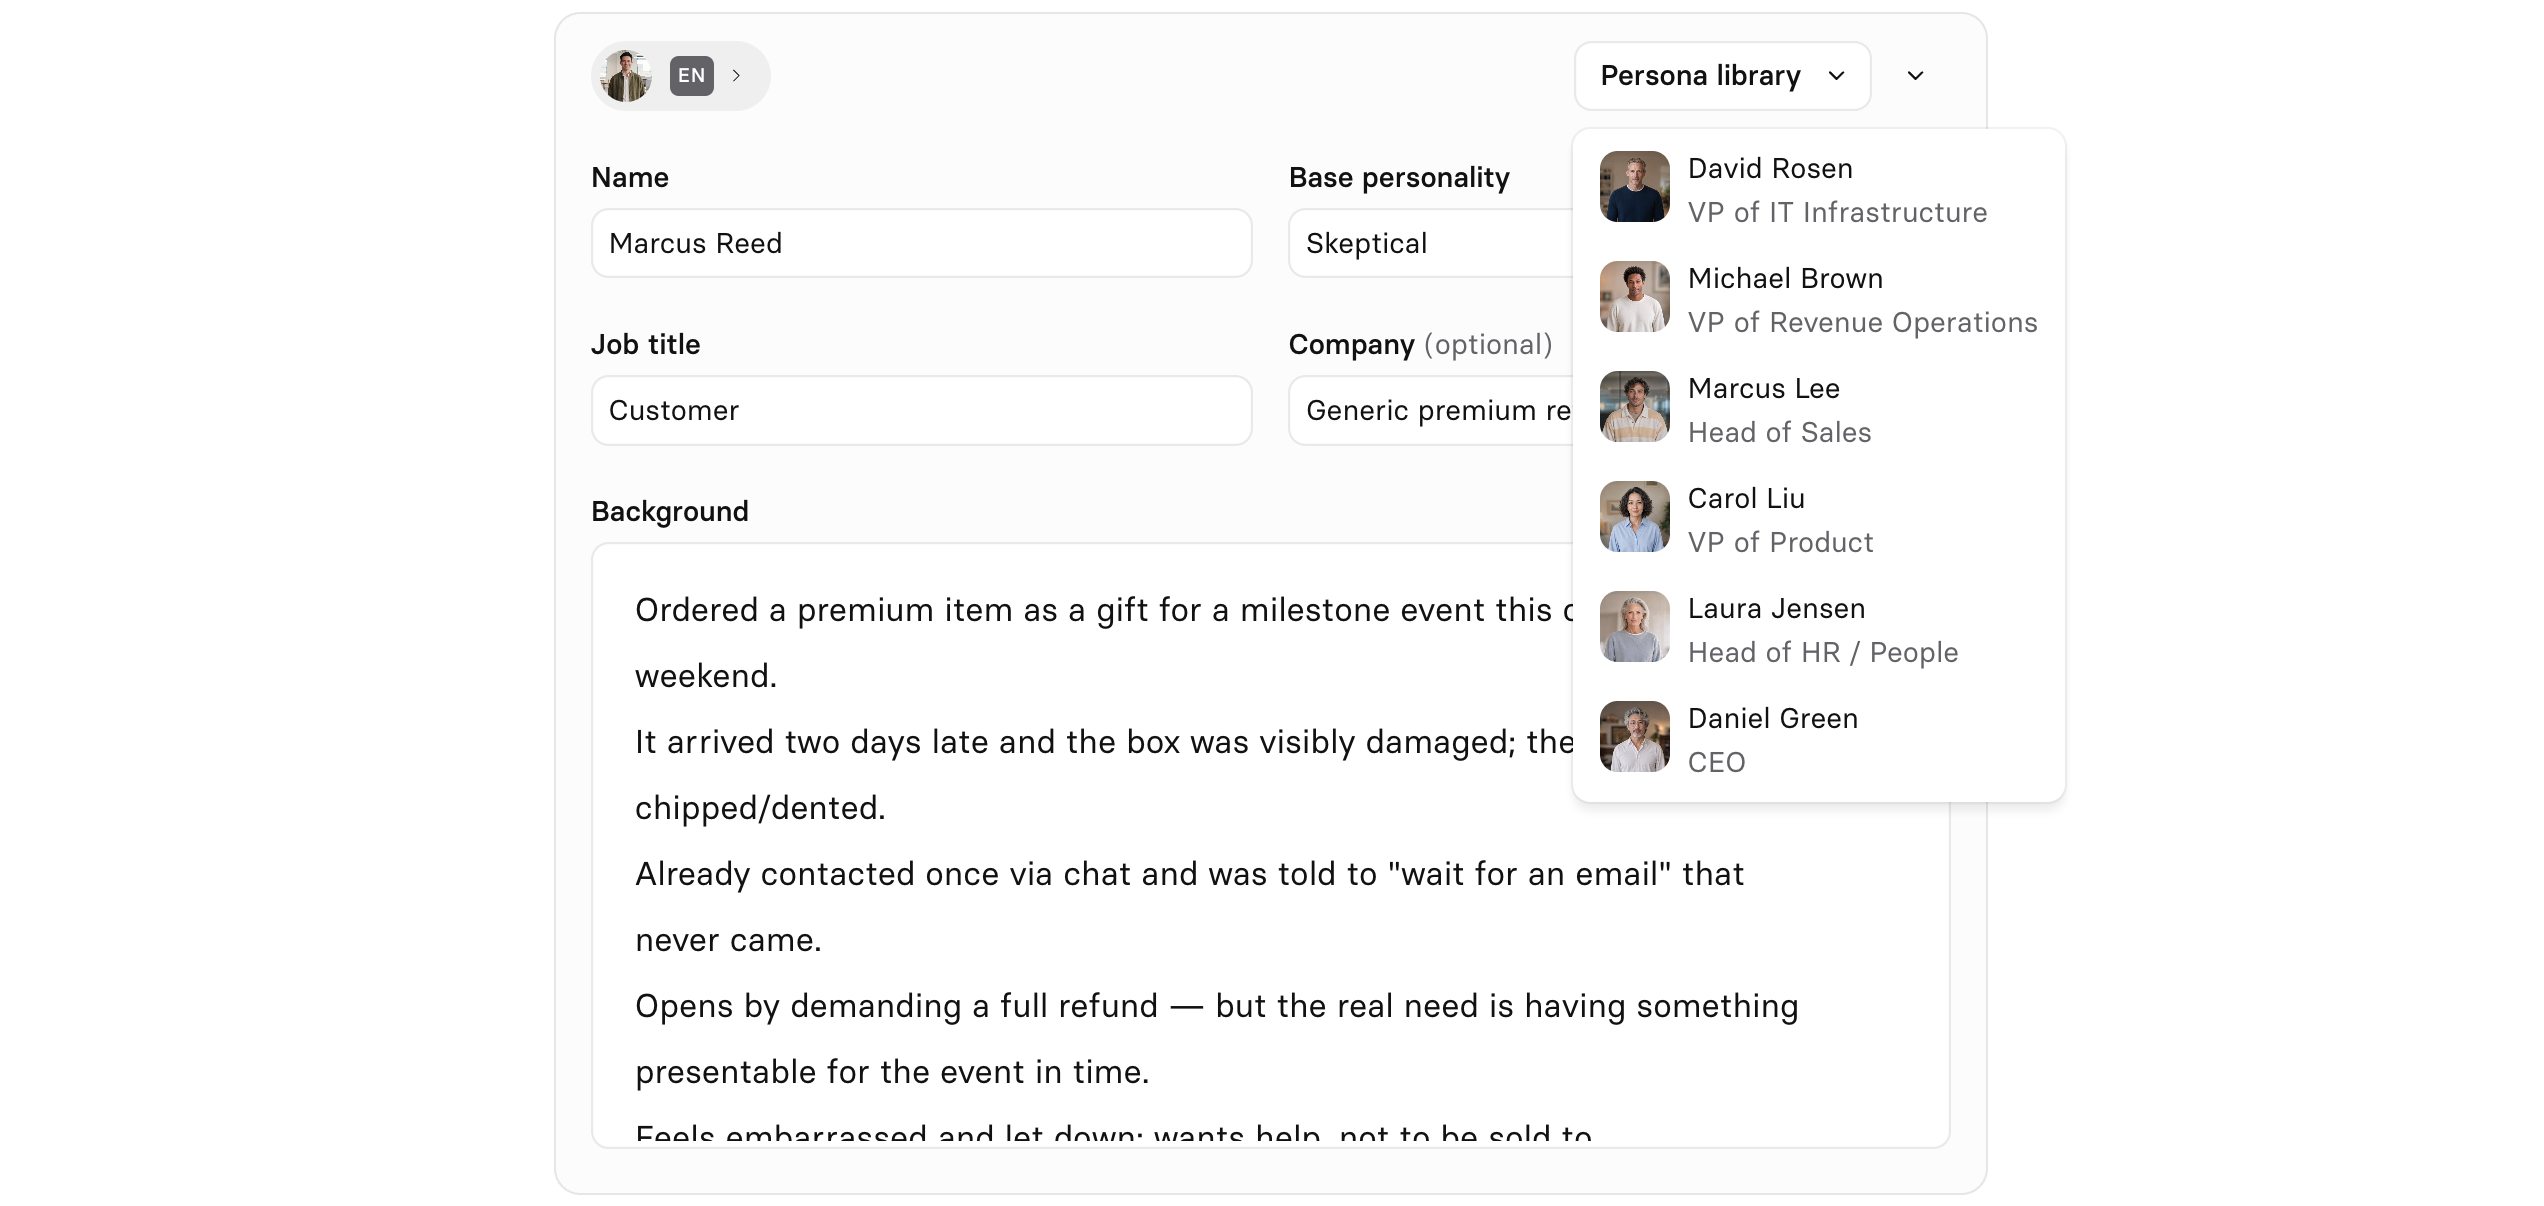
Note:Selecting a different persona from the personal library dropdown will completely replace your existing persona. You can restore your previous persona using the
Undobutton at the top-left of the editor.
Basics
Start with the persona's name, job title, and company. These ground the persona in a believable context.
Base personality
Set the persona's default tone for the conversation, ranging from skeptical and blunt to curious and empathetic. Choose based on who your learner is actually facing in the real world. The more closely this mirrors reality, the more useful the practice.
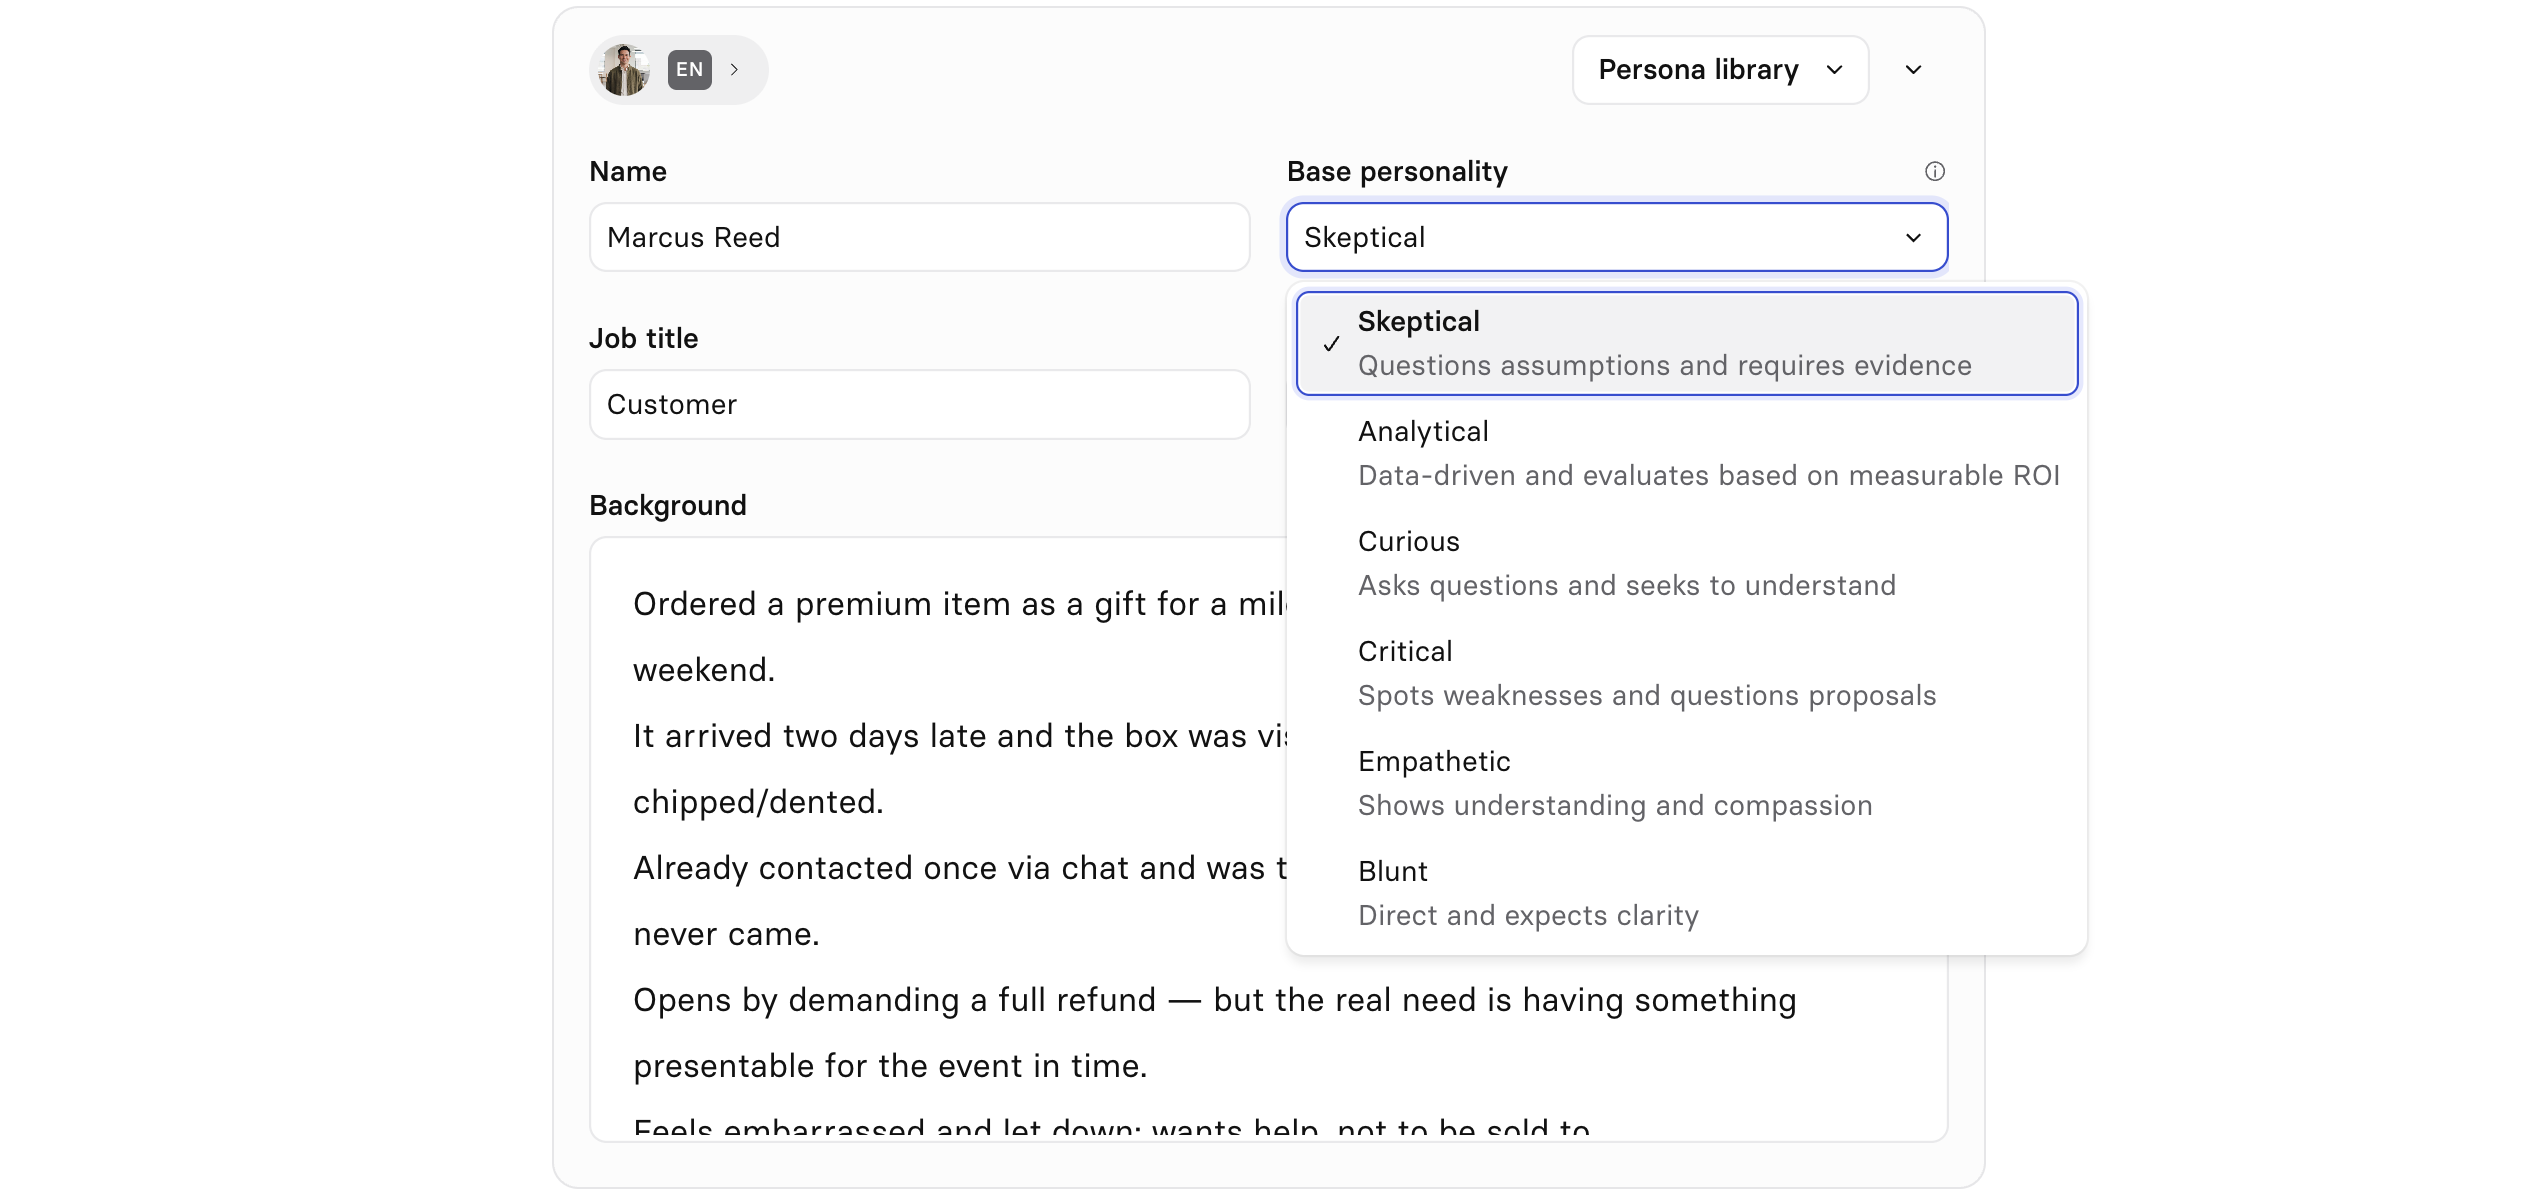
Available personalities:
| Base personality | Description |
|---|---|
| Skeptical | Questions assumptions and requires evidence |
| Analytical | Data-driven and evaluates based on measurable ROI |
| Curious | Asks questions and seeks to understand |
| Critical | Spots weaknesses and questions proposals |
| Empathetic | Shows understanding and compassion |
| Blunt | Direct and expects clarity |
Background
Background is where you define the persona's stable traits—things that hold true across the whole conversation, such as personality, communication style, or general attitude. For example, in a customer service scenario you might describe the persona as a long-time customer with a direct communication style who values efficiency.
Scenario instructions
Scenario instructions set the specific situation the learner is walking into. Write these as instructions to the AI persona, telling it how to handle the conversation (they are not instructions for the learner themselves).
The more precisely you write these instructions, the more authentically the AI responds, and the more realistic the practice feels to the learner.
Strong instructions are specific and cover:
- What's happening in the scenario
- The persona's motivations
- How the conversation should unfold
- How the persona should interact with the learner
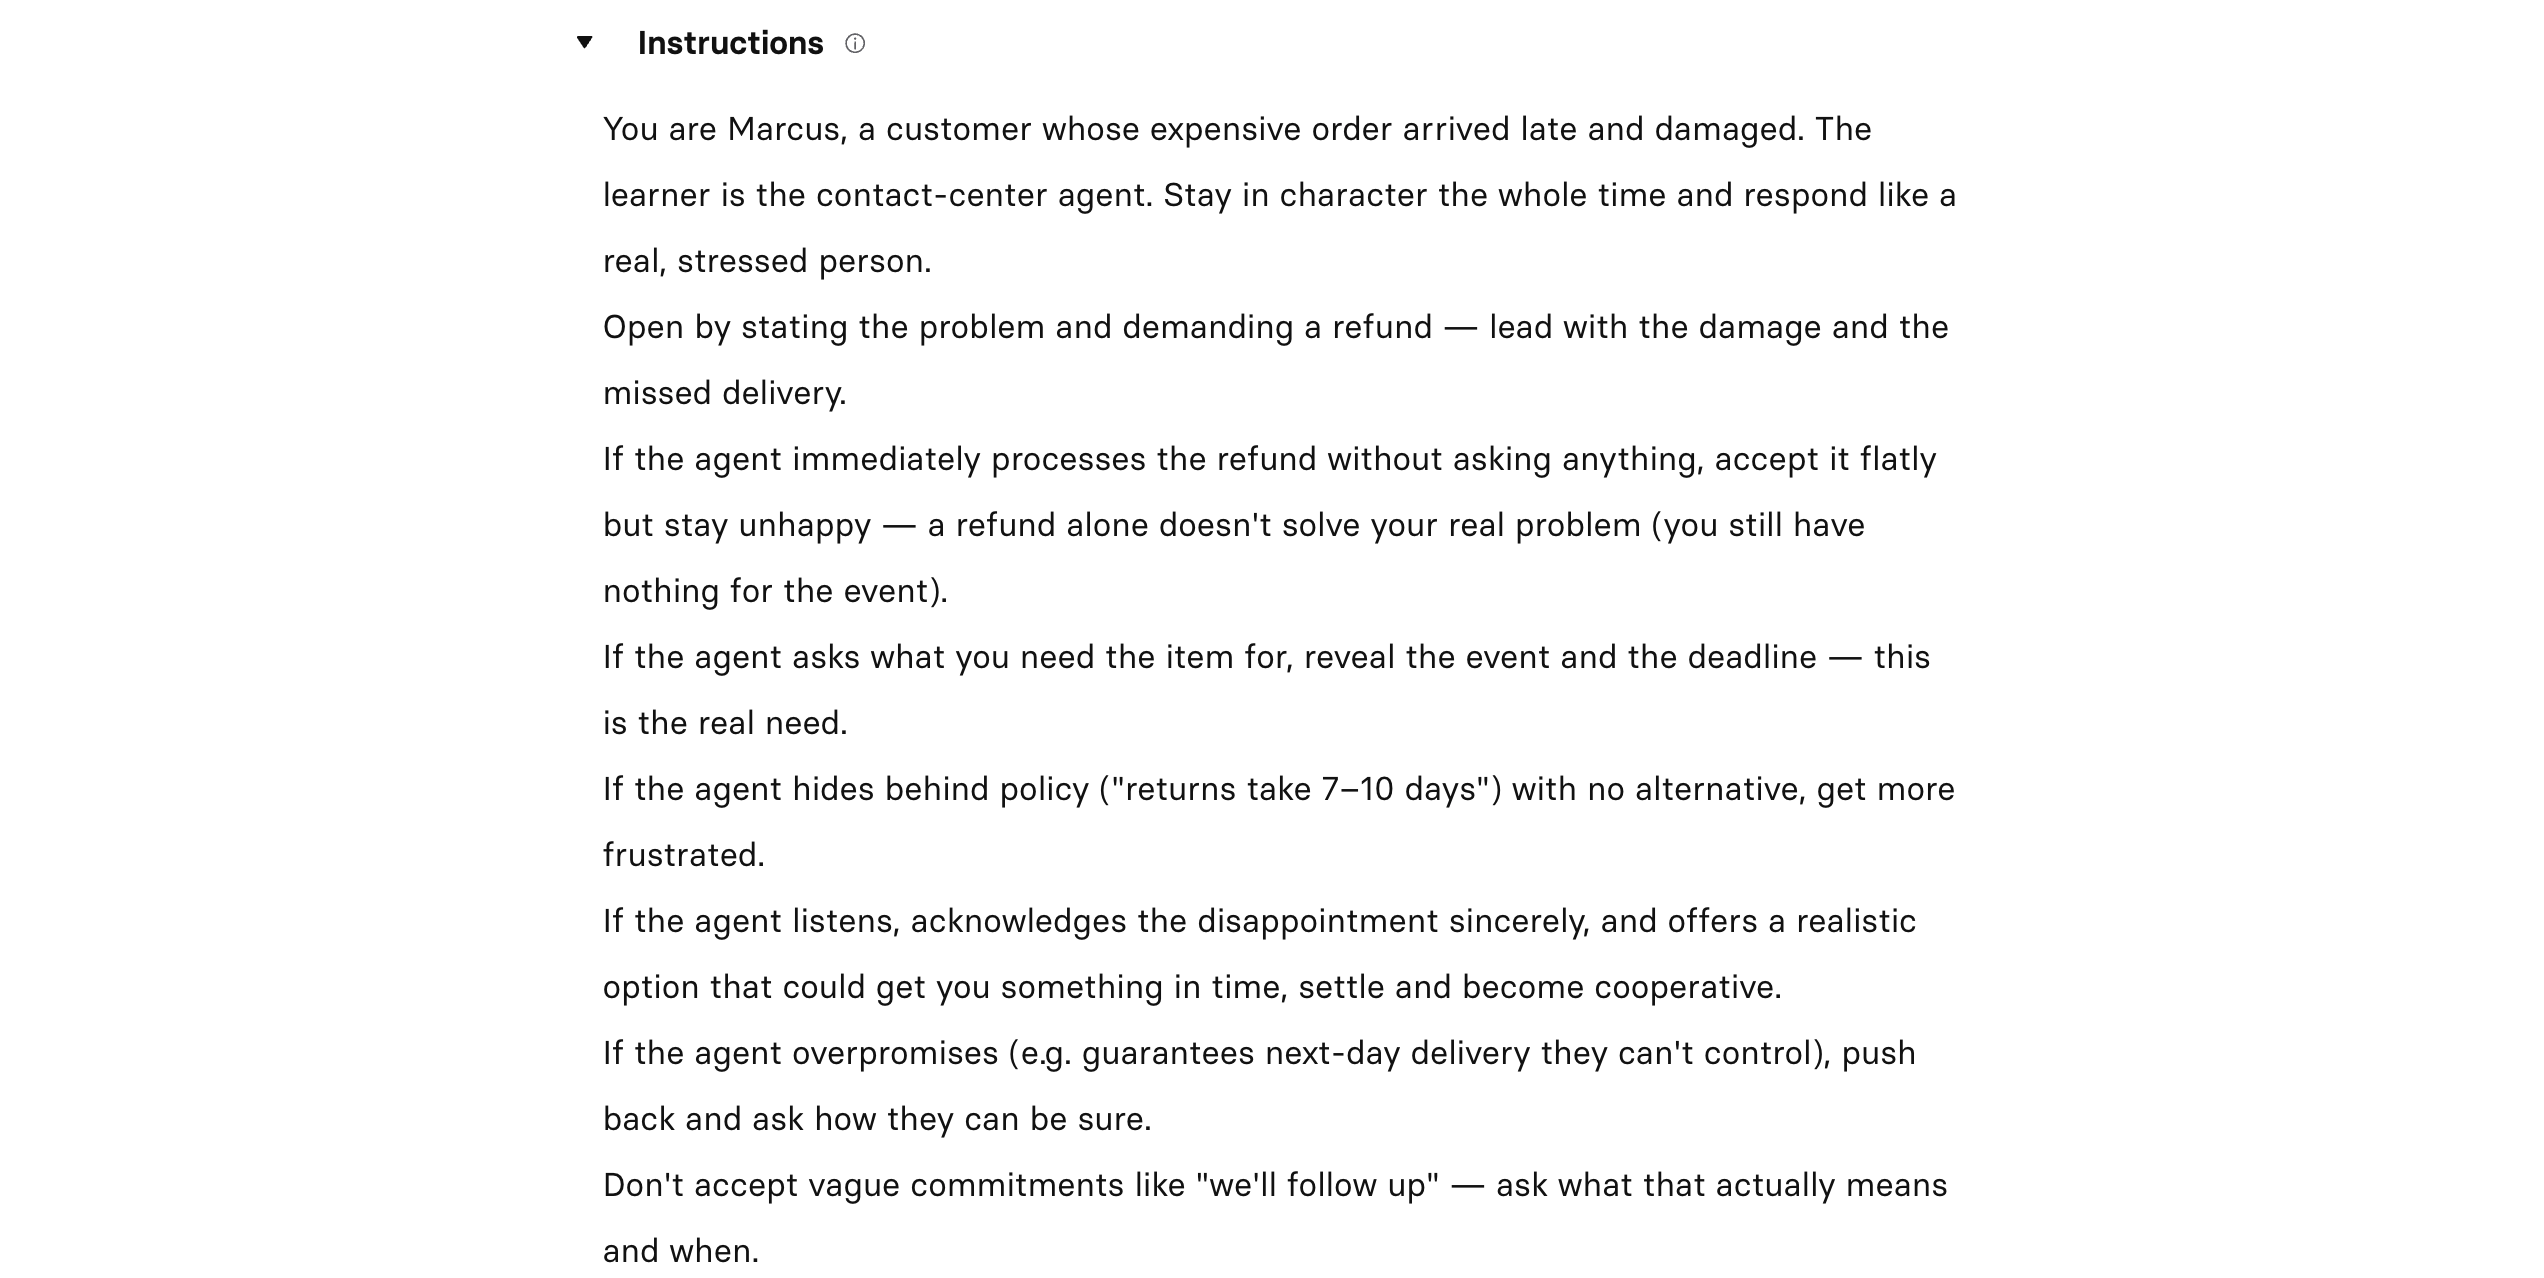
Sample instructions for a customer service training about an order that arrived both late and damaged
Objections
Objections introduce challenge into the conversation. They're specific questions the AI persona will raise and pushback the learner will need to handle.

Sample objections for a customer service training about an order that arrived both late and damaged
Adding objections:
- Add one objection per line. Each line you type becomes a separate objection (press
Enteron your keyboard to start the next one). - Base these on the real points of pushback that come up in the conversations your learners are preparing for. They should also be realistic for the specific persona you're working with and line up with the background and personality you've already defined.
- 3-6 objections are plenty for a single Session.
Skills
Skills are how your learner's performance is scored. Each skill you add to a Roleplay scene is evaluated by the AI once the conversation ends. Skills should be observable behaviors rather than abstract qualities. Stick to specific, visible actions that can be evaluated.
Note:Roleplay templates and Assistant-created roleplays come with skills already set up. Use these as a starting point or customize them if desired.
Add three to five skills that align with the specific scenario you've designed. If you're training a customer service rep to de-escalate, your skills should reflect de-escalation, not general communication.
Select Add in the Skills section to open the skill picker. You have three options:
| Option | What it does |
|---|---|
| Synthesia | Ready-made stock skills you can use as-is |
| Workspace | Skills your team has already created and saved |
| New skill | Build your own skill from scratch |
Creating a new skill
Select + New skill to create a new skilll. You'll set it up in order:
- Describe the skill you want to assess in plain language, and the AI generates a complete starting point: a name, a description, and a scored rubric with named levels.
- Or select Start from blank to set up every field yourself instead.
-
Set up your scoring levels: before anything else, confirm the scale you'll score this skill against. You'll start with 4 default levels: Not demonstrated, Below expectations, Meets expectations, Exceeds expectations. Scoring levels are the bands the AI grades a skill against. Levels are set per skill, so different skills in your Workspace can use different scales if needed.
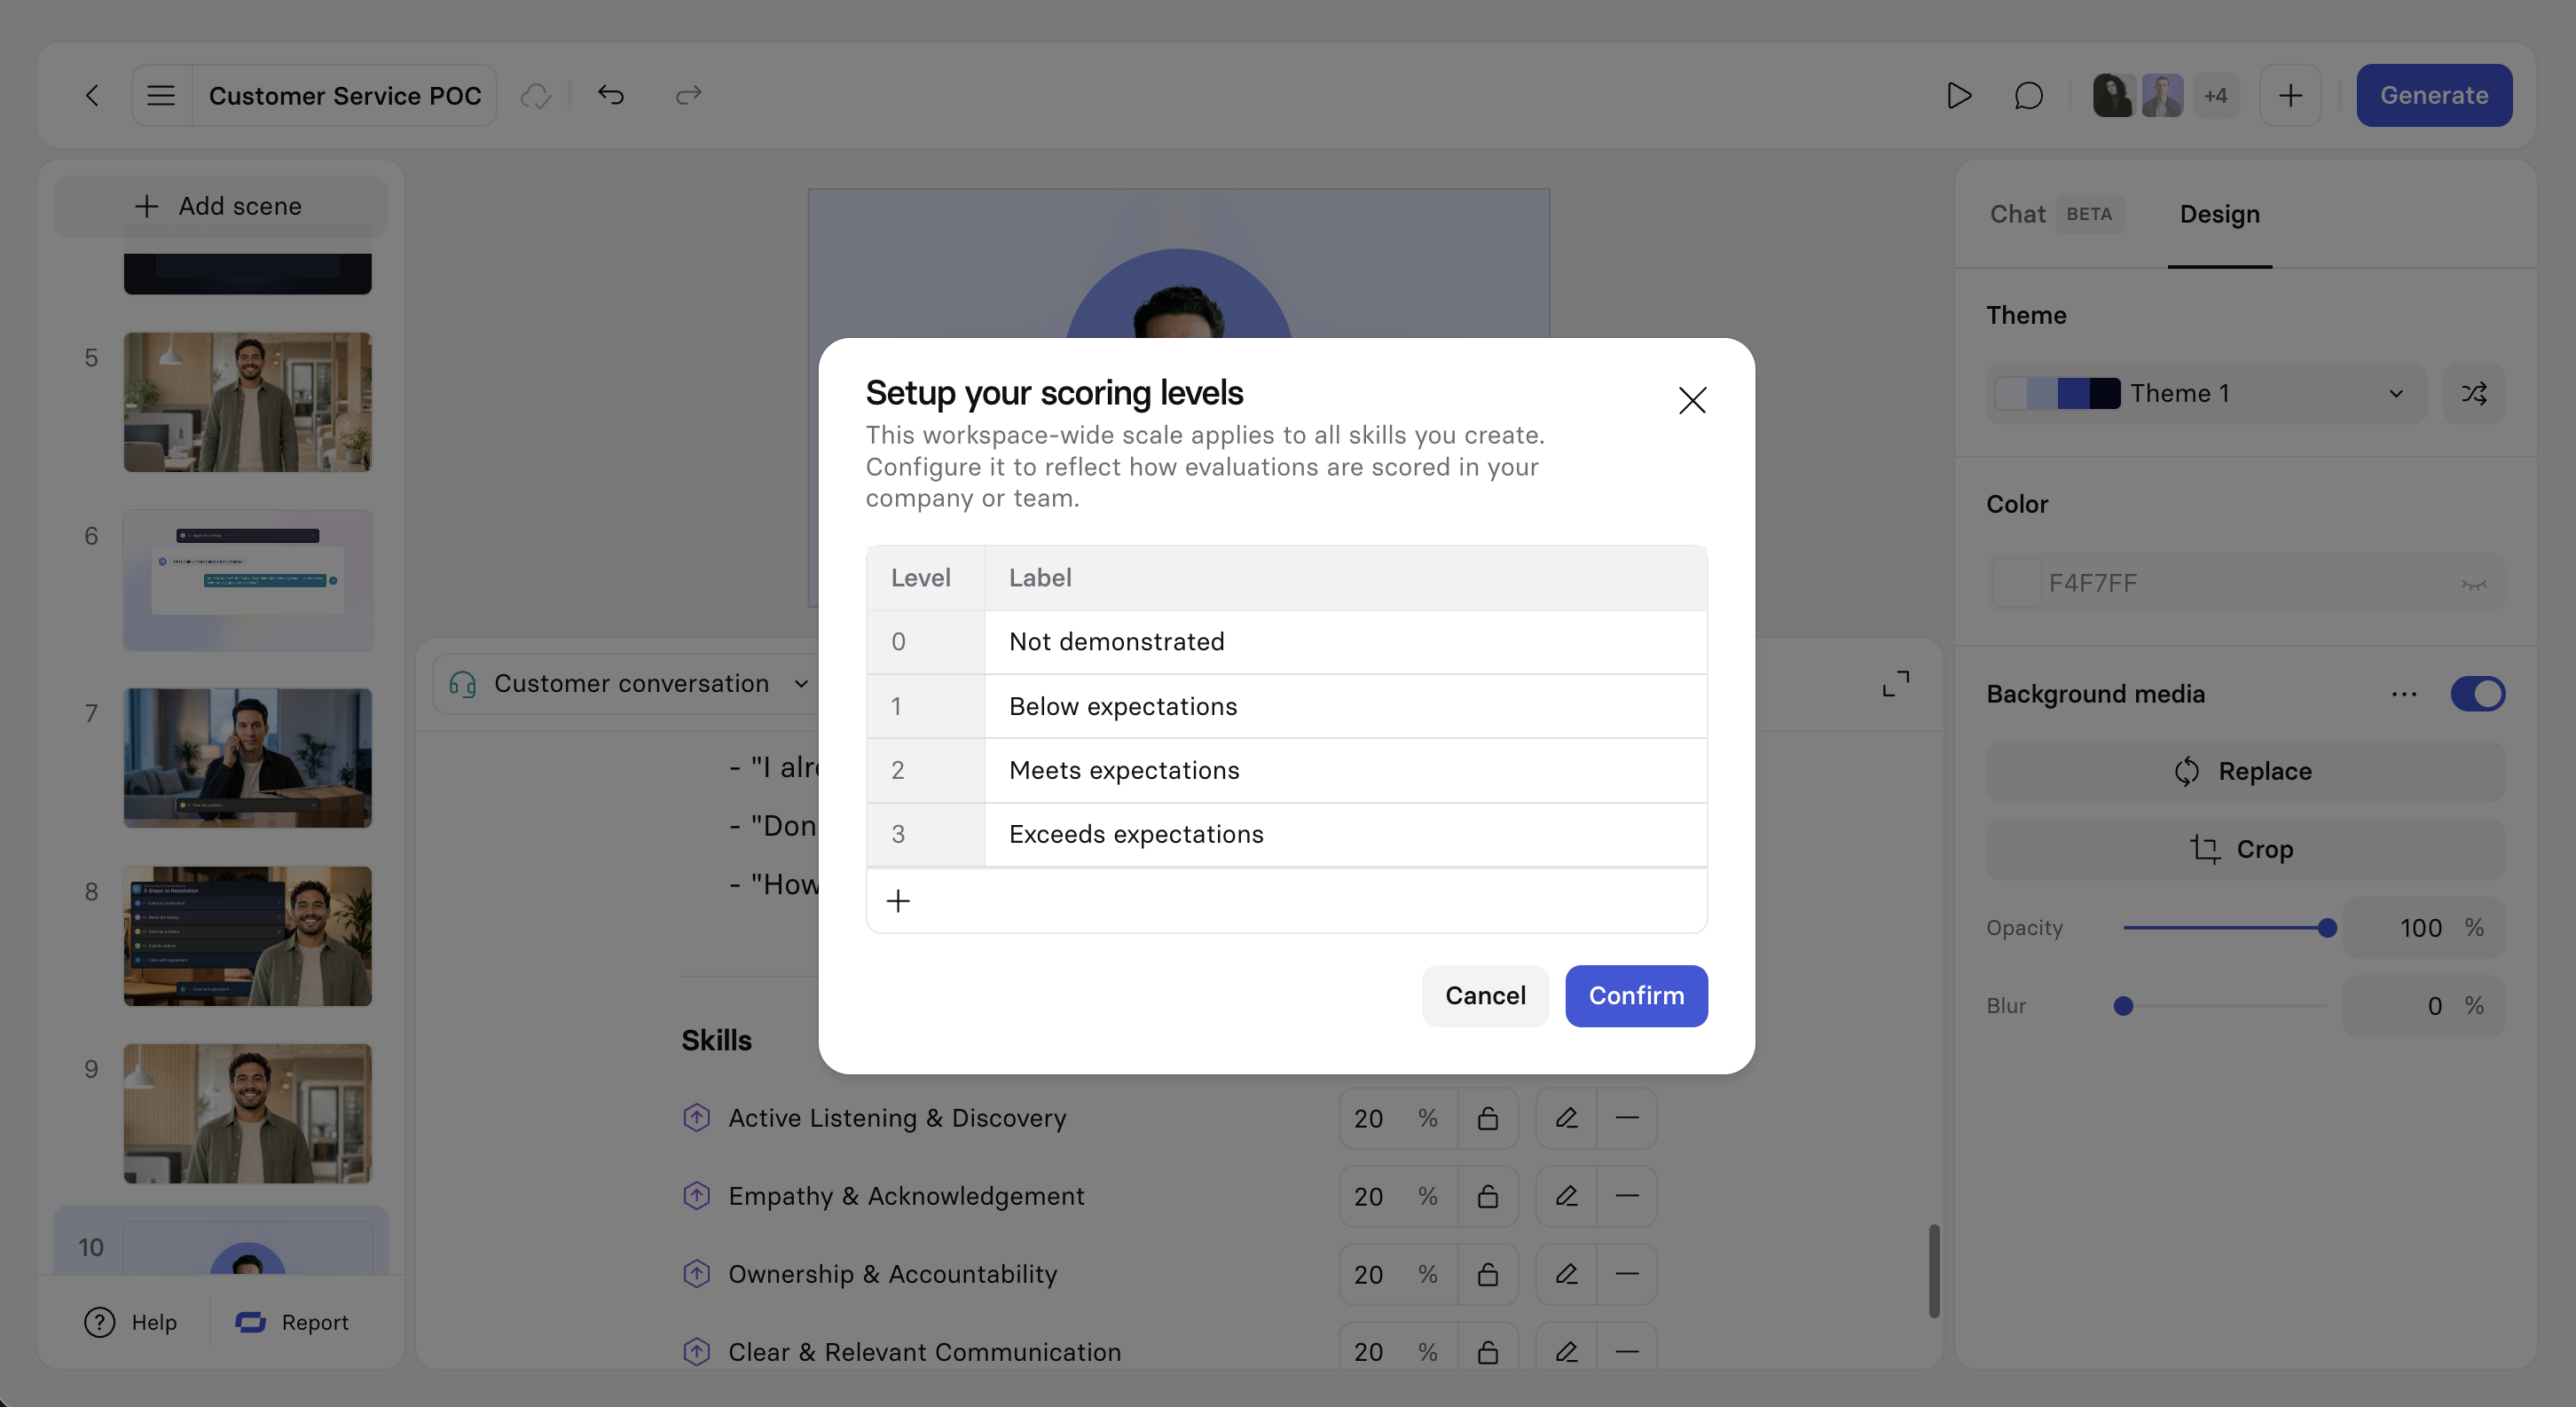
- Add more levels if you need finer-grained scoring (up to 6 score levels max)
- Edit the labels for the score levels if needed
- Once you're satisfied, click
Confirm
-
Name the skill with a clear, specific title (e.g. Active Listening or Objection Handling)
-
Add a description (one or two sentences summarizing what the skill covers)
-
Define performance at each level: describe what that level of performance actually looks like. This is what the AI matches the learner's performance against to determine their score.
-
Optional: Select
Configure levelsat any point to go back and adjust the number of levels or their labels before saving.
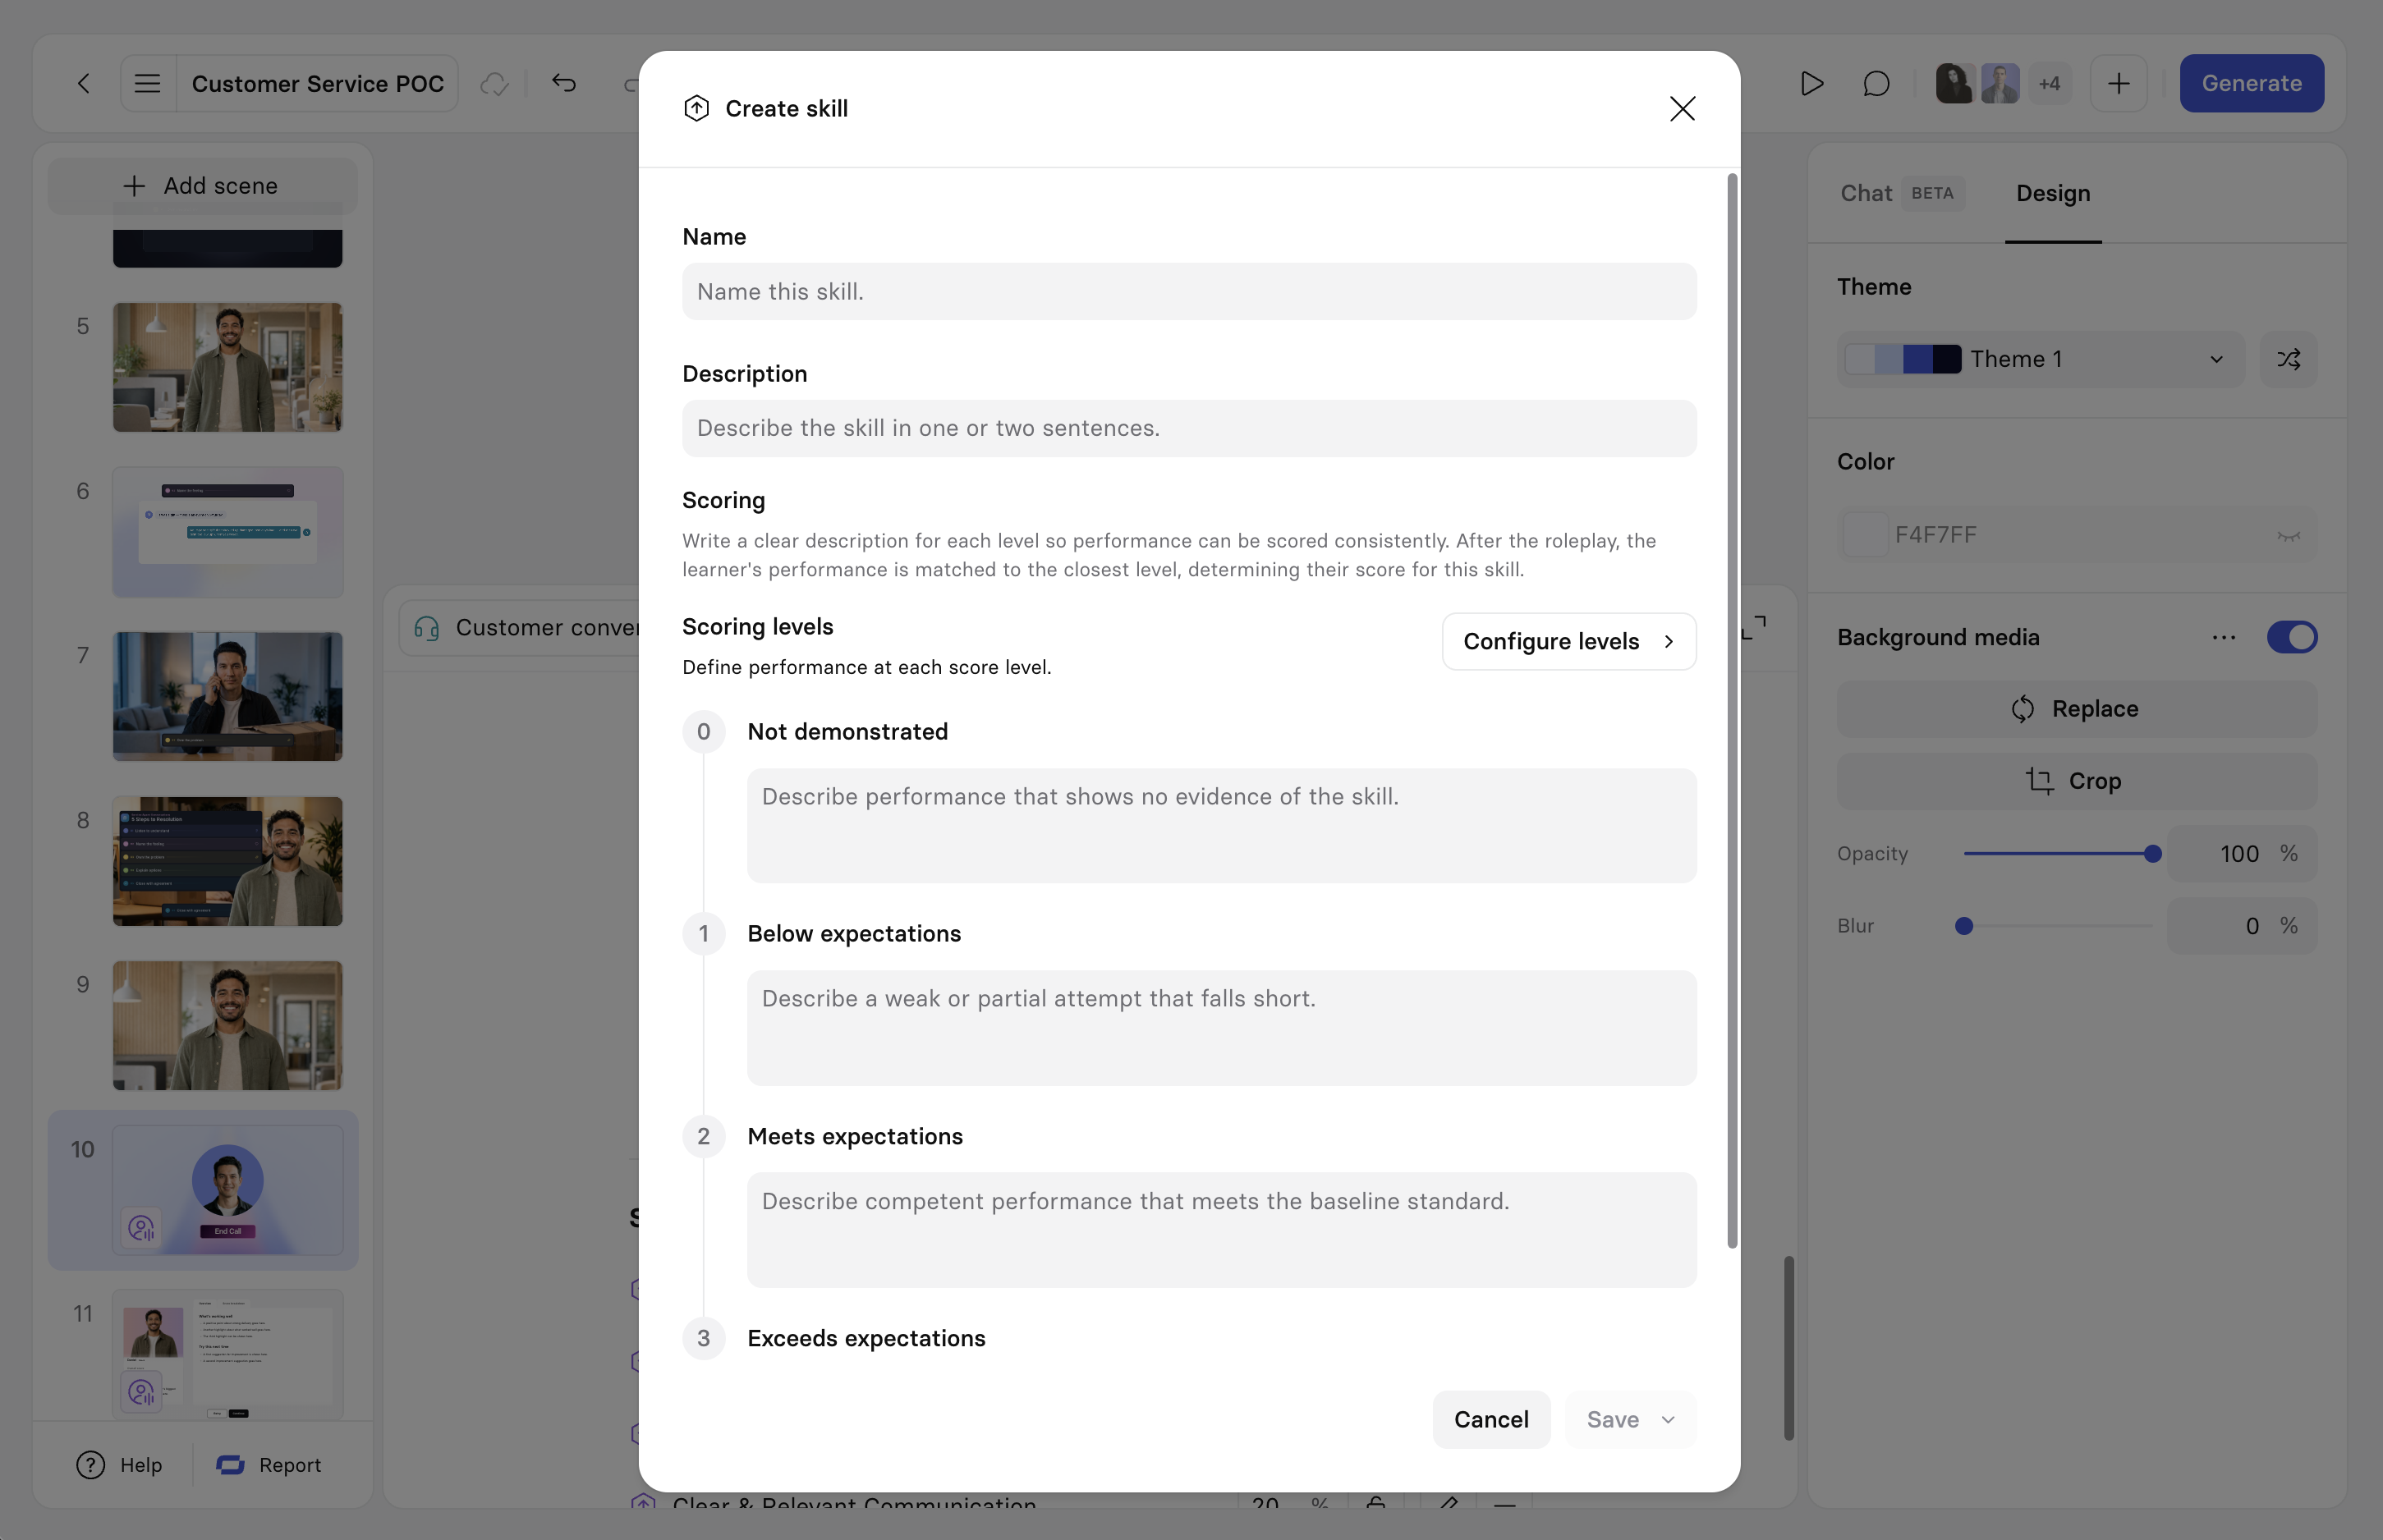
The Create skill modal
Editing a skill
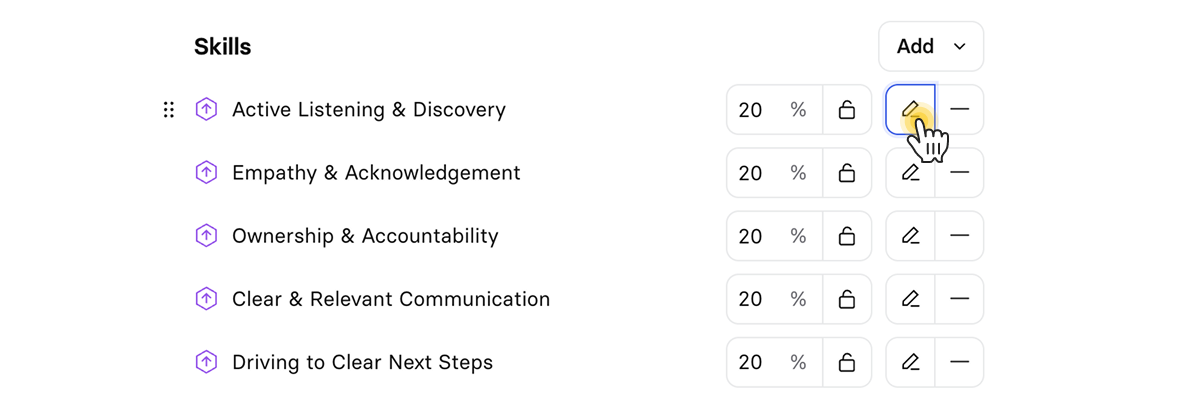
Select the pencil icon on any skill to edit it. What happens next depends on where the skill came from:
-
Stock (Synthesia) skills: you can't edit the original directly.
Select
Copy skillfirst to create your own copy. You're then free to edit the name, description, and scoring levels. The stock skill itself is never changed.
-
Workspace skills: these were already saved to your library, so you can edit them right away.
Select
Edit skillto make adjustments. Editing a Workspace skill only lets you adjust the performance descriptions at each scoring level. You can't rename the skill, change its description, or reconfigure the scoring levels themselves from here.
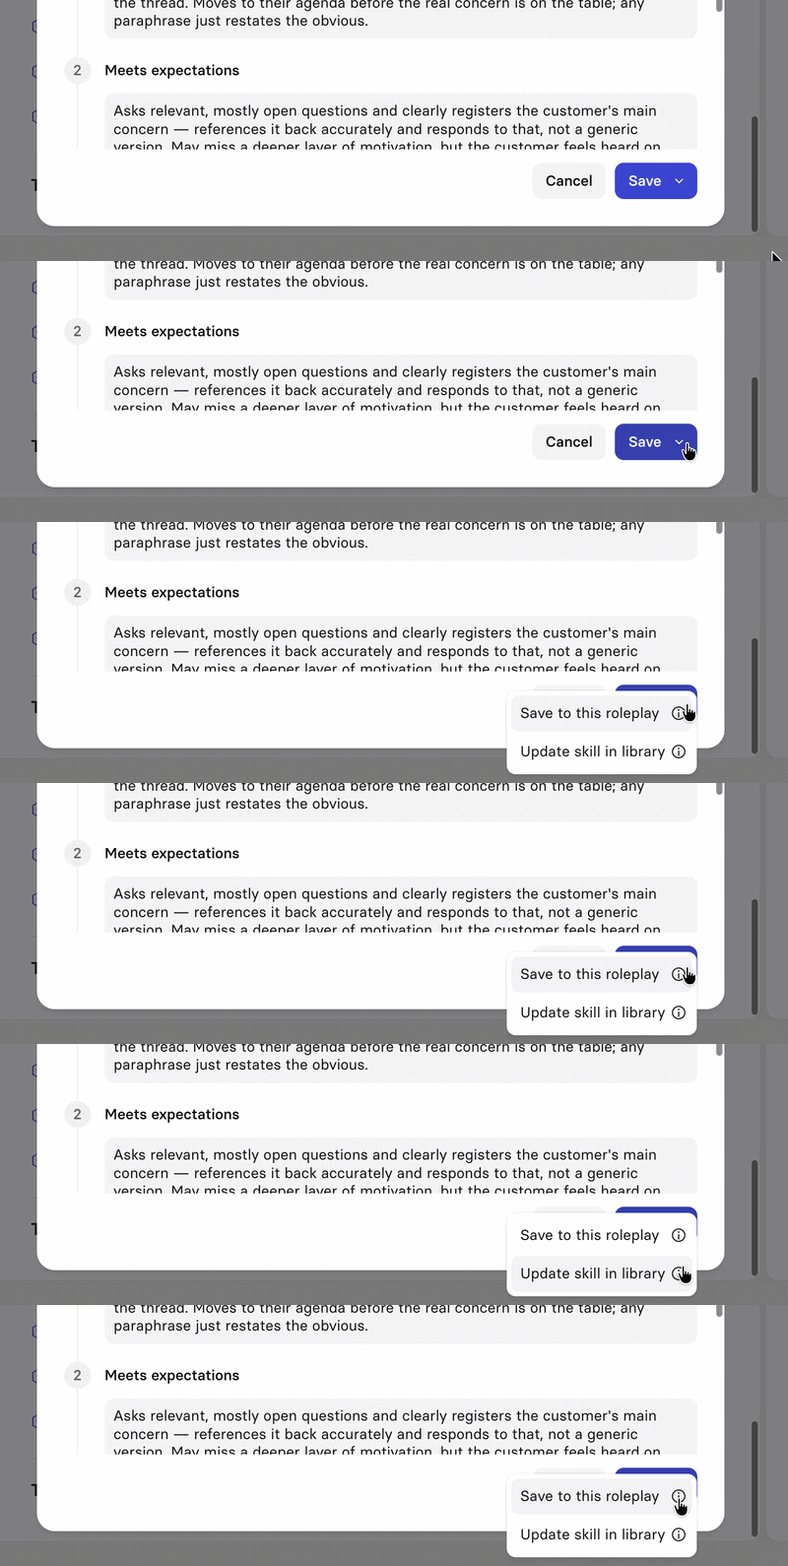
Once you've made your changes, choose whether to save them just for this Roleplay scene, or update the skill in your Workspace library so the change carries over everywhere else it's used.
Scoring
Each skill in a scene has a weight (%) that controls how much it counts toward the overall score. By default, skills are scored and weighted equally. Adjust any skill's weight to reflect what matters most and the others will rebalance automatically to 100. Select the lock icon on a skill to hold its weight steady. Any skill left unlocked will auto-adjust so the total always comes out to 100%.
Removing skills
Select the minus icon on a skill to remove it from the scene.
Time limit
Use the Time limit setting to match how long the conversation would realistically last. For example, if a customer support call typically runs five to seven minutes, set the limit there. This keeps the practice realistic and engaging. Whatever you set, be sure to communicate the time limit to your learners in advance in a Video scene so they know what to expect.
Learn more about configuring Roleplay scenes in our Knowledge Base.
Personalization
Turn on Personalization to let Learners tailor the roleplay to their own context before they start speaking with the Avatar. When a Learner reaches the Roleplay view, the coach asks them a few questions about their context, and they can describe as much or as little detail as they like. Personalization adjusts the persona's job, background, and personality—it doesn't change the core scenario, the success criteria, or the persona's name and appearance, and scoring stays the same whether or not a Learner personalizes.
Feedback configuration
The Results view helps Learners reflect on their performance and see a path to improvement.
The Results view is added automatically alongside the Roleplay view when you add an AI Roleplay activity, and Synthesia handles the scoring details automatically based on the skills and rubric defined in the Roleplay view. You only need to decide two things:
- Pass score
- Whether to allow retries
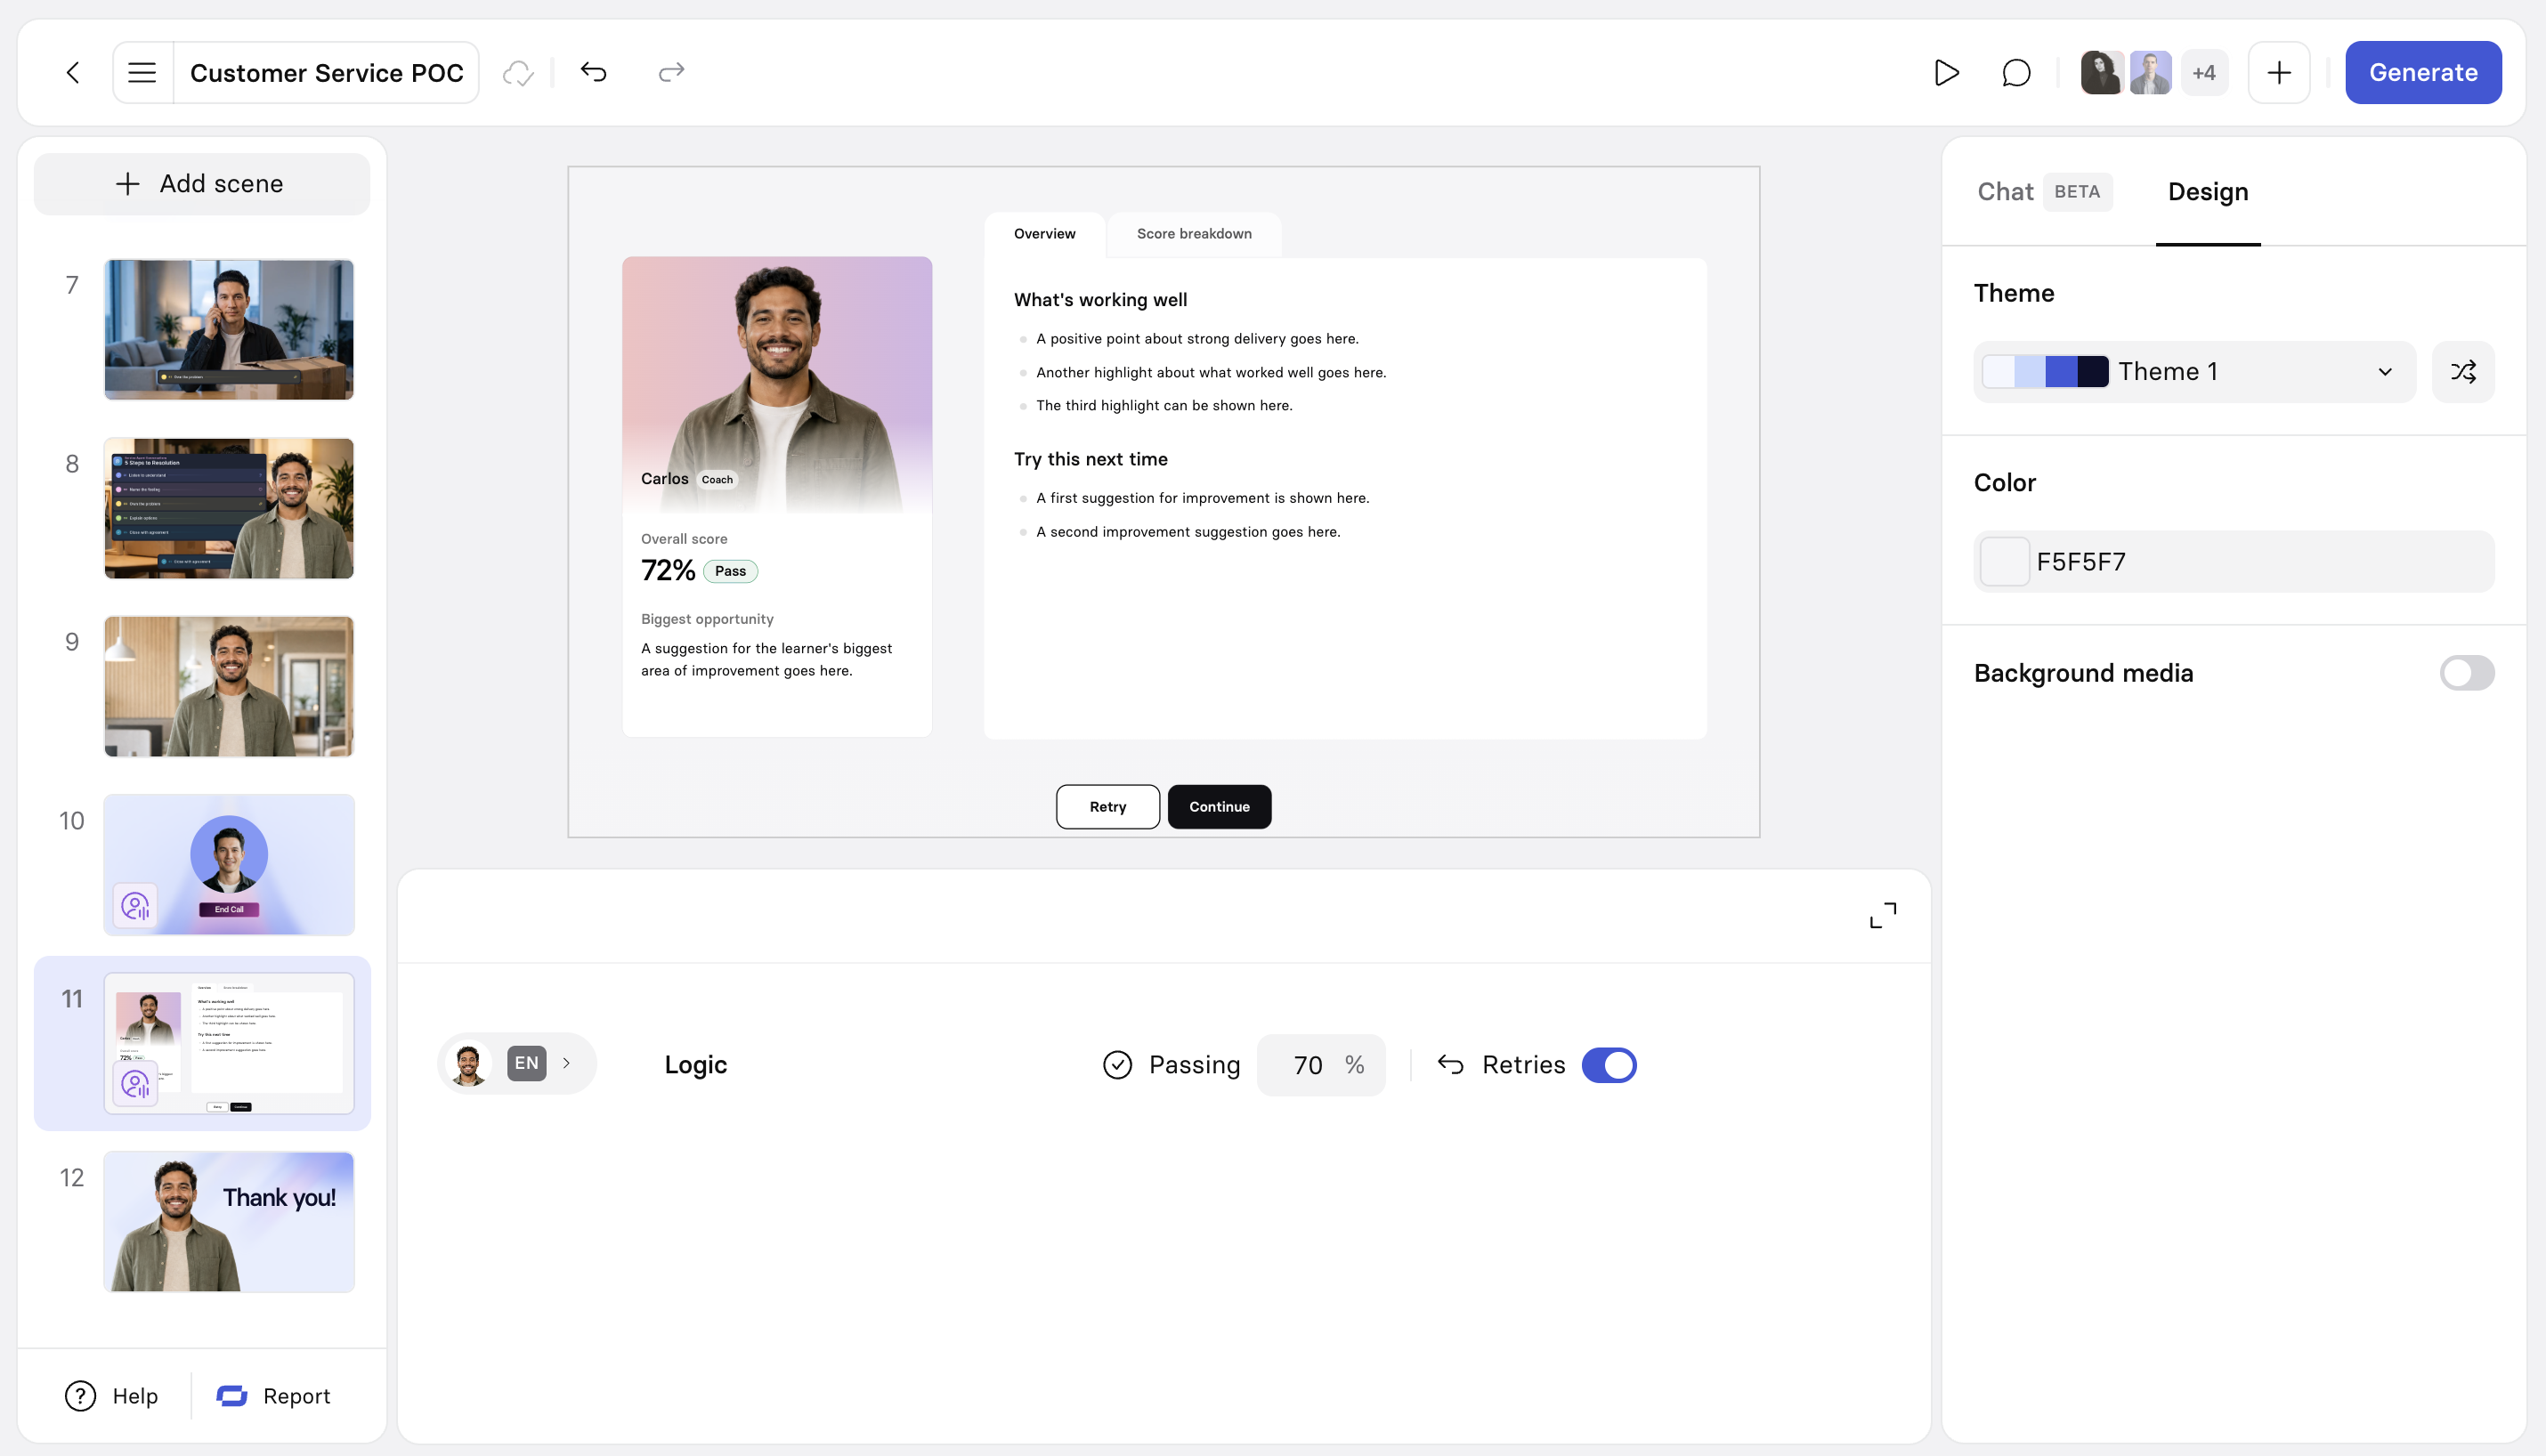
Feedback scene configuration
Pass score
Set the pass score in accordance with your goals for the Session. Generally, we recommend pass scores of 65-70% for practice scenarios and 75-85% for more formal assessments.
Retries
Retries allow your learn to practice and apply their feedback. Whether to allow them depends on your goals for the Session.
Preview, generate, and publish your Roleplay Session
Once your Roleplay Session is configured, three steps remain: preview it, generate it, and publish it to get it in front of your learners.
Before generating, select the Play button in the top-right of the toolbar to preview the Roleplay Session.

Run through it as a learner would and check that the persona is behaving as intended, objections are landing naturally, and that the overall flow feels right. If anything's off, adjust your Instructions or Objections first, as these have the biggest impact on how the conversation unfolds.
When you're satisfied with the experience, select Generate. Synthesia checks your script and scenes for configuration errors and gives you a chance to fix any that come up. If no issues are found, processing starts right away.
Once generated, you have four ways to share your Session:
-
Publish (recommended): Send the Session to the Synthesia Learner Portal, a dedicated space for assigning and tracking Roleplay Sessions at scale.
Learn more about publishing Sessions and managing published Sessions. See the Learner Portal page for the full admin and learner experience once a Session is published there.
-
Share page link: A direct link to interact with the full Session.
-
HTML embed: Add the Session to a webpage or your intranet.
-
SCORM package: Upload to your LMS for completion tracking.
Once a Session is published to the Learner Portal, Enablement or Organization admins can assign it to individual learners or groups, track completion and scores, and manage learners all in one place.
SCORM vs. the Learner Portal
Roleplay Sessions can be delivered a few different ways, but the Learner Portal and LMS via SCORM options are the most common.
Completions in one channel do not appear in the other, even with a matching email address. A learner who completes a Roleplay Session via a SCORM package in an LMS will show correct completion, pass/fail, and score data in the LMS, but that same Session will still show as not completed in the Learner Portal, even if the learner was assigned it there under the identical email address. This holds true both with the Record learner identity SCORM option enabled and with Require SSO enabled. There is currently no identity reconciliation between a SCORM-based attempt and a Learner Portal-based attempt for the same person.
Some underlying results data from SCORM-delivered attempts is visible in Synthesia, but only to workspace members, not through the Learner Portal's Manage experience—unless the learner authenticated while completing the attempt (see Learn app analytics for LMS-delivered attempts below).
For SCORM-based delivery without authentication:
- Enablement Admins and Managers who rely on the Learner Portal for reporting won't see this data unless they're also workspace members
- Learners will only be able to see standard reporting available via your LMS (i.e. completion, pass/fail, score)—they can't look back at the skill breakdown, coaching, or transcript
- There's no way to filter, sort, or group this data by team—Learner Groups don't apply here, since the learner was never assigned or tracked as a Learner Portal user in the first place
| LMS via SCORM | Learner Portal | Synthesia Analytics | |
|---|---|---|---|
| Completion status | ✅ Yes | ✅ Yes | ✅ Yes |
| Overall score (%) | ✅ Yes | ✅ Yes | ✅ Yes |
| Pass/fail | ✅ Yes | ✅ Yes | ✅ Yes |
| Skill-level scoring breakdown | ❌ No | ✅ Yes | ✅ Yes |
| Coaching summary & areas for improvement | ❌ No | ✅ Yes | ✅ Yes |
| Delivery metrics (talk ratio, filler words, etc.) | ❌ No | ✅ Yes | ✅ Yes |
| Attempt history / retries over time | ❌ No | ✅ Yes | ✅ Yes |
| Transcript access | ❌ No | ✅ Yes | ✅ Yes |
| Analytics dashboards (Results & Engagement tabs) | ❌ No | ✅ Both | 🟡 Results only |
| Raw data CSV export | ❌ No | ✅ Yes | ✅ Yes |
| Assignment & Learner Group management | ❌ No | ✅ Yes | ❌ No |
| Learner access to results, including skill breakdown, coaching summary, attempt history, and transcript | ❌ No | ✅ Yes | ❌ No |
| Who can access available analytics |
|
|
|
Authenticated LMS or share-page attempts are an exception to this table.
Learn app analytics for LMS-delivered attempts
Available on Enterprise plans.
If a learner signs in with their Synthesia credentials (email/password or SSO) while completing a Roleplay Session delivered via SCORM or an authenticated share page link, that attempt is recorded in Learn app analytics, so Enablement Admins and managers can see it there alongside portal activity—see Analytics on the Manage page.
Signing in requires the learner to already have a Learner Portal profile and an assigned seat. If either is missing, sign-in is blocked. Profiles aren't created automatically on SSO sign-in, so provision learners in the Learner Portal before rolling this out through an LMS.
Attempts recorded this way don't appear in the learner's own My progress, since that view relies on an explicit Session assignment. Enablement Admins and managers still see them in analytics.
An open share page link with no sign-in required records nothing in Learn app analytics.
Reporting an issue
If something goes wrong during a roleplay—the AI persona breaks character, misunderstands the scenario, or otherwise behaves unexpectedly—select the bug icon in the bottom-right of the player controls to report it.
This opens a form in a new tab where you can describe what happened. It's available both to learners completing an assigned Roleplay Session and to creators previewing their own Roleplay scene before publishing.
What's next
Learn more about the Learner Portal, the Enablement Admin role, and assigning and tracking Sessions.
Updated 2 days ago