

Script box
Add a your script to the script box to transform your text to speech and adjust the pronunciation, pacing, and emphasis of the speech as needed.
Create your script by either typing or copying and pasting text into the script box.
The maximum duration of the script for each scene is 5 minutes.
Your script can be in any of the languages that Synthesia supports. You can use multiple languages in a single scene and/or video by applying different voices to paragraphs of your script in the script box—each paragraph (hard return) can have its own voice, allowing you to assign different speakers, voices, and languages to each paragraph if needed. Synthesia automatically selects a voice that matches the detected language of your script, but you can always change the voice from the voice picker.
Once you've added your script, you can control the speaker and the voice that will be used by selecting the speaker pill on the left side of the script.
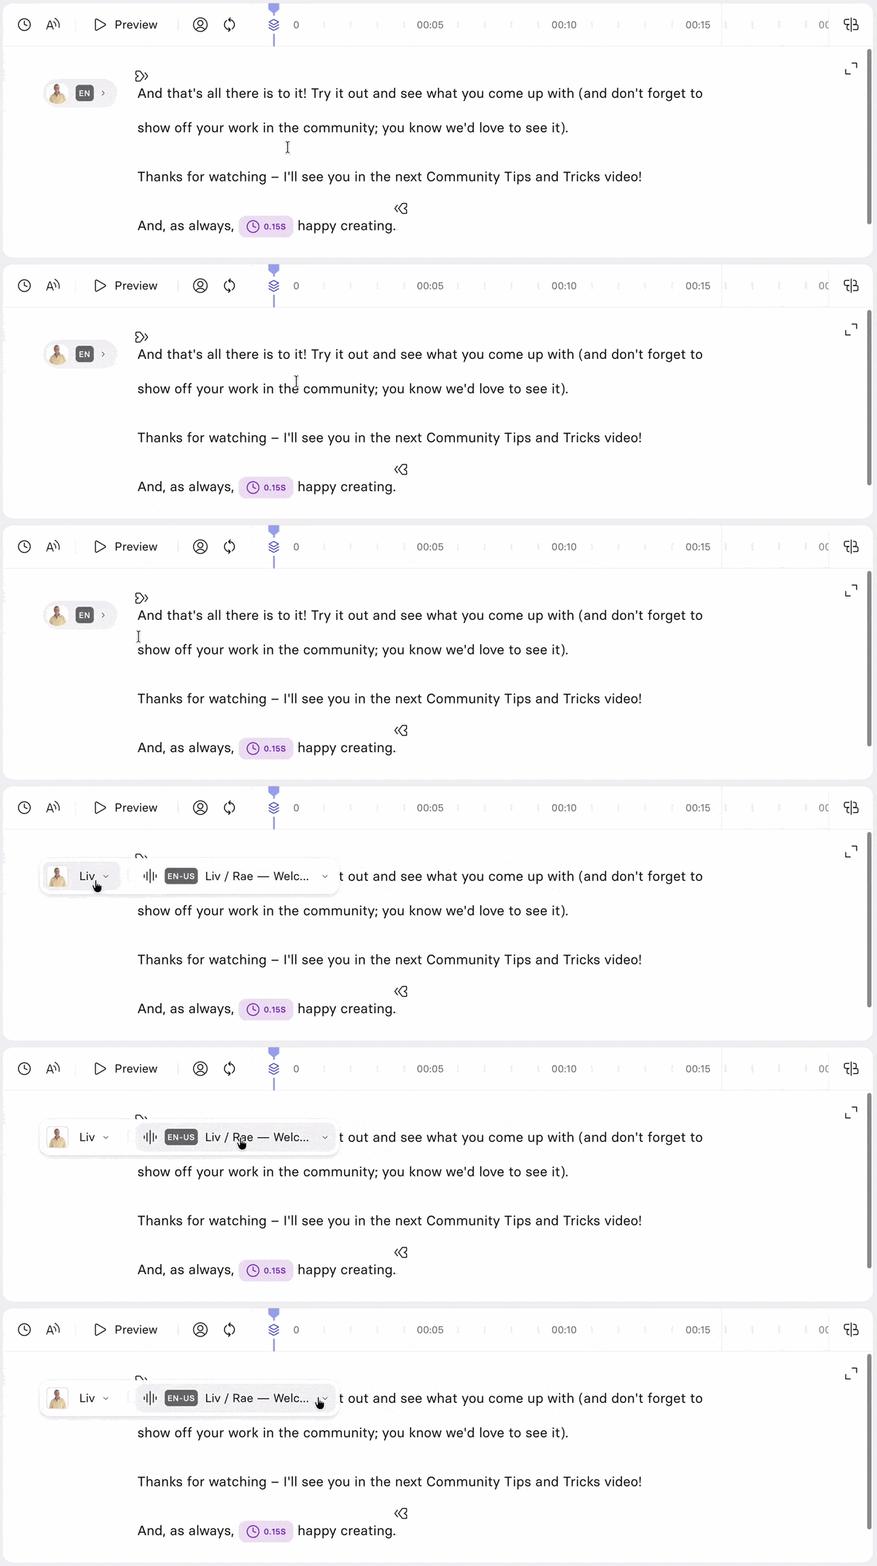
When you create line breaks by pressing Enter on your keyboard, you create new paragraphs. Each paragraph has its own speaker pill, so you can adjust the speaker, voice, voice speed, and regenerate speech for it independently of the others. This allows you to create dialogue (by setting one or more different speakers throughout the script) and otherwise fine tune each paragraph as needed.
Note:If you're looking to edit the transcript for a dubbed video, check out the dubbing page.
Speaker
If you have more than one speaker or avatar in your scene, select the left side of the speaker pill to assign the desired speaker to that line:
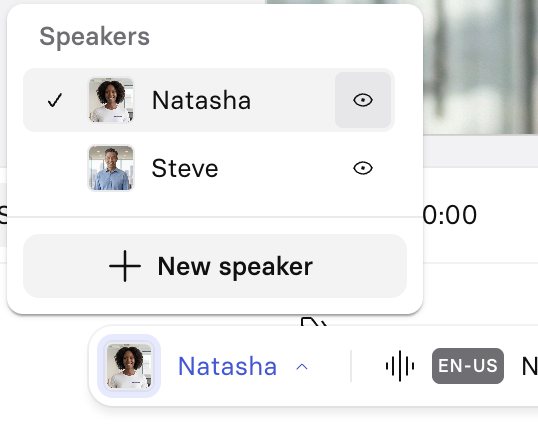
In this modal:
- Selecting the eye icon toggles the visibility of the avatar in the scene. Disable it if you just want the voiceover.
- Selecting
+ New speakerallows you to pick a new avatar to use as the speaker for that paragraph (and adds it to your scene).
Voice settings
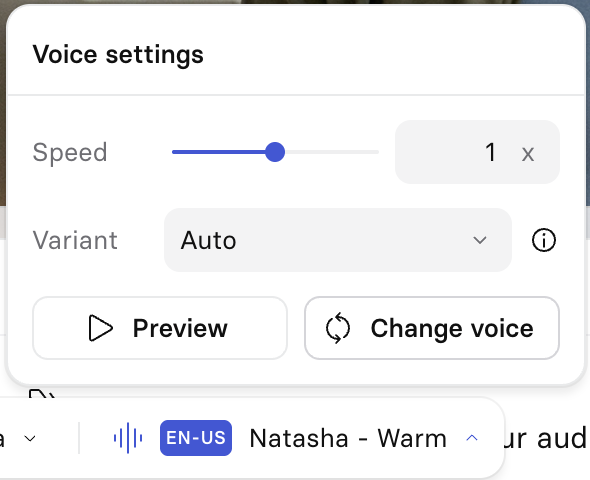
From the Voice settings panel you can preview the current voice, adjust speed and Variant, or select Change voice to open the voice picker and choose a different voice or language.
Select a different voice for a section of the script
Select Change voice to open the voice picker. By default, it's filtered to the language and accent currently in use:
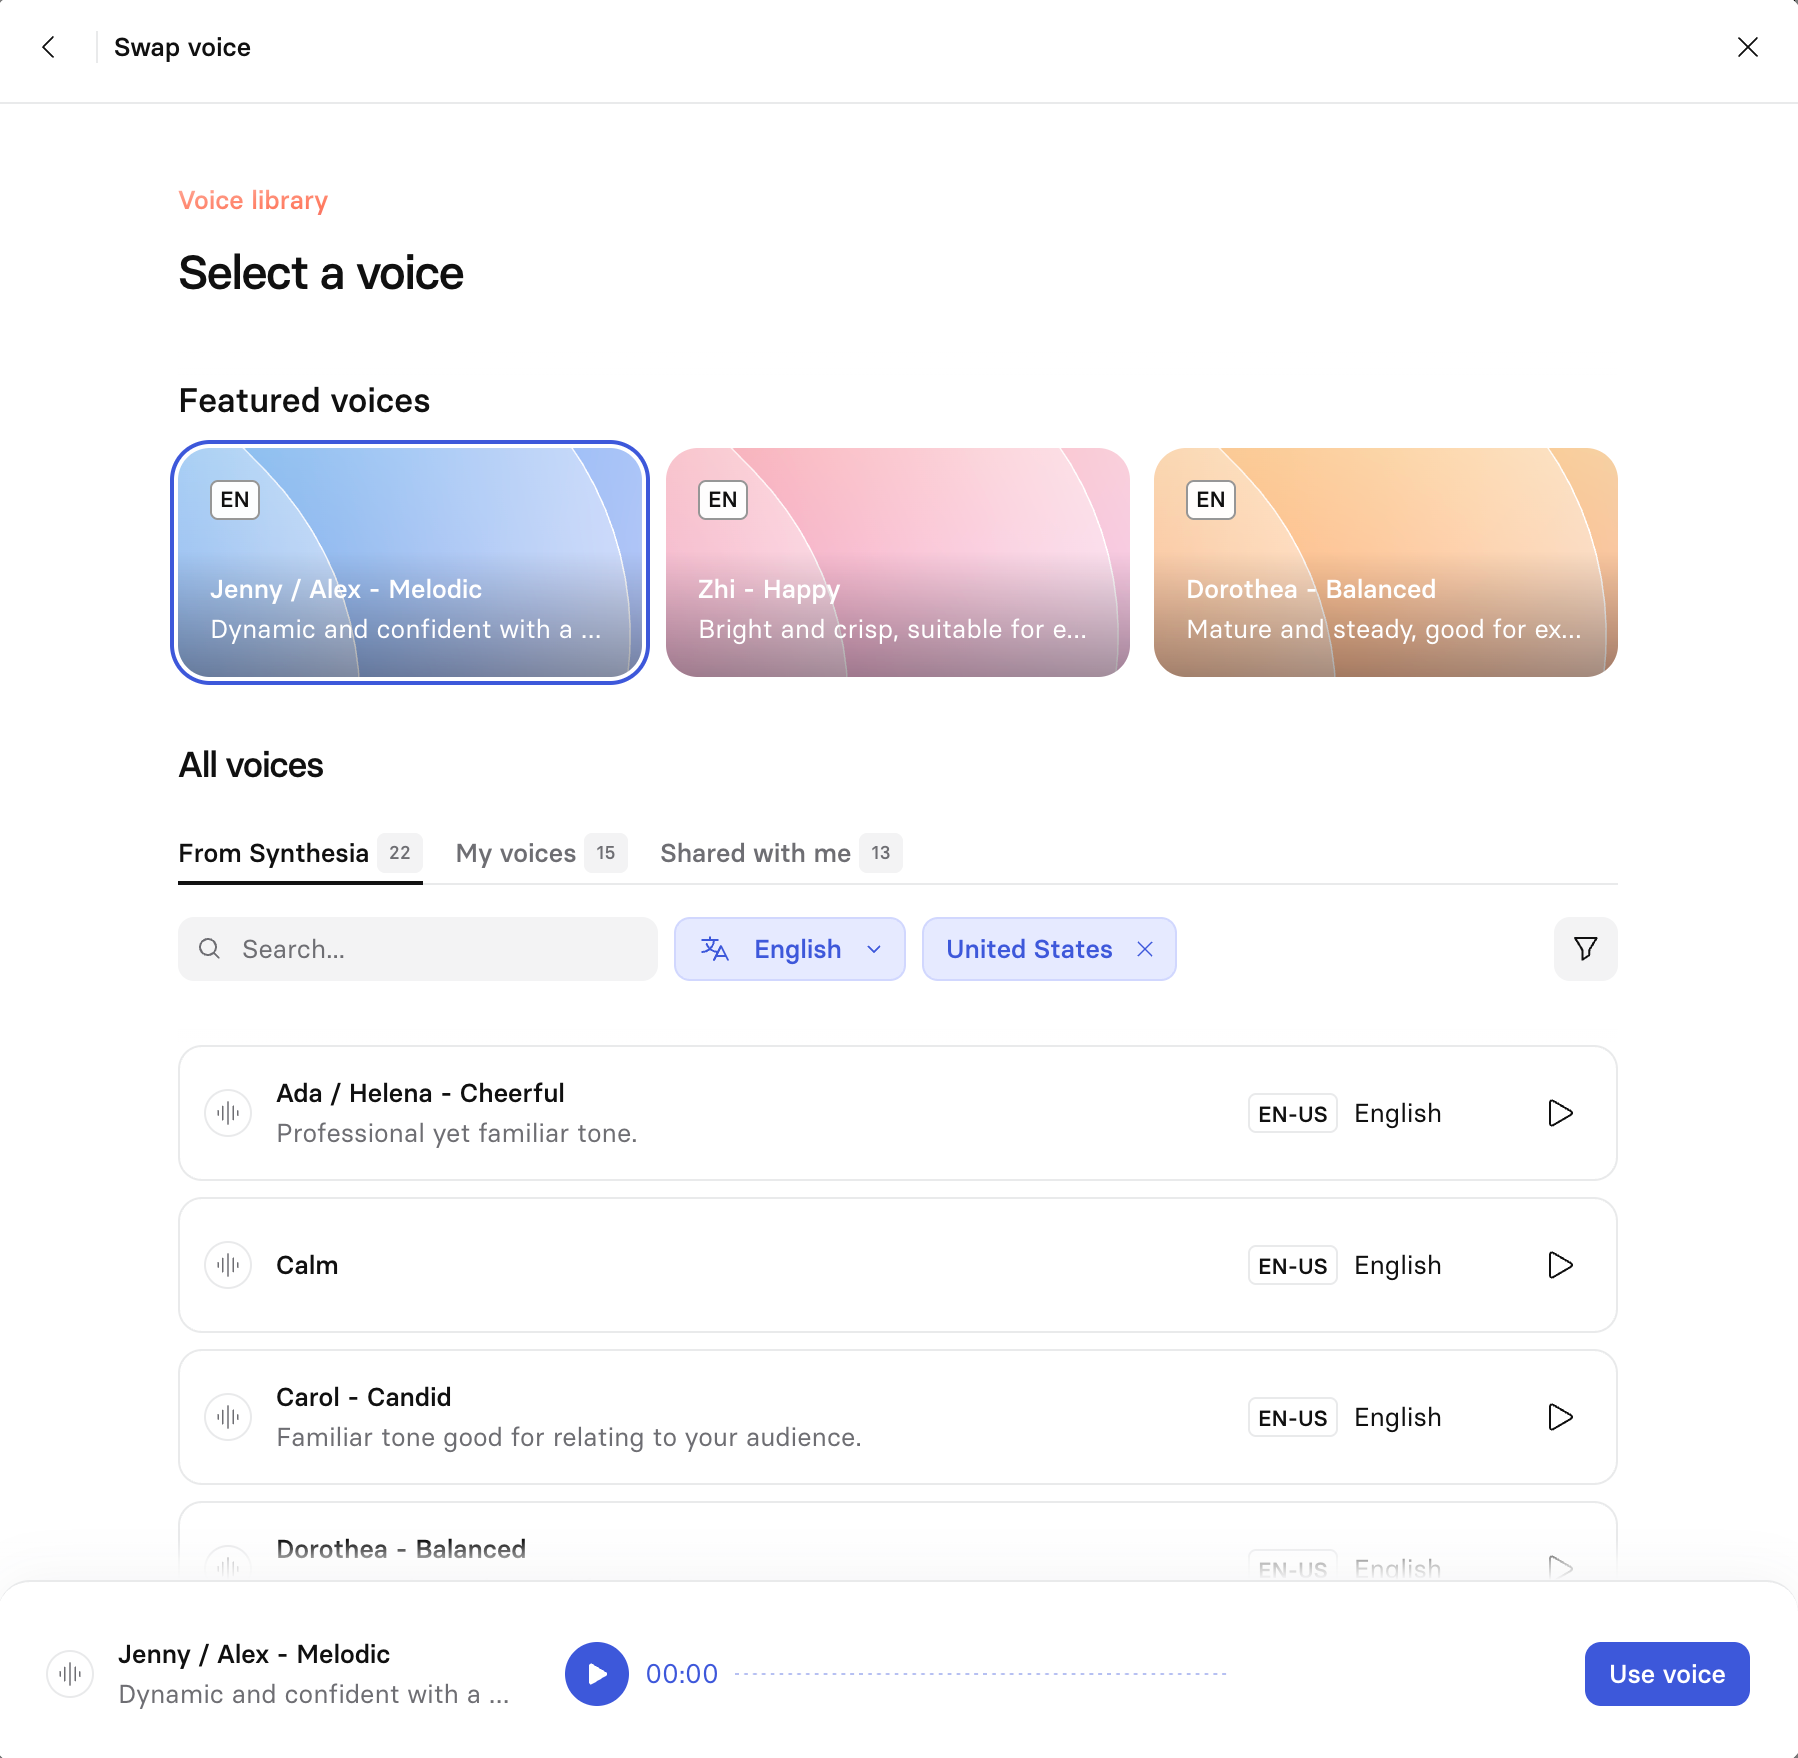
- Browse
Featured voices—Synthesia's recommended picks—at the top of the picker, or go toAll voicesand choose a tab:-
From Synthesiafor Synthesia's built-in voice catalog My voicesfor your own voice clones (available if you've created one using Synthesia's voice cloning feature or a personal avatar)Shared with mefor voices a teammate has shared with you.
-
- Optionally, search for a voice by name, filter the list by language or accent, or use the sort control to reorder it. To assign a different language to this paragraph, filter by that language and pick a voice from the results—the languages available are the same ones supported elsewhere in Synthesia.
- Preview a voice by selecting the play button on its row, or select the row itself to load it into the preview bar at the bottom of the picker.
- Select the
+button on a voice's row, or selectSwap voicein the preview bar, to apply that voice.
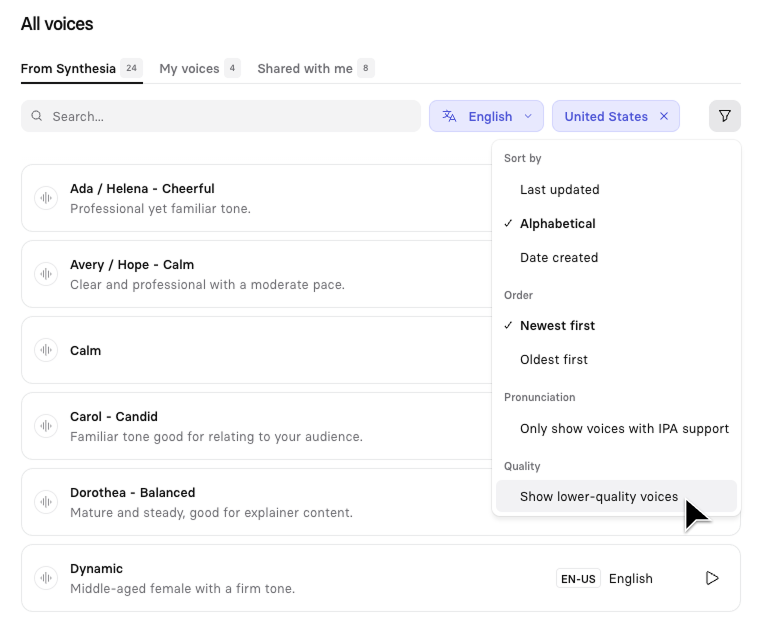
Note:If a voice you expect to see is missing, open the filter options and turn off the
Qualitytoggle—when it's on, it hides voices Synthesia doesn't recommend:
Change the voice variant
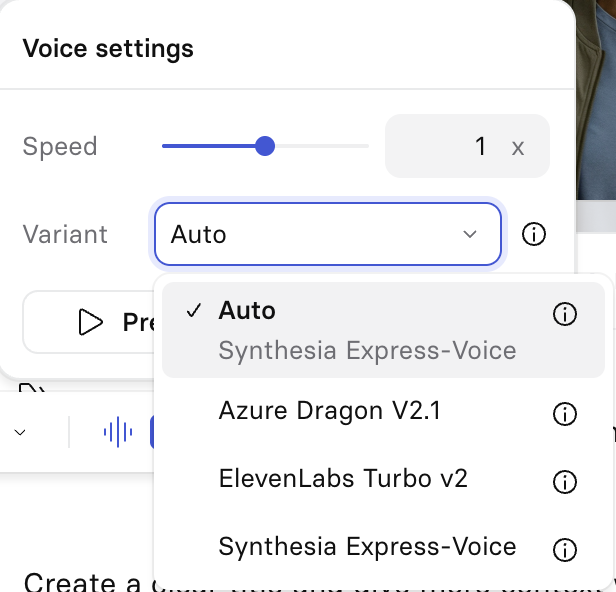
A voice can have several variants—different styles of the same voice, each powered by different underlying speech technology. Every voice defaults to the Auto variant, which always uses the latest and highest-quality technology available for that voice. Most of the time you won't need to change this.
If you're sensitive to small changes in how a voice sounds, you can lock a voice to a specific variant:
- Select the voice, then open
Voice settings. - Open the
Variantdropdown. - Select a variant from the list. Each option has an info (ⓘ) icon with details about that variant.
Note:An avatar's voice uses a single variant for the whole video—you can't switch variants between scenes.
Remastered voices and pronunciation controls
Remastered voices use the Synthesia Express-Voice variant by default and unlock pronunciation controls. They may sound slightly different from the previous version.
If you notice that a voice you've been using has changed, you can return to the original sound: open the Variant dropdown and select ElevenLabs Turbo v2. Note that this disables pronunciation controls for that voice. Because remastered voices use Express-Voice, previewing them can take a few seconds longer than the older variant did.
Voice speed controls
Use voice speed controls to fine-tune how fast a voice speaks, so you can match the pacing to your content and audience. You can apply speed changes per paragraph in your script, or across the whole video with one setting. This gives you flexibility to slow down dense, instructional content while keeping other parts of the video more dynamic. Voice speed controls for specific sections of a single sentence or paragraph aren't available.
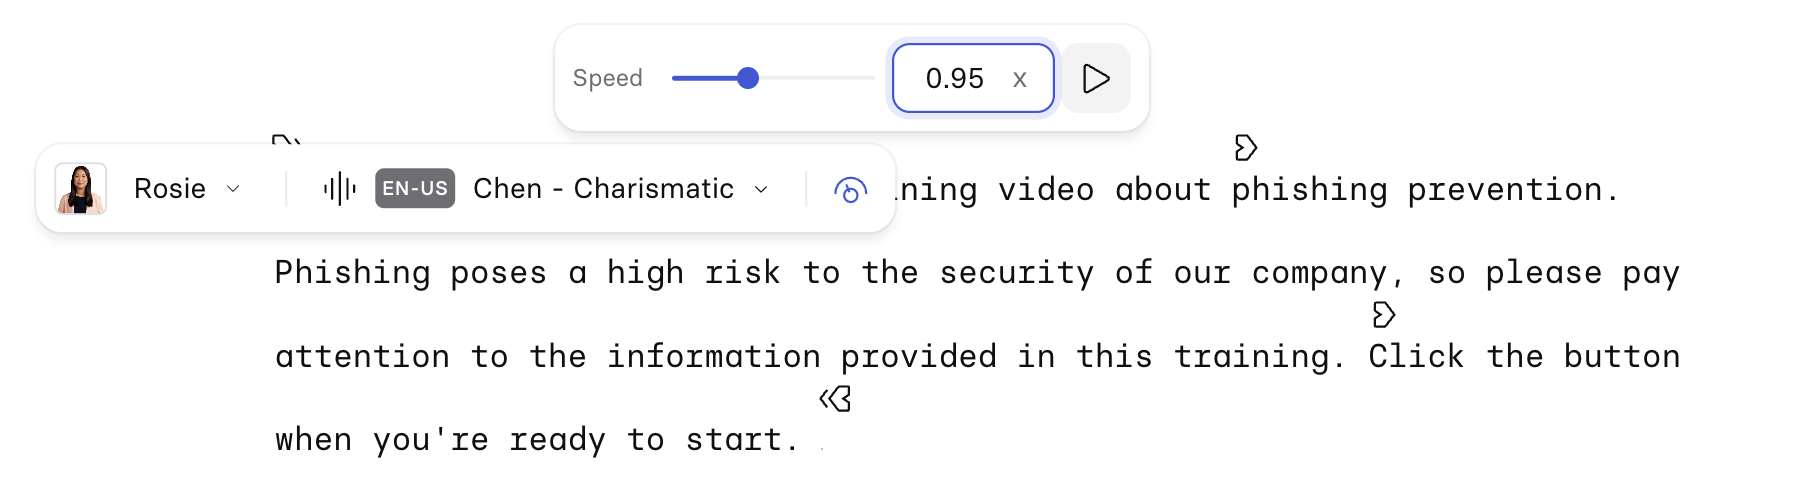
To adjust the voice speed for a paragraph:
- Hover over the speaker pill on the left side of that paragraph.
- Select the speed icon on the right side of the speaker pill.
- Use the slider or directly input your desired voice speed. The numeric values (for example, 1.2×) are approximate guides for speed, not exact percentages of the default speed.
- Minimum speed: 0.8× (slower, more deliberate delivery)
- Maximum speed: 1.2× (faster, more energetic delivery)
To standardize the voice speed across the whole video:
Select the Change all button in the toast notification at the bottom of the screen after adjusting the voice speed for a specific paragraph.

We recommend previewing your video after adjusting the speed to ensure it still sounds natural and remains easy to follow.
Speech regeneration
Use speech regeneration to get an alternative take of the same script with the same voice, without changing your script, settings, or visuals. When you regenerate speech for a line, paragraph, or scene, Synthesia keeps your script, language, and voice exactly the same while producing a new audio take with subtle differences in timing, intonation, rhythm, and emphasis on certain words.
To regenerate the entire scene, select the Regenerate (arrow) icon to the right of the Preview scene button, then choose whether to regenerate the voice alone or both the voice and avatar:
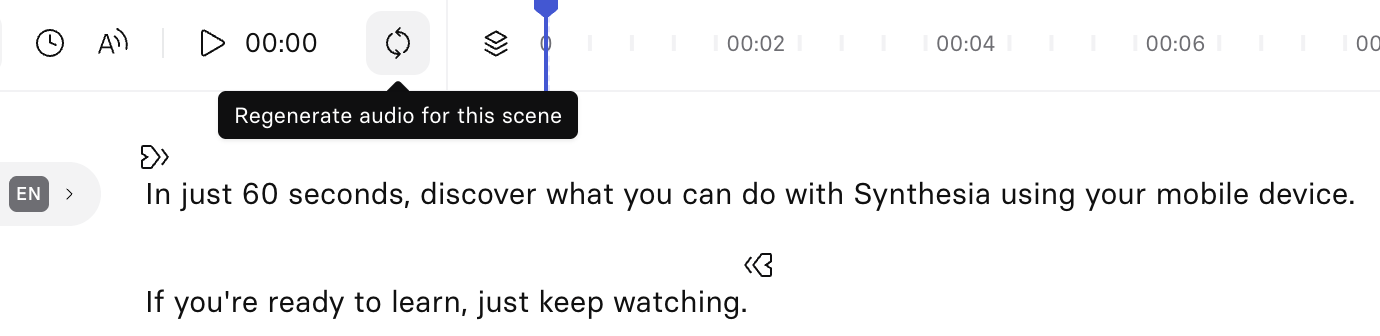
To regenerate audio for a paragraph, either:
- Select a paragraph and right-click to access the context menu, then select the
Regenerateoption. - Select a paragraph and select the
Regenerate(arrow) icon to the right of thePreviewbutton:
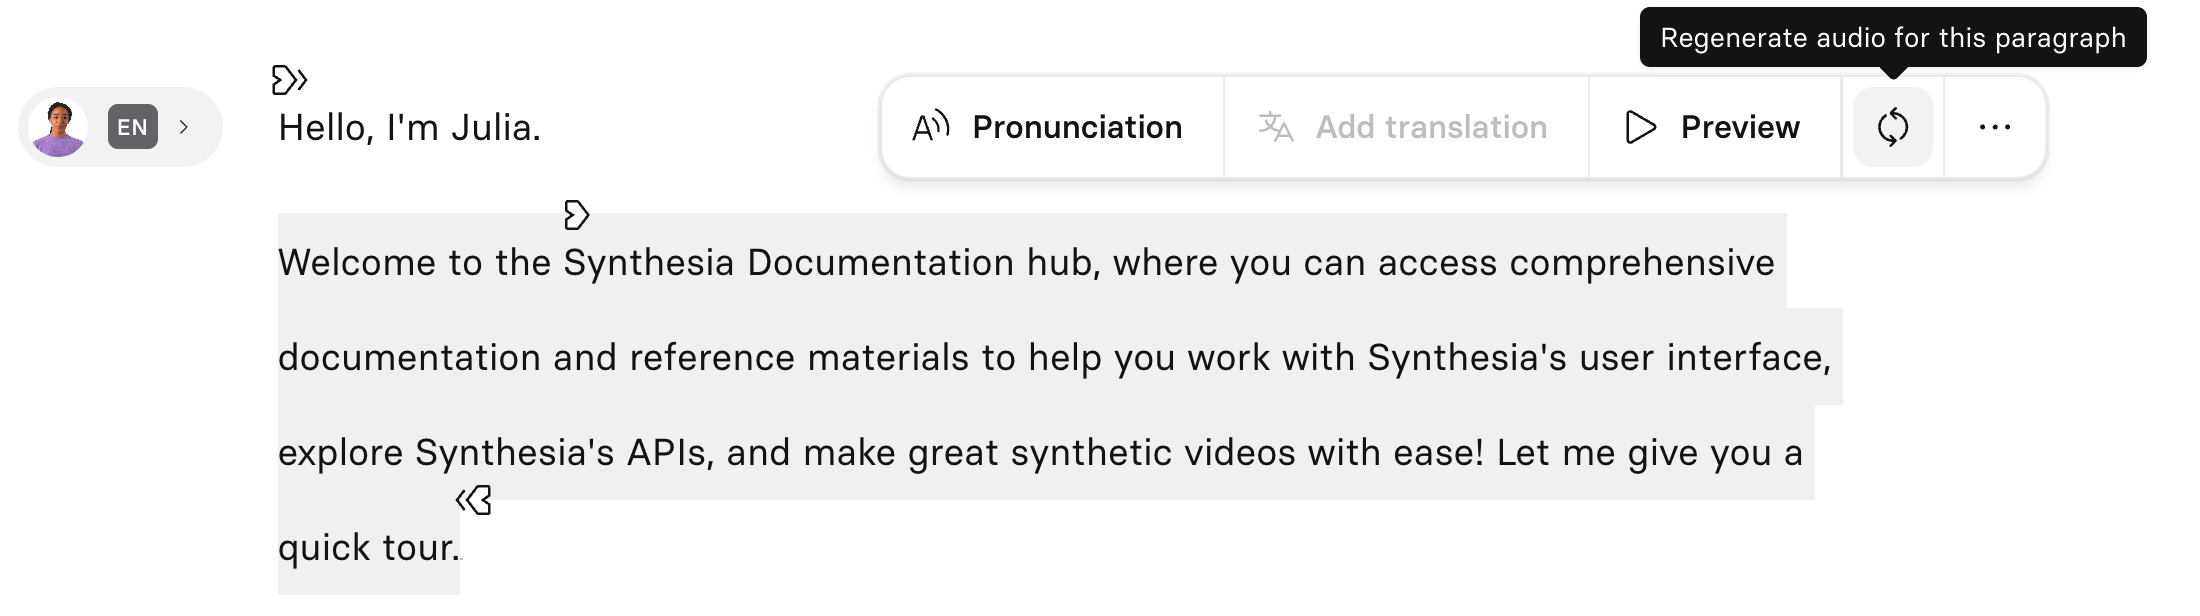
You can regenerate multiple times and keep the take that works best. If you change your mind, you can revert back to a previous speech version with the undo button.
This is especially helpful when a word sounds slightly off but doesn't need a pronunciation fix, when the delivery feels too flat in one spot, or when you want a version that better matches the energy of a specific scene.
Synthesia's AI voices are non-deterministic, which means the same script and voice can sound slightly different each time you generate audio. Speech regeneration lets you take advantage of that to quickly find a version that sounds more natural for your use case.
Additional script actions
Right-click anywhere in the script box to display all script actions available. Highlighting text before right-clicking specifies the script text that the actions are applied to:
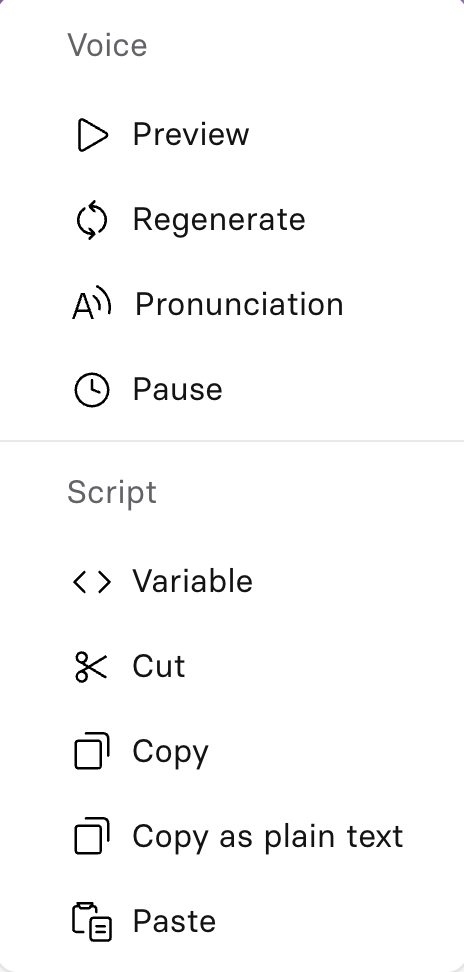
Highlighting a portion of your script also reveals a menu above it, with quick access to several script actions:

Edit with AIPronunciationAdd translationPreview- The regenerate icon—see Speech regeneration.
- The
•••(more) icon—opens the same options available from right-clicking in the script box.
See the sections below for what each of these does.
Edit with AI
Use Edit with AI to rewrite, lengthen, shorten, adjust the tone of, summarize, or translate part of your script, without leaving the script box.
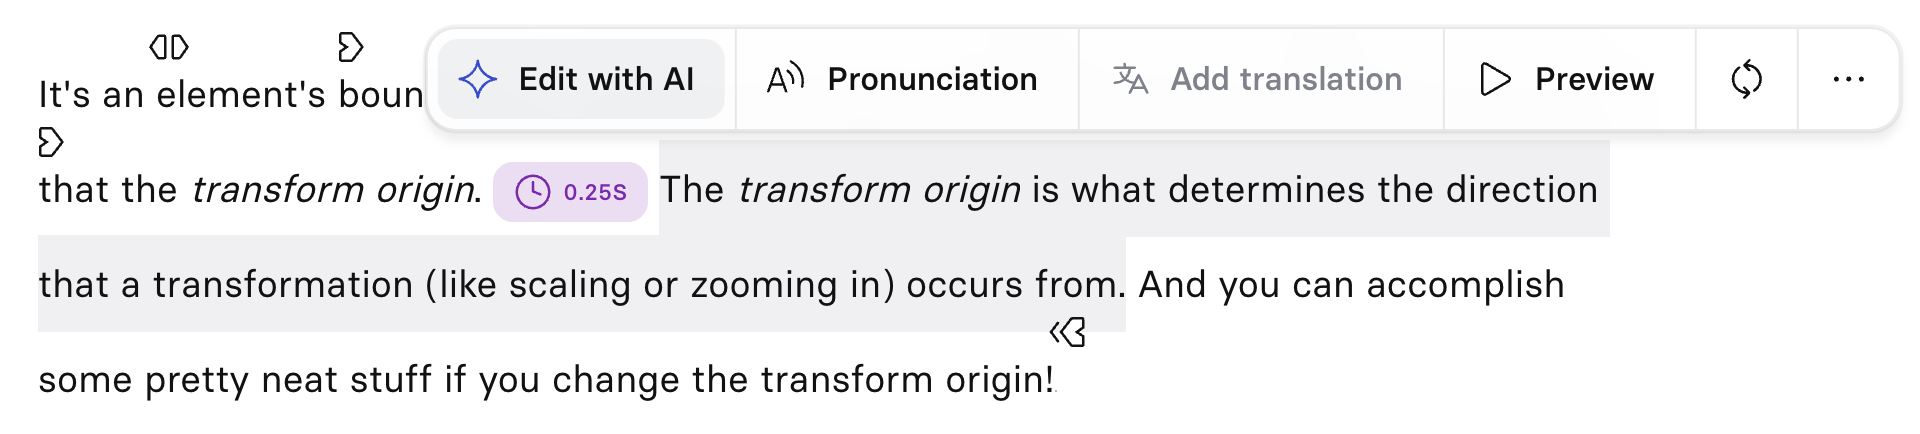
To edit part of your script with AI:
- Highlight the portion of the script you want to edit.
- Select
Edit with AIfrom the menu that appears above the highlighted text. This opens the AI Video Assistant panel. - Either:
- Type your own instruction instead—for example, ask it to translate the highlighted text into another language, or describe any other edit you want.
- Select one of the preset options:
Rewrite,Make it longer,Make it shorter,Change tone, orSummarize.
- Select the arrow button to submit and preview the result.
- If you're happy with it, select
Replaceto swap in the new text. Otherwise, refine your instruction and try again.
Pause
Use pauses to pause the script for a defined period of time. Use them to adjust the pacing of your script and the emotional tone of the voice being used.
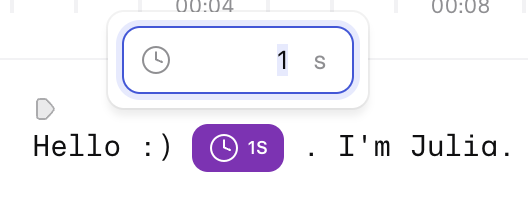
To add a pause to your script:
-
Position your text cursor where you want to add a pause, and either:
-
Right-click and select the
Pauseoption from the context menu. -
Select the
Pausebutton at the top-left of the script box.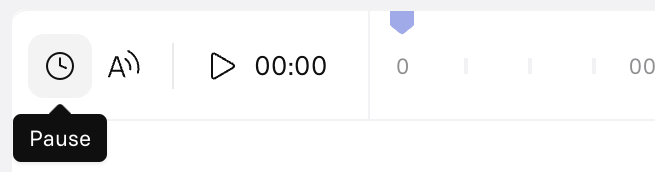
-
-
Adjust the pause duration to a value between 0.1s and 99s (the default is 1 second).
Pauses can be dragged and dropped to change their position within the script. You can also highlight a pause to copy and paste elsewhere in your script.
Pronunciation
Use the pronunciation feature to adjust the pronunciation of words and phrases in the script—useful for brand names, technical terms, and acronyms.
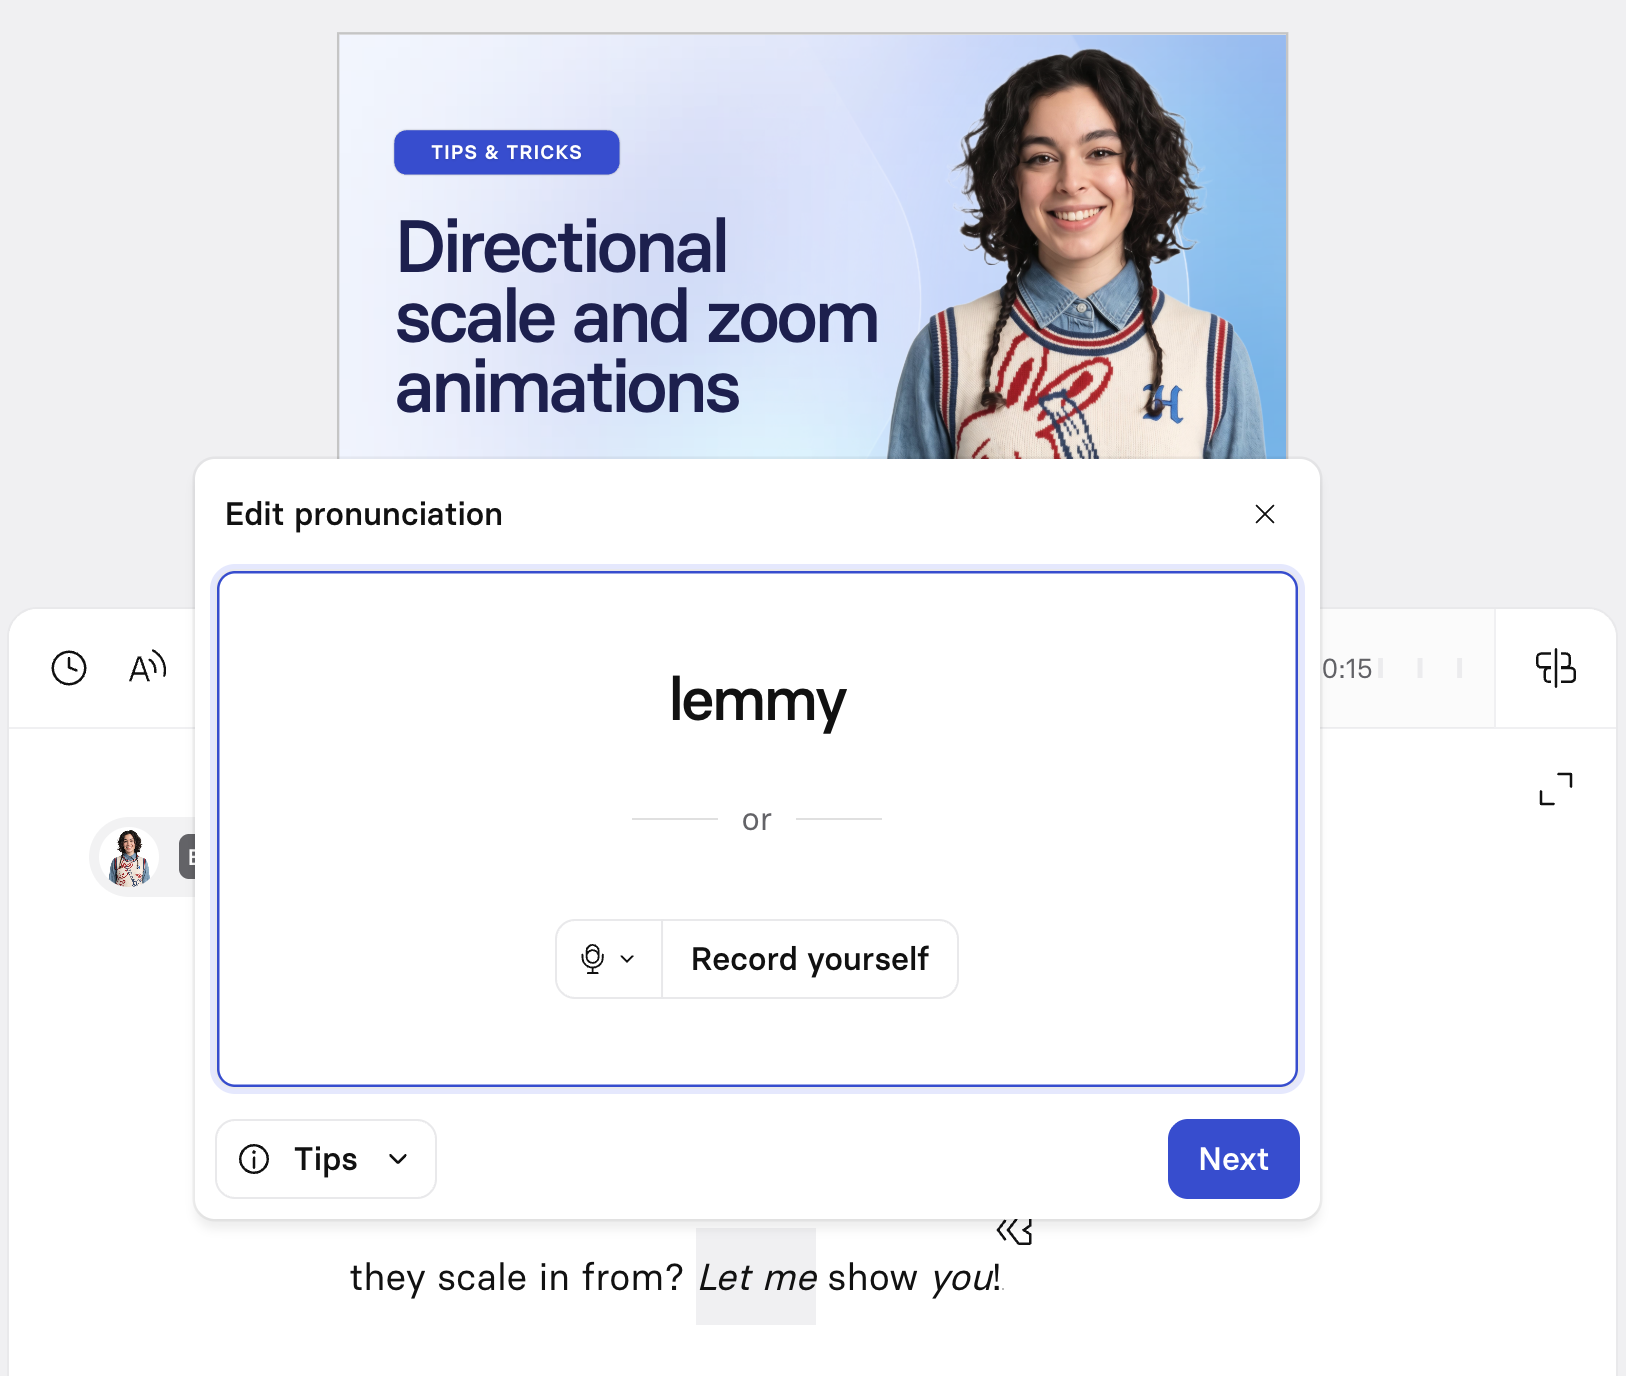
To modify the pronunciation of a word or phrase:
-
Highlight the text you'd like to adjust the pronunciation for, and either:
- Select
Pronunciationin the modal that appears above the highlighted text. - Right-click and select the
Pronunciationoption from the context menu. - Select
Pronunciationat the top-left of the script box.
- Select
-
Choose how to set the pronunciation:
- Type Pronunciation: Enter a phonetic spelling that sounds right when read naturally (for example, "sin-THEE-zhuh" for Synthesia).
- Select
Record yourselfand say the word aloud—Synthesia captures your pronunciation and uses it as the reference.
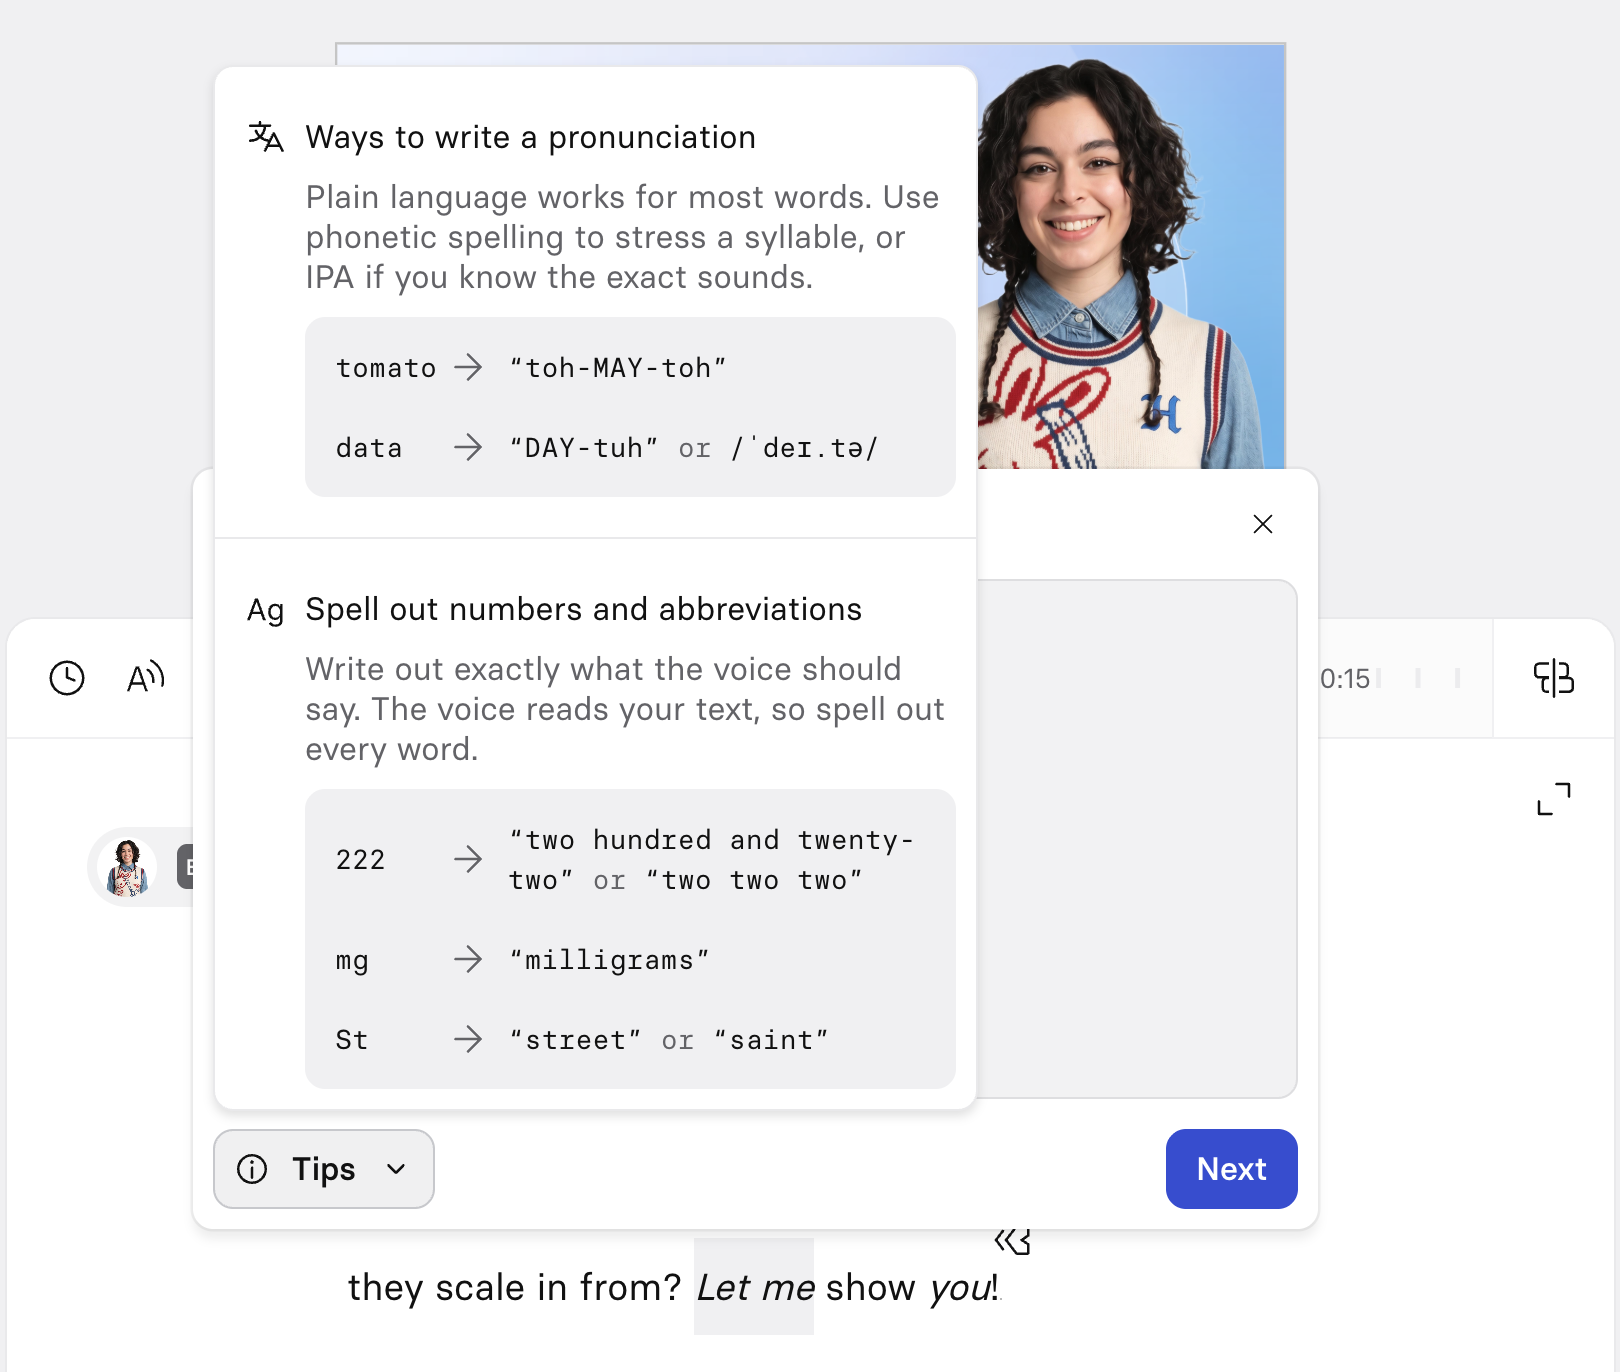
Tips for defining a pronunciationSelect
Tipsfor guidance:-
Plain language works for most words—use phonetic spelling to stress a syllable, or IPA if you know the exact sounds (for example, "tomato" as "toh-MAY-toh", or "data" as "DAY-tuh").
-
For numbers, symbols, and abbreviations, spell out exactly what the voice should say, since it reads your text literally (for example, "222" as "two hundred and twenty-two", "mg" as "milligrams", or "St" as "street" or "saint").
-
Select
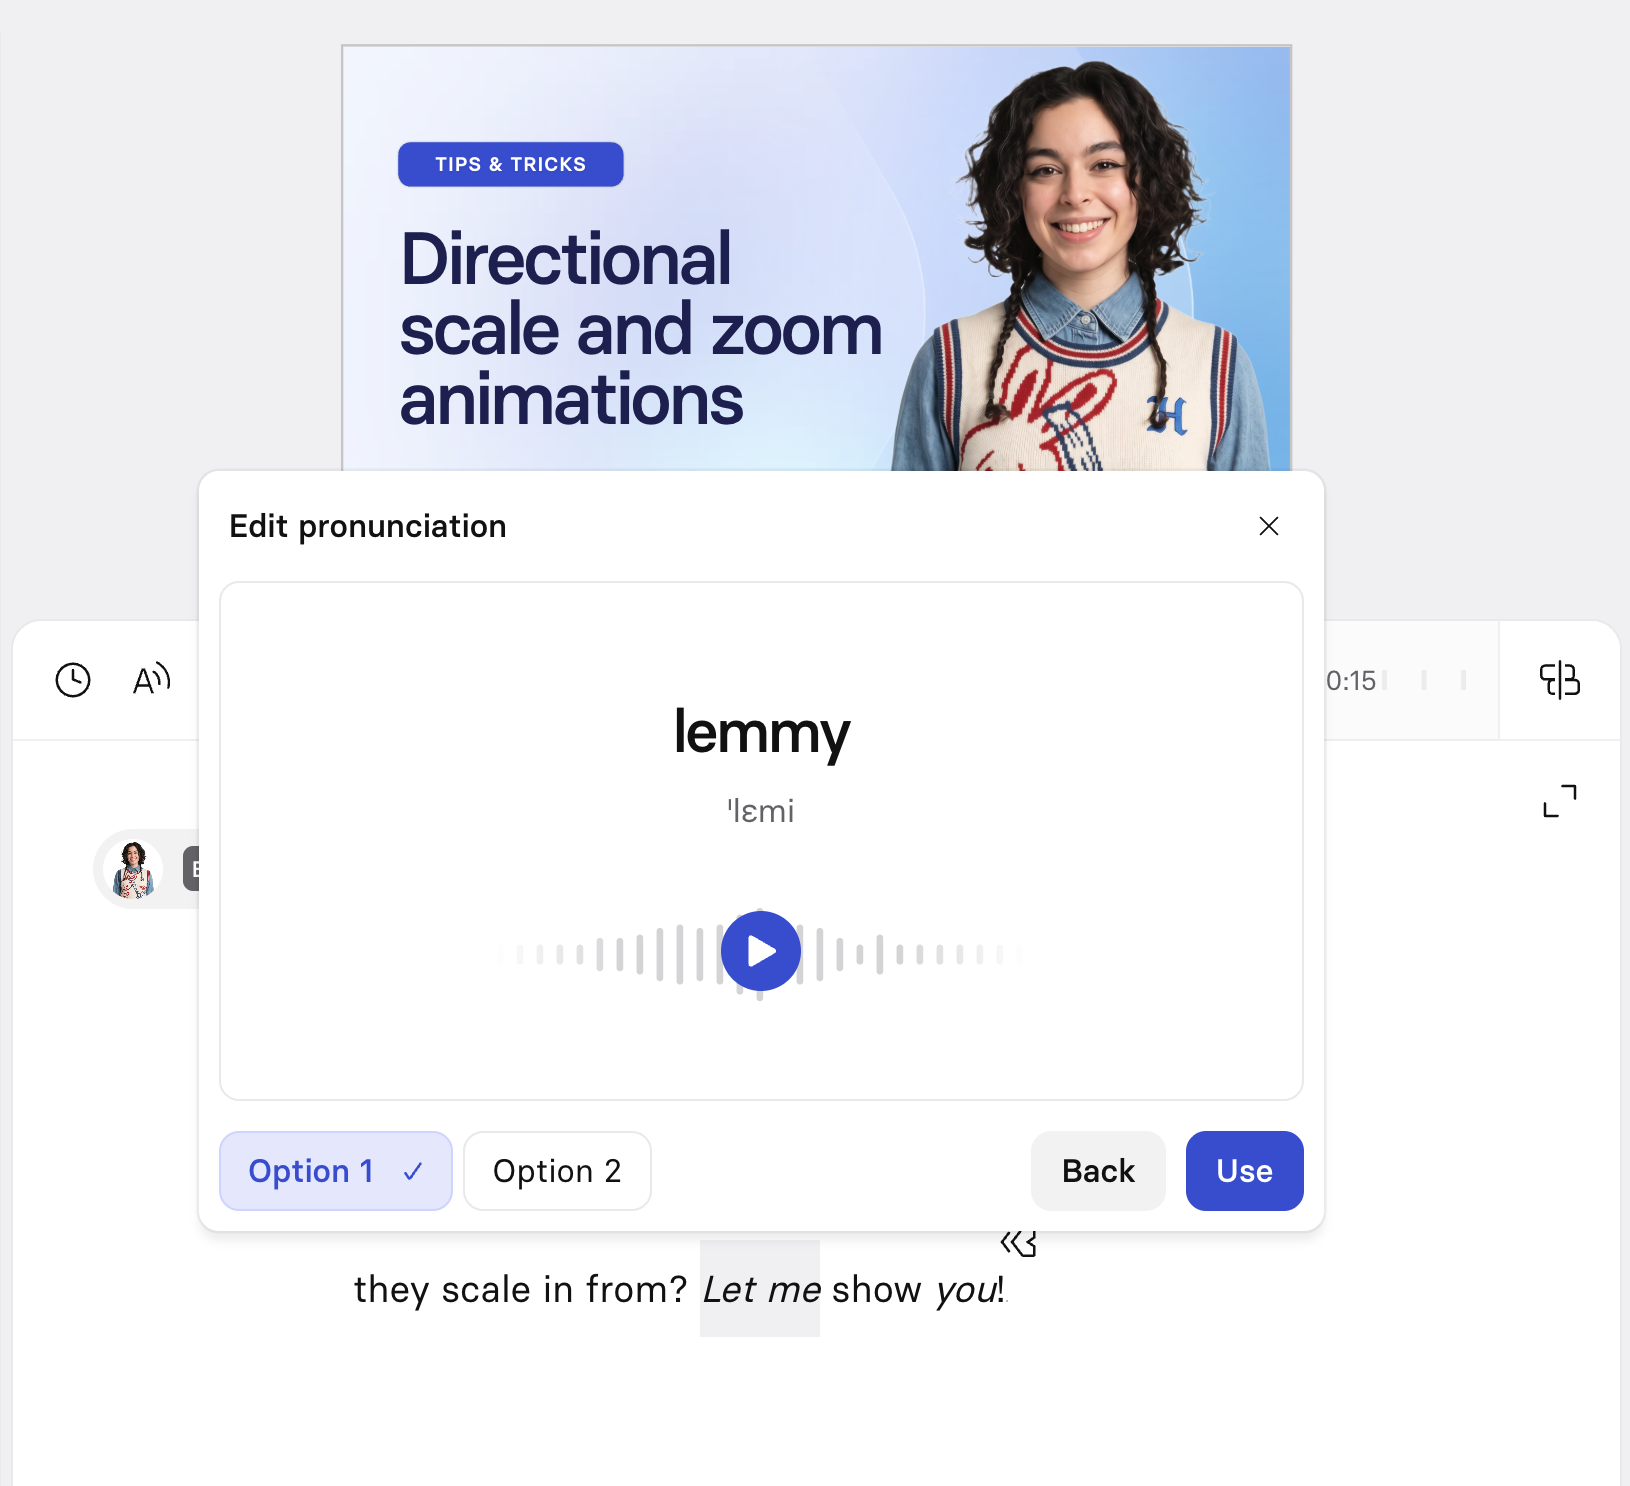
Next. Synthesia analyzes what you entered and offers two versions of the pronunciation to preview and choose from:-
Option 1 uses IPA (International Phonetic Alphabet) and is best for fine-tuning how a word sounds phonetically.
-
Option 2 uses a respelling that replaces the text before it reaches the voice model, making it more consistent for numbers, dates, symbols, and abbreviations.
-
-
Preview each option, then select
Useto save the one you prefer, orBackto adjust your input and try again. -
Optionally:
- Apply the pronunciation to all instances of that word or phrase throughout your video by selecting
Apply to allin the toast notification that pops up at the bottom of the editor after confirming your pronunciation preference. This doesn't automatically apply the pronunciation to additional instances of that word or phrase that you add to your script afterward. - Add the pronunciation to your workspace's Glossary—the option you chose (IPA or respelling) is saved with it, so it's applied automatically and consistently the next time anyone in your workspace types that word.
- Apply the pronunciation to all instances of that word or phrase throughout your video by selecting

By default, a Glossary pronunciation applies across every voice in a language, not just the one you set it on—you can narrow this to a specific voice or locale (for example, British English only) from the Glossary page.
Note:Pronunciation reliability varies by voice and language—voices created by Synthesia tend to be the most consistent, while third-party voices and some older voices in non-English languages may be less reliable. If you're on a voice with limited reliability, a notice appears in the pronunciation menu with the option to switch to a more reliable one.
If a word is still mispronounced after saving a pronunciation, try regenerating the audio for that scene.
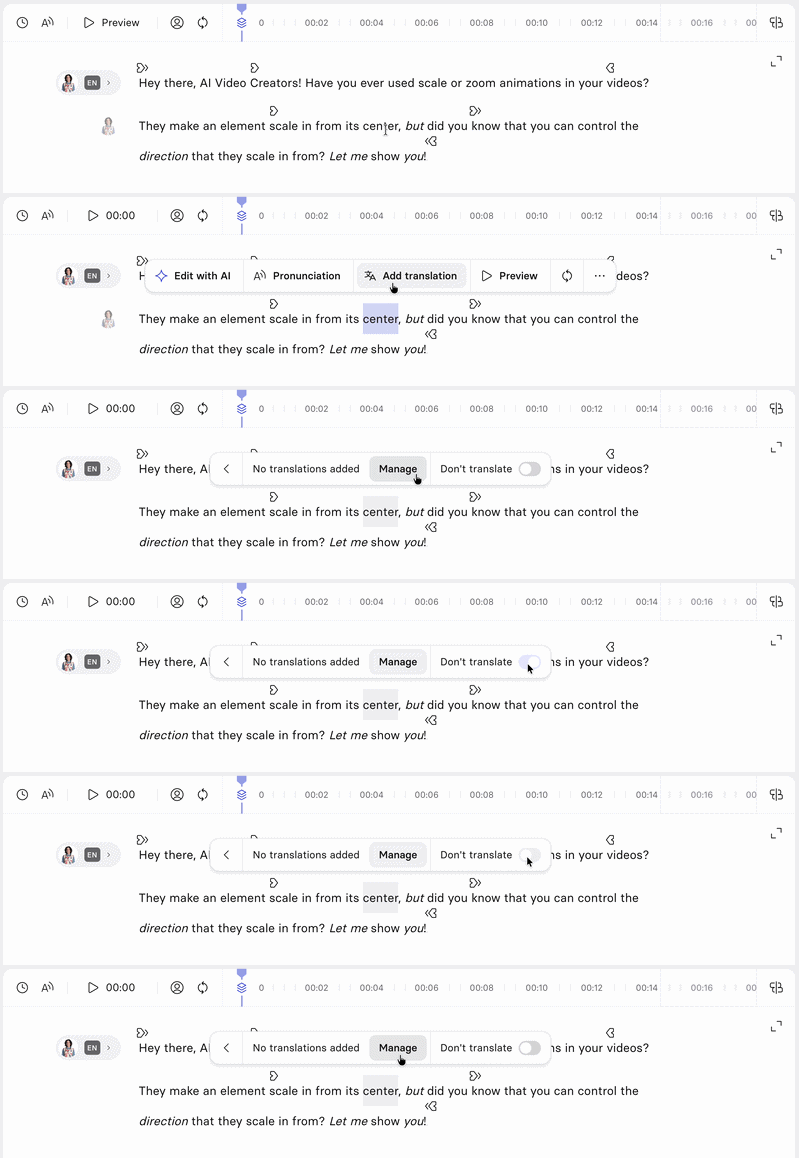
Add a translation
To add a translation:
- Highlight the term in the script and select
Add translation. - From the panel, you can toggle
Don't translate, view and select existing translations (if available), or selectManage translationsto open the full Glossary page.
Previewing the scene
You can preview the entire scene or just a portion of it in a few different ways.
Preview the entire scene
Select the Preview scene button (play icon) at the top left of the script box to launch a scene preview. You can use the playhead/seeker in the timeline to set a starting point for the scene preview.
Launching a scene preview:
- Launches a voice-over of the script.
- Animates all assets from the scene.
- Plays the music selected for the scene.
- Previews the transition to the next scene.
- Doesn't animate avatars on screen (their lips won't move).
Generate an avatar preview
The preview above doesn't show the animation of the avatar unless the video has already been previously generated and the scene remains unchanged. To see and hear the avatar's full performance for a scene—without rendering the entire video—use Scene Preview.
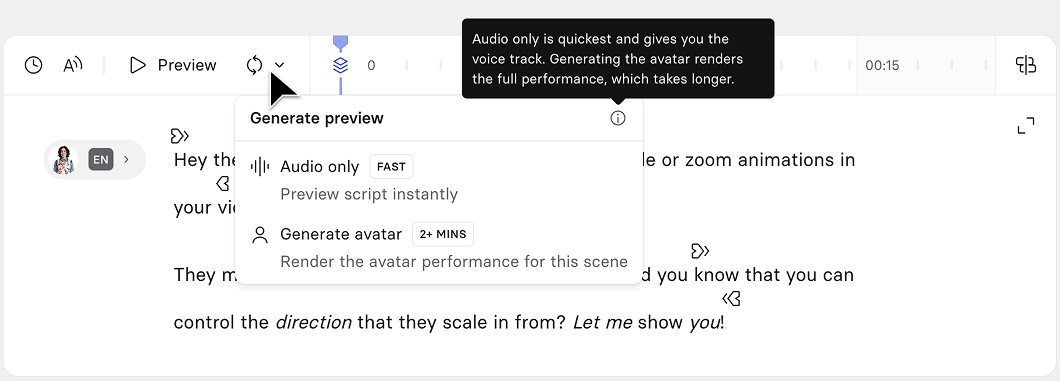
To generate an avatar preview:
-
Select the dropdown arrow next to Preview, at the top of the script box, to open the Generate preview menu.
-
Choose one:
- Audio only: Previews the script instantly, without generating the avatar's performance.
- Generate avatar: Renders the avatar's full performance for this scene. This takes a couple of minutes, depending on the length of your scene.
-
While the avatar performance renders, its progress appears in the Activity panel, where you can select
Cancelto stop it: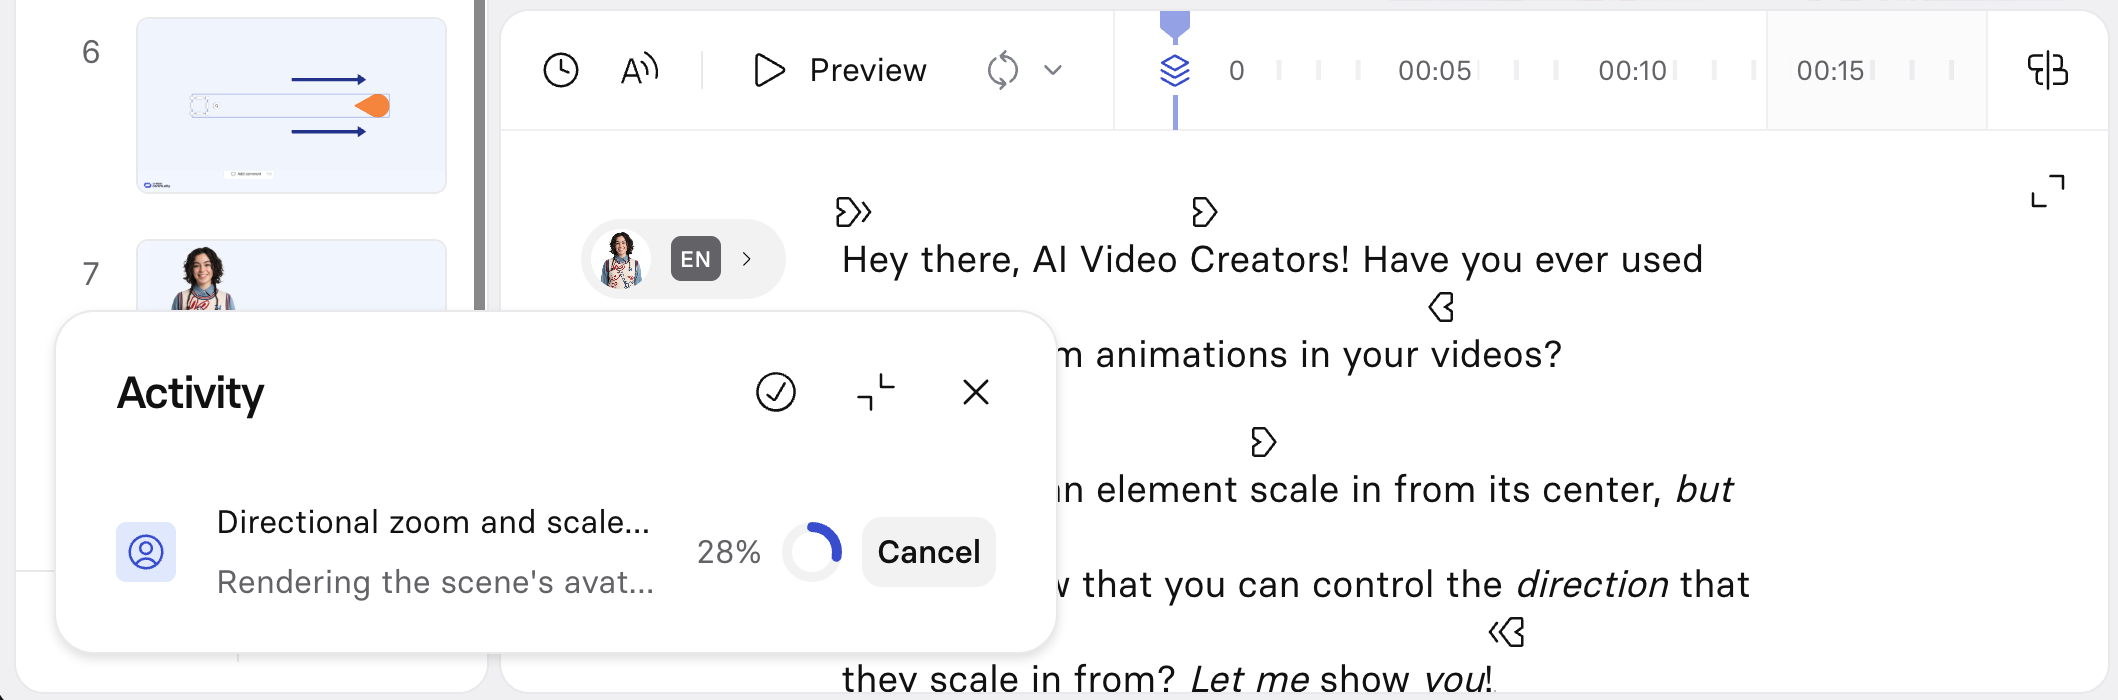
-
Once the render finishes, the icon next to
Previewturns green to show the avatar preview is ready:
-
Click the
Previewbutton to the left it to watch the performance, or regenerate it again for a new take: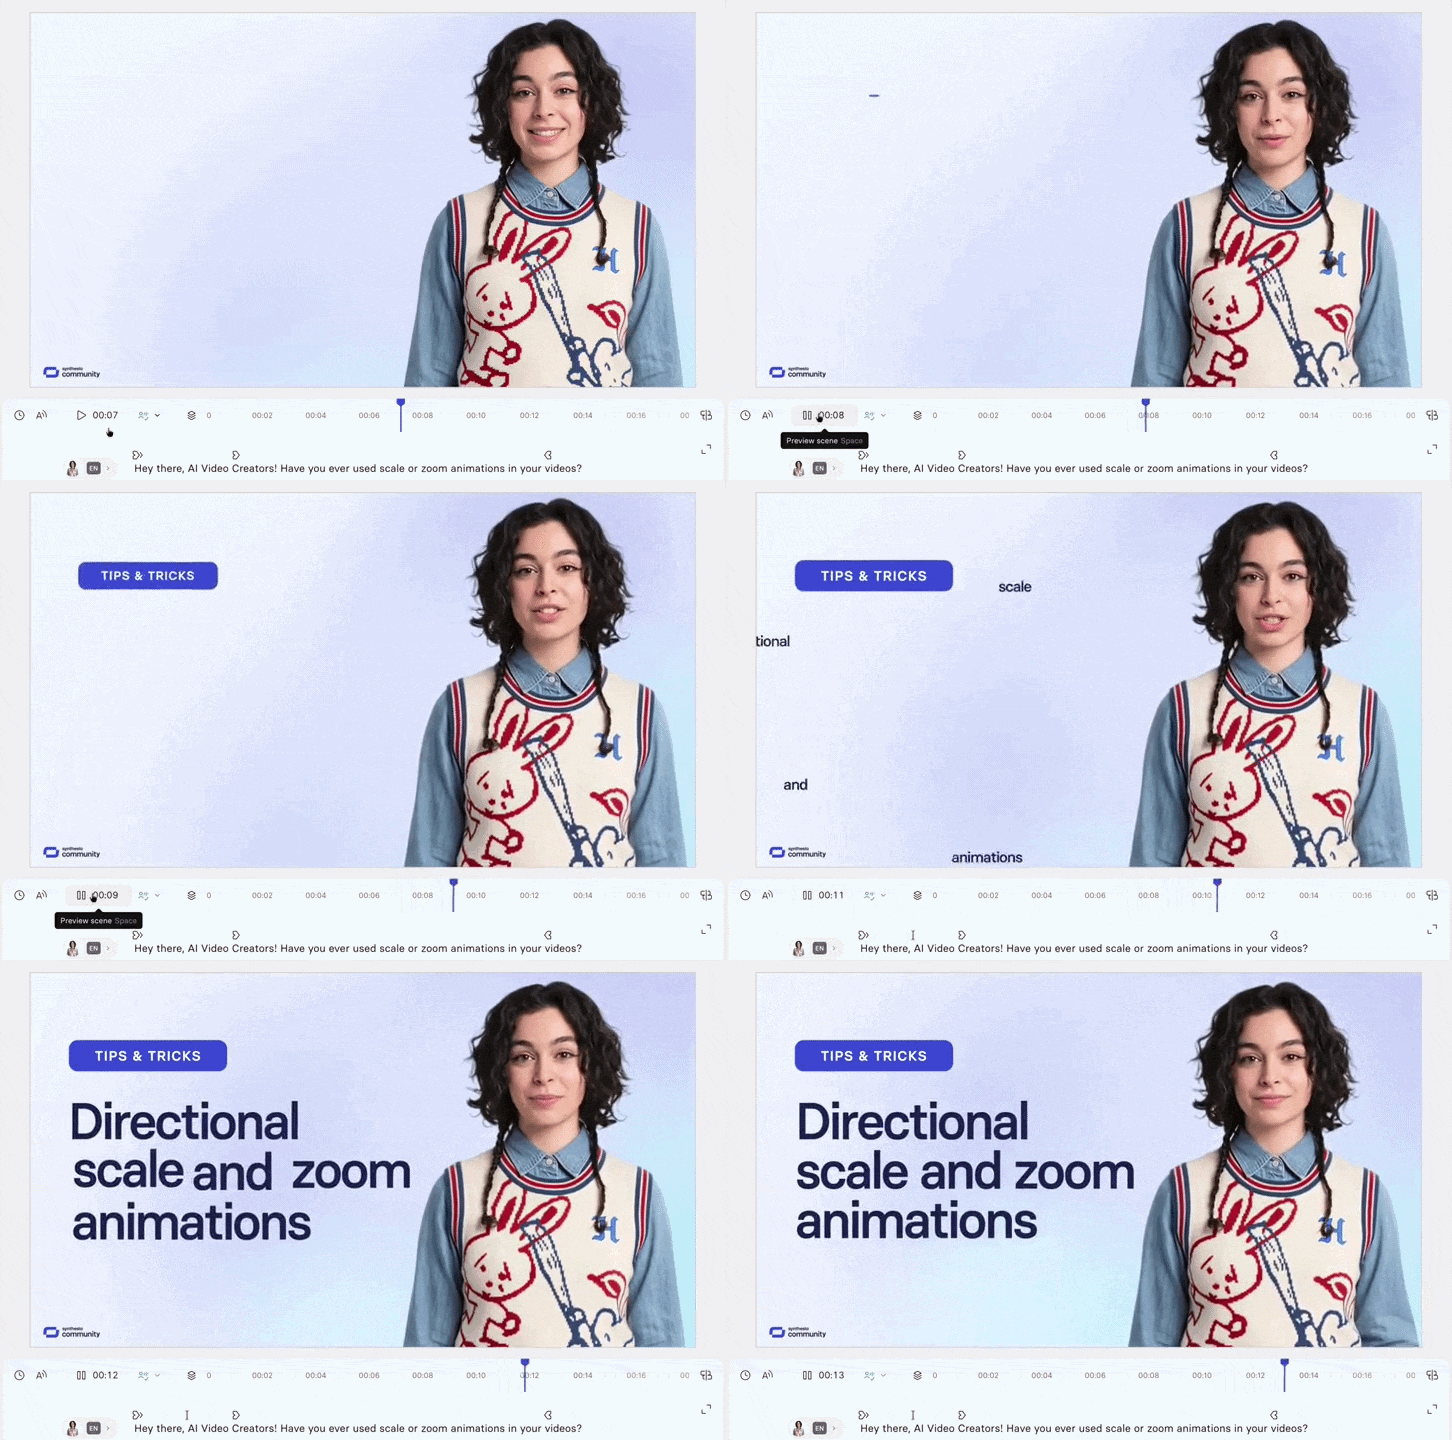
Synthesia reuses a scene's existing avatar performance for the preview when nothing has changed, so you don't need to regenerate it every time you reopen the editor. If you edit the script, voice, or framing for that scene, the existing avatar performance is discarded and you'll need to generate it again—each generation re-renders the avatar and voice together, so you can't refresh just one and keep the other.
Like any other render, generating an avatar preview is subject to Synthesia's usual content moderation.
Preview the animations and scene transition
If you don't need to preview any audio and just want to make sure the visual design for your scene is on track, select and drag the playhead/seeker for the timeline at the top of the script box.
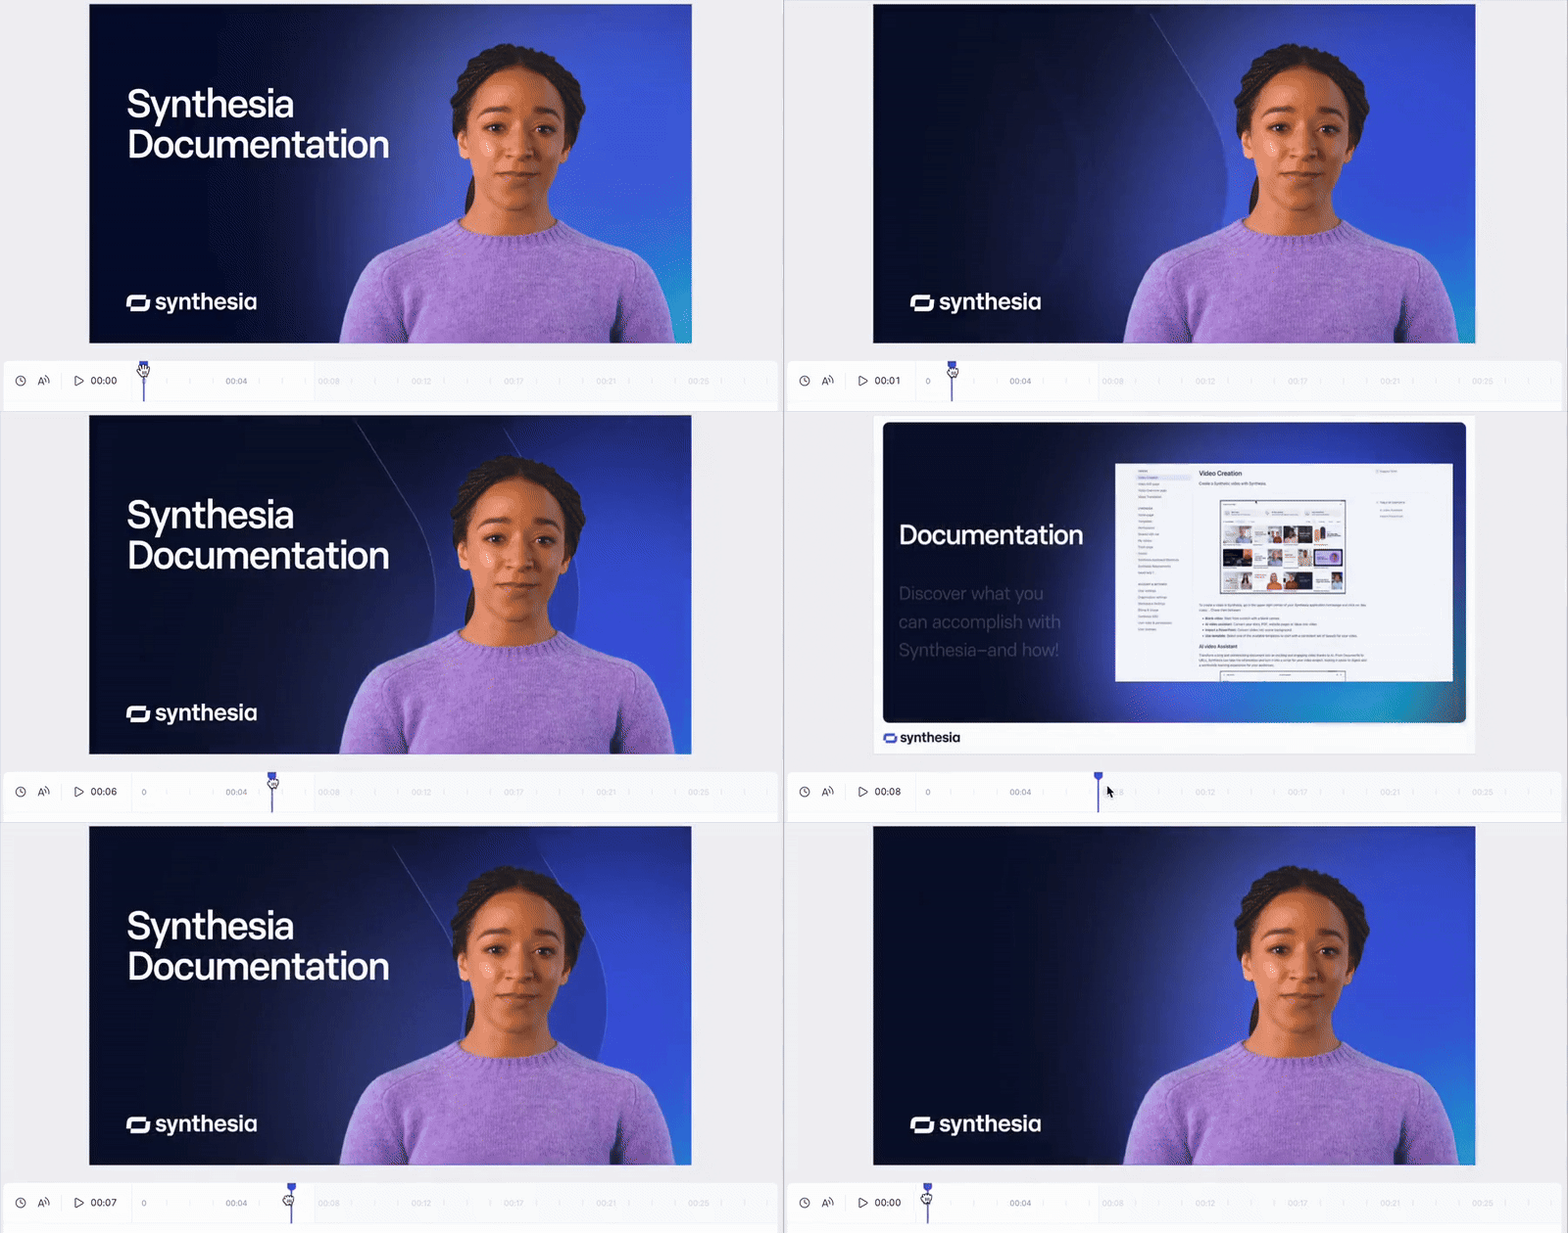
Dragging the playhead all the way to the end of the timeline previews the transition to the next scene.
Preview part of the voiceover
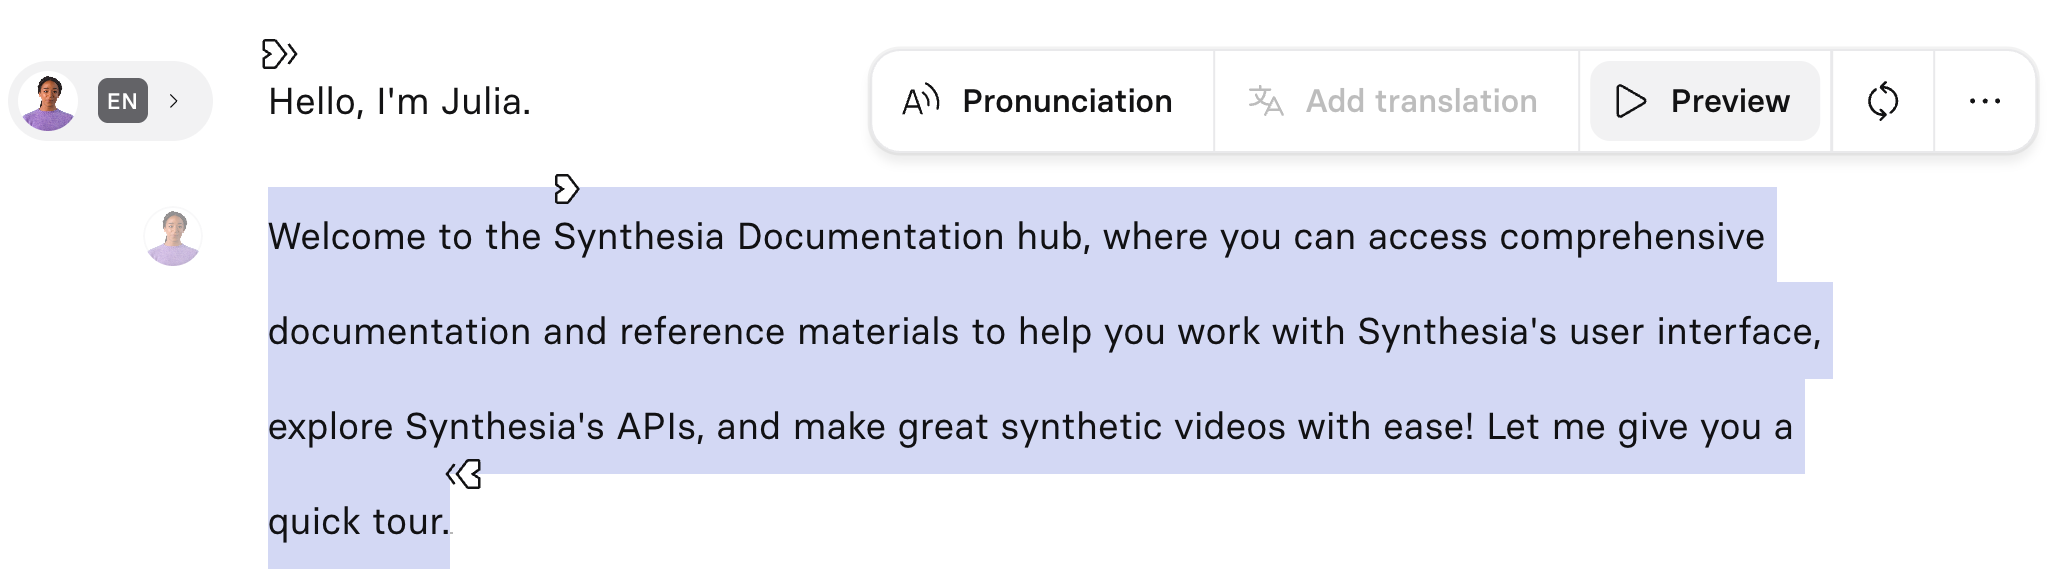
If you have a long script, preview only part of your text:
- Highlight the portion of the script that you want to preview.
- Then, either:
- Select
Previewin the menu that appears above highlighted text. - Right-click on the highlighted text and select
Playfrom the context menu.
- Select
Previewing your voiceover this way doesn't launch a preview of the animations, music, or transition for the scene.
Variables
Right-click in the script box and select < > Variable to insert a variable, for building templates you can use to create videos at scale. See Add variables for programmatic video creation on the Templates page.
Audio file upload
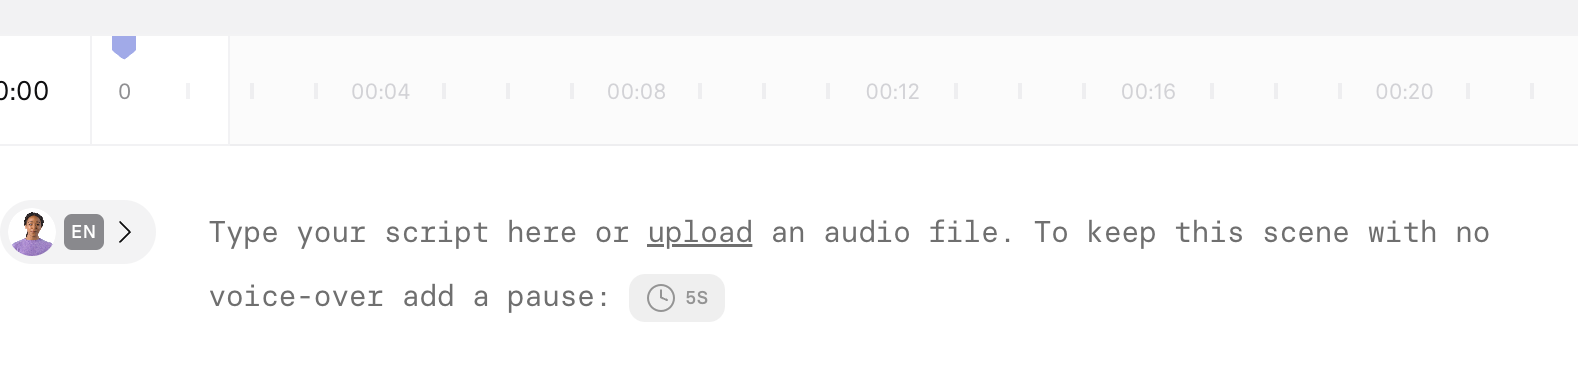
Instead of writing a script, you can upload an audio file with a voiceover to be spoken by the avatar.
You can upload a maximum of 5 minutes of audio per scene. Supported formats: .mp3, .flac, .wav, .m4a.
To upload an audio file:
- Select upload in the script box.
- Choose the desired file.
- Select
Opento upload the file. - Specify the language of the audio file.
It's not possible to change the volume or playback speed of uploaded audio.
Script remediation guidance
Script remediation guidance gives you feedback on script issues before generating your video, so you can fix them upfront instead of waiting for a rejected submission.
This feature is off by default for Enterprise plans—organization admins can enable it globally or per workspace, and workspace admins can enable it for their own workspace, from their respective settings. This setting can't be configured for non-Enterprise plans—script remediation guidance is always enabled there.
When you open the generate panel, Synthesia checks your script in the background. If it finds an issue, you'll see guidance on what to change before you select Generate. Fix the flagged content directly in the editor and resubmit without starting over.
Note:This guidance is advisory only. You can still choose to generate your video without addressing it, and normal content moderation still applies as usual after you generate.
Gestures
Note:Gestures are a legacy feature only available for non-expressive avatars. For older avatar versions, expressiveness isn't automatic—you should manually add gestures in your script for the avatar to show emotion.
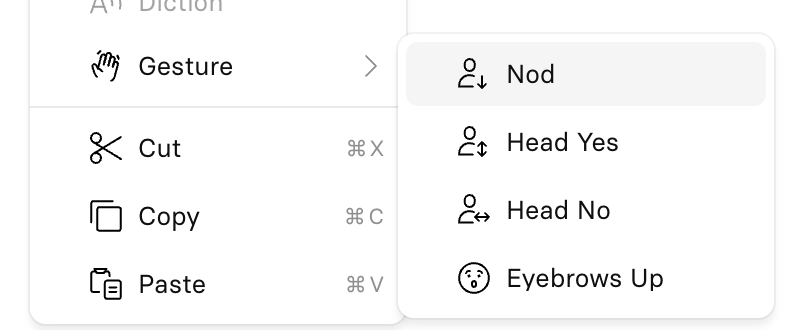
Available gestures are:
- Nod: The avatar nods down once.
- Head Yes: The avatar moves its head twice up and down.
- Head No: The avatar moves its head twice left and right.
- Eyebrows Up: The avatar raises its eyebrows.
Updated about 21 hours ago