Studio Avatars
Get the most advanced AI Avatar created with our EXPRESS-1 model, perfectly designed for professional-quality productions.
Creating your Studio Avatar requires three recordings of your actor or client speaking straight to the camera for 2-3 minutes. Whether you are working with a videographer, studio, or filming independently, make sure to share the instructions in this page with all team members involved (and follow them, of course).
You can share either the EXPRESS-1 Avatar instructions PDF or a link to this page with your team.
In order to achieve the best results with a Studio avatar, following these recording guidelines is crucial. A reshoot might be needed if the requirements specified in this page are not met.
Reach out to the Synthesia Support team if you have any questions.
Filming footage for your Studio avatar
To create a Studio avatar, you'll need to submit:
- 3 videos of yourself reading a performance script (pick your best takes)
- 1 video of yourself reading a consent script
Footage requirements
Edits that have removed parts of the performance from the middle of the video or jump cuts are not permitted.Your footage may be rejected if there are any jump cuts or edits that remove parts of your performance.
| Footage requirement | Specifications |
|---|---|
| File size | Under 2GB (per video) |
| Codec | Advanced Video Coding (AVC), a.k.a H.264 |
| File format | MP4 |
| Resolution |
|
| FPS (frames per second) | 29.97 or 30 frames per second |
Script
Performance script
Follow the performance script and focus on delivering an expressive and emotional performance as directed.
Don't worry if you paraphrase a few words or phrases, but stick to the script as closely as possible. We recommend that you practice reading the script at least once before your first take.
Download the Performance script.
Consent script
As part of the submission process, Synthesia requires a recording of the performer reading the consent script to the camera.
For this script, there's no need to worry about the style of the delivery, as long as the script is clearly and accurately read by the performer and the performer directly faces the camera.
Note:This script needs to be read in the actor’s native language.
Get in touch with us if you need a copy of the consent script in another language.
Best practices for filming your footage
Follow these guidelines to ensure that you're able to film the best footage possible for your Studio avatar.
Background

- Use a green screen as the background (if the performer is wearing green, use a blue screen instead)
- Make sure that there's enough contrast between the background and the performer’s clothing and skin tone
- Keep the background well lit, with minimal shadows
- Do not remove or replace the background prior to submitting your footage to Synthesia
Camera
Film your footage in accordance with our footage requirements :
- For best results, film in 4K UHD (3840 x 2160) at 29.97 or 30 FPS (frames per second)
- If you can’t record in 4K UHD, the minimum resolution requirement is FHD (1920 x 1080)
- Make sure the focus on the face is sharp
- Don't use any type of streaming software, webcams or applications that capture your recording over an internet connection
- Use of a high-quality camera and external microphone is required
Framing
In all cases:
- The performer should keep their hands out of the frame and avoid extreme gestures
- The camera lens should be set at at chin-height
- Make sure the performer remains in the frame for the entire recording
4K UHD (3840 × 2160)
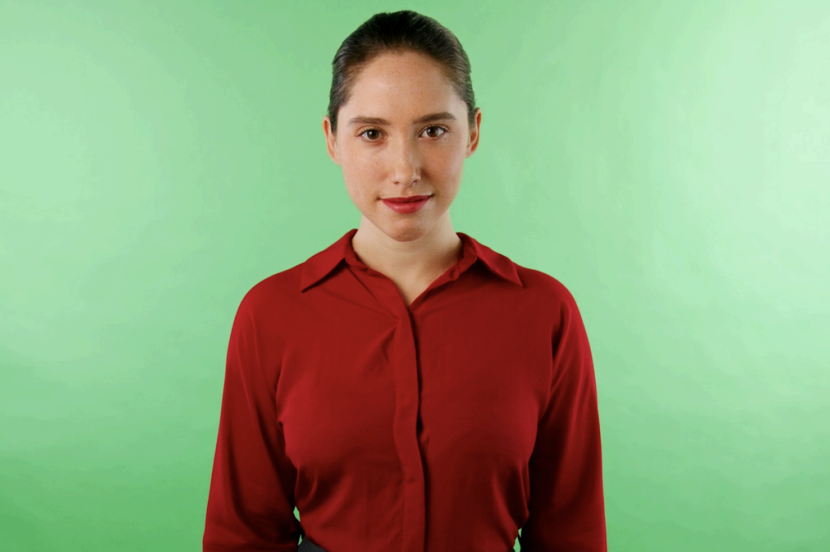
The performer should be framed from the waist-up if the footage will be recorded in 4K UHD (3840 x 2160).
We'll zoom in (if necessary) to perfect the framing of the Studio avatar.
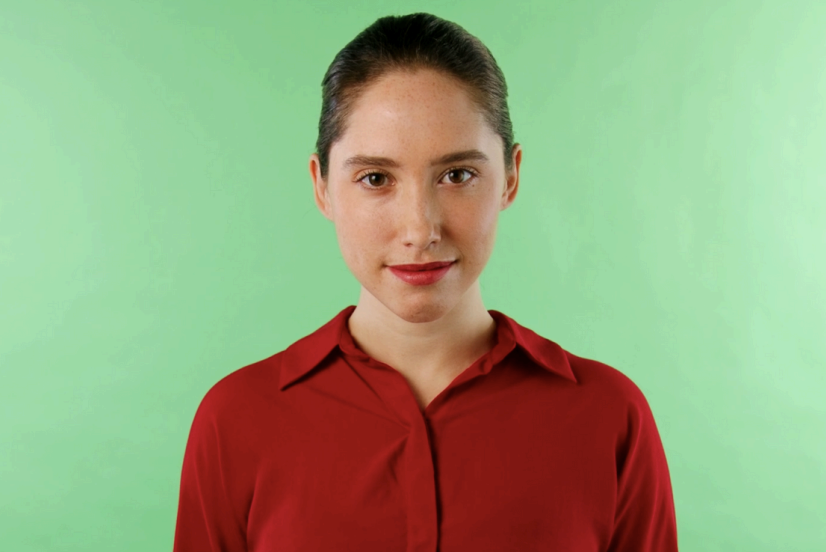
FHD (1920 x 1080)
The performer should be framed from the chest-up if the footage will be recorded in FHD (1920 x 1080).
Note:With this framing, we won't be able to zoom in or adjust the framing without sacrificing the quality of your Studio avatar.
Lighting
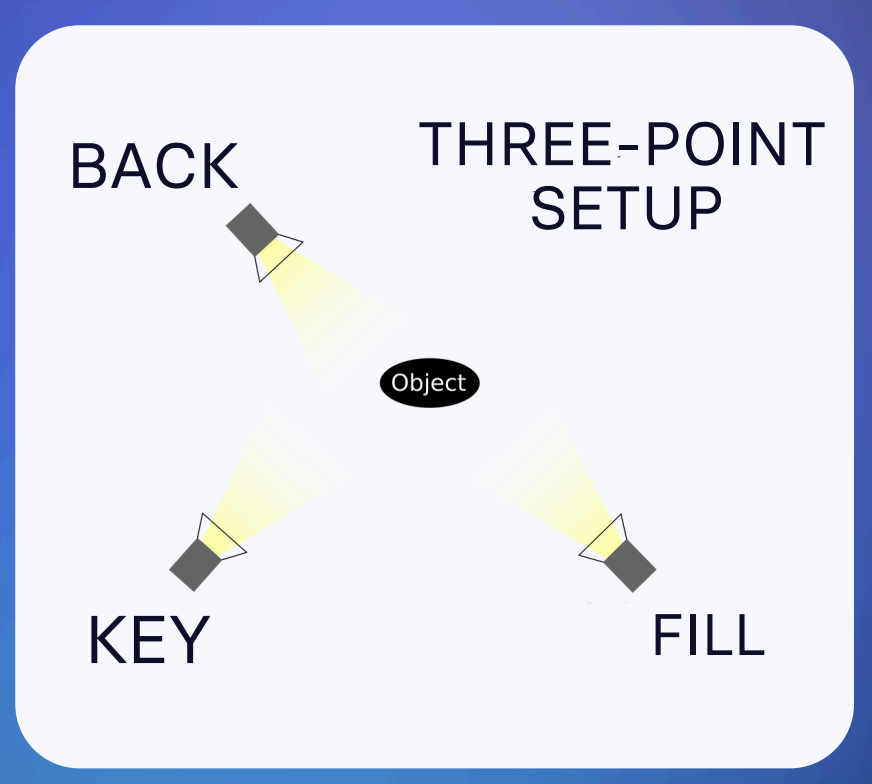
- Use a three-point lighting setup consisting of key, fill, and back lights.
- Maintain fixed illumination with no changes throughout the take
- Stylistic choices and contrast can be achieved with different lighting configurations, but Synthesia won't be able to change this in post-production and your avatar will maintain that style permanently
Audio
- The audio must be perfectly synced with the video
- Make sure the recording is free of echo or background noise
- Use a lavalier or boom microphone
- Hide the microphone well, as Synthesia cannot remove a visible microphone from your footage
- Test the audio quality to ensure there's no scratching or interference before recording your final takes
- Avoid off-camera audio such as “Action” or “Cut”
The audio captured in your Studio Avatar footage will be used to create a voice clone.However, if you'll have access to a sound booth while filming your Studio Avatar footage, it'll be a great opportunity to create a professional-quality voice clone.
Use our voice cloning feature to create a voice clone to use with your Studio Avatar.
Color grading
Submit footage with the desired color grading; not the raw, ungraded footage.
Remember, the way your footage looks will be the way your avatar looks—aside from cropping for framing adjustments when necessary, we don't make any modifications to your footage.
Makeup, hair and wardrobe
- Avoid clothing colors that clash with the background
- Avoid clothes that move around a lot, like tassels, fringes, or frayed, ripped, or distressed fabrics
- Be mindful of how your sleeves and other flowing fabrics move, and try to keep the position of the fabric and any creases in your clothing consistent throughout the performance
- Do not wear sunglasses or eyewear with dark lenses
- The clear lenses used for most standard prescription eyewear are fine, but additional guidelines must be followed
- Do not wear hats or headgear that sit low on your forehead (i.e. baseball caps)
- Headgear and hats that do not obscure your face are fine (i.e. construction helmets, turbans, berets, etc.)
- Keep your hair pinned back and away from your forehead.
- Avoid long beards if possible.
Glasses
Synthesia's Express-1 technology is always improving, and we've made it possible to create a Studio avatar with glasses. That being said, certain types of eyewear can be difficult for our AI Model to work with.
When recording with glasses:
- Make sure the performer's glasses frames aren't positioned too close to their eyelids.
- The performer should avoid tilting or rotating their head too much.
- Avoid see-through frames. If the performing will be wearing glasses at all, the glasses should have clear lenses in them.
To minimize the risk of footage failing to process, record takes with and without glasses on.
Performance
Watch the following video to prepare for your performance:
Head and eyes
- The performer's eye line should be level with the camera
- If using a teleprompter, make sure not to have it angled too far from the camera; the performer should be able to read from it while their eye line is kept level with the camera
- The performer should look in the direction of the camera and speak to the camera as though it is an imagined audience, but make sure that they're not looking too far beyond the camera or away from it
- The performer should move their head as they naturally would while expressing the emotions they're directed to express
Position and full-body movement
- No sneezing or coughing; if the performer sneezes or coughs, you'll need to record another take
- Do not adjust the distance between the performer and the camera throughout
- Make sure the performer doesn't change the position of their feet, rock back and forth, sway, or move closer to the camera while recording a take
Hands and arms
For an avatar with great movement in the upper body and arms, we would recommend the following:
- Hands should be kept below the belly button and by the waist
- Hands and arms should be moved naturally (but kept below the belly button)
- The upper body should be moved naturally as the performer expresses emotions and reads the script
Emotion and expressiveness
The performer doesn't need to be a professional actor. For an avatar to properly change emotions, the performer must display the emotion that is requested for an entire section of the script.
All that's required is pronounced, distinct, and consistent facial expressions:
| Emotion | Optimal performance | Direction to give performer |
|---|---|---|
| Happy | Smile, be calm, and maintain a professional demeanor |
|
| Sad | Be upset; portray negativity, annoyance, and grief |
|
| Excited | Be enthusiastic, positive, and enjoy the moment | Think about a time you were really proud of someone, or couldn't have achieved a goal without their help, and now you want to make sure they understand how much you appreciate their efforts |
Submitting your footage
When you're done recording your footage:
- Upload the best three takes of the performer acting out the Performance script
- Upload the footage of the performer reading the Consent script
- Submit your footage
By submitting your footage, you acknowledge that the performer fully understands that their visage will be used
to create an AI Avatar, that you agree to the Synthesia Ethical Guidelines and accept the Synthesia Terms and Conditions of Service.
Updated 5 months ago