

Manage
Learn how to manage the Learner Portal—everything from publishing content, adding users, building learner groups, reviewing analytics, and connecting HRIS integrations.
Manage is the admin side of the Learner Portal, built for Enablement and Organization admins. It's where you assign Roleplay Sessions (Content), add and organize learners (Users and Learner Groups), and connect the systems that keep your user list up to date (Integrations).
Content
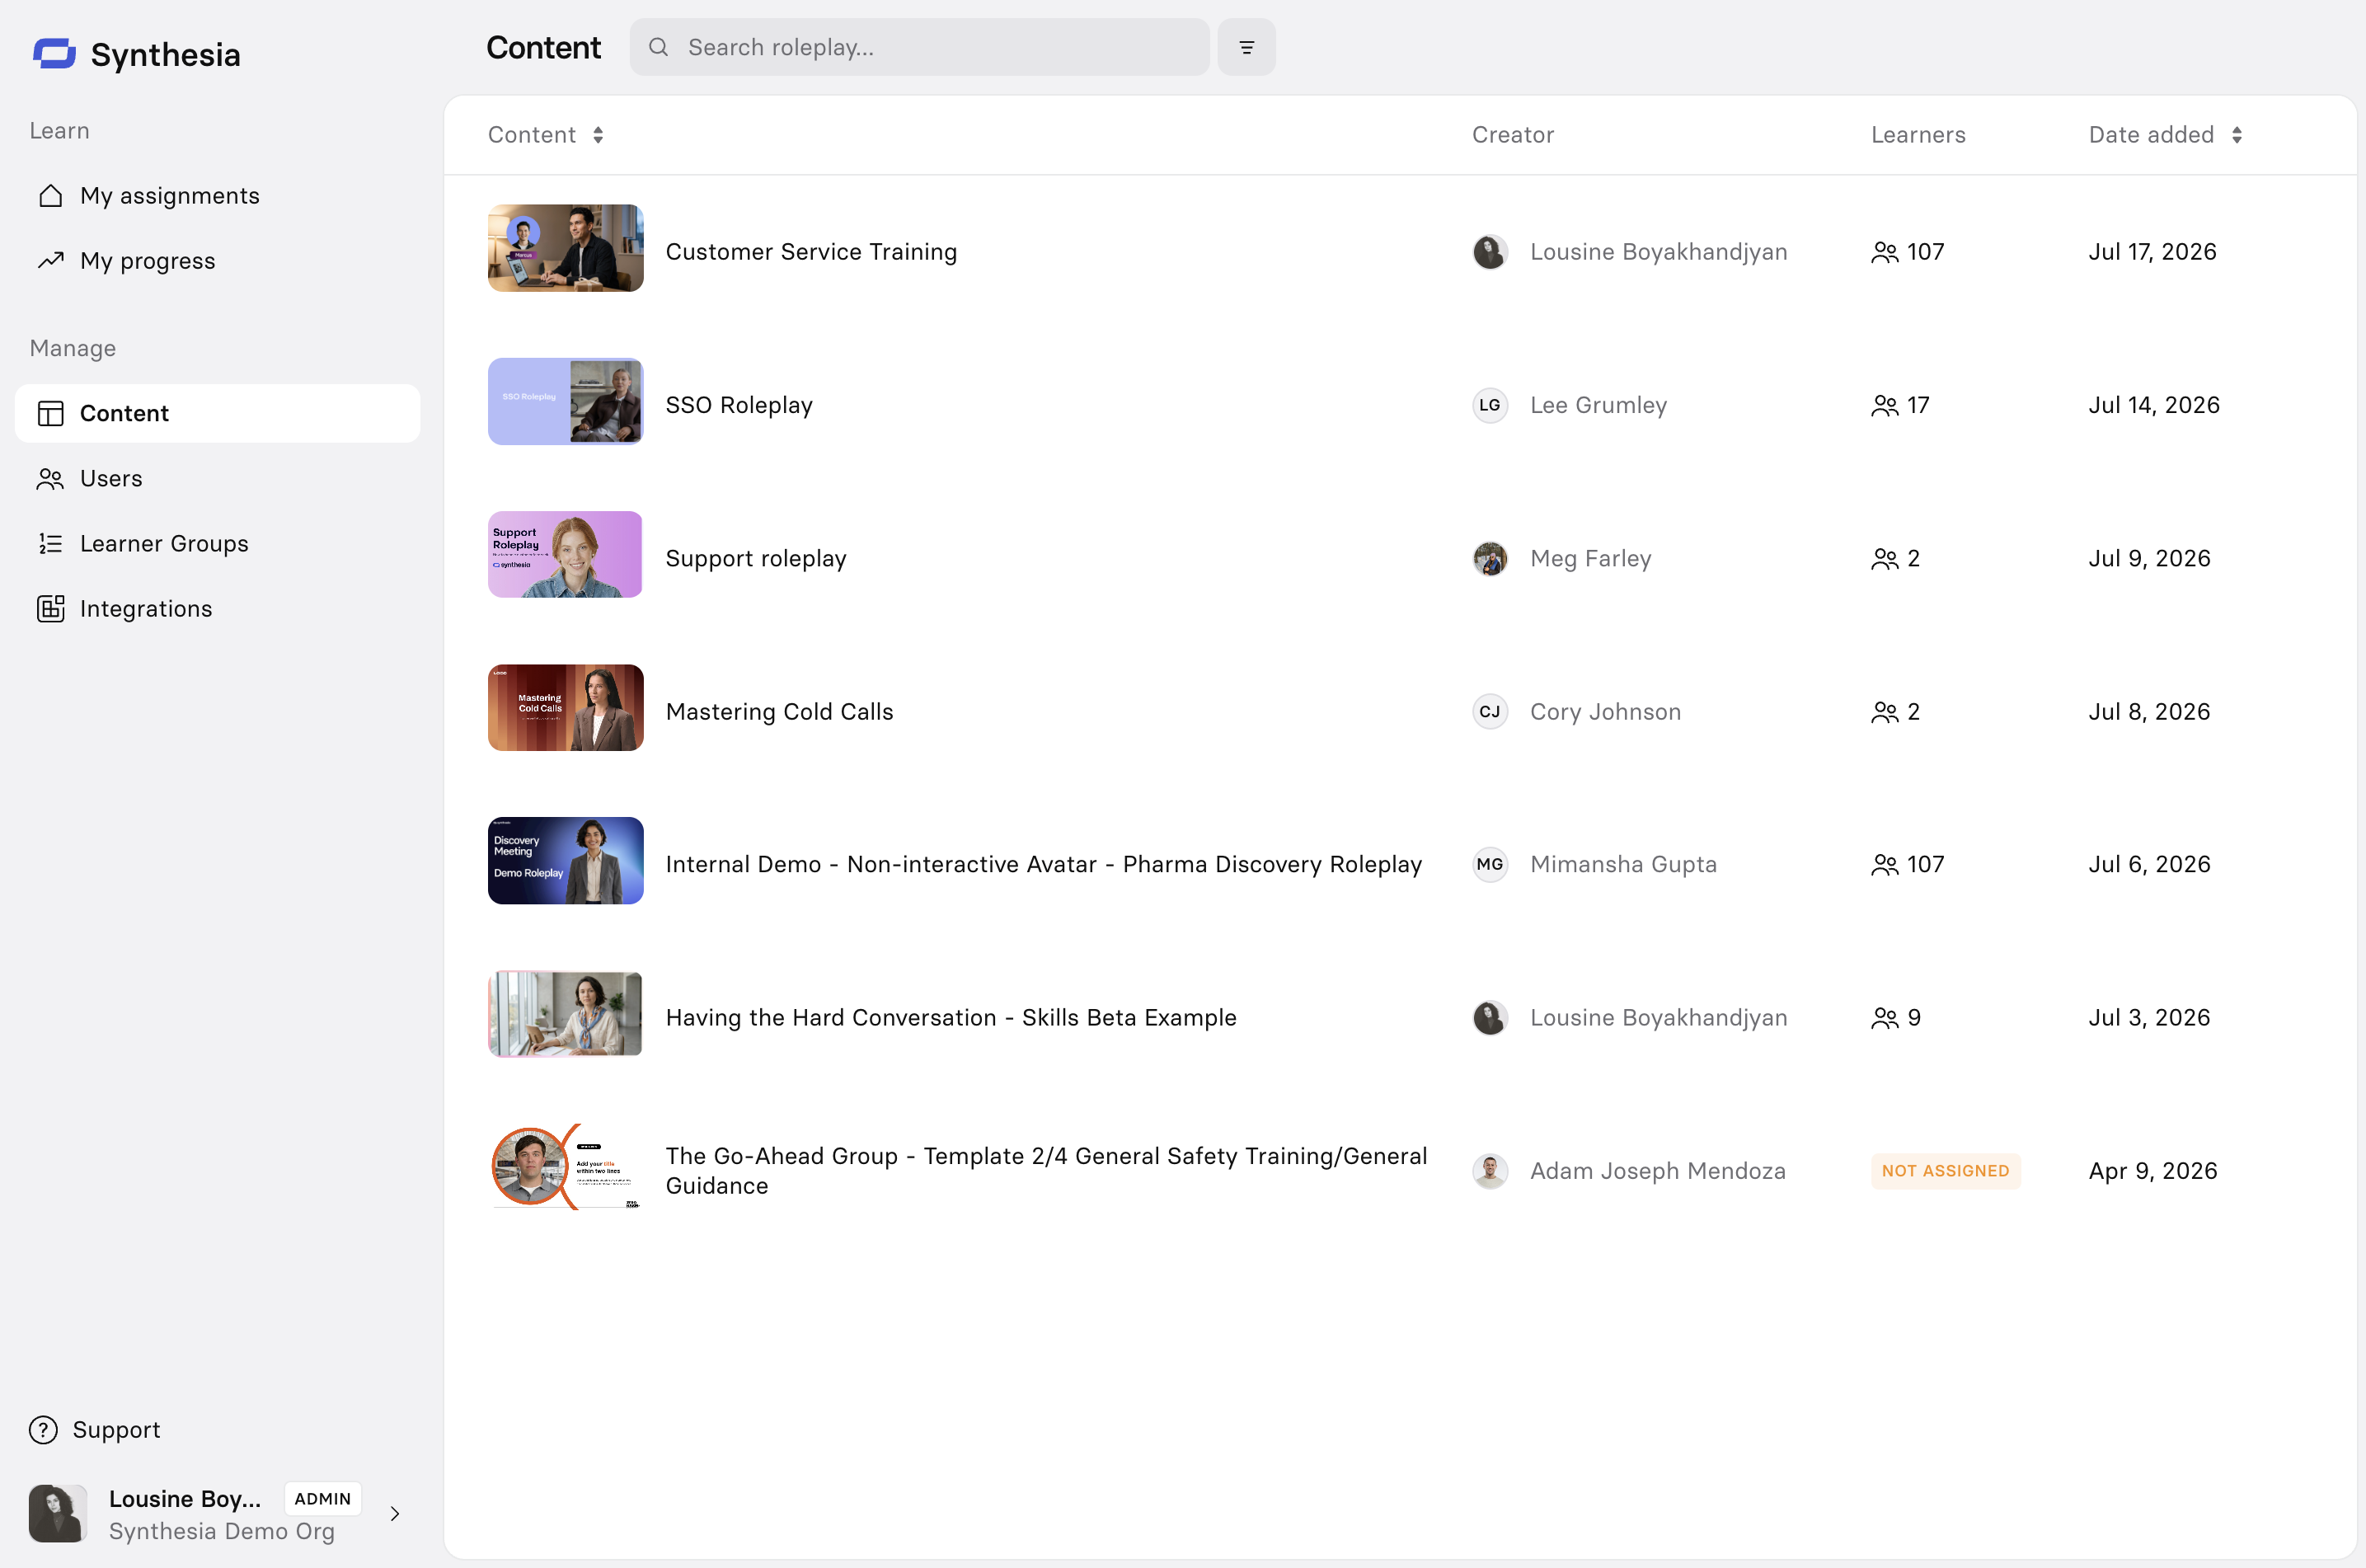
Content is your library of published Roleplay Sessions. Every Session you've published appears here, along with who created it, how many learners it's been assigned to, and when it was added. Select any Session to see its full details and assignment status.
Assign Content
Once your Roleplay Session is published to the Learner Portal, it's ready to be assigned.
To assign content to learners:
-
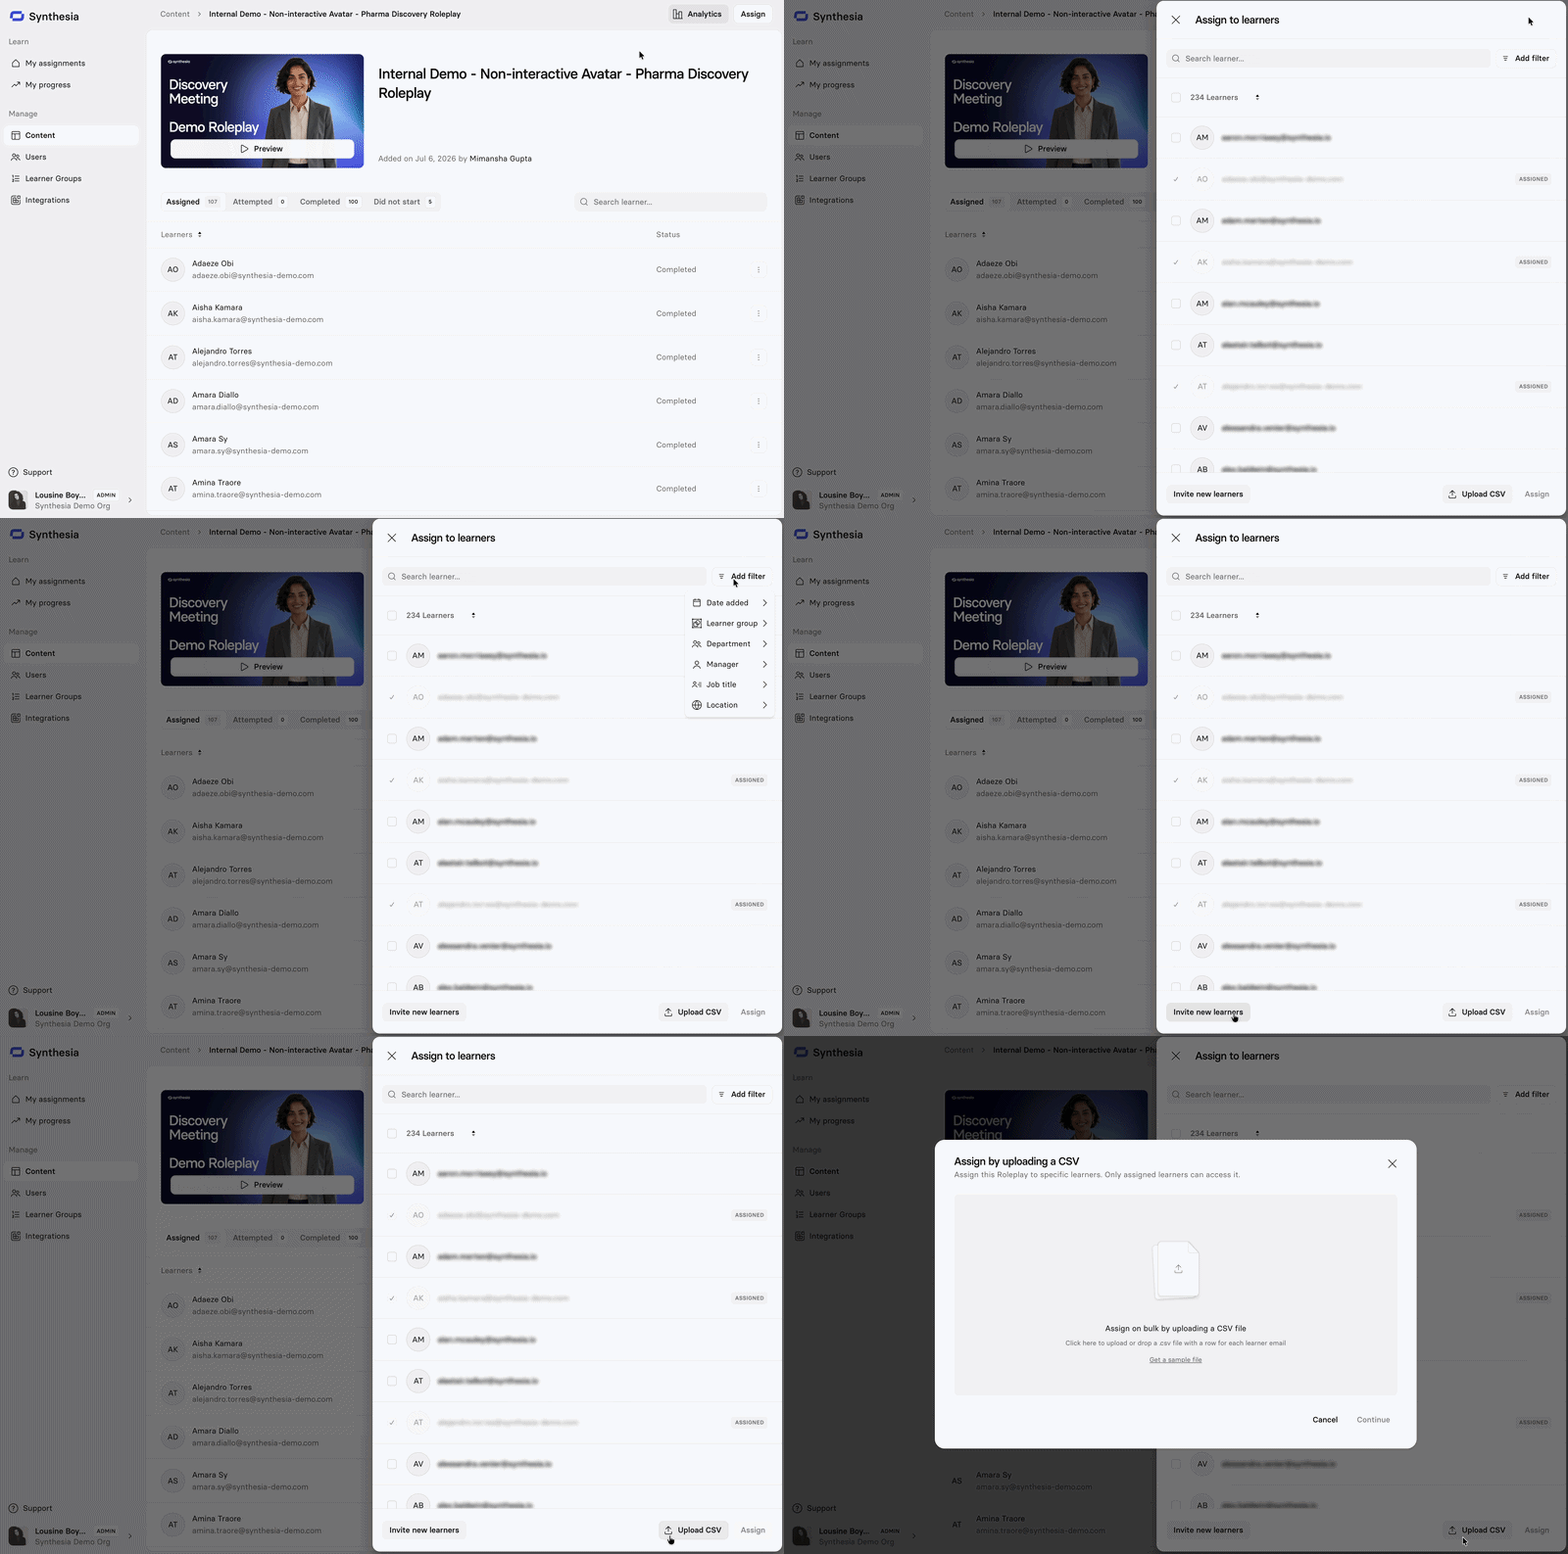
From the Content tab in the Learner Portal, select the Session you want to assign. This opens the Session detail page, showing its details and how learners have engaged with it so far (this data only appears once the Session has been assigned to learners).
-
Select
Assignin the top right. The assign panel will slide out with your full user list. -
Search for a learner by name or email, or select
Add filterto narrow down by group. -
Select the learners or groups you want, then select
Assign.You can also add new learners if they're not already available in the list, by clicking
Invite new learnersat the bottom-left of the assign panel to invite learners via email, orUpload CSVat the bottom-right of the assign panel. A sample CSV is available to assist with field mapping.
The moment you assign a roleplay, learners are notified in up to three places:
- Email: an email with a View Assignment button.
- Slack or Microsoft Teams: a message, if either integration is enabled.
- The portal: the Session appears under My assignments, where learners can start and complete the roleplay.
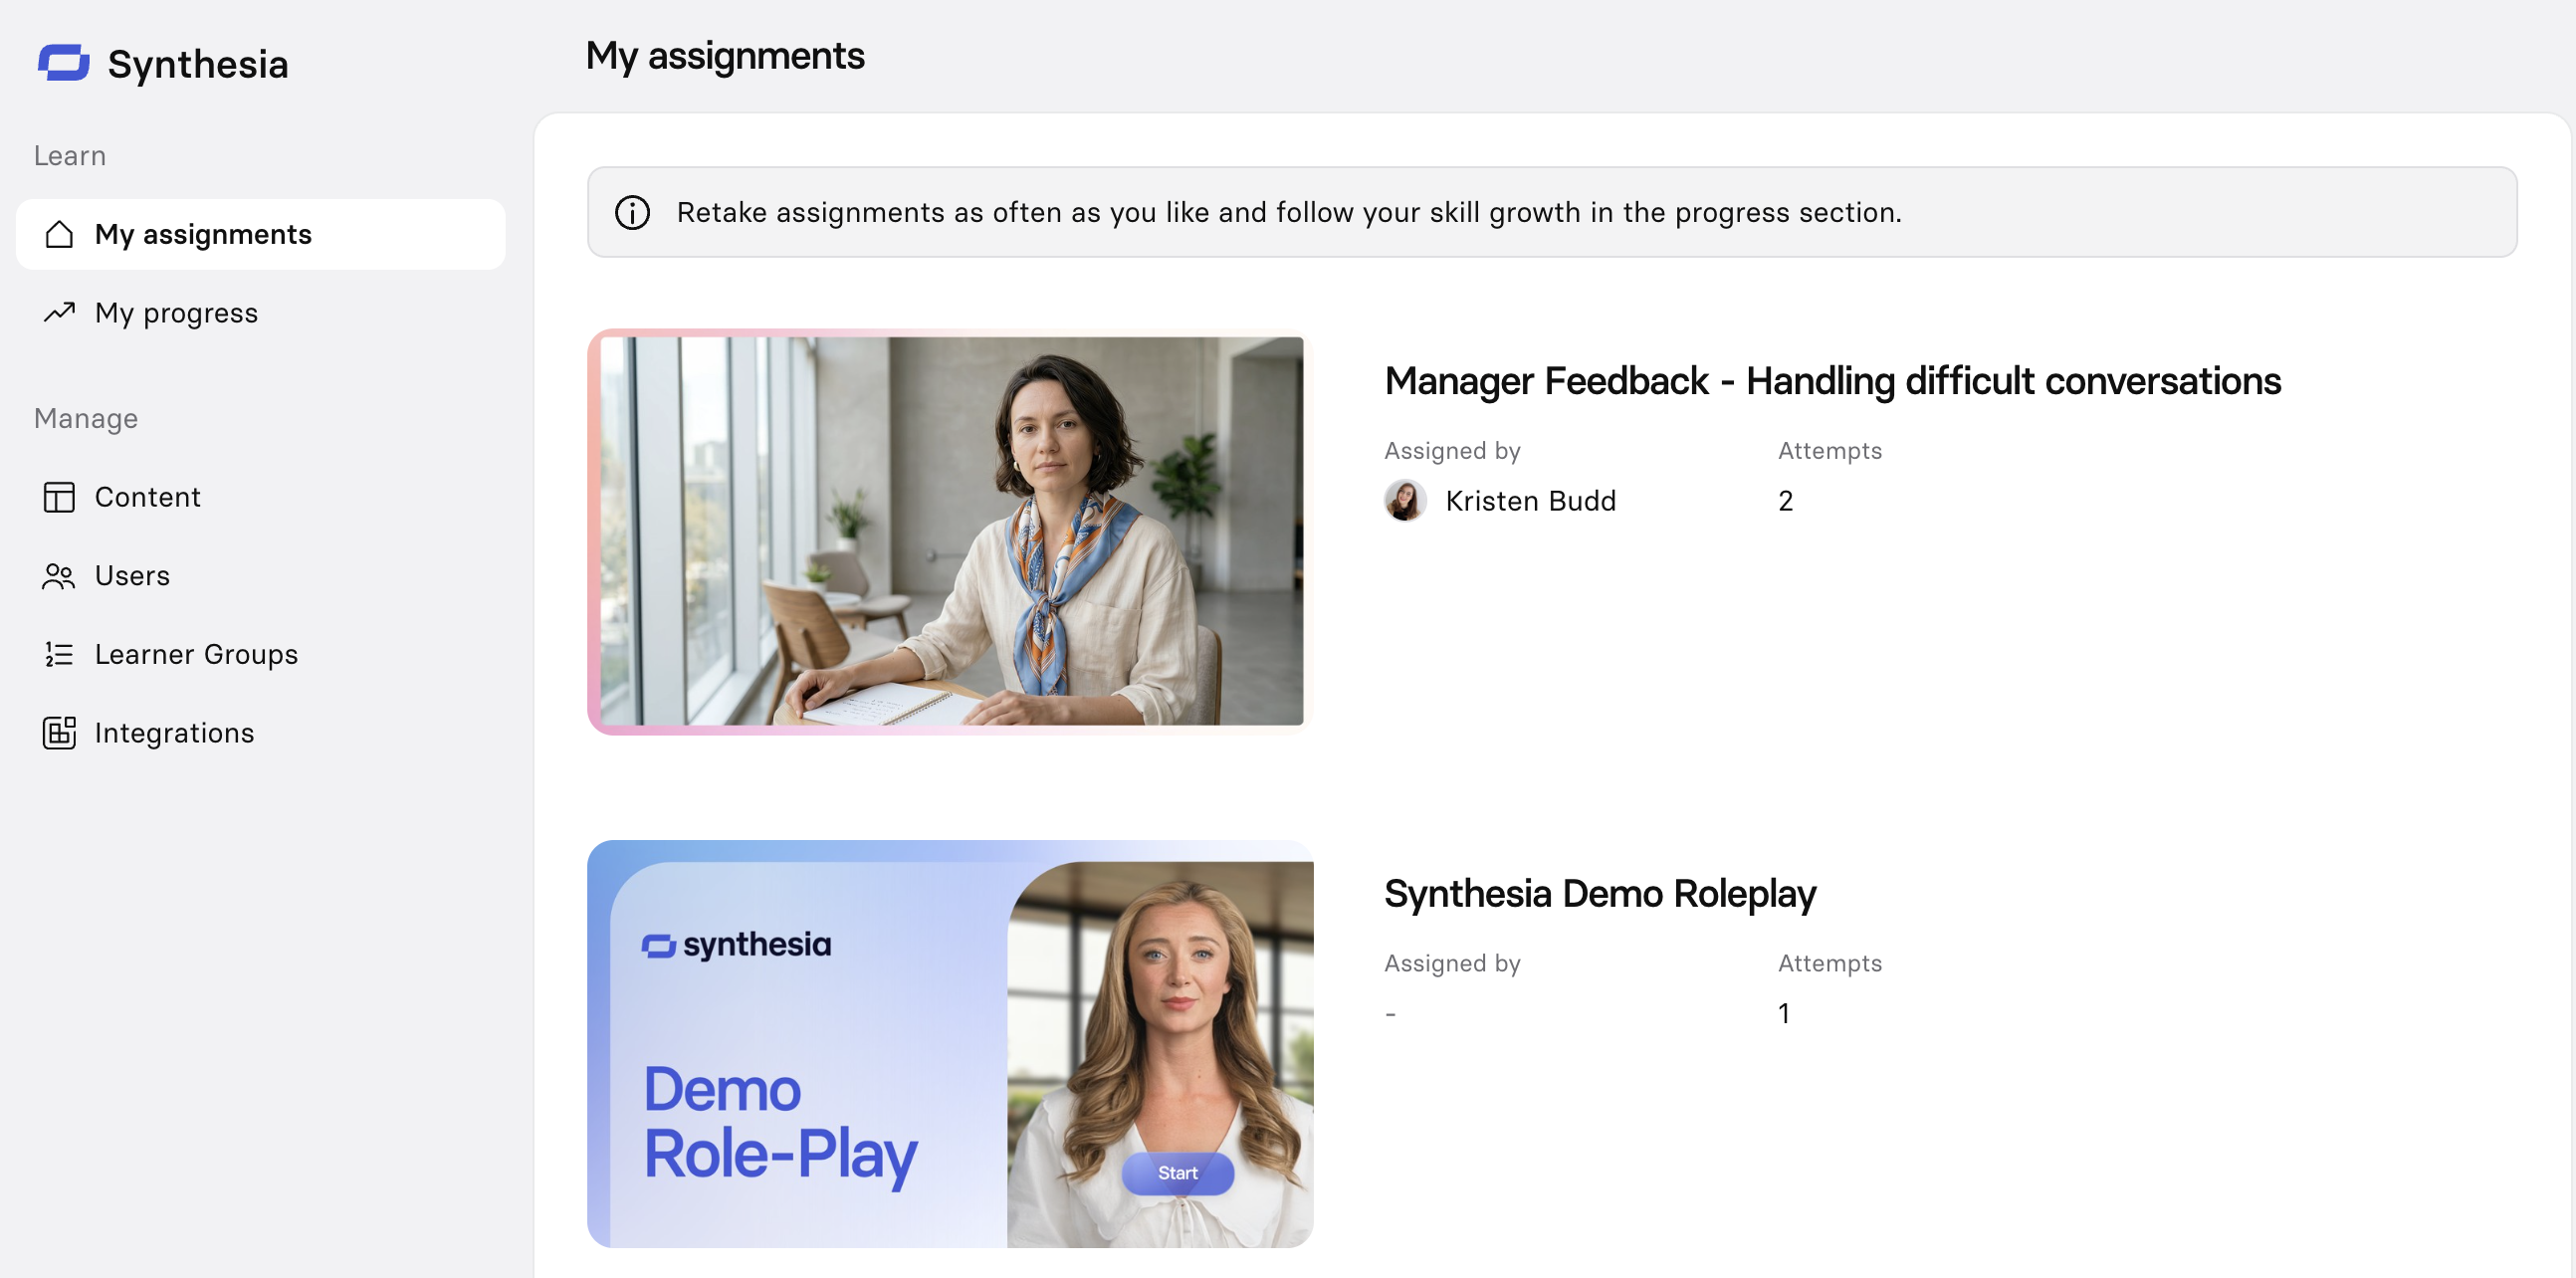
Assigned Roleplay Sessions in My assignments
Analytics
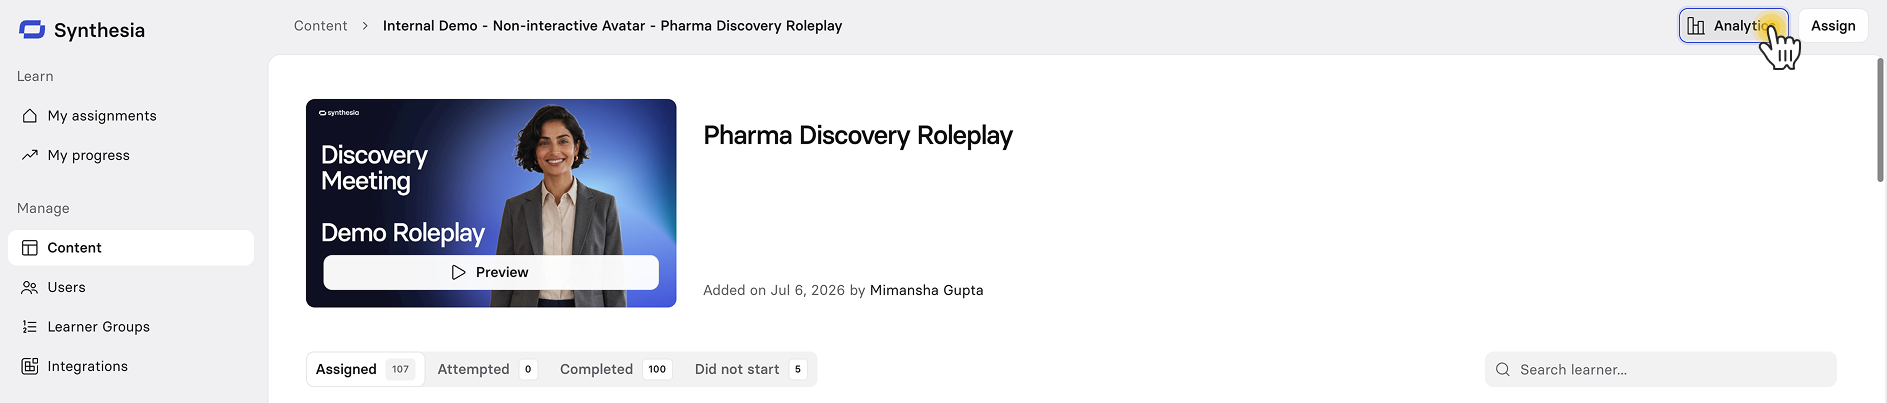
From the Content tab in the Learner Portal, select the Session you want to view analytics for and click the Analytics button at the top-right of the page.
Use the filter settings at the top right to narrow down your analytics:
- Date filter: Isolate a specific cohort without older assignments diluting the view.
Available options include last 7 days, last 30 days (default), this week, this month, this quarter, and custom range. - Add filter: filter by Manager, Learner group, Department, Job title, or Country.
Note:Organization Admins and Enablement Admins can open the analytics detail record for any learner. Managers see the full org at the aggregate/table level, but can only click into detail records for their own direct reports. If a learner in the table isn't one of their reports, that row won't be clickable for them.
Aggregated results mode
Aggregated results mode is an org-level setting, off by default, that switches roleplay results reporting for managers and admins from per-learner to group-level only. It's designed for deployments where showing individual performance data to managers isn't permitted.
An org admin turns it on from Organization settings → General → Aggregated results mode. Every change is recorded in the audit log.
When it's on:
- The Results tab shows topline metrics and charts only. The learner table, filters, CSV export, and score-distribution drill-down are removed, and results only render once a Session has 10 or more learners who've completed it—the same minimum applies to every filtered view, so no filter combination can isolate a smaller group.
- The Engagement tab keeps individual-level tracking for assigned, started, completed, and repeat counts, but rows are no longer clickable, so a manager or admin can't open an individual learner's detail view from here.
- Insights still generate themes and key takeaways, but without the learner quotes that back them.
- Learners always keep full access to their own scores, feedback, and transcripts, regardless of this setting.
This applies only to roleplay analytics—quiz and survey results are unaffected.
Turning on Aggregated results mode also stops scores and pass/fail status from being sent to the LMS over SCORM. Completion reporting to the LMS is unchanged.
Engagement tab
Before scores come participation. The Engagement tab answers the operational question: is my team showing up? It gives a live view of rollout progress (who's been assigned, who's started, who's complete) so you can step in before a deadline is missed.
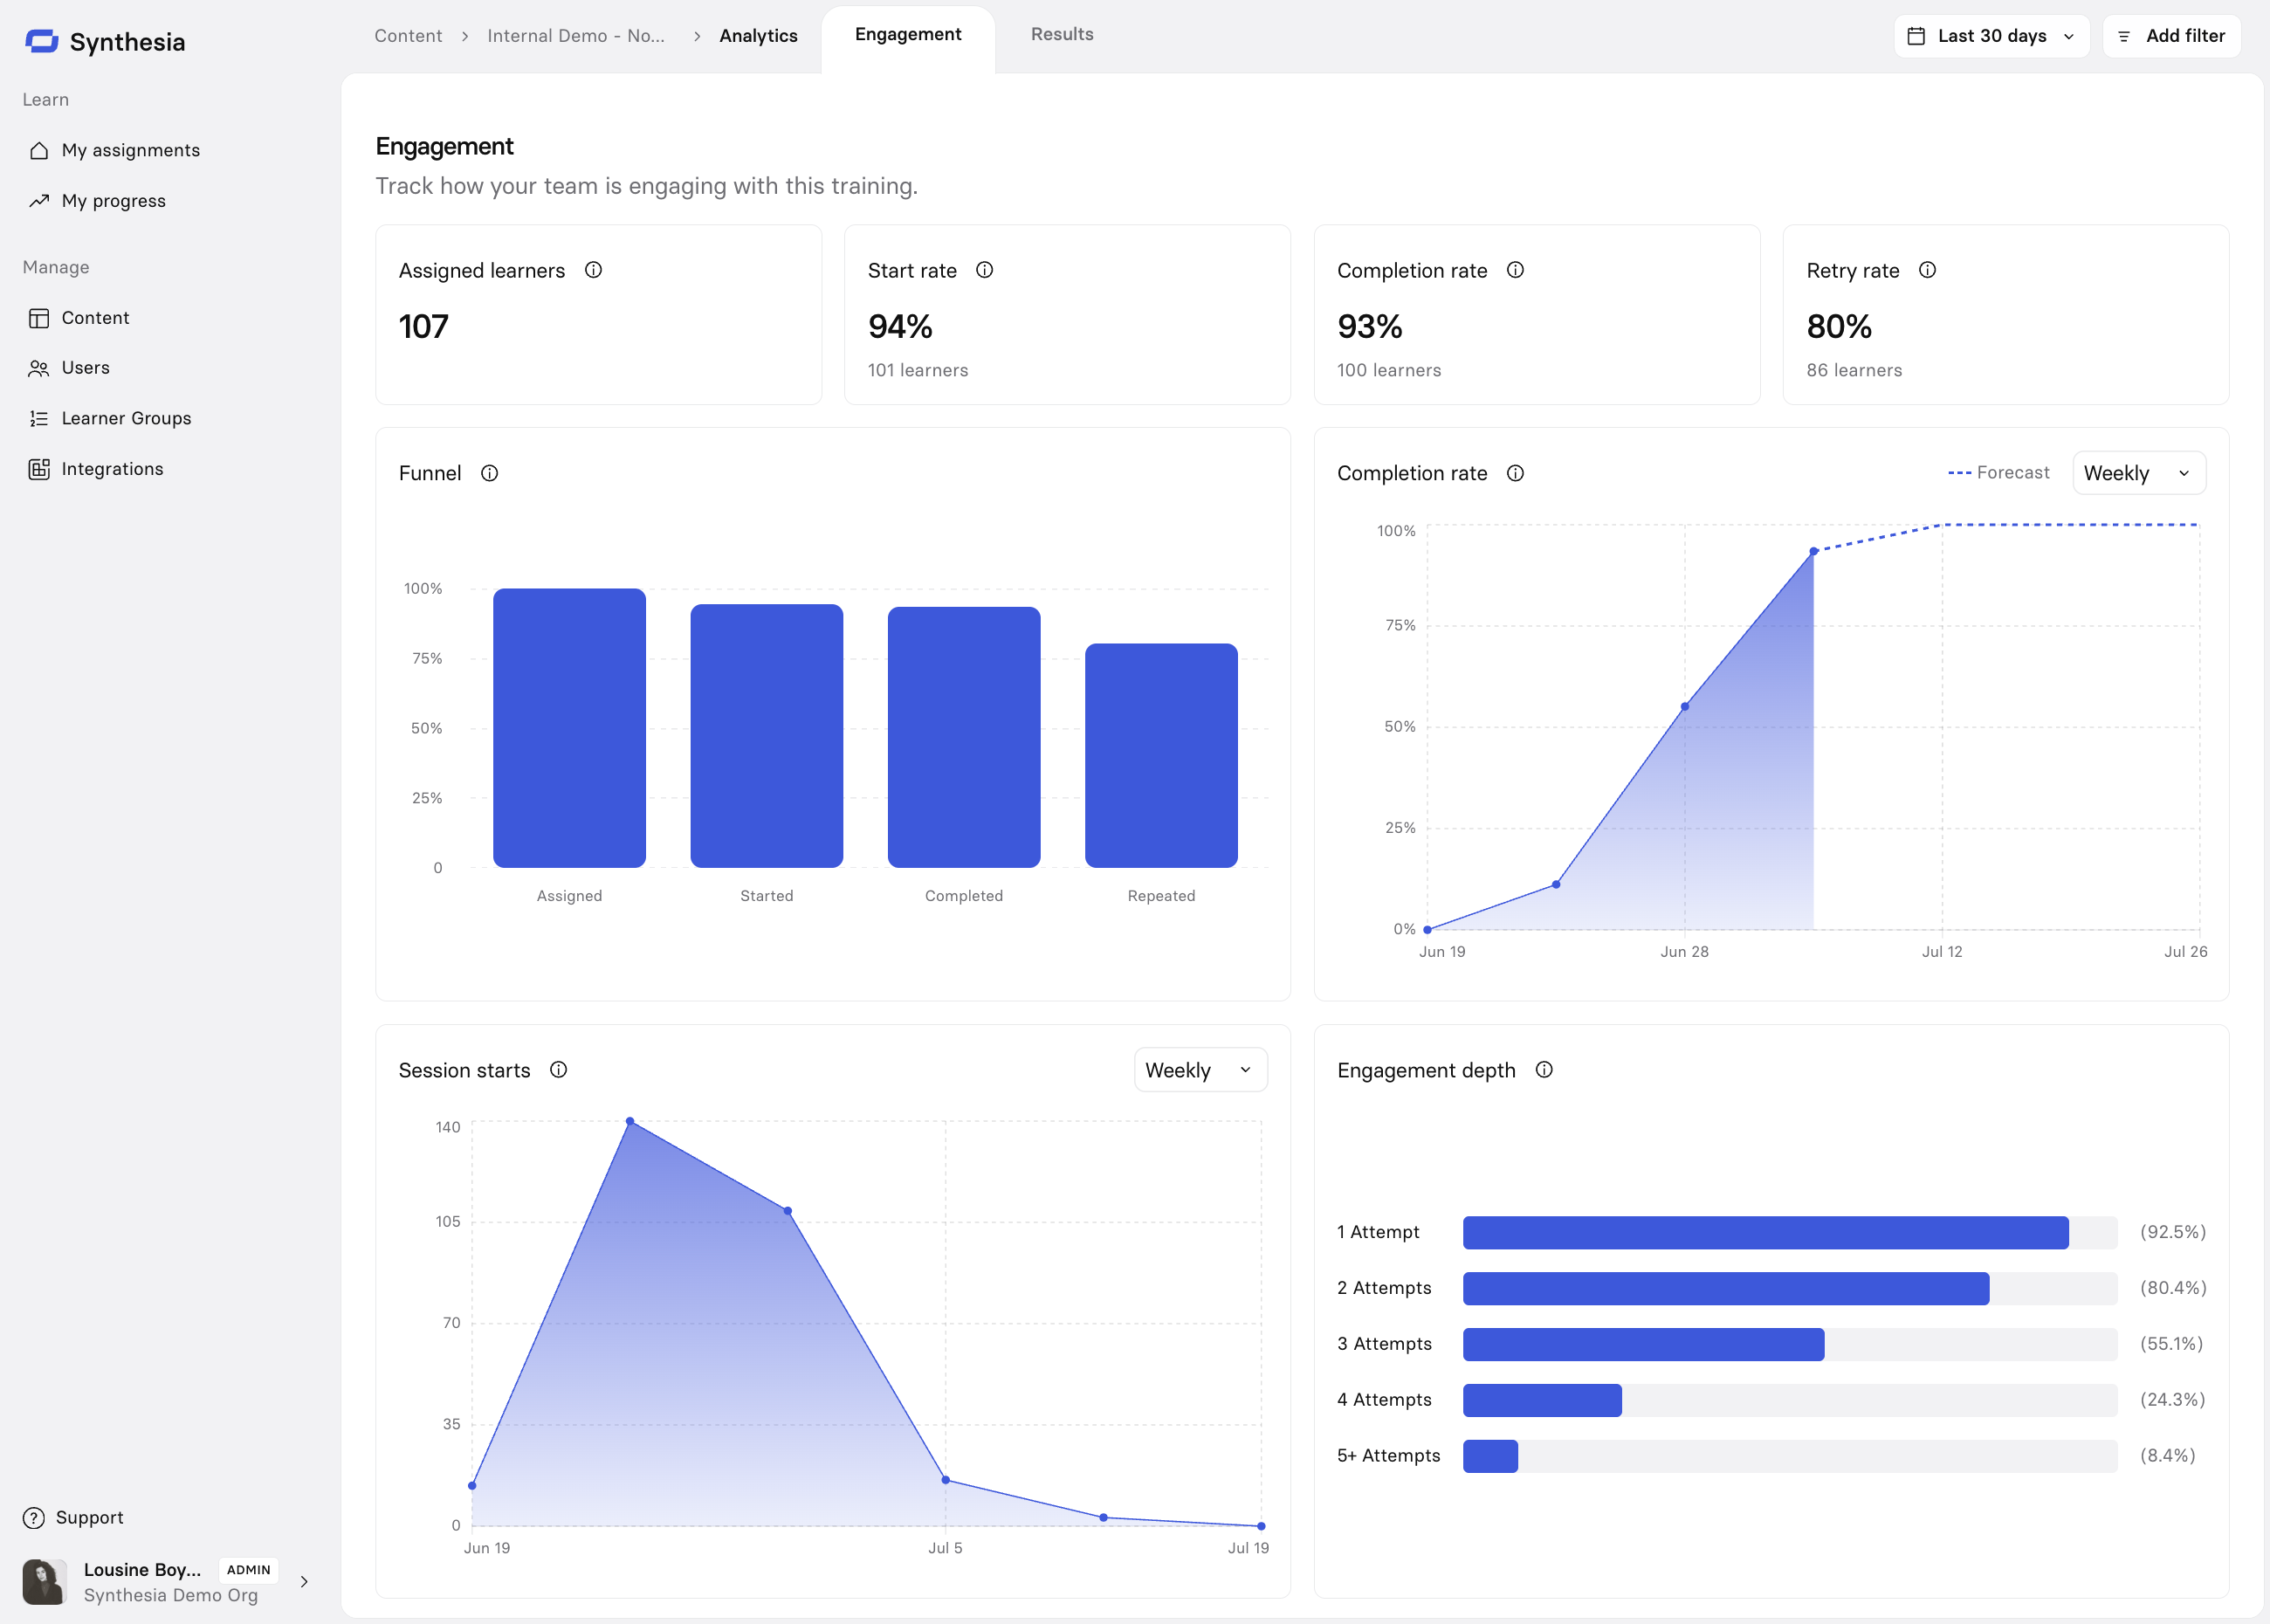
- The Assigned learners, Start rate, Completion rate, and Retry rate metrics form a funnel. Each step after the first shows both the percentage conversion from the previous step and the absolute learner count, so the biggest drop-off point is immediately visible.
- Assigned learners: everyone the training has been assigned to
- Start rate: learners who opened the training at least once
- Completion rate: learners who finished the training at least once
- Retry rate: learners who went back and repeated the training after completing it
- Session starts: Shows session starts over time at the selected granularity, which is useful for spotting when activity spikes after a reminder goes out, and when it goes quiet again.
- Completion rate: The actual cumulative completion (solid) line and a projection based on the current completion rate (dashed) line are plotted together. They show whether you're on track while there's still time to act.
- Learner table: A full table of learners with completion status and attempt count. Group by Manager, Department, Country, or any HRIS property to compare segments and surface where adoption is lagging. Selecting a learner opens their detail view scoped to that specific piece of content (that Session), showing things like their attempt history, scores, and completion status for that roleplay specifically, rather than a global view across everything they've ever done.
Results tab
The Results tab answers the harder question after completion: did the training actually work? It surfaces skill uplift and program performance without any manual reporting.
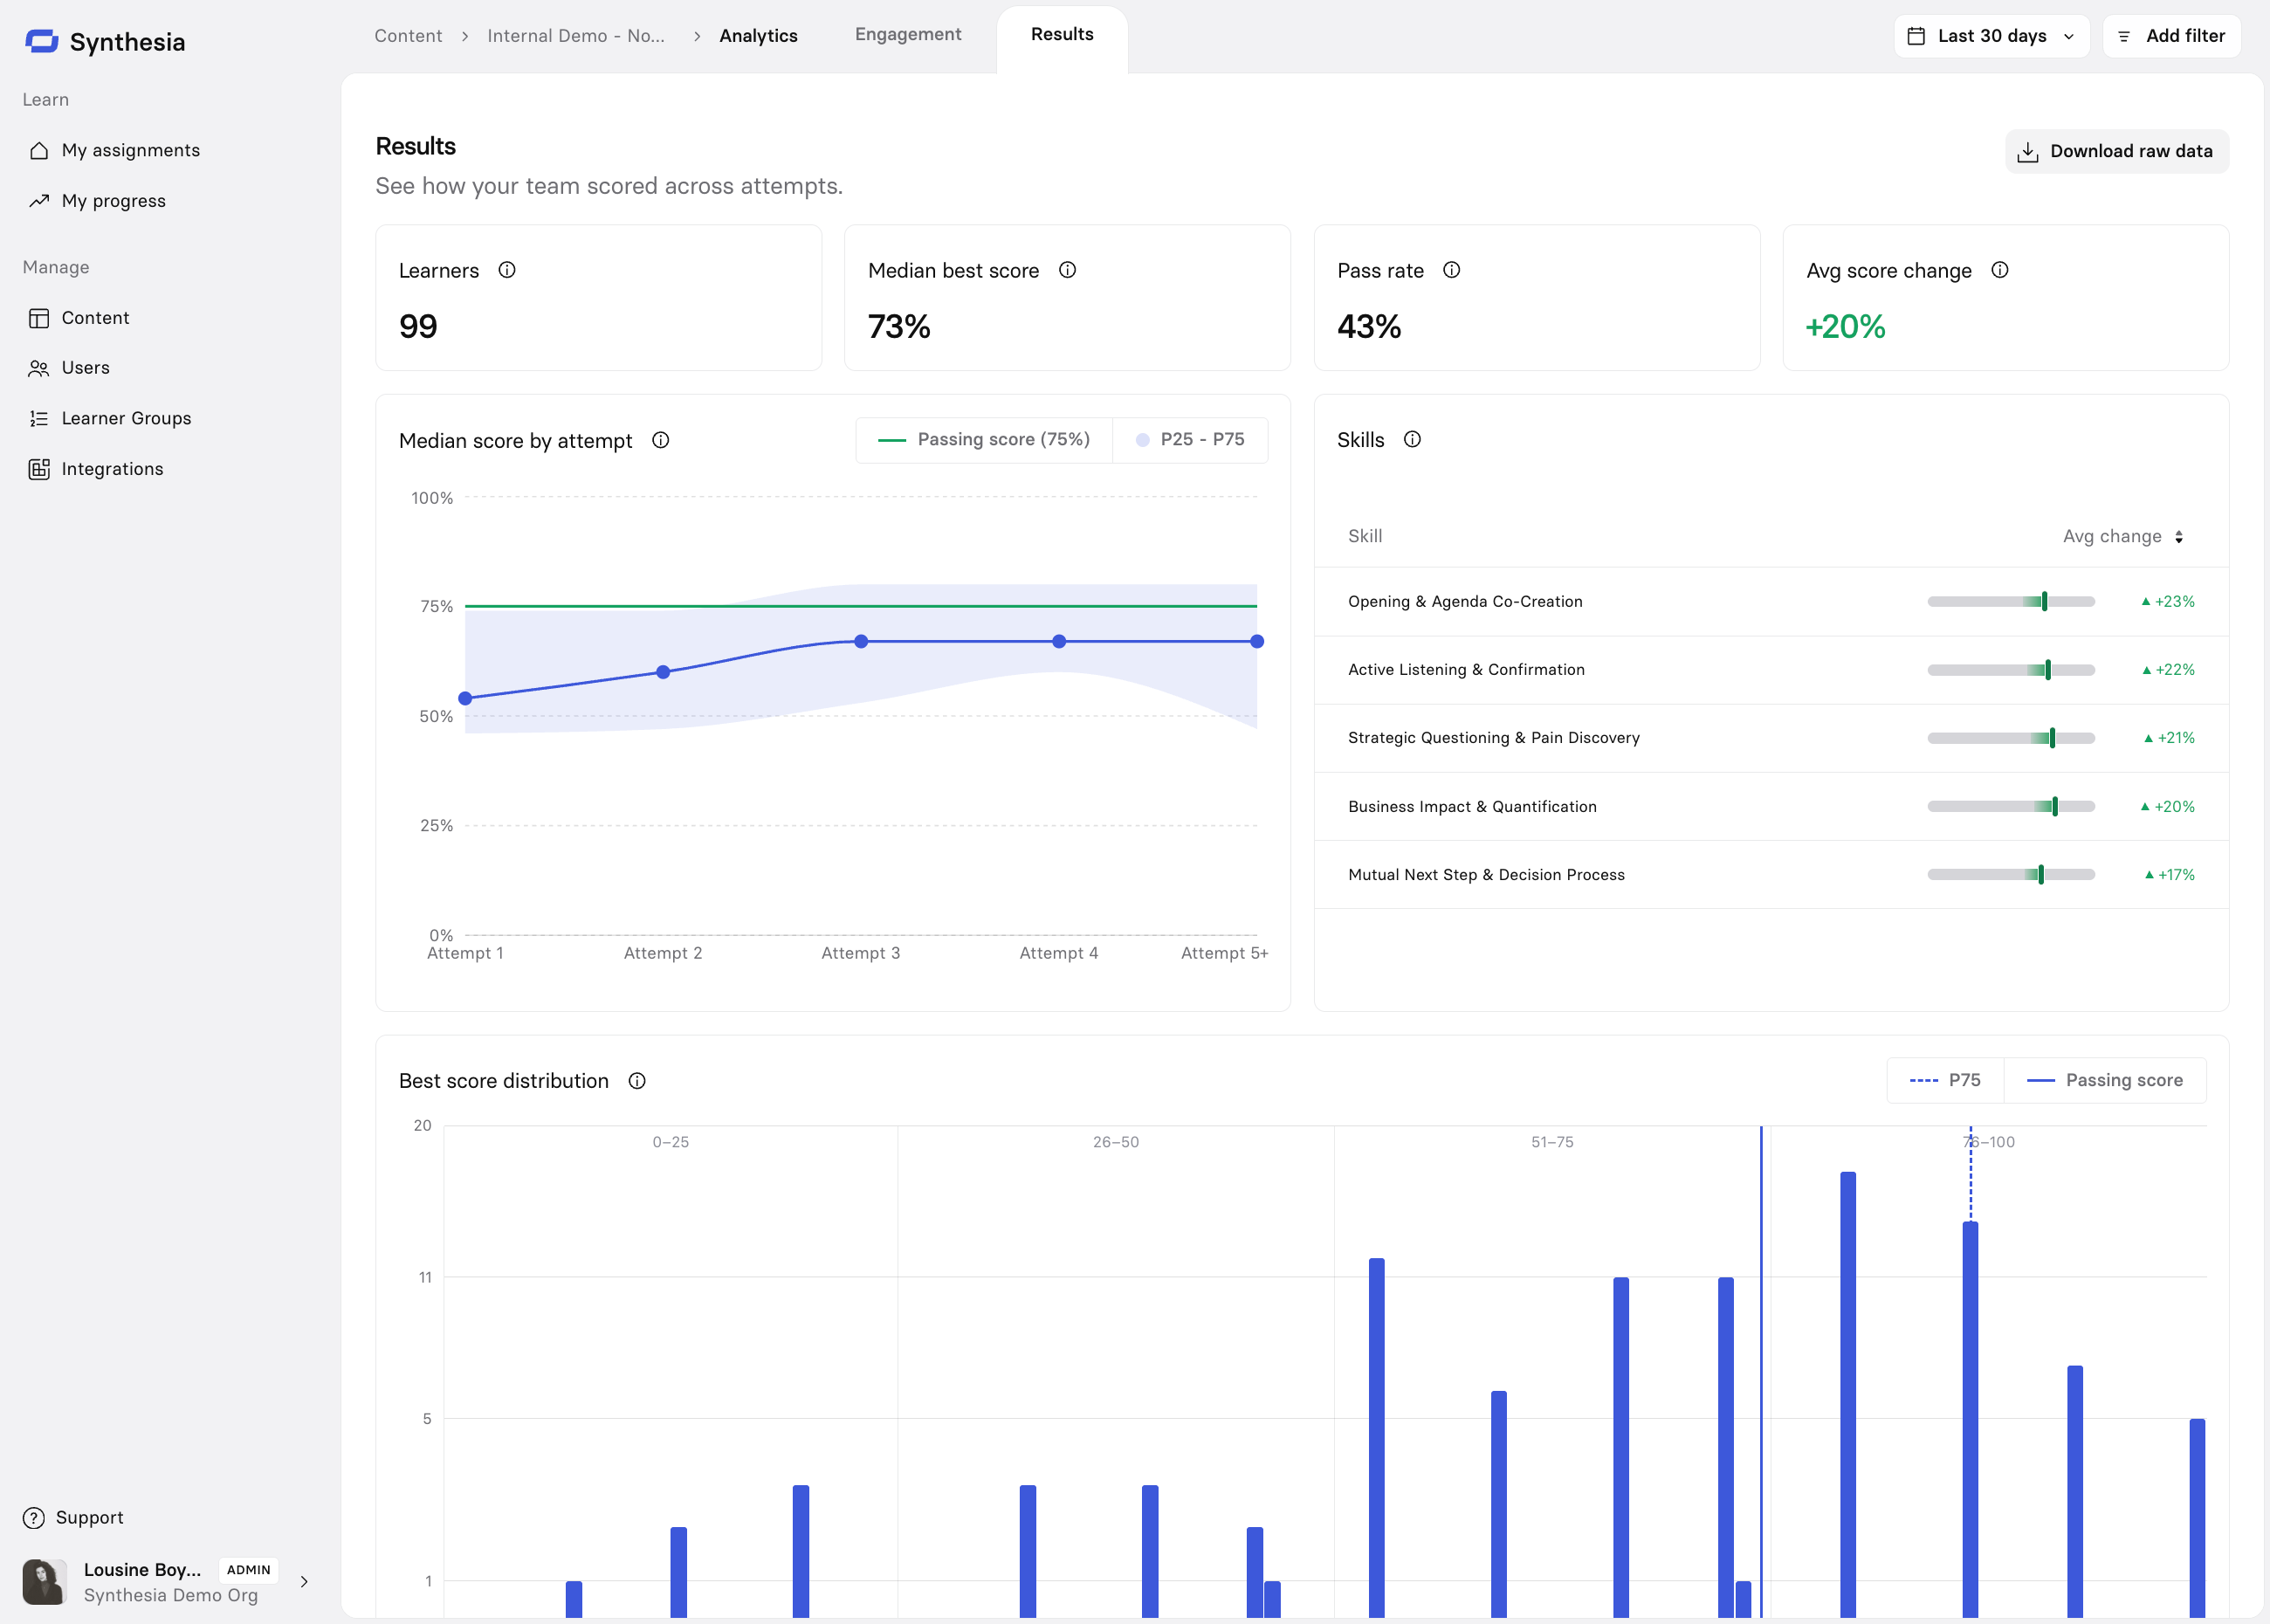
- The Learners, Median best score, Pass rate, and Avg change (the average improvement from each learner's first attempt to their best attempt) summary cards at the top of the tab give a one-glance read on the program.
- Learners: number of learners with at least one completed attempt
- Median best score: each learner's highest score, taken at the midpoint across all learners
- Pass rate: share of learners who reached a passing score after at least one attempt
- Avg change: average difference between a first score and a best score across all learners
- Median score by attempt: Plots the median score at attempt 1, attempt 2, and so on, against the passing threshold. A shaded band shows the spread between the 25th and 75th percentiles at each attempt, so you can see how many attempts it typically takes learners to pass, and whether the gap between your strongest and weakest learners is narrowing.
- Skills panel: Ranks every skill evaluated in the roleplay by average uplift (from each learner's first attempt to their best), with strongest at the top and weakest at the bottom. Green means a skill improved across the program; red means it didn't. This is where you can see which skills the training is actually moving.
- Best score distribution: A histogram of every learner's best score, with the passing threshold and the 75th percentile marked. You can select any quartile band to filter the rest of the tab to just those learners, which is useful for finding the cluster sitting just below passing, where a small coaching push often wins the most people back.
- Learner table: Lists every learner with their attempt count, best score, pass/fail status, and score change from first to best attempt. Group the table by Manager, Department, Region, or any HRIS attribute to compare performance across segments. Selecting a learner opens their detail view scoped to that specific piece of content (that Session), showing things like their attempt history, scores, and completion status for that roleplay specifically, rather than a global view across everything they've ever done.
Exporting results
Results data for each content item can be exported in CSV format by clicking the Download raw data button in the top-right. We'll generate a ZIP archive containing CSVs of the raw results and email it to you when it's ready.

Select Export from the Results tab to download a ZIP containing two CSV files:
- one CSV containing rows per attempt:
your_session_name_attempts.csv - one CSV containing rows per skill scored within each attempt:
your_session_name_skills.csv
your_session_name_attempts.csv
One row per roleplay attempt.
| Column | Description |
|---|---|
attempt_id | Unique identifier for the attempt |
learner_identifier | The learner's login identifier (email) |
learner_name | The learner's display name |
video_name | Name of the Roleplay Session |
video_id | Unique identifier for the Session |
video_version | Version of the Session at the time of the attempt |
attempt_started_at | Timestamp the attempt started, in ISO 8601 (UTC) |
attempt_completed_at | Timestamp the attempt completed, in ISO 8601 (UTC) |
score_total | Raw points earned |
score_max | Total points possible |
score_percentage | Overall score as a percentage |
score_pass_fail | PASS or FAIL, based on pass_threshold |
pass_threshold | The passing score (%) configured for the Session |
playback_status | Attempt status (e.g. completed) |
attempt_duration_seconds | Length of the attempt, in seconds |
your_session_name_skills.csv
One row per skill scored, per attempt — joins to your_session_name_attempts.csv on the value for attempt_id.
your_session_name_attempts.csv on the value for attempt_id.| Column | Description |
|---|---|
attempt_id | Joins to the matching attempt in _attempts.csv |
skill_id | Unique identifier for the skill |
skill_name | Name of the skill |
skill_score | Points earned for this skill on this attempt |
skill_max_score | Maximum points possible for this skill |
Use skills.csv to analyze skill-level trends (e.g. average score per skill across all learners), and attempts.csv for overall completion and pass-rate reporting. Join the two on attempt_id to build a combined view.
Insights tab
Insights is available on Enterprise plans.
The Insights tab reads every attempt on a Roleplay Session and surfaces team-level themes—what learners consistently do well, and where they consistently struggle—so you don't have to read transcripts one by one. It's available to Enablement Admins and managers, in both Studio and the Learn app, alongside Engagement and Results.
Insights generate once a Session has attempts from more than 10 learners, and only in workspaces with learner seats purchased. Each view shows a last-updated timestamp and the number of attempts it's based on, since insights are a snapshot rather than a live view.
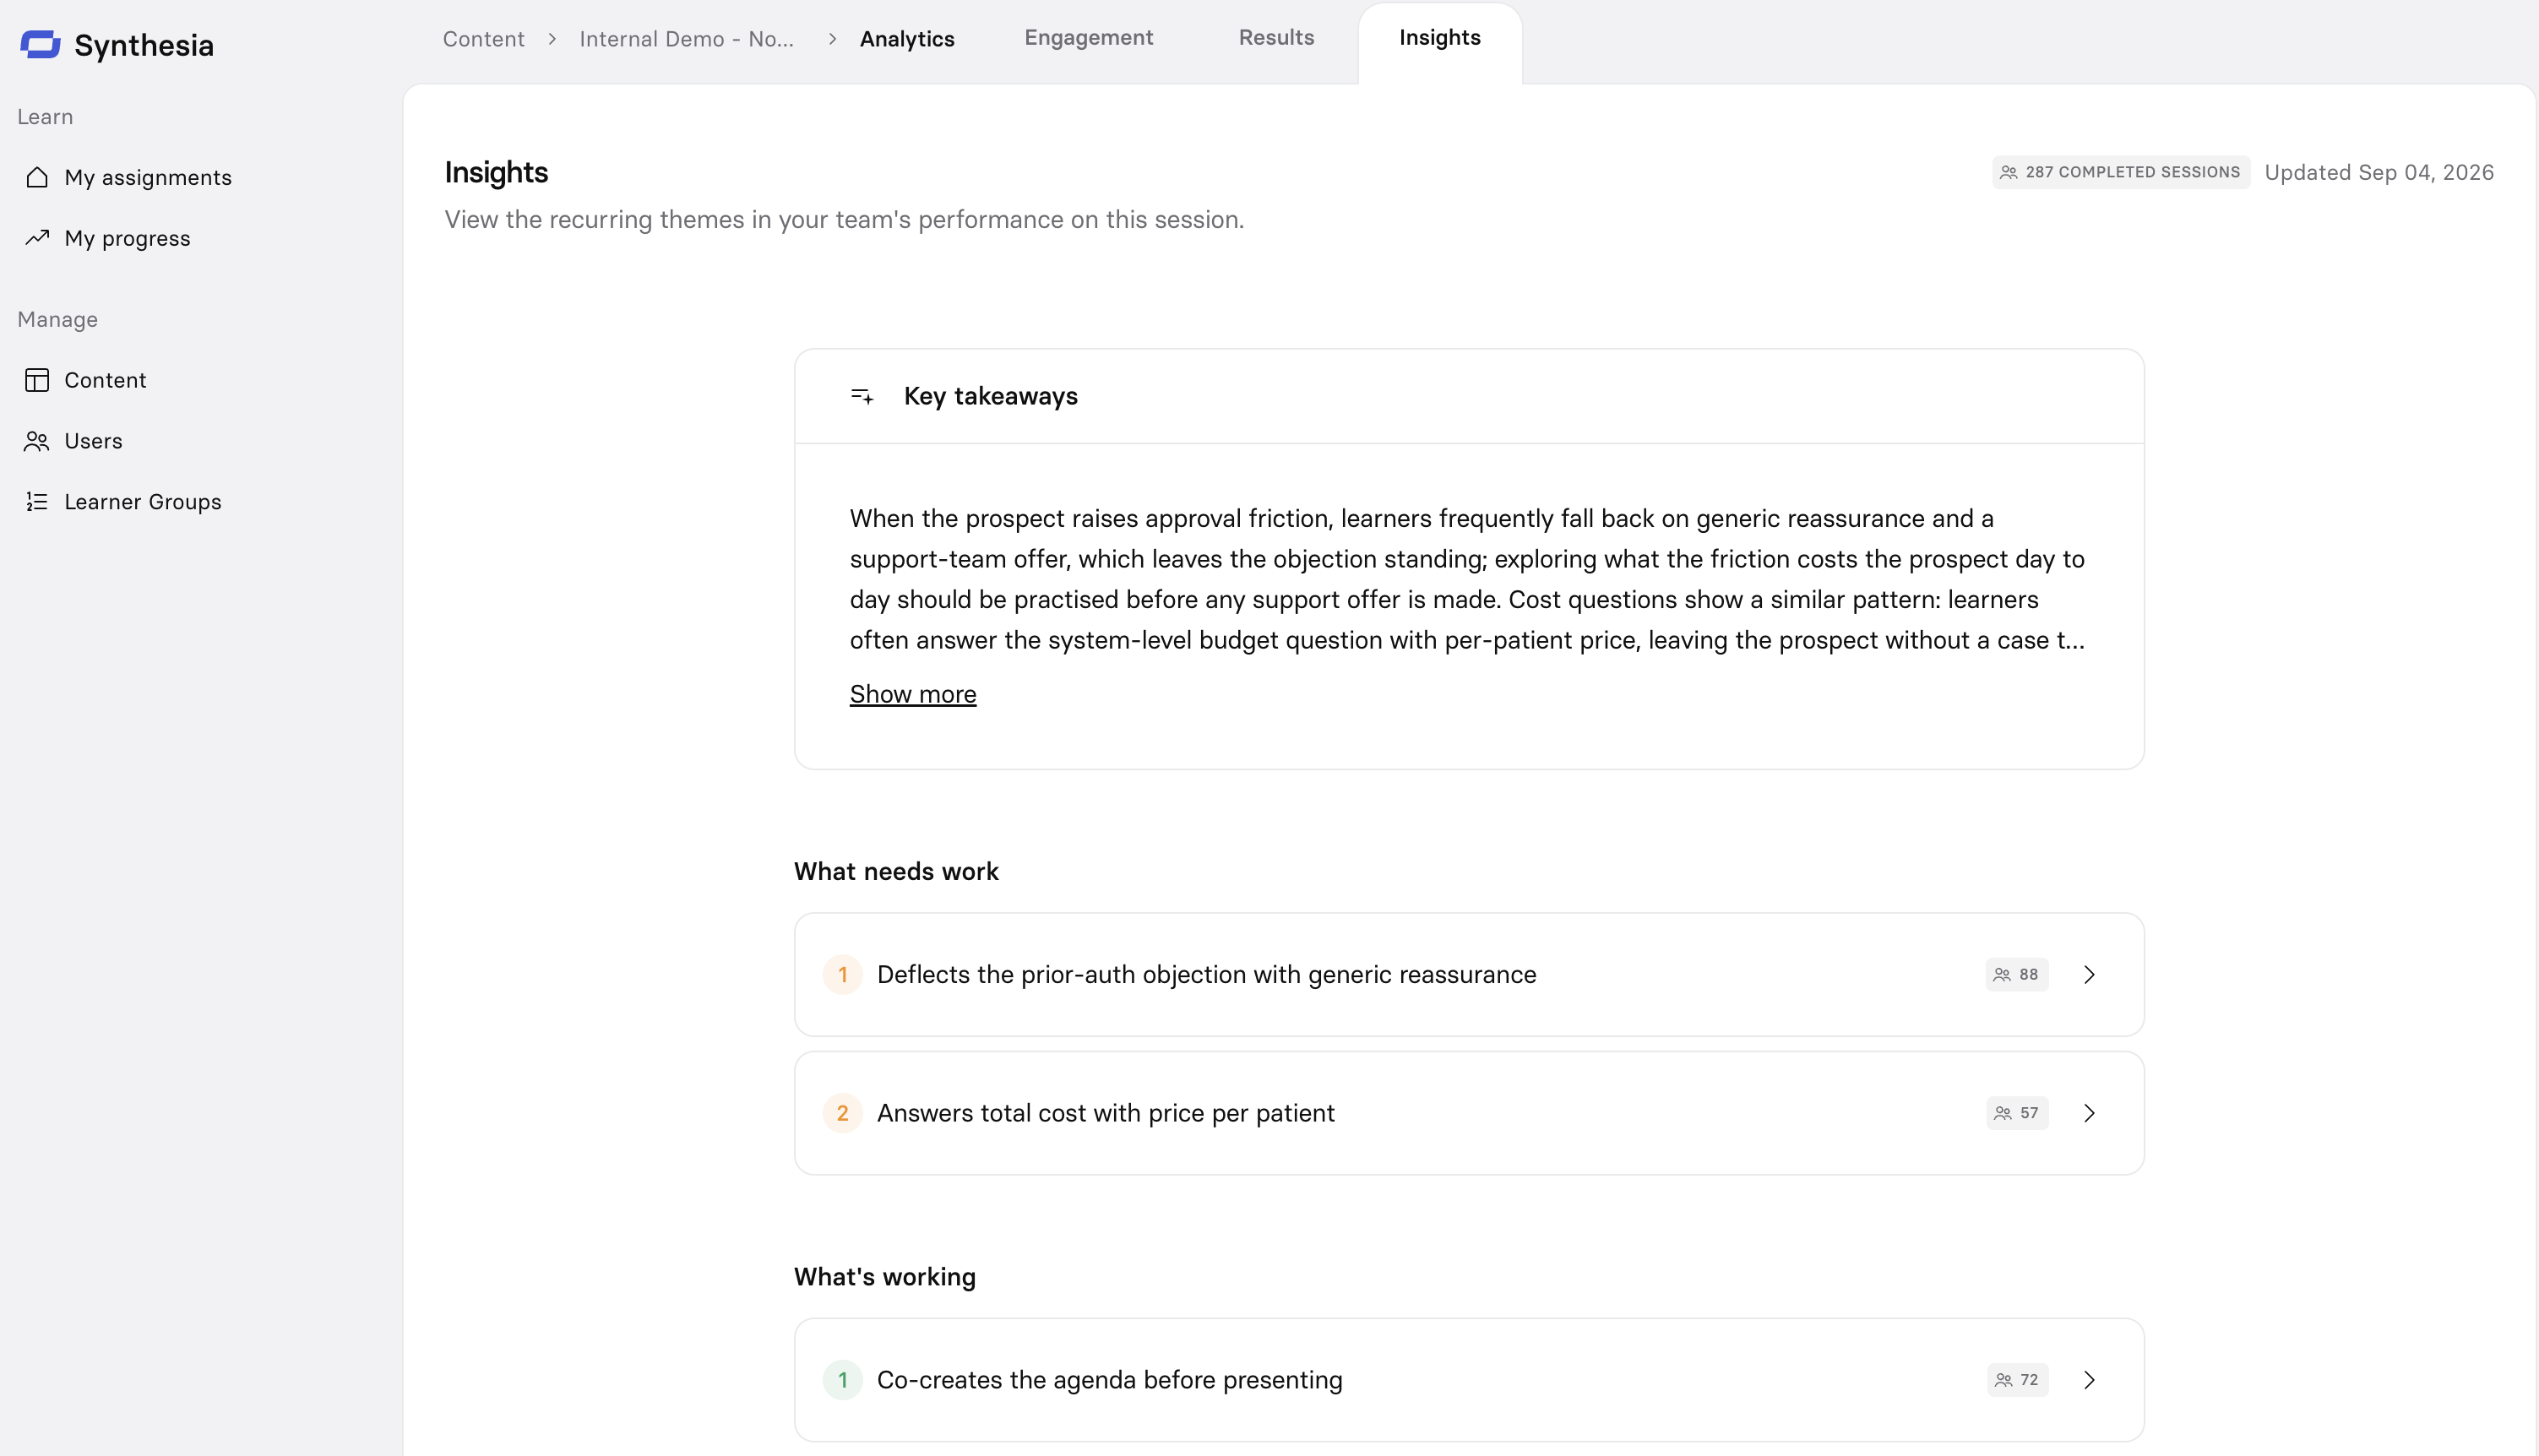
At the top of the tab, key takeaways summarize the biggest gaps and the standout strength across the team, and call out when several gaps trace back to the same root cause.
Below that, themes describe specific behaviors—each one framed as either a strength or a gap, with the context it showed up in and what it cost (or gained) the learner. Every theme is backed by real quotes from actual attempts; select a quote to open the attempt it came from. Up to 6 themes are shown per Session, strengths and gaps combined.
Enablement Admins see learner names on quotes and can open the full attempt behind any of them. Managers see the same themes and takeaways, but quotes are attributed to "Anonymous learner" and they can't open the underlying attempt.
Users
Users is a full list of everyone with access to your portal (Learners, Managers, Enablement Admins, and Organization Admins).
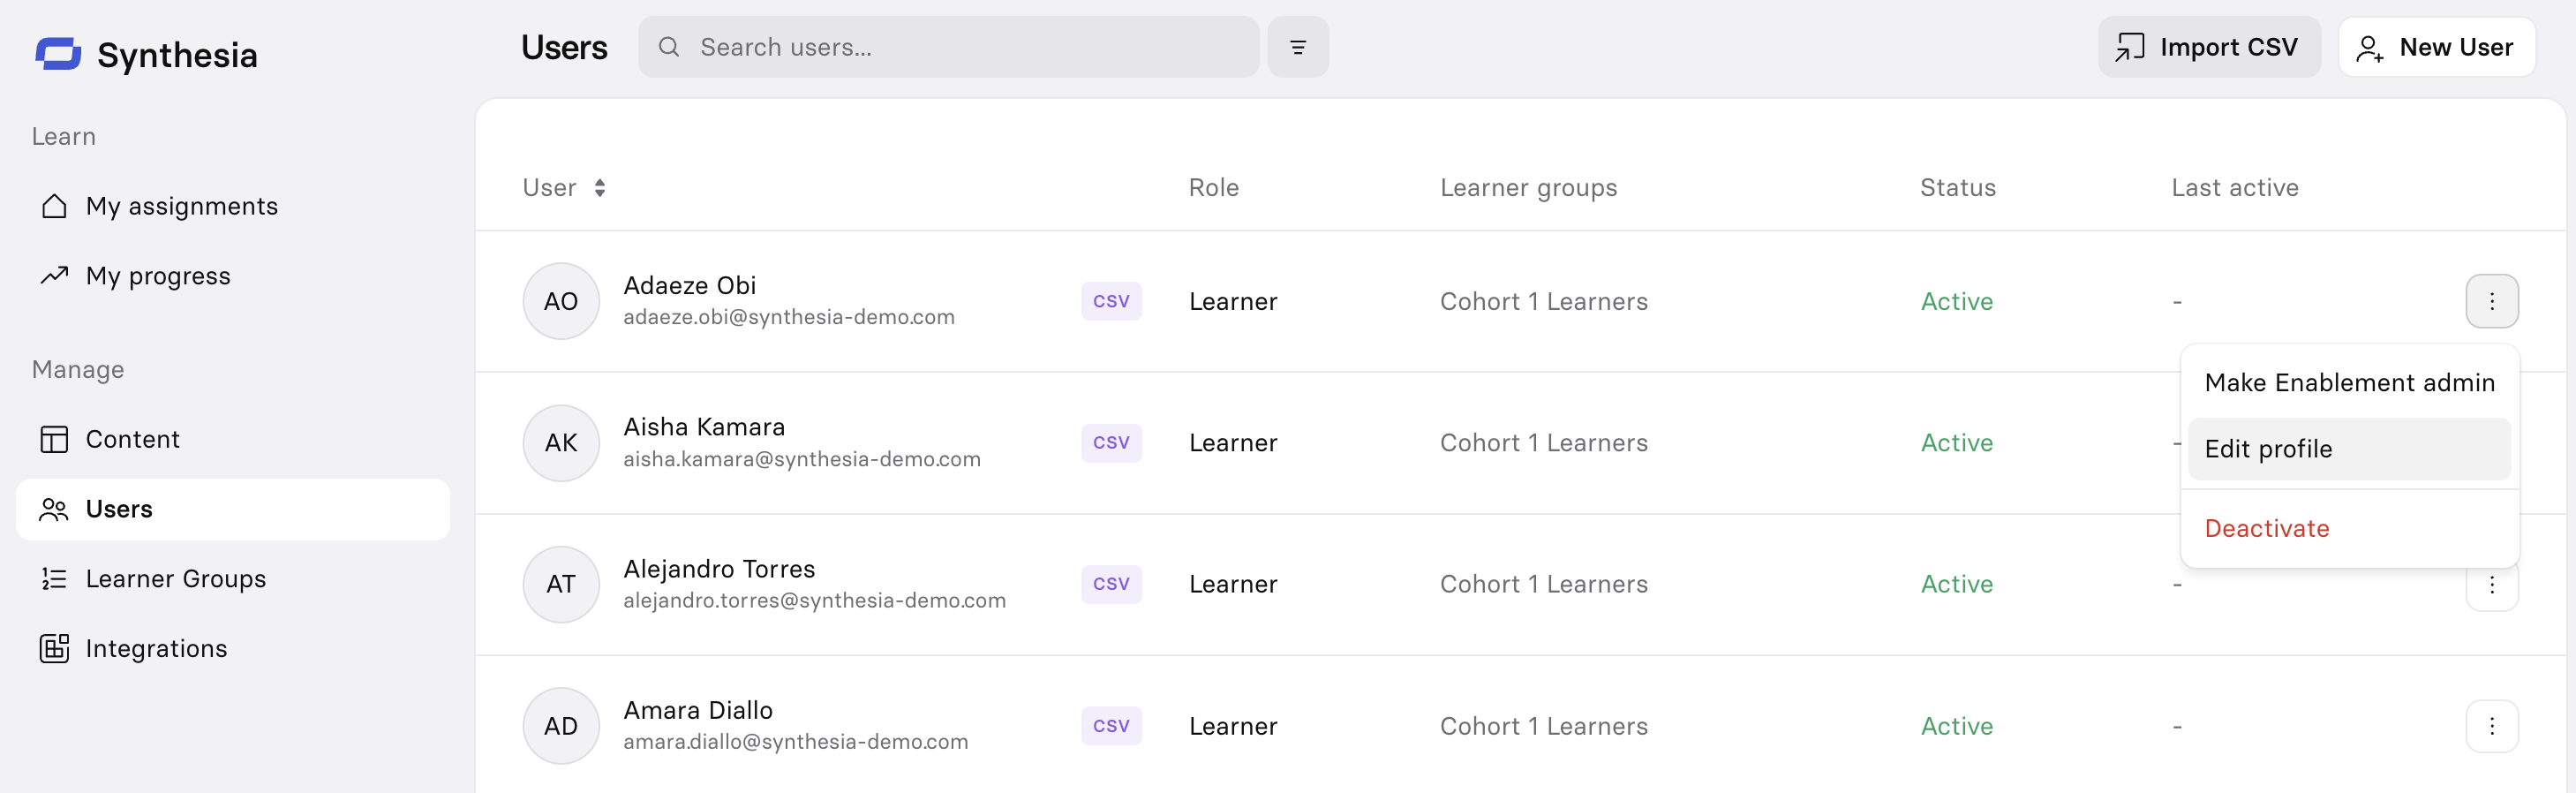
For each user, you can see:
- Name and email address
- Role
- Learner groups they belong to
- Status
- When they were last active
Managing users
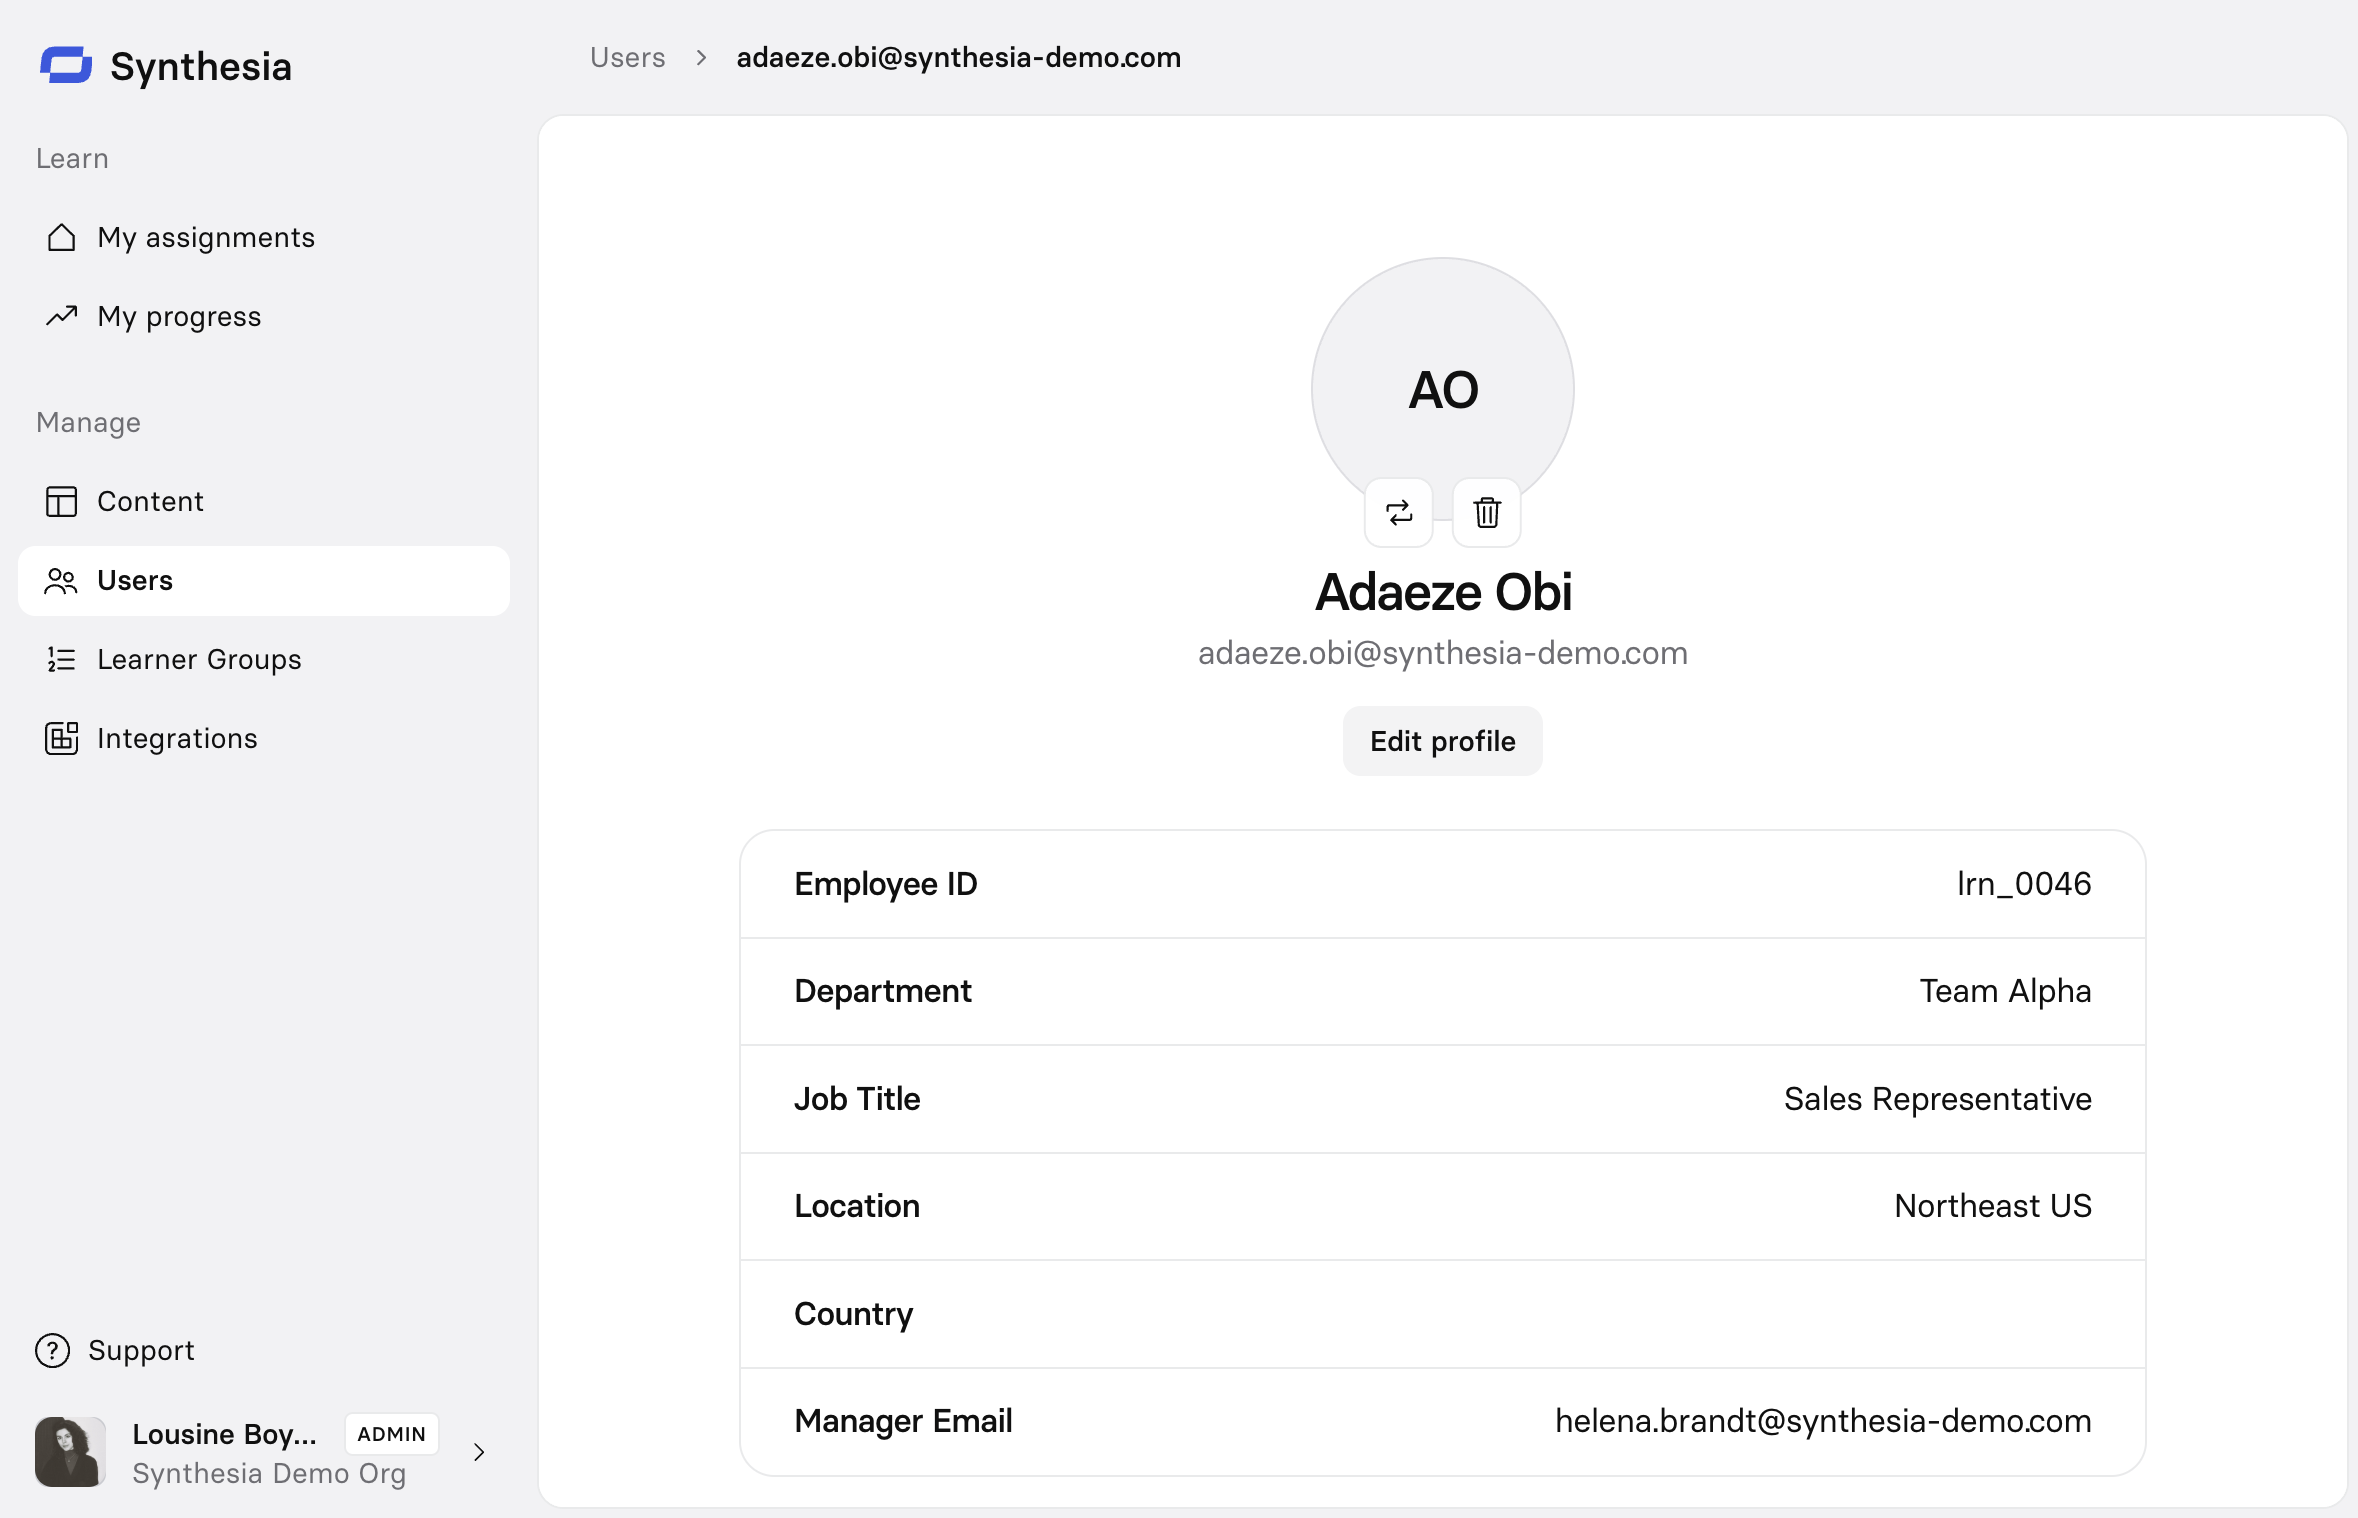
You can manage a user's Enablement admin status, edit their profile, or deactivate them by clicking the 3-dot menu at the right of their row, or by clicking on the row to view their full profile:
Add new users
There are three ways to add new users:
- Select
Import CSVfrom the top-right to bulk upload users (a sample CSV is available to assist with field mapping) - Select
New Userfrom the top-right to add a single user manually - Integrate your HRIS system
Learner Groups
Learner Groups let you organize users into groups so you can assign content to a whole team at once, rather than learner by learner. Select New Group from the top-right of the page to create one and add members.
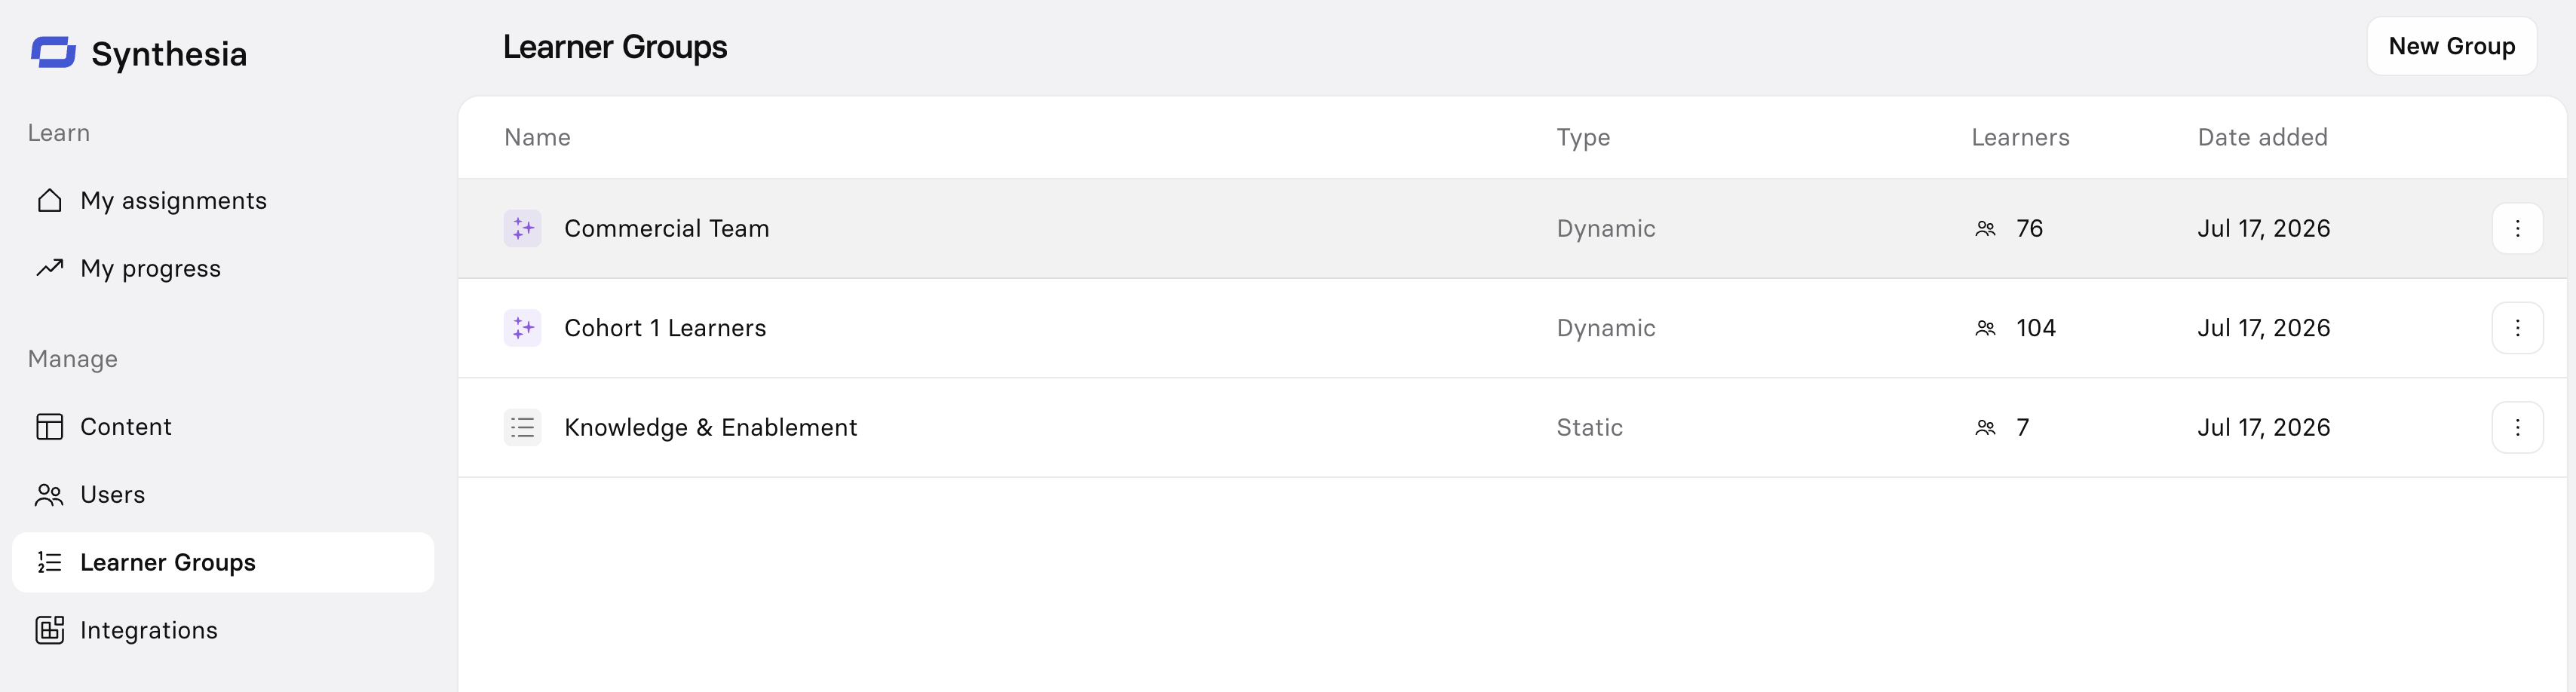
Learner Groups can be:
- Dynamic: populated automatically based on attributes like department or role
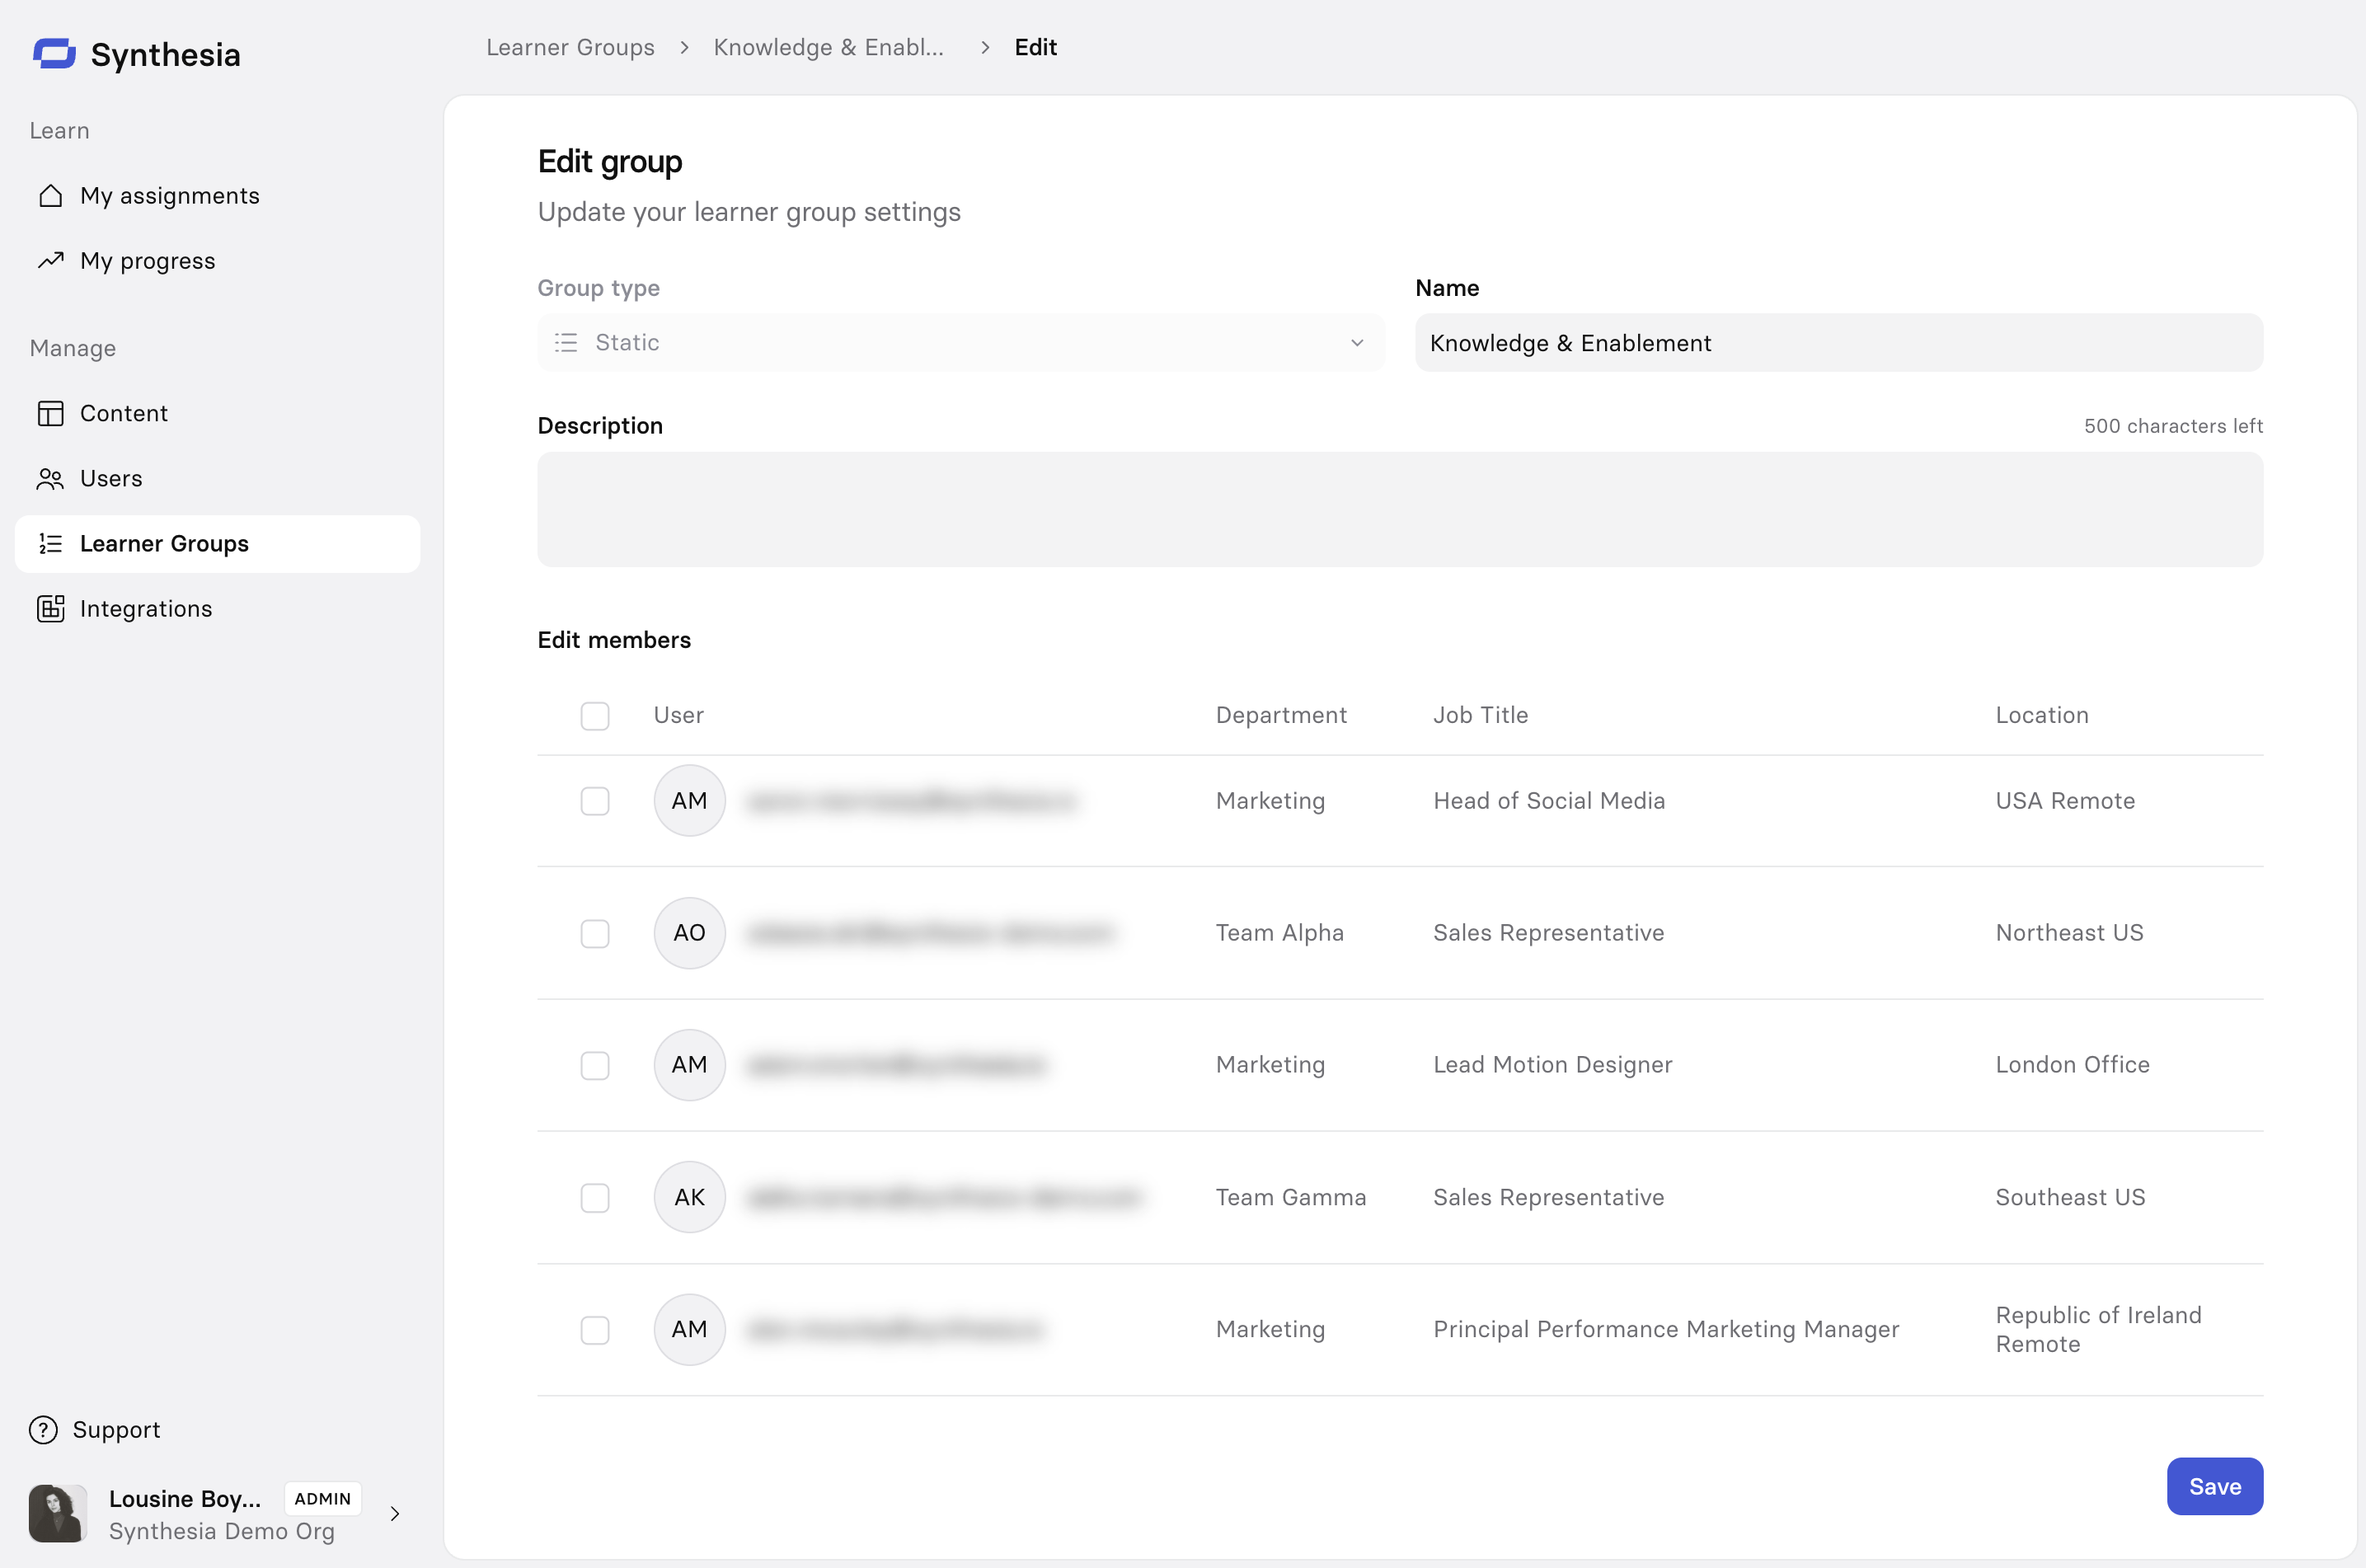
- Static: populated manually by selecting specific users from a list
For either, set a name and description (max 500 characters), and then target your learners.
A Learner Group can be edited to update targeting or deleted by clicking the 3-dot icon at the right:
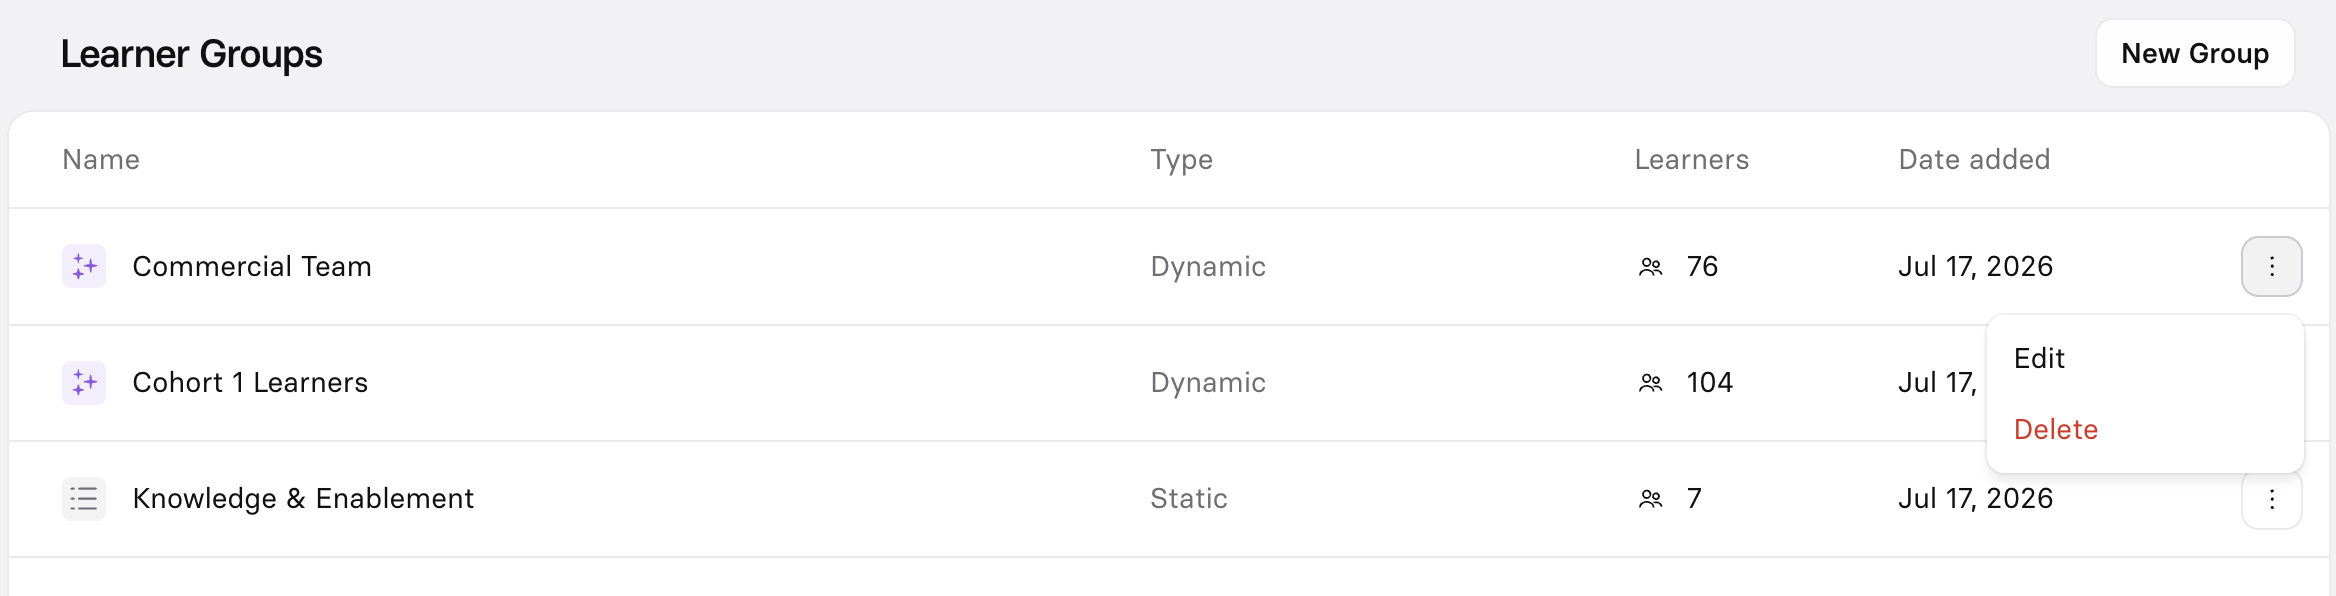
Note:You cannot switch between Learner Group types (e.g. if you have a Dynamic Group, you cannot switch it to a Static Group later).
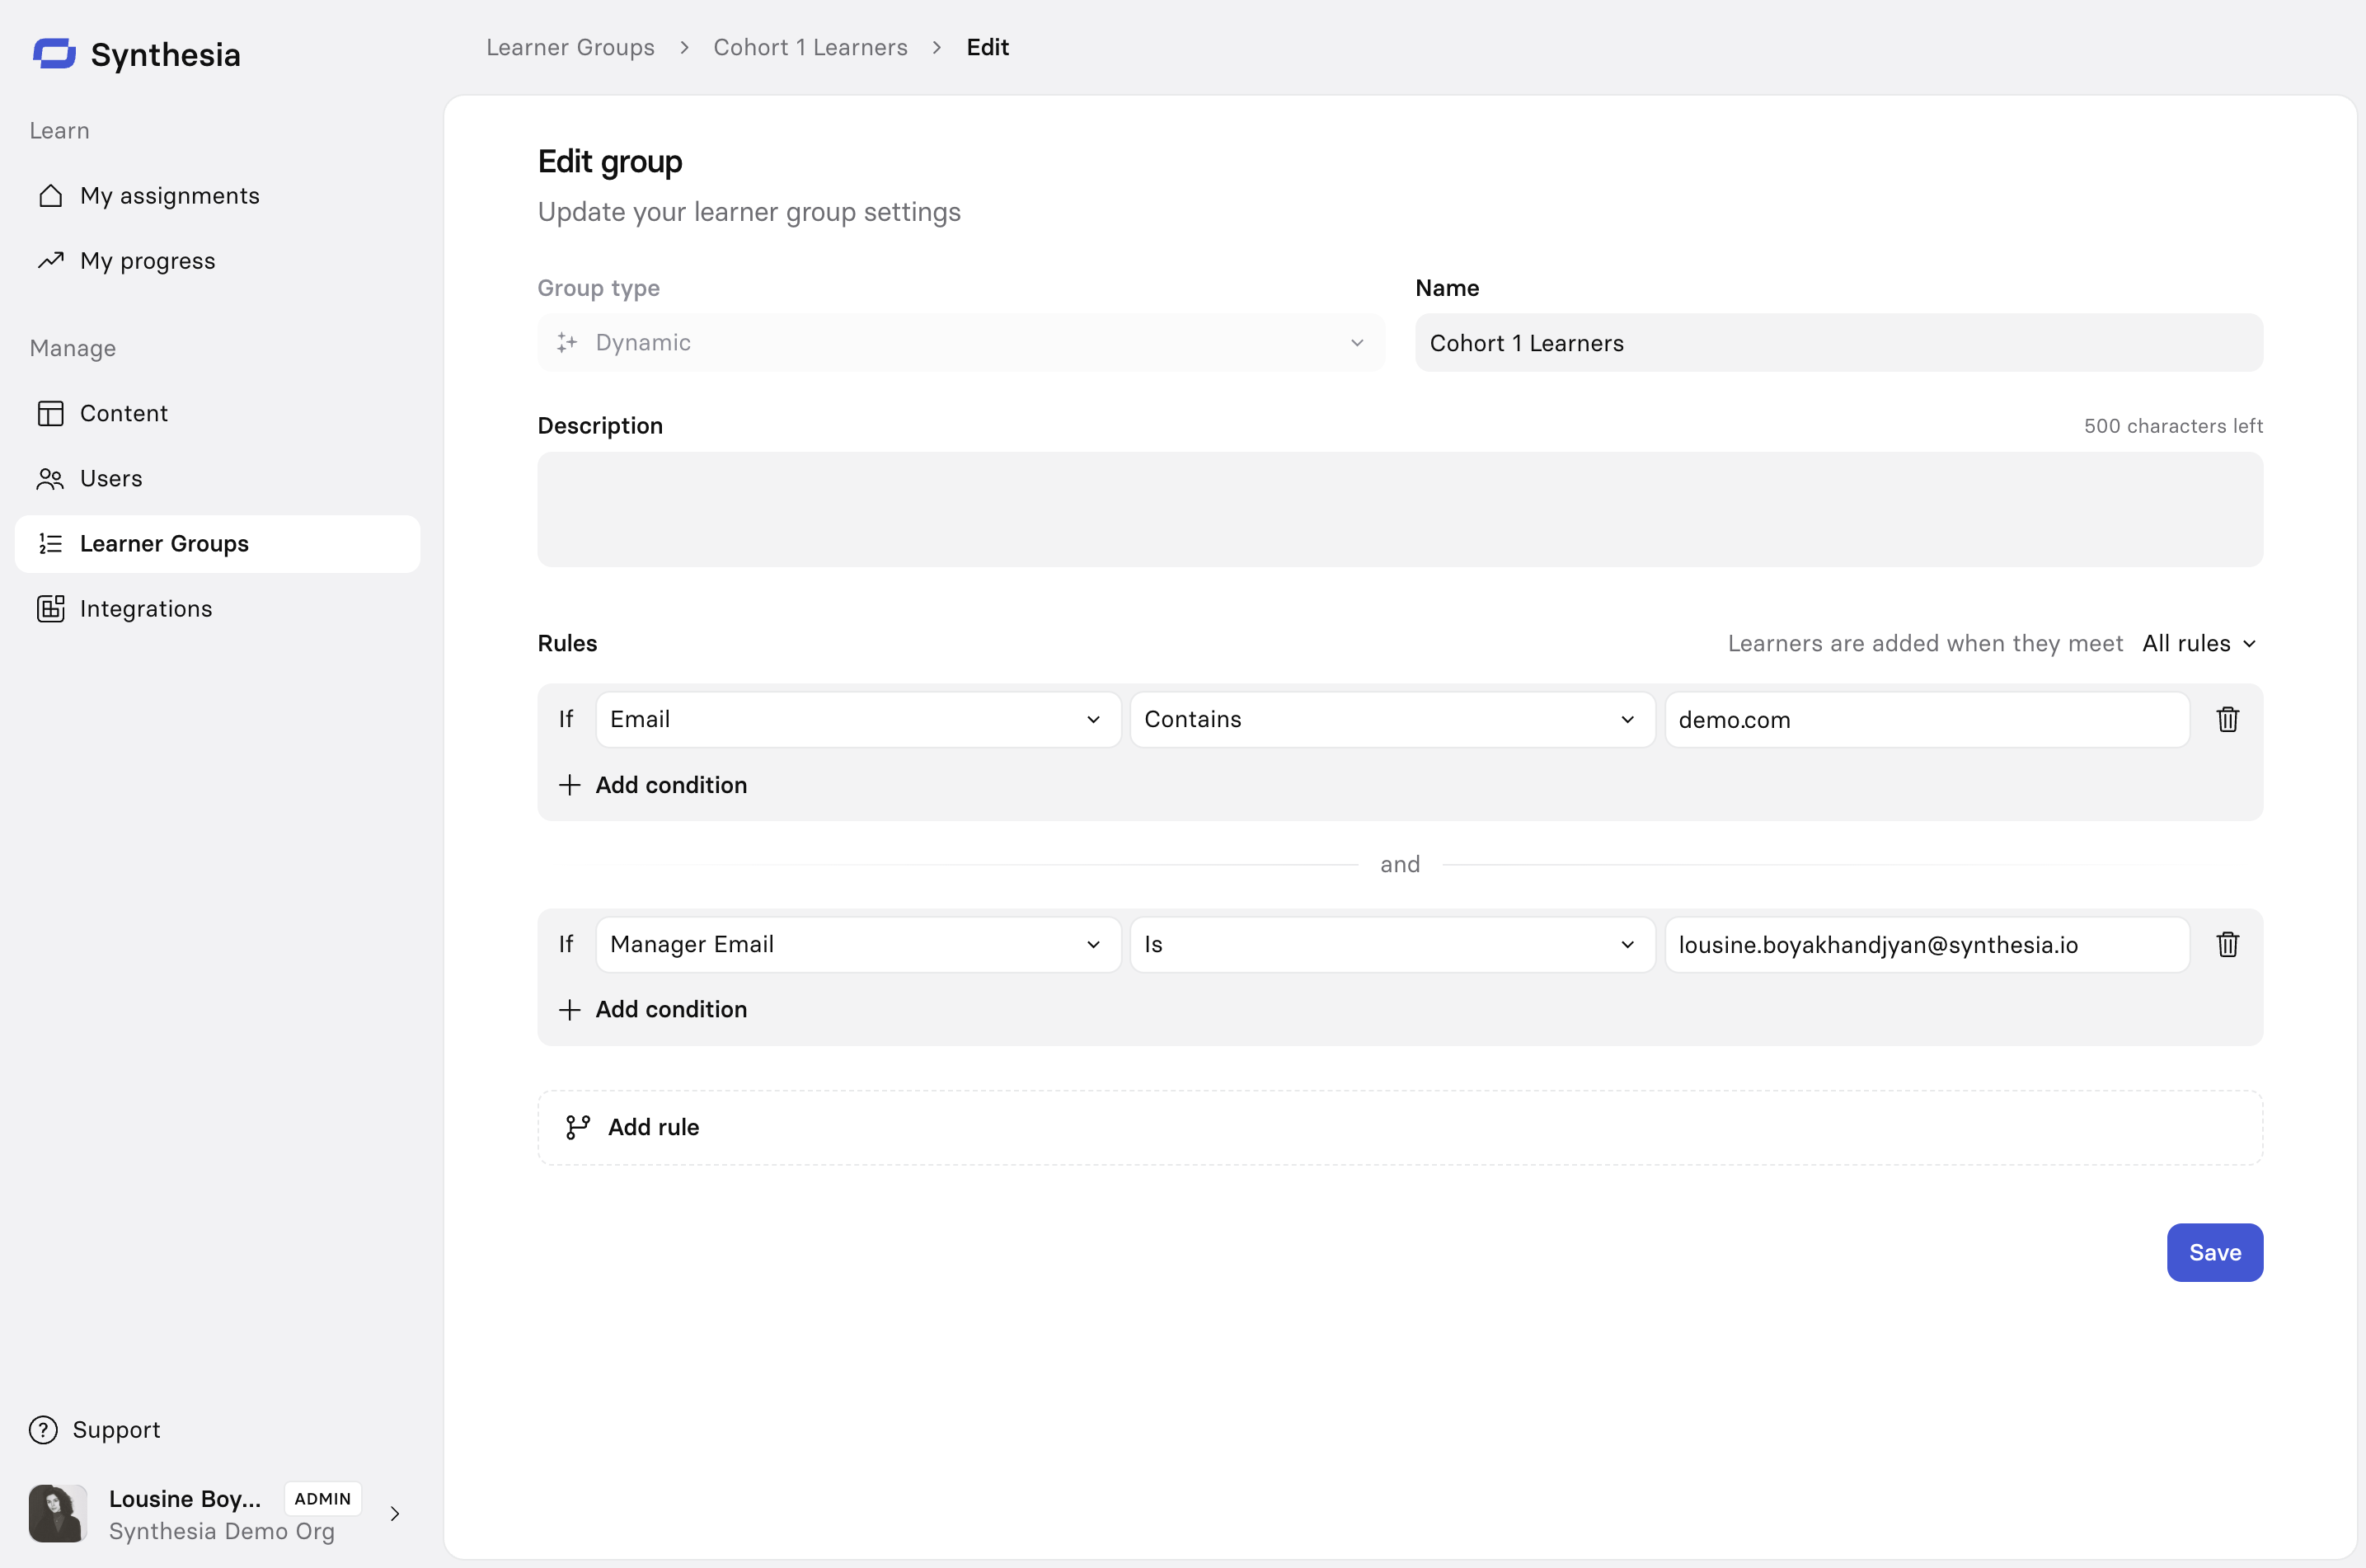
Dynamic Learner Groups
For Dynamic Learner Groups, use a set of filters to target specific learners dynamically:
Static Learner Groups
For Static Learner Groups, select learners from a list manually to target them in that group:
Integrations
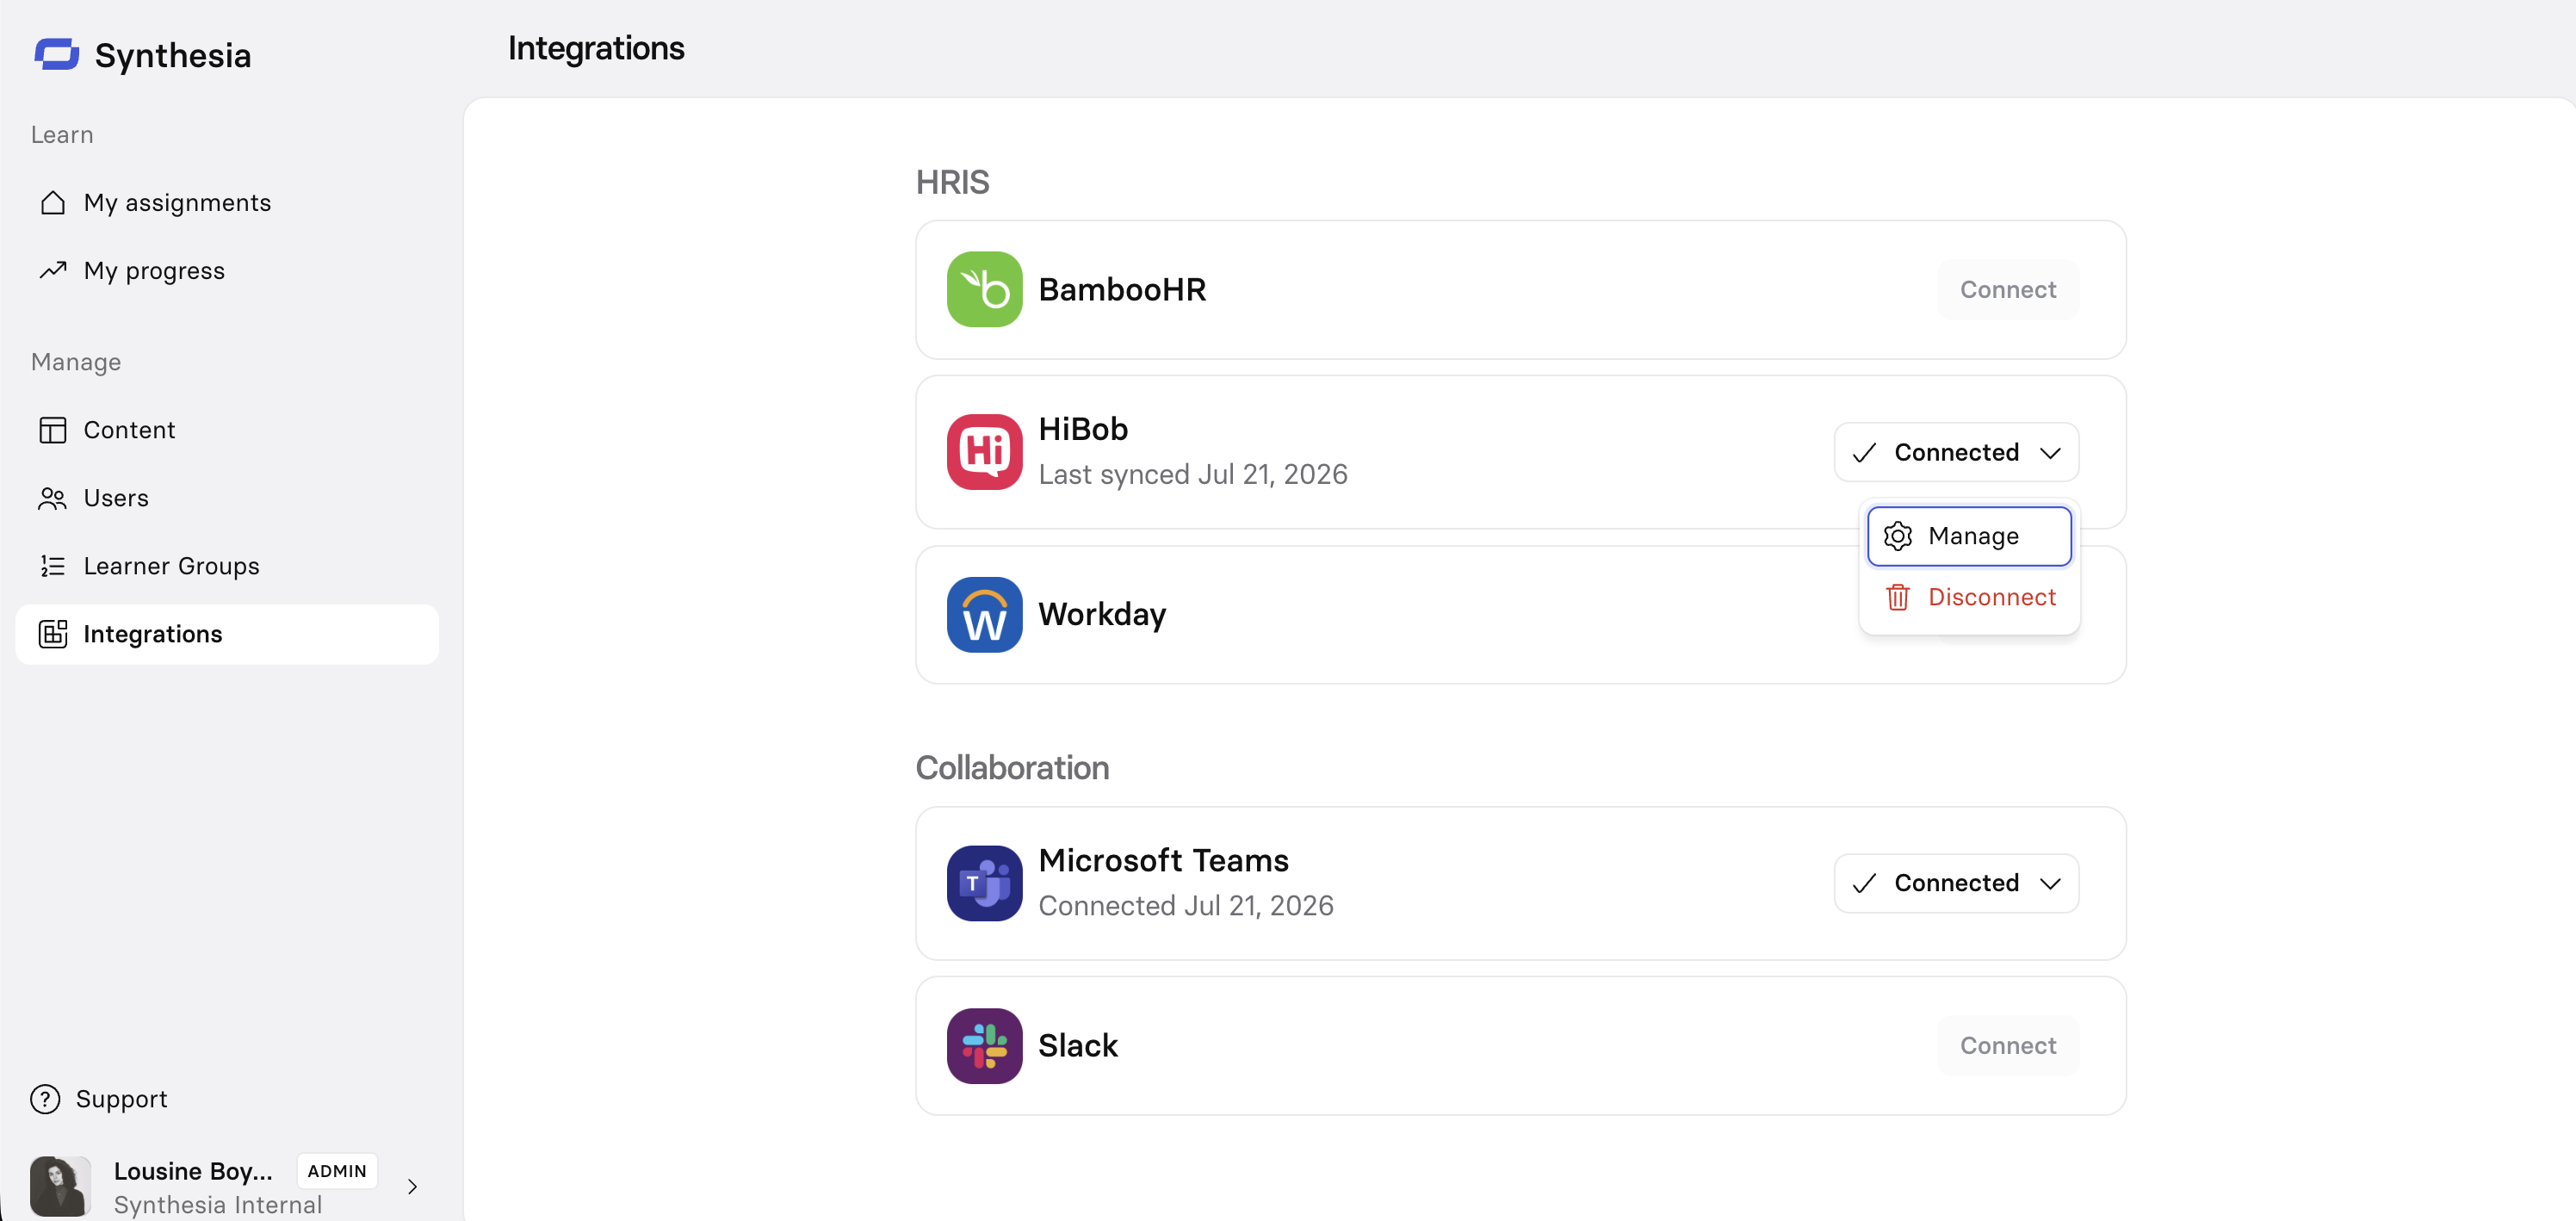
Integrations connect Synthesia to the tools you already use, so learner management and notifications run automatically instead of by hand. Synthesia currently supports two types: HRIS integrations, for syncing your learner roster, and messaging integrations, for sending reminders through Slack or Microsoft Teams.
Only one of each type of integration can be connected at a time. Once connected, click on the dropdown at the right to Manage or Disconnect the connection.
HRIS integrations
Integrate your HRIS to keep your learner roster in sync automatically every night, auto-assign Sessions to new hires who match your assignment criteria, auto-deactivate departed employees after a 7-day grace period, and assign Sessions at scale using HRIS attributes.
HRIS integrations are available on Custom Roleplay Sessions plans only. See How do I choose the right Roleplay Sessions plan? for details.
We currently support BambooHR, HiBob, and Workday for learner management.
The first sync overwrites existing data. On initial connection, existing learners in Synthesia are reconciled against your HRIS report, and HRIS attributes overwrite existing Synthesia values. Review your report before connecting so you don't lose data you've entered manually.
Collaboration and messaging integrations
Connect Slack or Microsoft Teams to reach learners with reminders where they already work, in addition to email. Once connected, learners receive a direct message when a Session is assigned and when they complete one, each with the Session title and a link to open it.
Updated 26 days ago