Set up Entra/Azure for SSO Configuration
Step 1: Request SSO Setup
Start by reaching out to your Customer Success Manager to ensure your current plan allows SSO setup. Then loop in the Support Team ([email protected]) and ask them to kickstart the process.
Step 2: Configure the connection between your Identity Provider (IdP) and Synthesia’s SSO service provider
- After the support team sends you the WorkOS setup link, please click on it and follow the Admin Portal instructions
- You will see a list of the IdP providers available. Choose the one you need and follow the corresponding step-by-step guidelines on how to configure the IdP settings.
Once done, you will be able to test your SSO integration with that identity provider.
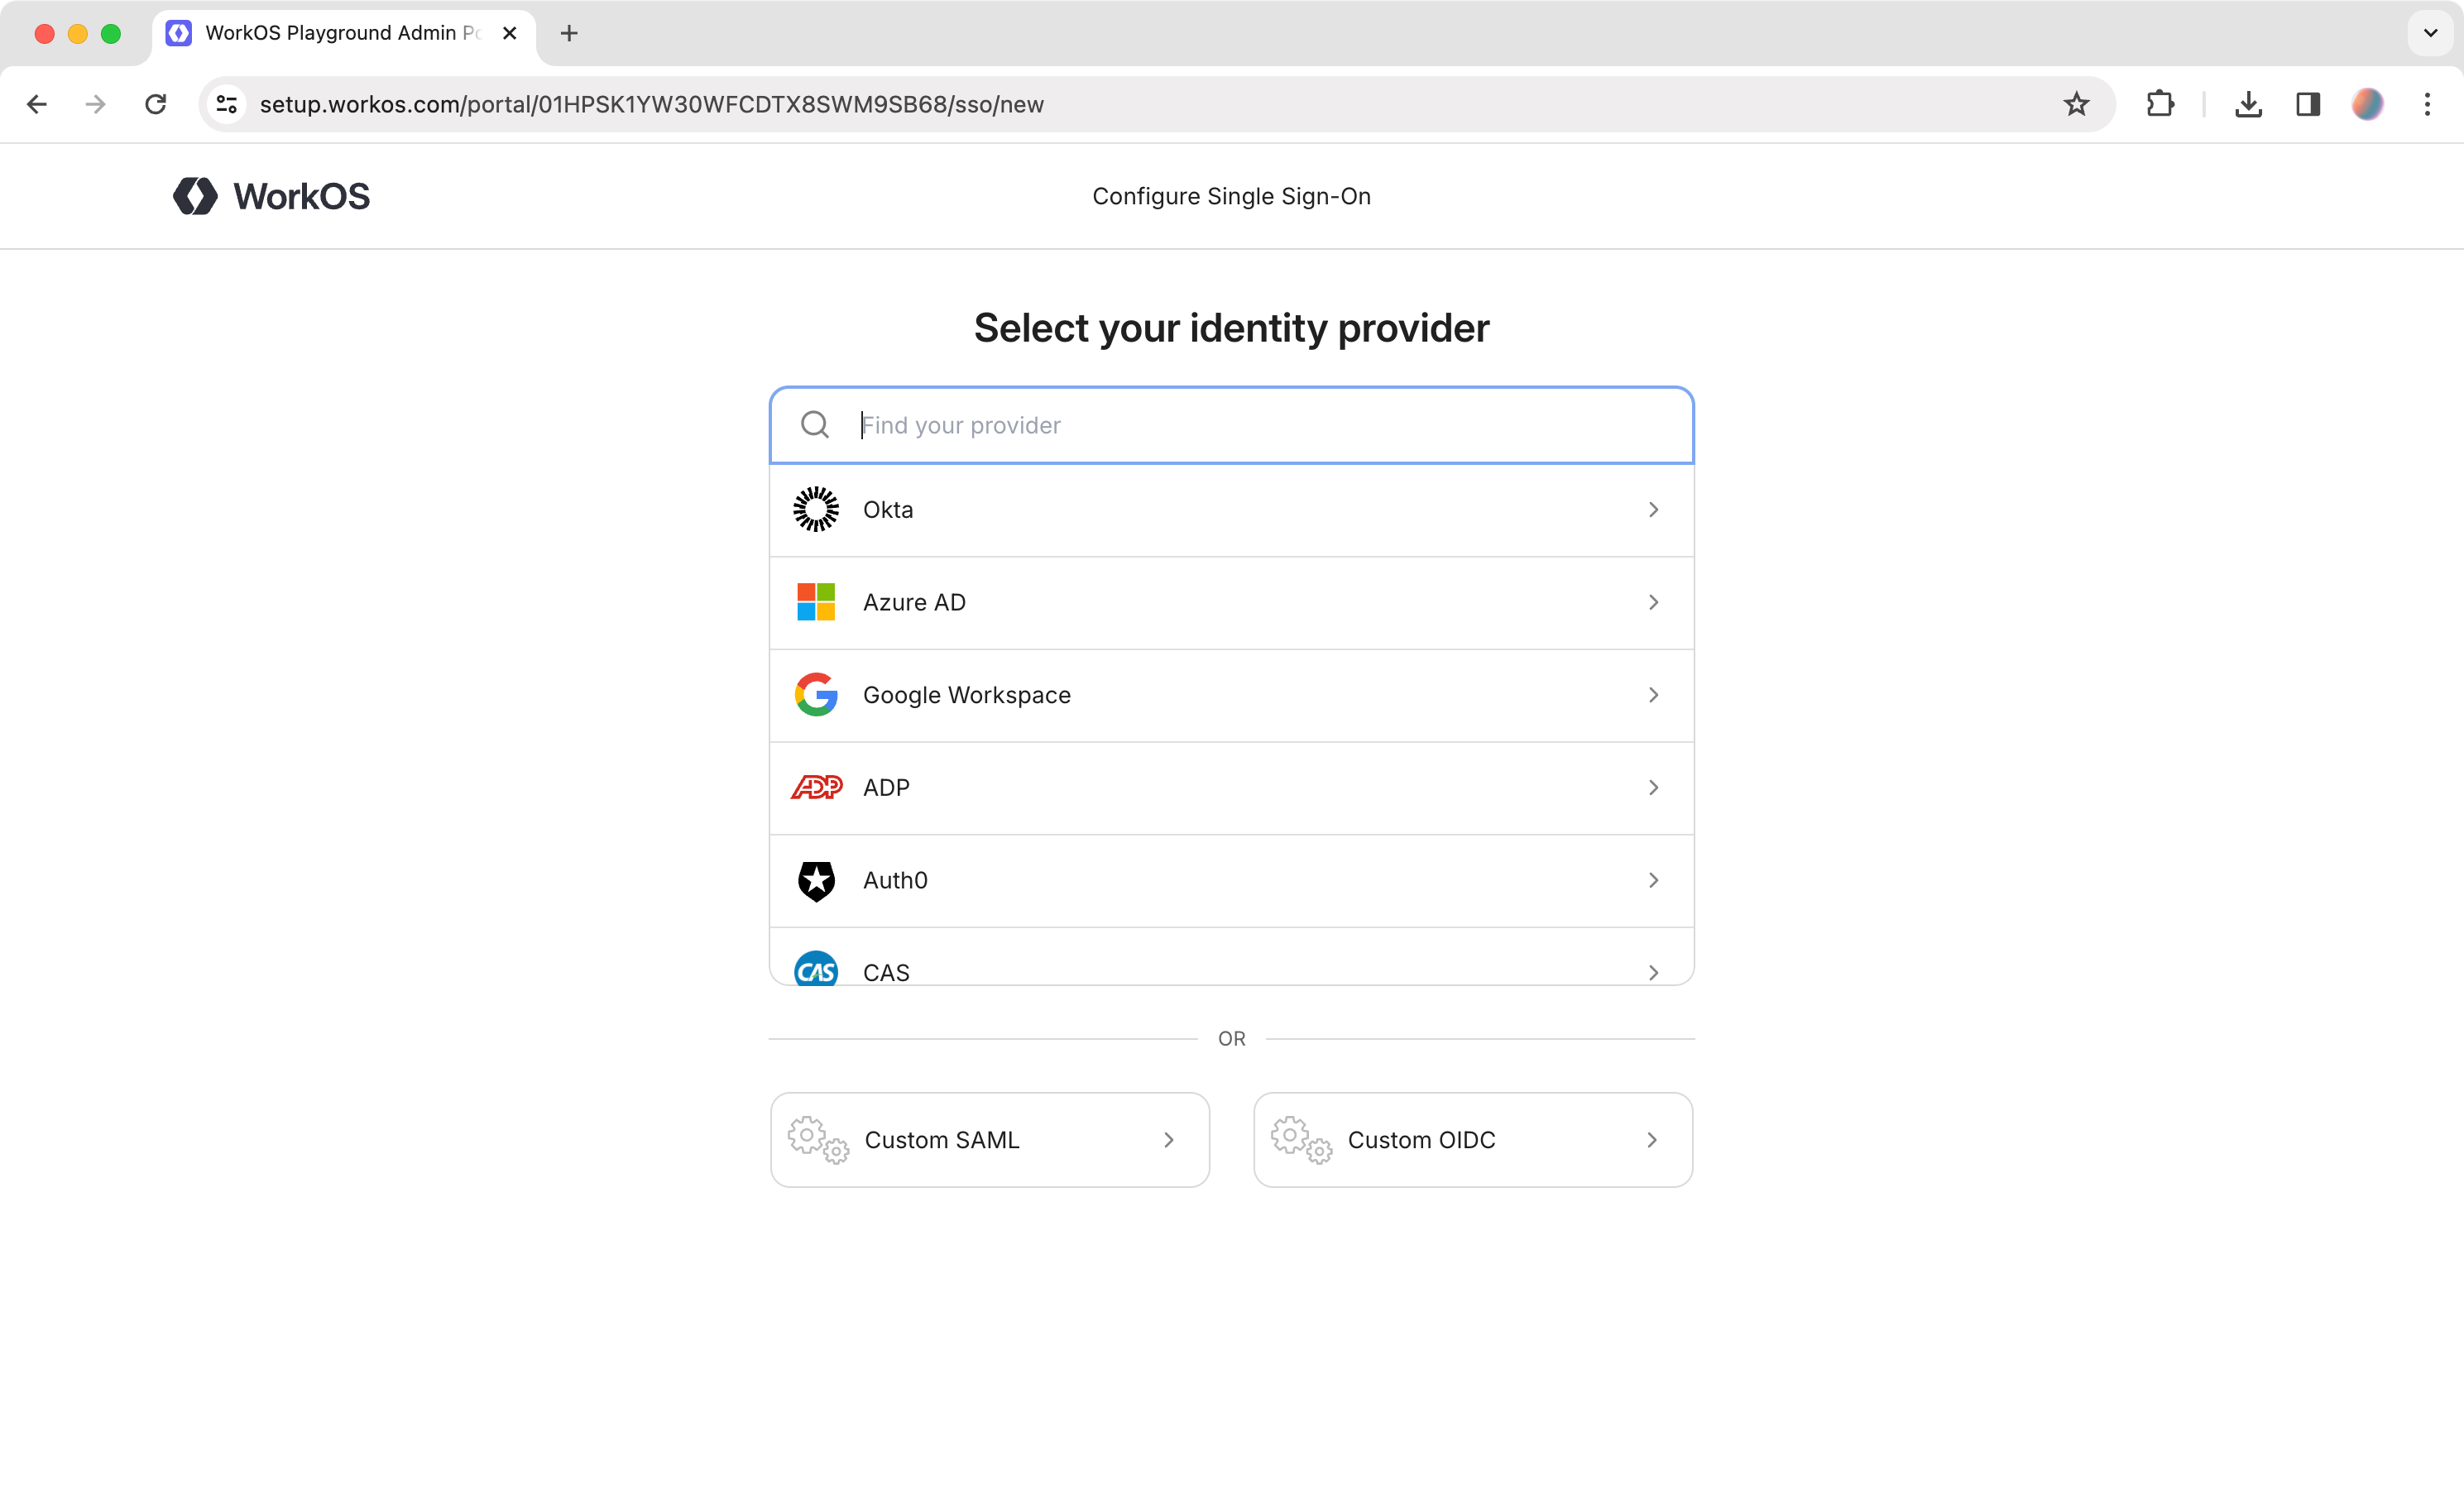
Configure Single Sign-On - WorkOS
Step 3: Create an Enterprise Application
- Sign in to the Microsoft Entra admin center.
- In the left navigation menu, expand the Identity section.
- Expand the Applications sub-section.
- Select the Enterprise applications tab and click
New application.
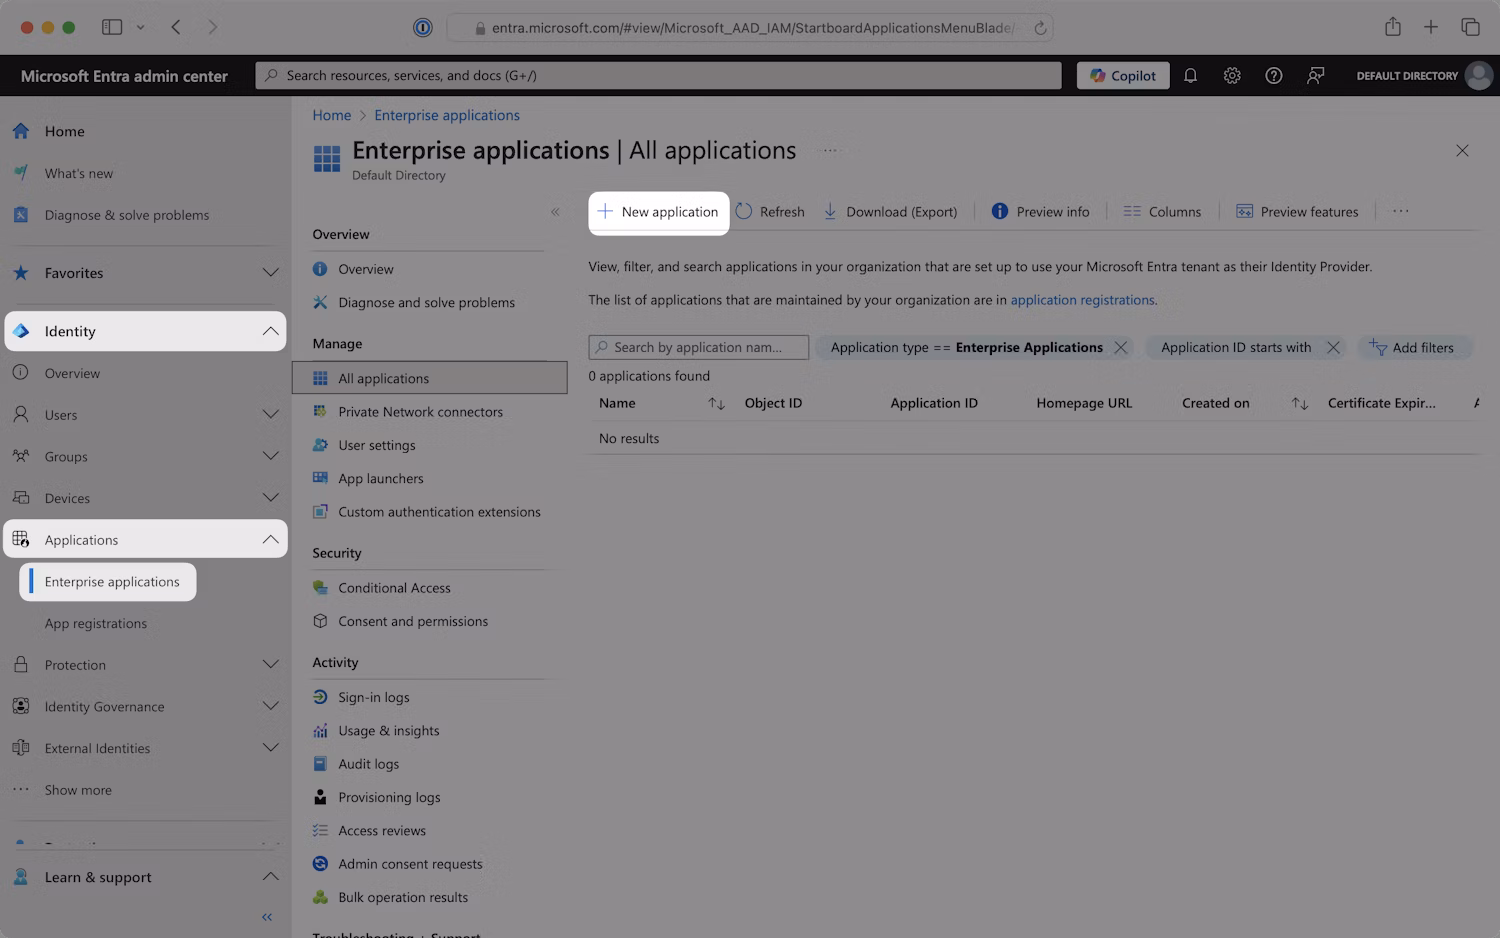
Enterprise applications - Microsoft Entra admin center
- On the Browse Microsoft Entra Gallery page, click
Create your own application.
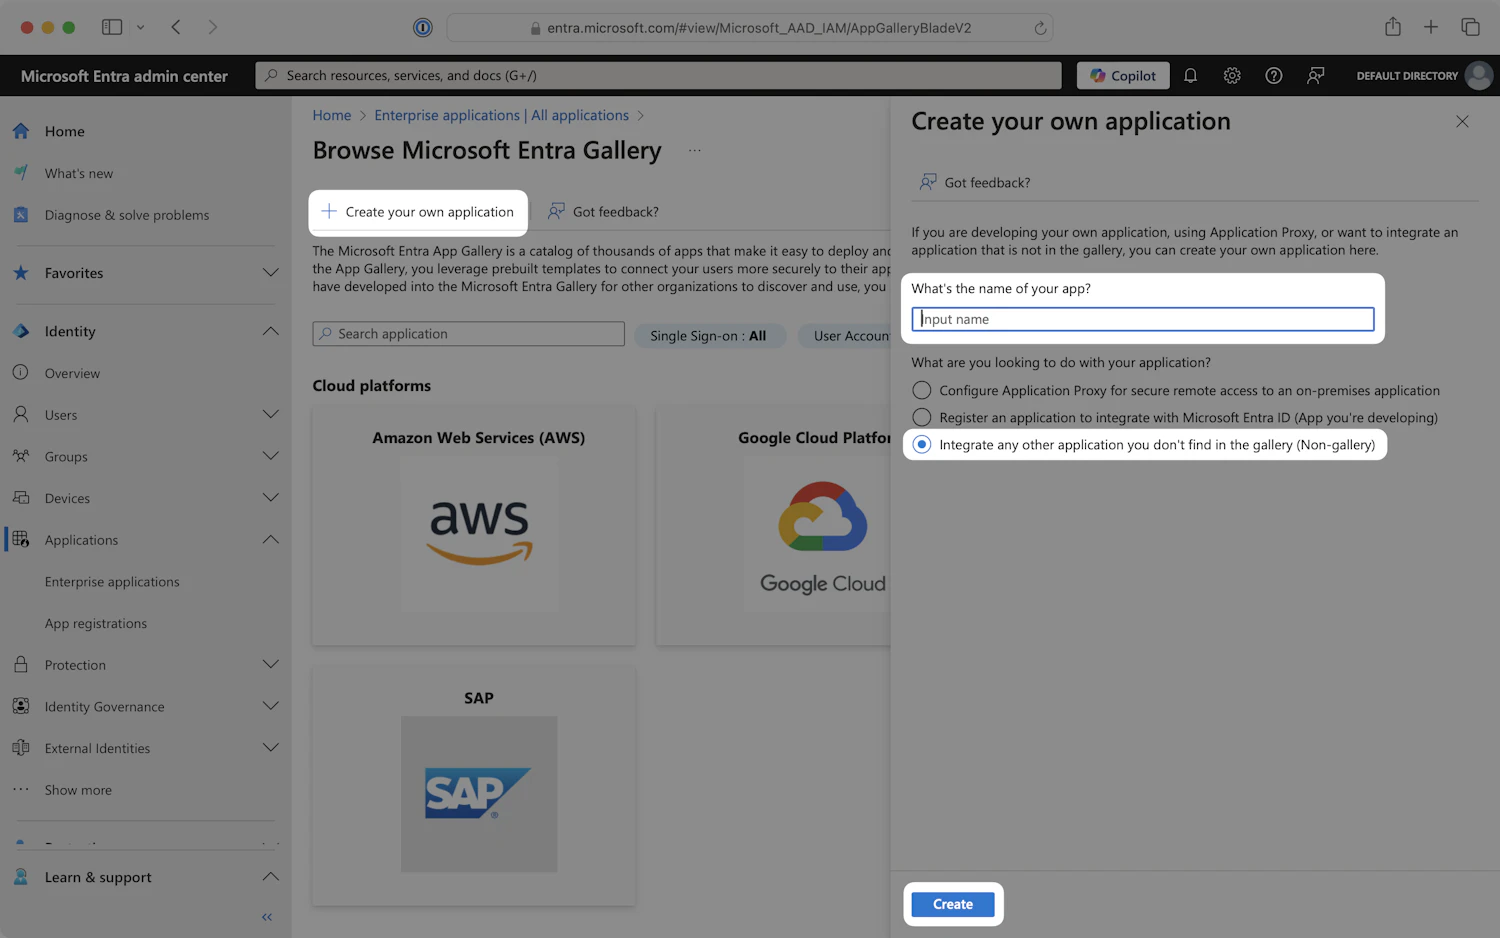
Create your own application - Browse Microsoft Entra Gallery
- Enter an appropriate app name, such as "Synthesia".
- Select the
Integrate any other application you don’t find in the gallery (Non-gallery)option, then clickCreate.
Step 4: Basic SAML Configuration
- In the left navigation menu, select the
Single sign-ontab and click on theSAMLtile.
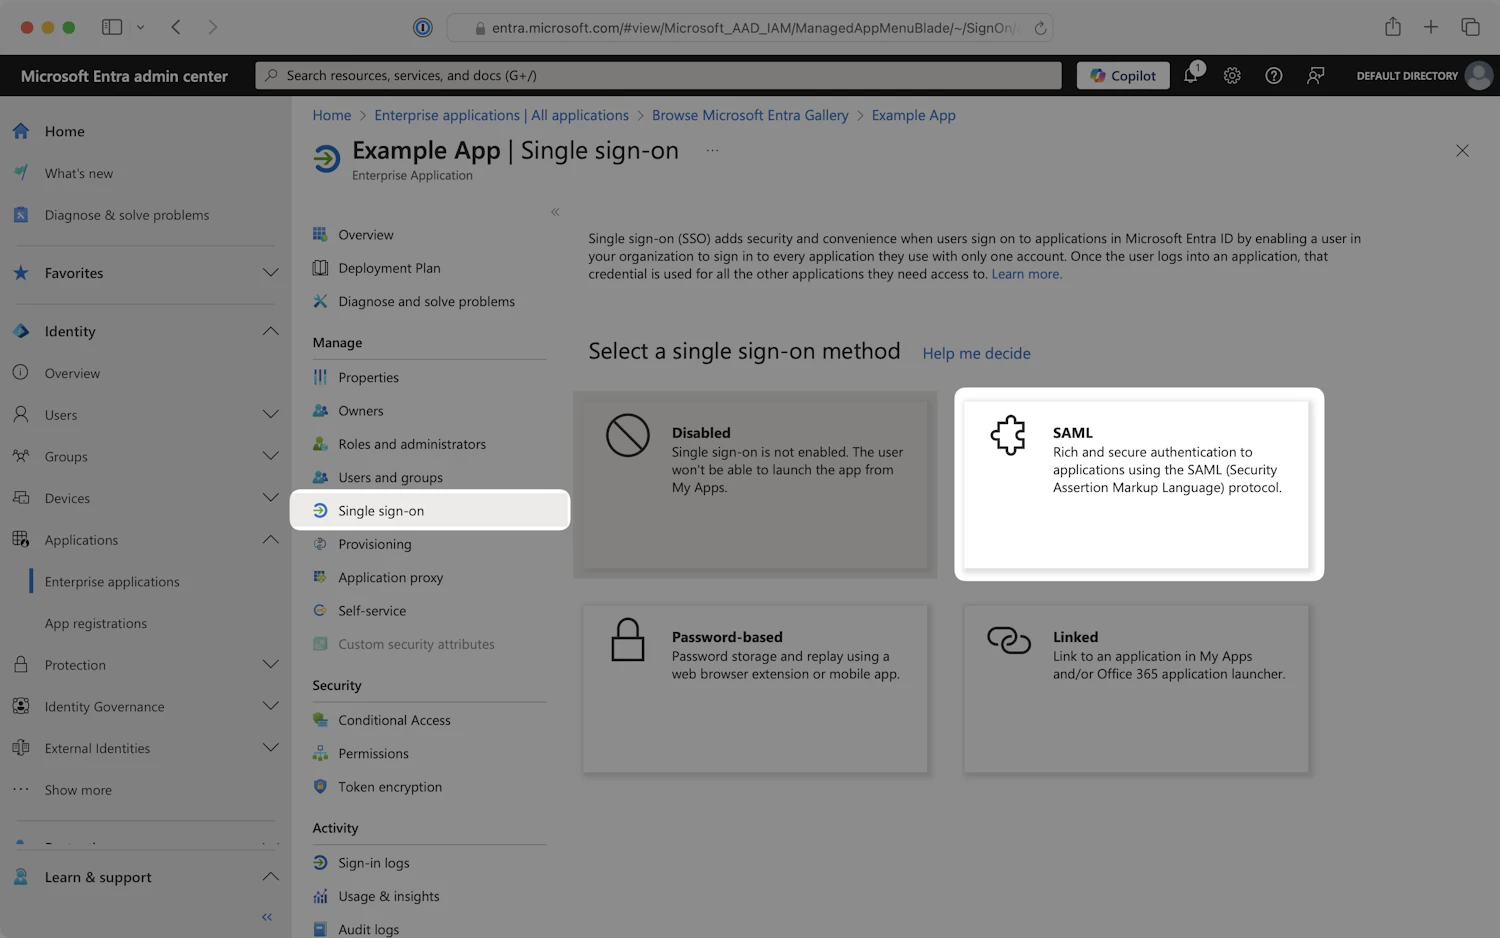
SAML tile - Single-sign on
- The Setup Single Sign-On with SAML page will open.
- Locate the Basic SAML Configuration section and click on the
Editicon in the top right corner of the step.
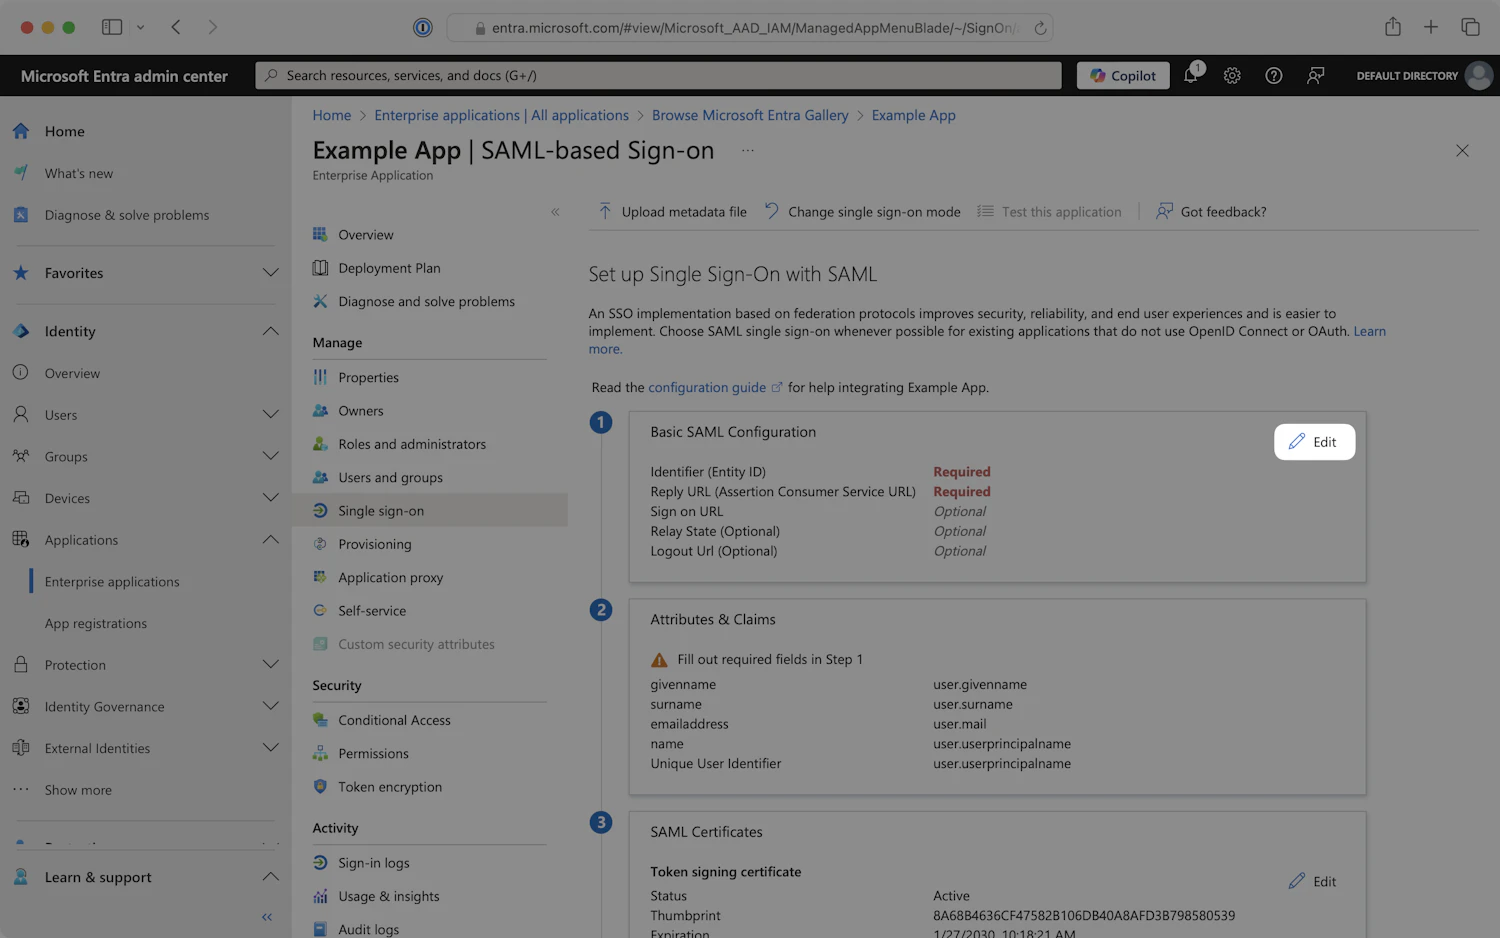
Basic SAML Configuration - Setup Single Sign-On with SAML
- Copy the Identifier (Entity ID) and the Reply URL (Assertion Consumer Service URL) from the WorkOS guide setup link you received and paste them into the Basic SAML Configuration panel.
- Click
Save, then close the edit panel.
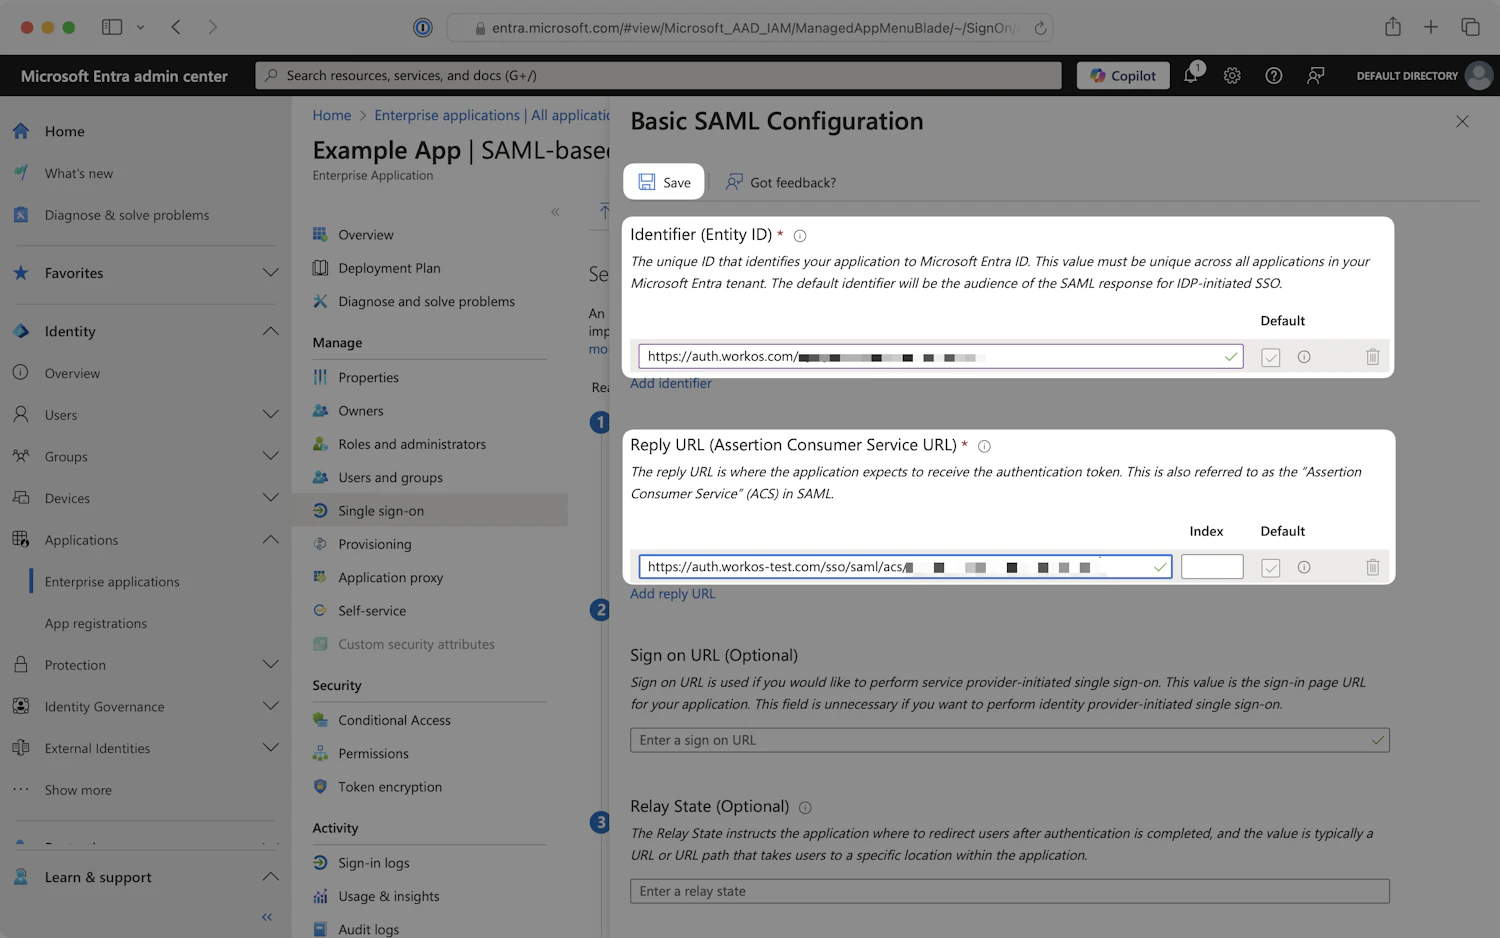
Basic SAML Configuration - Setup Single Sign-On with SAML
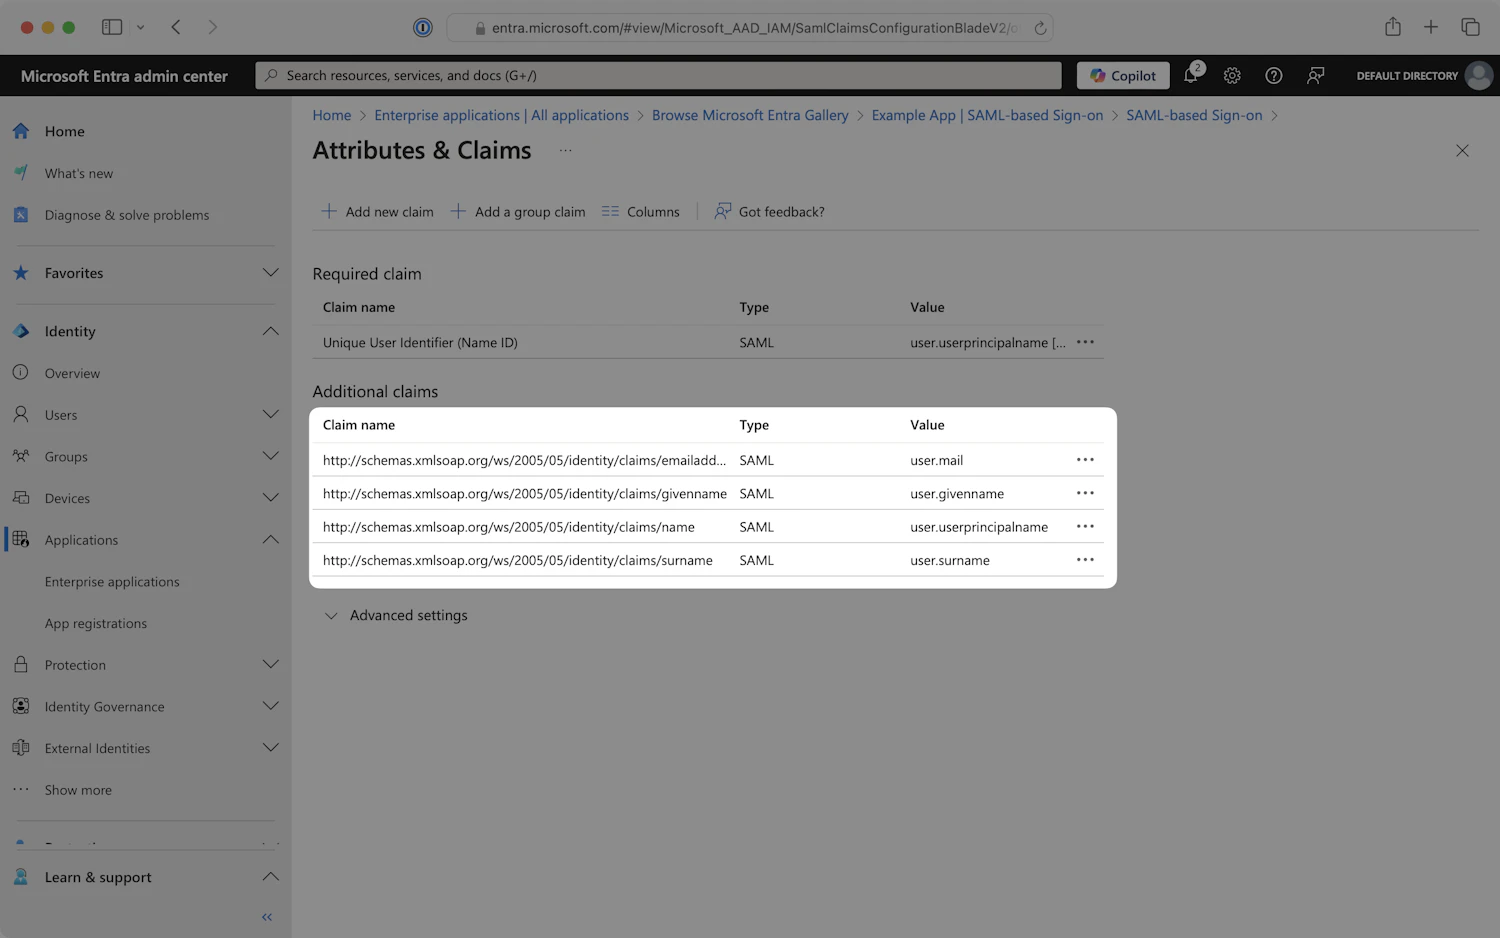
Step 5: Configure Attributes and Claims
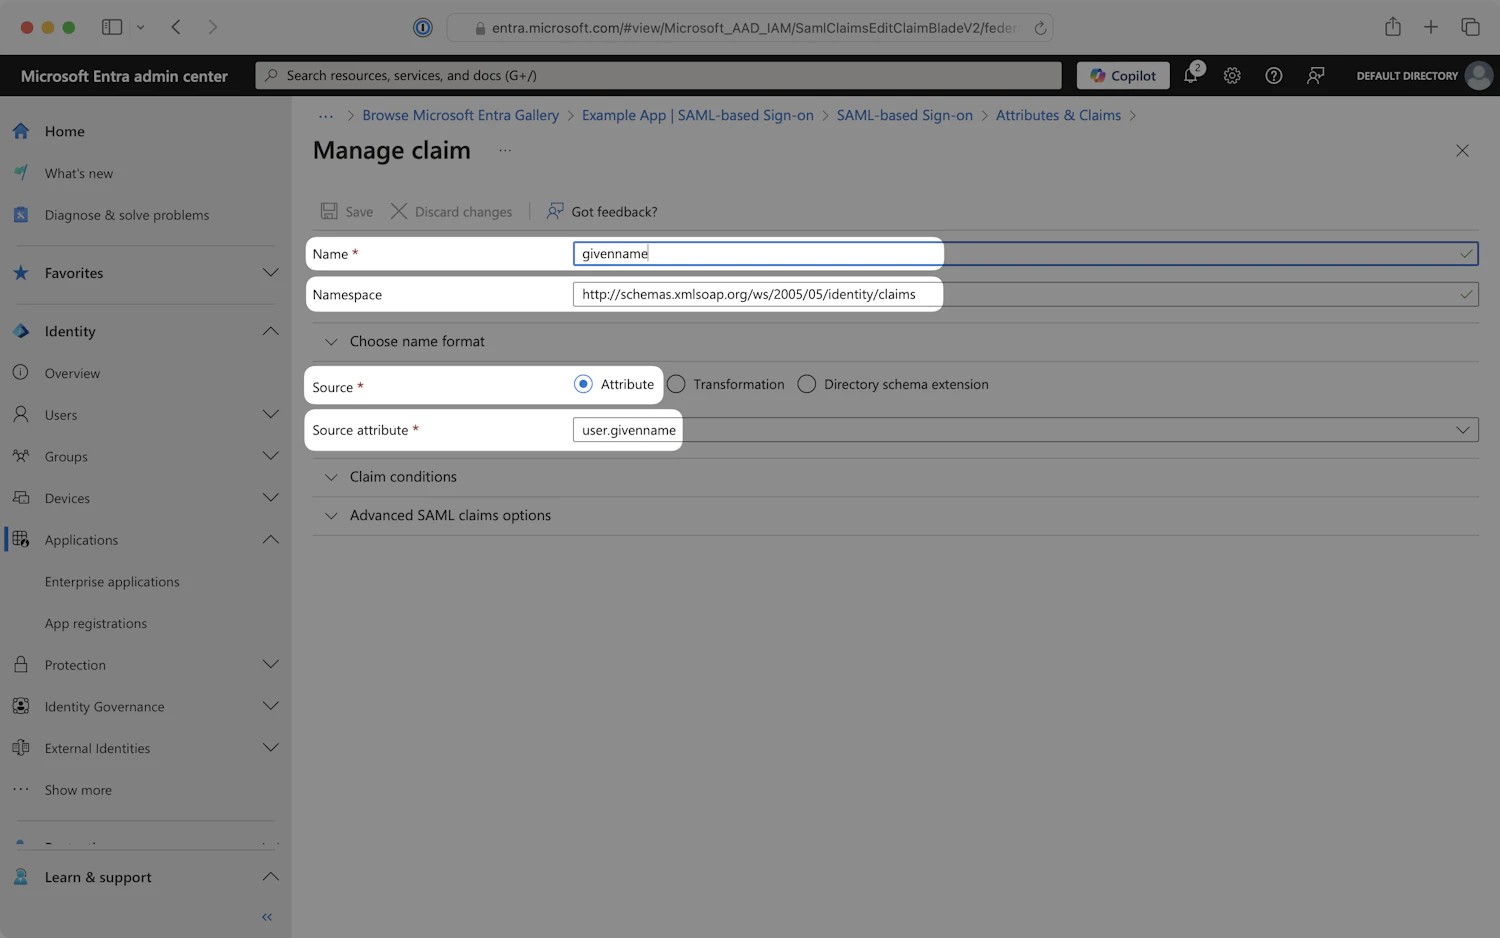
- Locate the Attributes & Claims section and click on the
Editicon in the top right corner of the step.
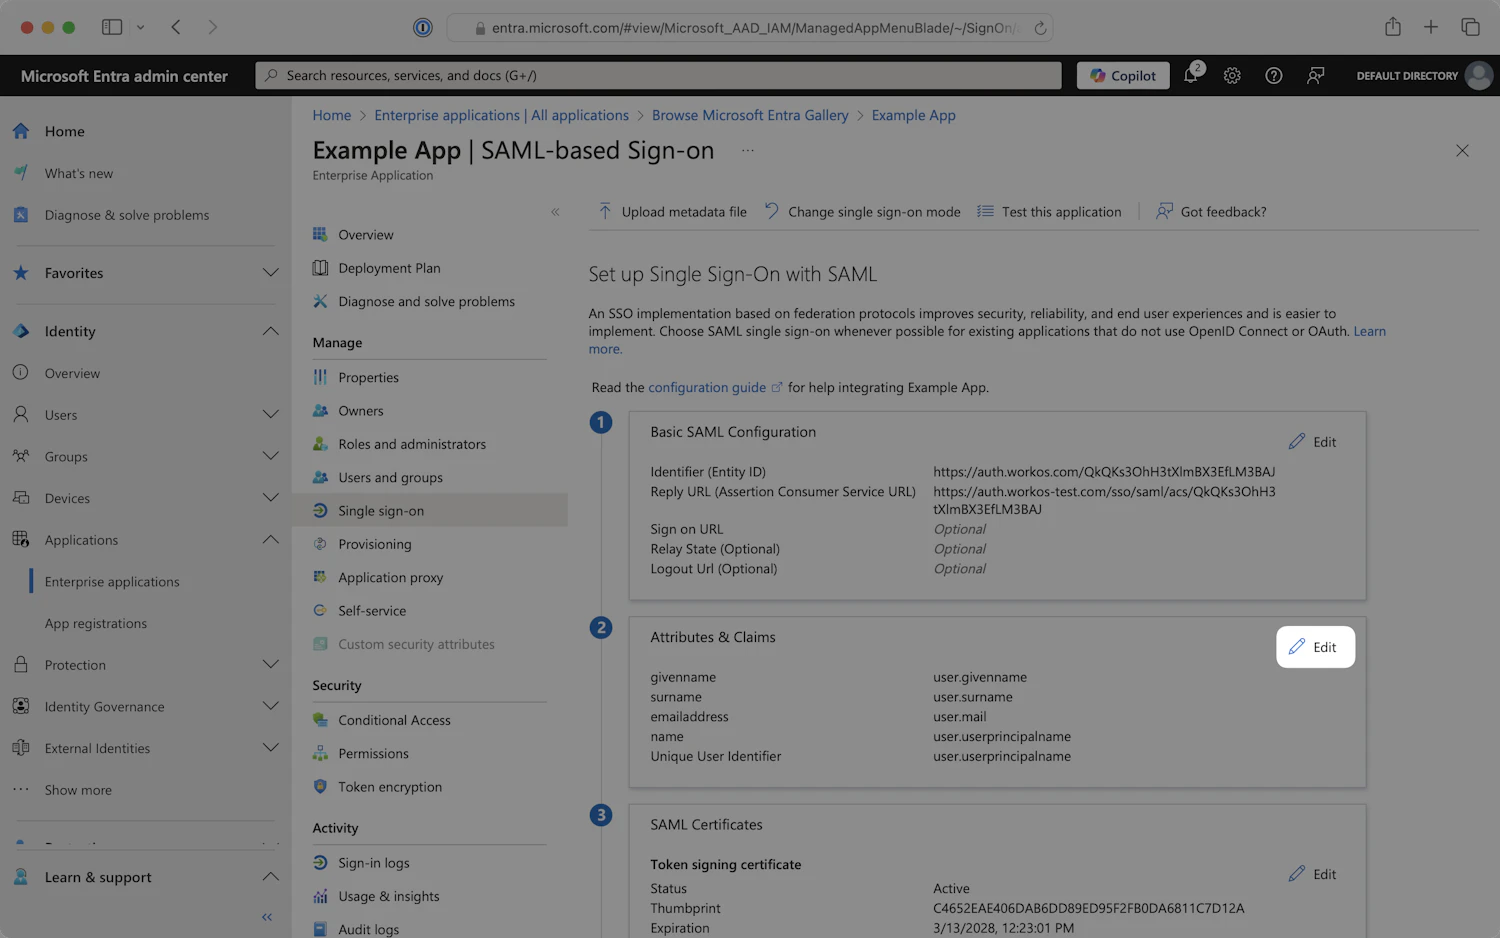
- Ensure that the required claims listed below are configured. The claims may or may not already be configured, depending on your current configuration.
| Name | Source Attribute |
|---|---|
| emailaddress (Required) | user.mail |
| givenname (Required) | user.givenname |
| name (Required) | user.userprincipalname |
| surname (Required) | user.surname |
Below is an example of how to format your claim within the Azure claim editor. Make sure the Namespace value ends in /claims.
Step 6: Assign Users and Groups
- In the left navigation menu, select the
Users and groupstab, then clickAdd user/group.

Users and groups - Attributes & Claims
- Select appropriate users and groups to add to the SAML application.
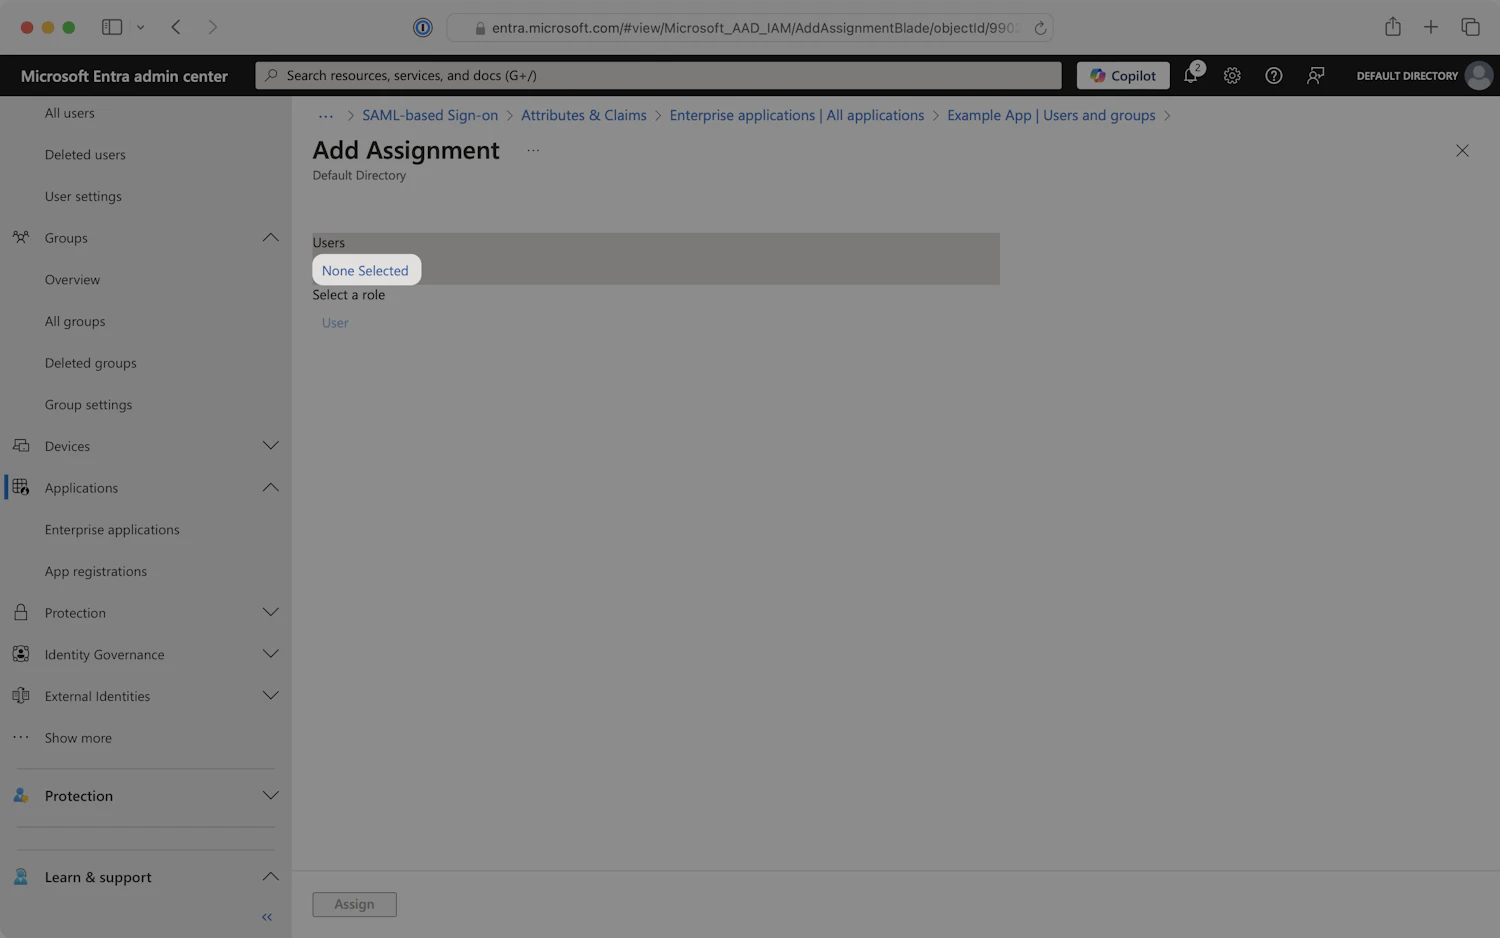
Add Assignment - Attributes & Claims
- When finished, click
Assignto add the selected users and groups to your SAML application.
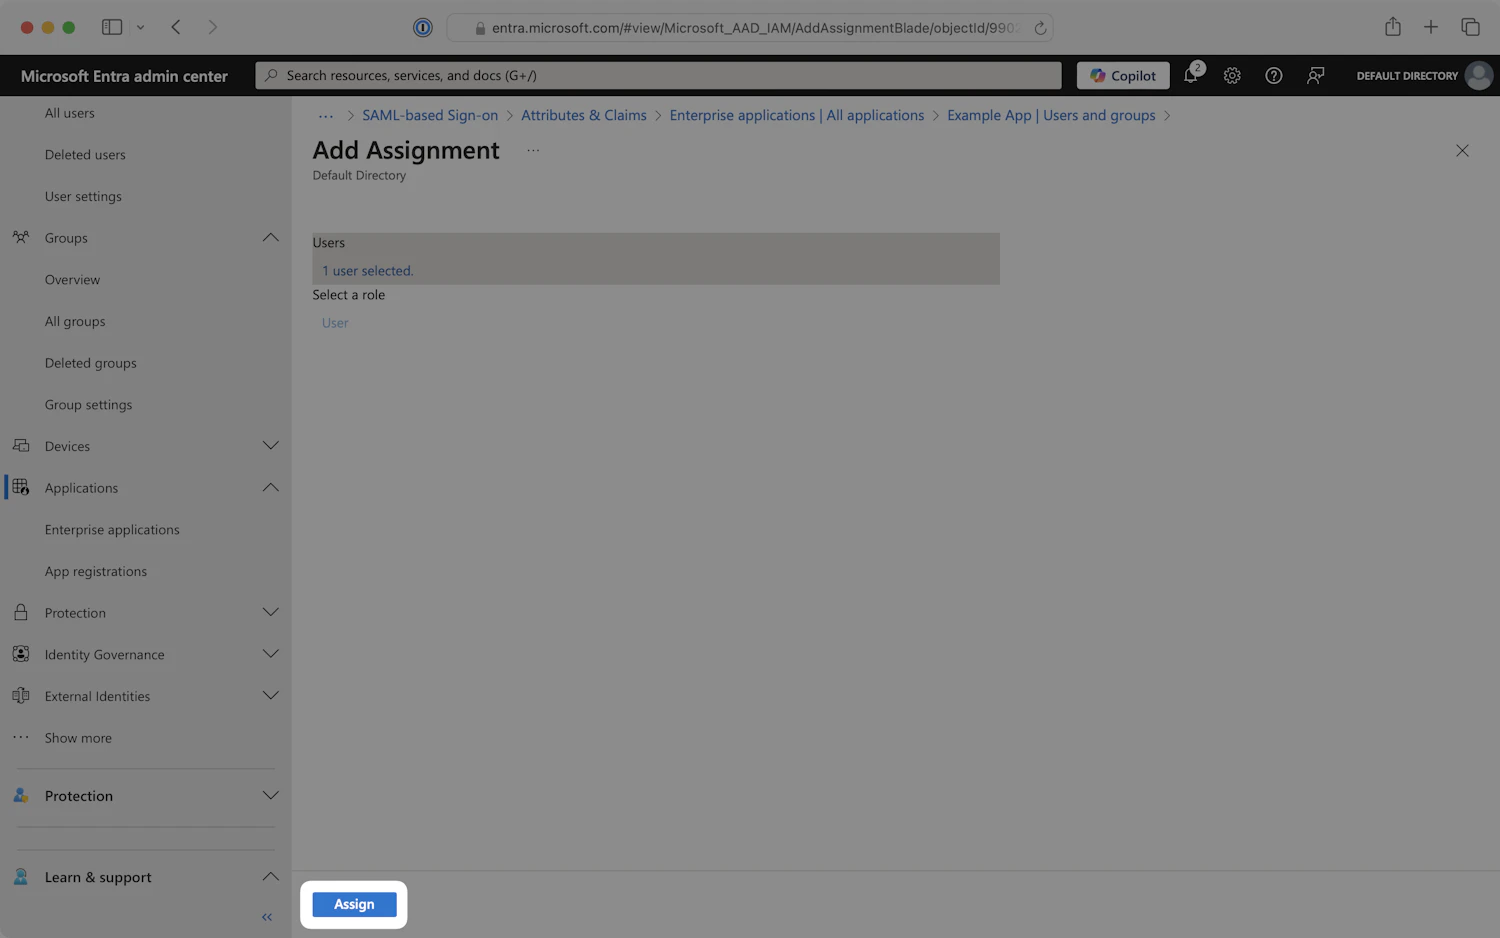
Assign Users and Groups - Attributes & Claims
Step 7: Add an Application Logo
Optionally, you can add a logo to serve as the app’s entry point on the Microsoft Entra My Apps portal. Including a logo helps users easily identify and access Synthesia.
- In the left navigation menu, select the
Propertiestab and locate the Logo field. - Click on the blue folder icon to upload the logo image, then click
Save.
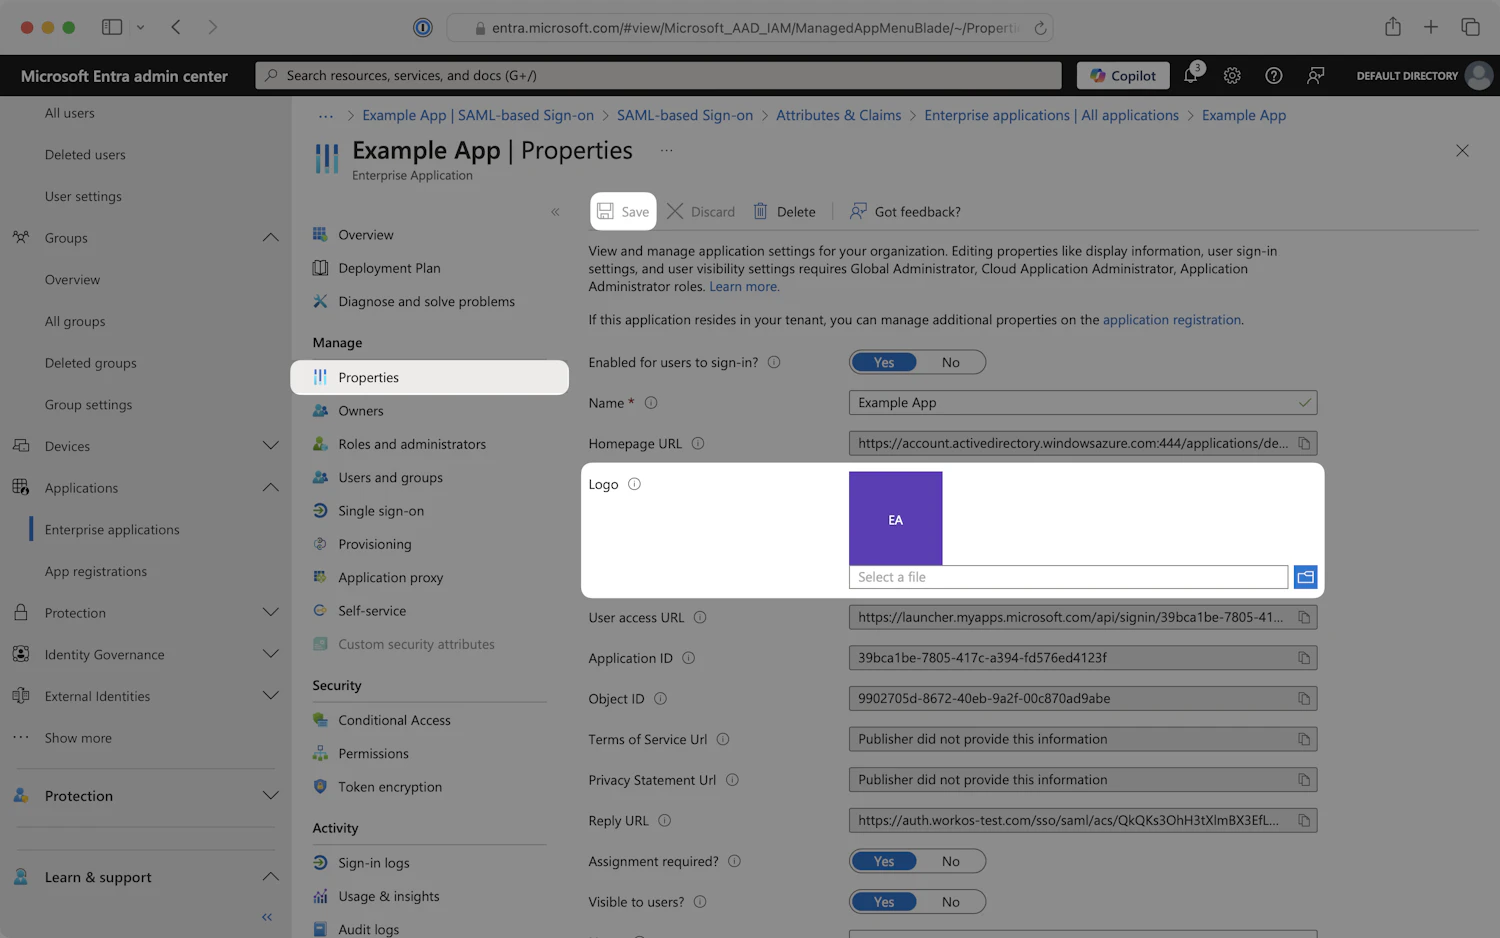
Application logo - Attributes & Claims
Step 8: Set Identity Provider Metadata
- Choose either
Dynamic configuration(recommended) orManual configuration(enter your identity provider settings). - In the left navigation menu, select the
Single sign-ontab. - Scroll down to the SAML Certificates section and locate the App Federation Metadata Url.
- Click on the field to copy the URL.
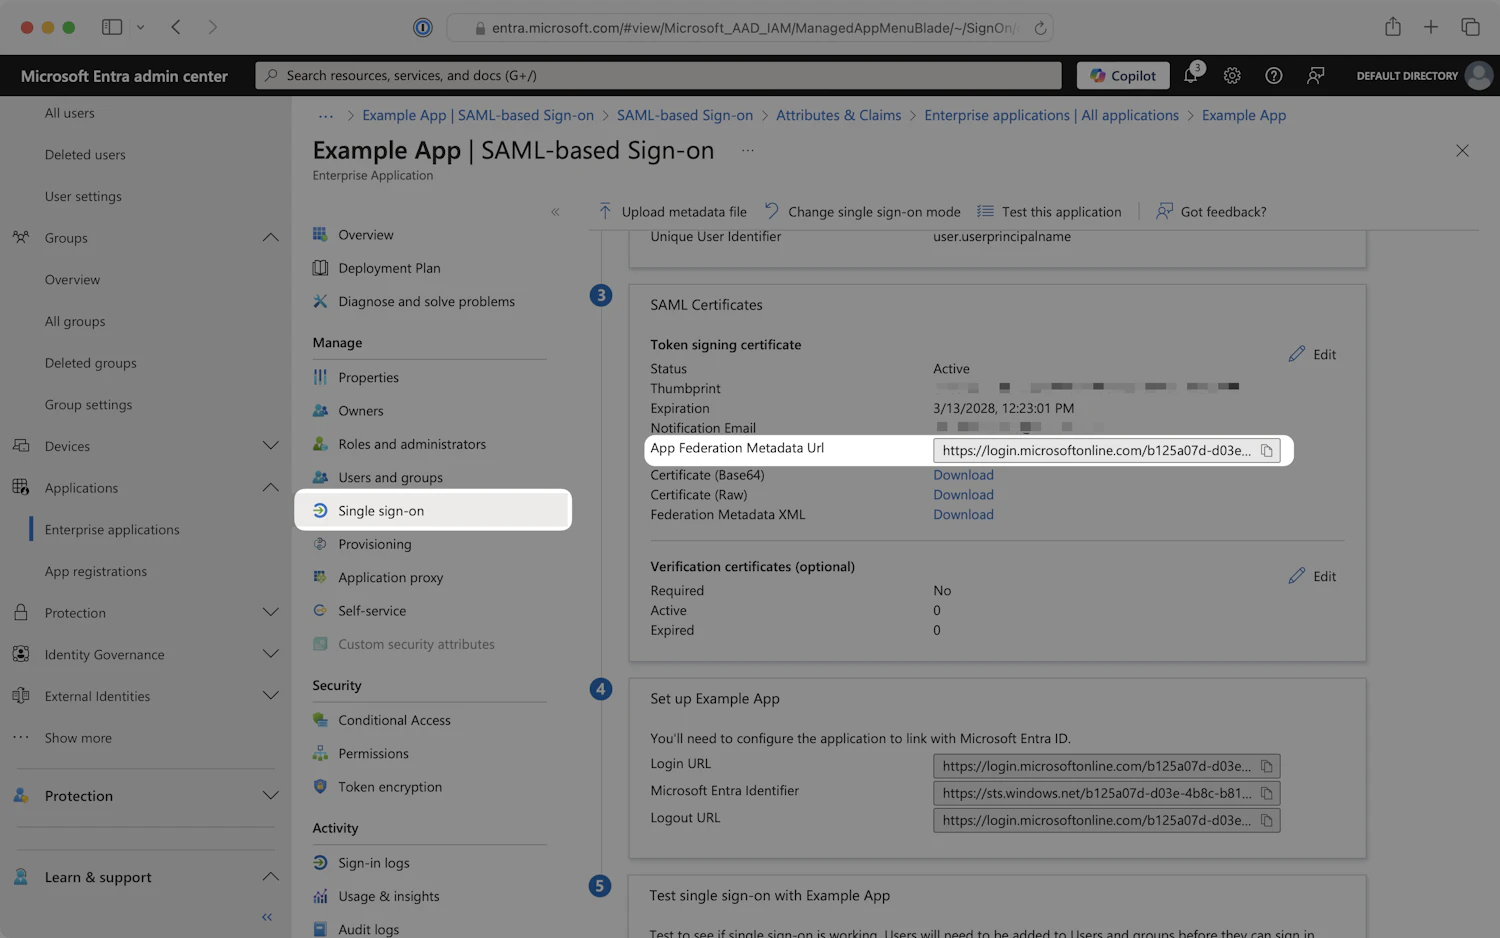
SAML Certificates - SAML-based Sign-on
- Paste the value into the Identity provider metadata URL field in the WorkOS setup guide you received to continue to the next step.

Step 9: Test Single Sign-On
Test signing in with Entra ID to verify that the single sign-on connection was configured correctly.
When you finish the setup, you should get the SSO successful test notification, which would mean that the connection between WorkOS and your IdP was established:
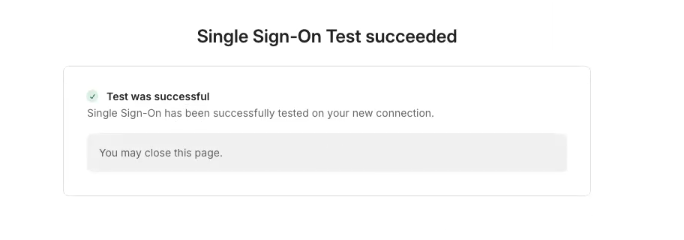
SSO Test succeeded notification
Step 10: Enforce SSO
After a successful test, please reach out to the Synthesia support team, who will send you a test login link to try accessing your account with SSO and after you confirm a successful attempt, they will be able to enforce your SSO in production.
Be sure to include:
- A validation that the tests worked
- A list of domain names managed by your IdP (e.g. synthesia.io)
Updated 8 months ago